# FoxTransfer - Clone web design to Foxify

{% embed url="<https://youtu.be/00zI4oDGuz4>" %}

{% hint style="info" %}
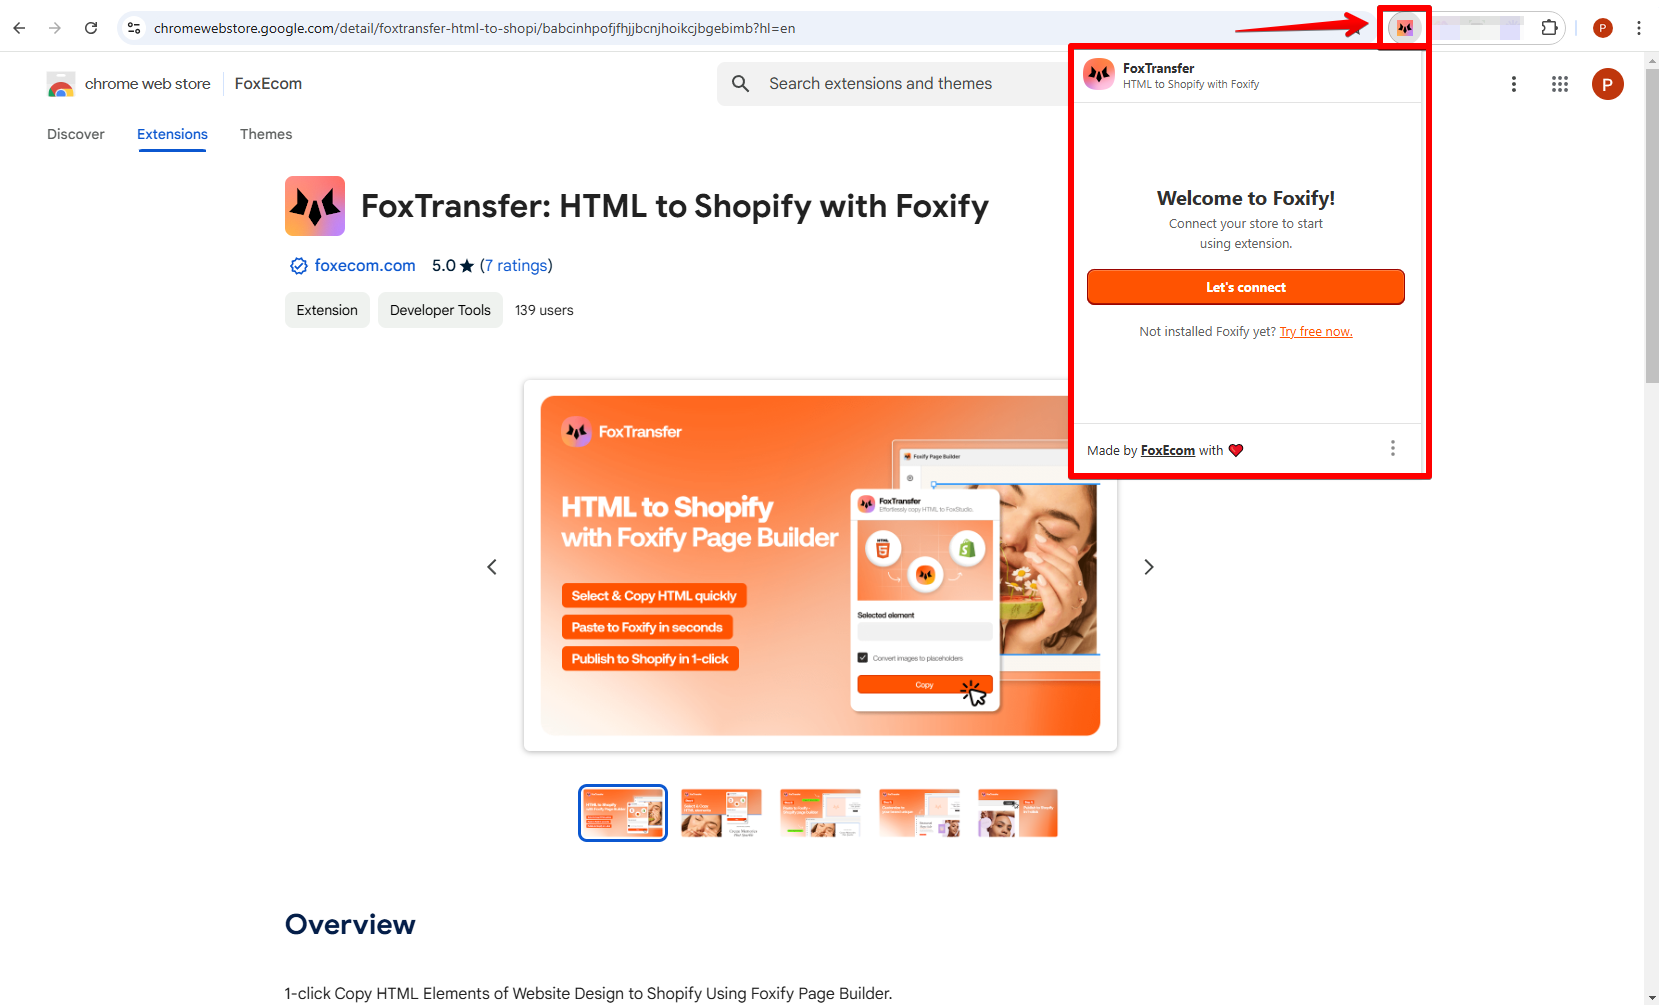
**Copy any web designs by copying HTML elements** and instantly paste them to your Foxify page builder using [FoxTransfer](https://chromewebstore.google.com/detail/foxtransfer-html-to-shopi/babcinhpofjfhjjbcnjhoikcjbgebimb?utm_source=foxecom\&utm_medium=help_center_foxify_foxtransfer_clone_web_design\&utm_campaign=anchor_text\&utm_term=foxtransfer).
{% endhint %}

This feature boosts your productivity, accelerates workflows, and gives you the creative freedom to adapt and refine existing designs effortlessly.

{% hint style="danger" %}
**Beta version:** This feature is currently in its beta stage. You may encounter minor issues as we work to improve it. Your feedback is valuable in helping us perfect this function :heart:
{% endhint %}

## Before you start

{% hint style="warning" %}
To ensure a smooth experience with **FoxTransfer** and copy webpage designs into **FoxStudio**, make sure the **following requirements** are met.
{% endhint %}

<details>

<summary><strong>Google Chrome browser</strong> (latest version recommended)</summary>

This extension is only available on Chrome browser.

👉 [Download Chrome](https://www.google.com/chrome/)

</details>

<details>

<summary><strong>Clipboard permission is enabled in Chrome</strong></summary>

:white\_check\_mark: Before using **FoxTransfer**, make sure to enable Clipboard permissions for Chrome. Here’s how:

1️ Method 1:

1. Open **Foxify Page Builder** app in Shopify.
2. Click the site information icon next to the URL in the address bar.
3. In the dropdown menu, locate the **Clipboard** option and select **Allow.**

<img src="/files/ZAHAUfvirafI6UYITety" alt="" data-size="original">

2️ Method 2:

1. Open **Chrome settings** by clicking the three vertical dots (<img src="/files/wths7LjyyWsz693Y4nsY" alt="" data-size="line">) in the upper-right corner. Select **Settings**.
2. Navigate to **Privacy and Security** in the left-hand menu.&#x20;
3. Then click **Site settings** > **Permissions > Additional permissions** > **Clipboard**:  <chrome://settings/content/clipboard>&#x20;
4. In the list of sites allowed to see your clipboard, add **admin.shopify.com**.

![](/files/y4csSkkjEaECWuuY9ltq)

</details>

## Add FoxTransfer extension to your Chrome

{% hint style="success" %}
**Steps:**

1. Open [FoxTransfer in the Chrome Web Store](https://chromewebstore.google.com/detail/foxtransfer-html-to-shopi/babcinhpofjfhjjbcnjhoikcjbgebimb?utm_source=foxecom\&utm_medium=help_center_foxify_foxtransfer_clone_web_design\&utm_campaign=anchor_text\&utm_term=foxtransfer_in_the_chrome).
2. Click **Add to Chrome.**
3. Review the types of data that the extension will be able to access. Then click **Add extension**.

You'll see your extensions in Chrome as buttons on the toolbar.
{% endhint %}

<figure><img src="/files/va0yKWJ59Poijpeq6bNM" alt=""><figcaption></figcaption></figure>

{% hint style="info" %}
**Note**: You can't add extensions if:

* You're [browsing as a guest](https://support.google.com/chromebook/answer/1057090).
* You're using your Chromebook at work or school. If you have questions or need help, contact your administrator.
  {% endhint %}

## Connect FoxTransfer with your FoxStudio

Once you have added FoxTransfer extension to your Chrome, it's time to connect it with your FoxStudio.

{% hint style="success" %}
**Steps:**

1. Select **FoxTransfer** extension on the Chrome toolbar.
2. In the pop-up, select the **Let's connect** button.
3. Enter the required information:&#x20;

   1. **Your name**;
   2. **Store domain**: Your primary domain (in the format your-store-name.myshopify.com);
   3. **Secret key:** Your API secret key in Shopify admin > Foxify app > **Settings** > **Account** section.&#x20;

   :information\_source: *Learn more :* [How to get API Secret key in Foxify](/foxify-app/faqs-and-troubleshooting/faqs/how-to-get-api-secret-key-in-foxify.md)
4. Click **Connect store**.
   {% endhint %}

<figure><img src="/files/H084LkJk6qiyh9esXWR6" alt=""><figcaption></figcaption></figure>

All set! 🎉 Now you're ready to copy and paste the element you want to your FoxStudio pages.  :raised\_hands:

## Use FoxTransfer to copy a design and paste it into your FoxStudio editor

### Copy a design from a webpage

{% hint style="success" %}
**Steps:**

1. Open **FoxTransfer** extension on the Chrome toolbar.
2. In the extension's pop-up, click **Select element**.
3. Select the element you want to copy from the webpage.
4. Check/uncheck the option **Conver images to placeholders.**

If the option is checked, all images in the design will be converted to placeholders once pasted into your FoxStudio editor.

5. Click **Copy**.
   {% endhint %}

{% embed url="<https://youtu.be/_MOcGFsPOwY>" %}
Copy a design from a webpage using FoxTransfer Chrome extension
{% endembed %}

<figure><img src="/files/OXyrDjESAEZ5VGwDrboB" alt=""><figcaption></figcaption></figure>

### Paste a design to your FoxStudio editor

After you have copied the element using the **FoxTransfer** extension, you can paste it to your **FoxStudio pages**.

{% hint style="info" %}
Each paste action will use **2** credits.

:coin: *Learn more about credits in Foxify:* [All about credit](/foxify-app/ai-powered-fox-magic/all-about-credit.md)
{% endhint %}

{% hint style="success" %}
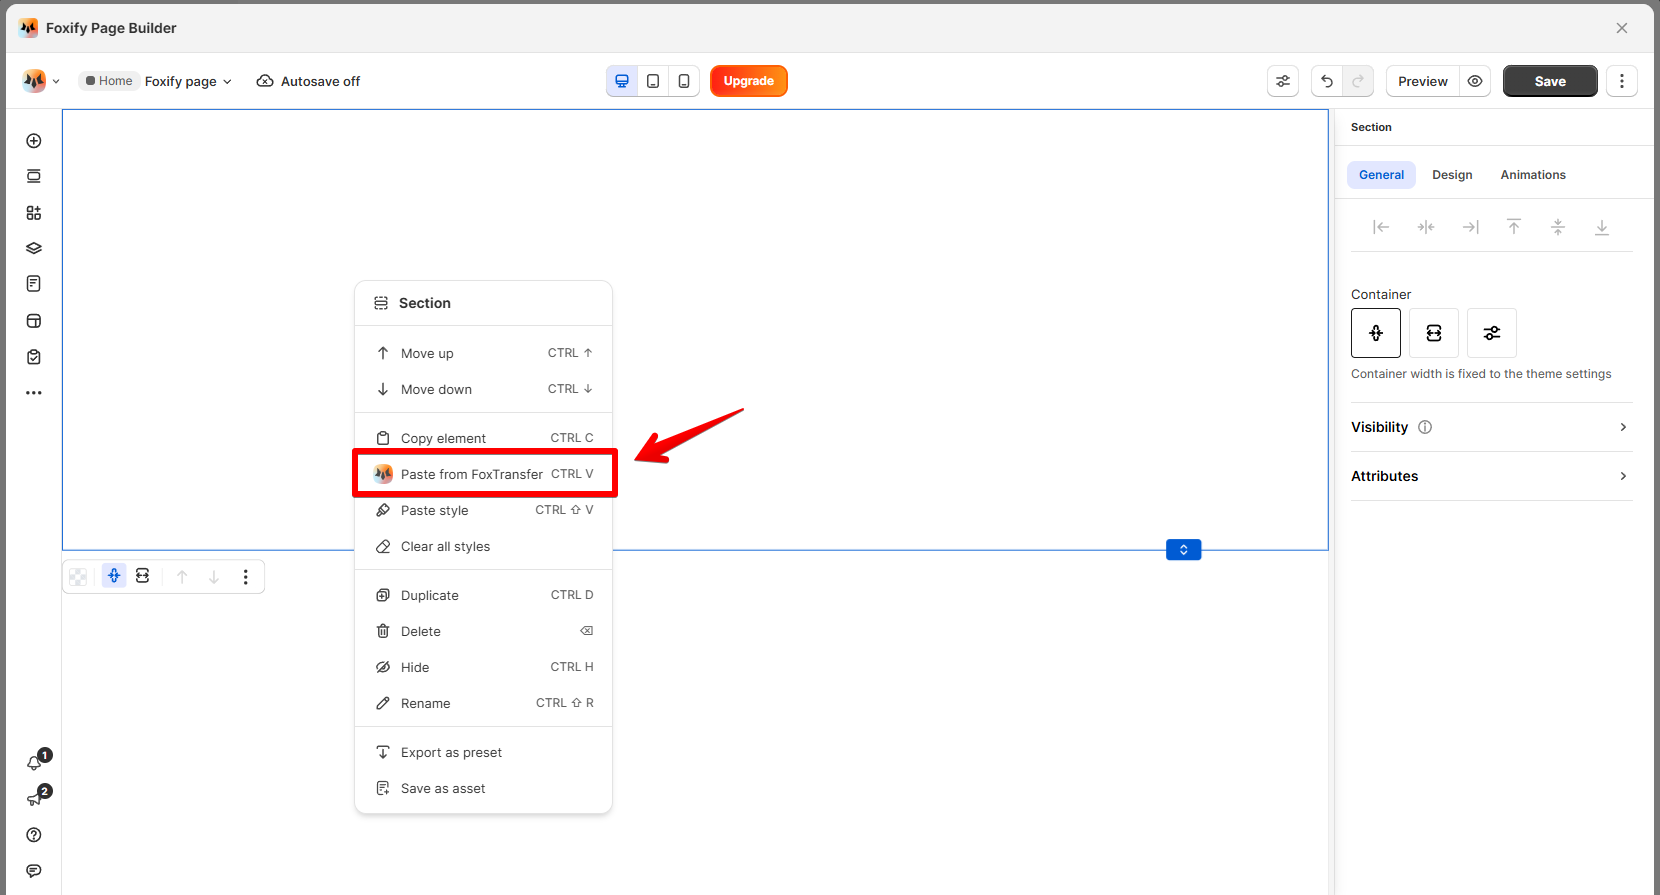
In your FoxStudio editor, you can paste the copied design to your section in 2 ways:

* Use hotkeys: **CMD + V for Mac OS** or **CTRL + V for Windows**
* Right-click in the editor and select the option **Paste from FoxTransfe**r.

The pasted element's position will depend on the cursor's current location.&#x20;

After placement, the pasted element can be edited like other elements using the available tools in the editor.
{% endhint %}

<figure><img src="/files/HIMdYeuied71l7DVdi39" alt=""><figcaption></figcaption></figure>

{% hint style="warning" %}

### Best practices and notes:

* **Copy smaller elements instead of large sections**&#x20;

💡 **Why?** Copying smaller elements rather than an entire section reduces complexity and avoids transferring a deeply nested structure, which may be harder to adjust later.&#x20;

✅ **Example:** Instead of copying an entire homepage section, try copying only a text block, image container, or button group for easier customization.

* **Adjust for each viewport**

💡 **Note:** **FoxTransfer applies the design only to the current viewport you are working on.**

✅ **Best practice:** After transferring, **switch to other devices** (desktop, tablet, mobile) and manually adjust the design to ensure proper responsiveness.
{% endhint %}

#### How Foxify handles the assets of the copied design

* **Custom fonts**: Any custom fonts used in the element will be uploaded to the user’s store automatically.
* **Google fonts**: No further action is needed if the element uses detected Google fonts.
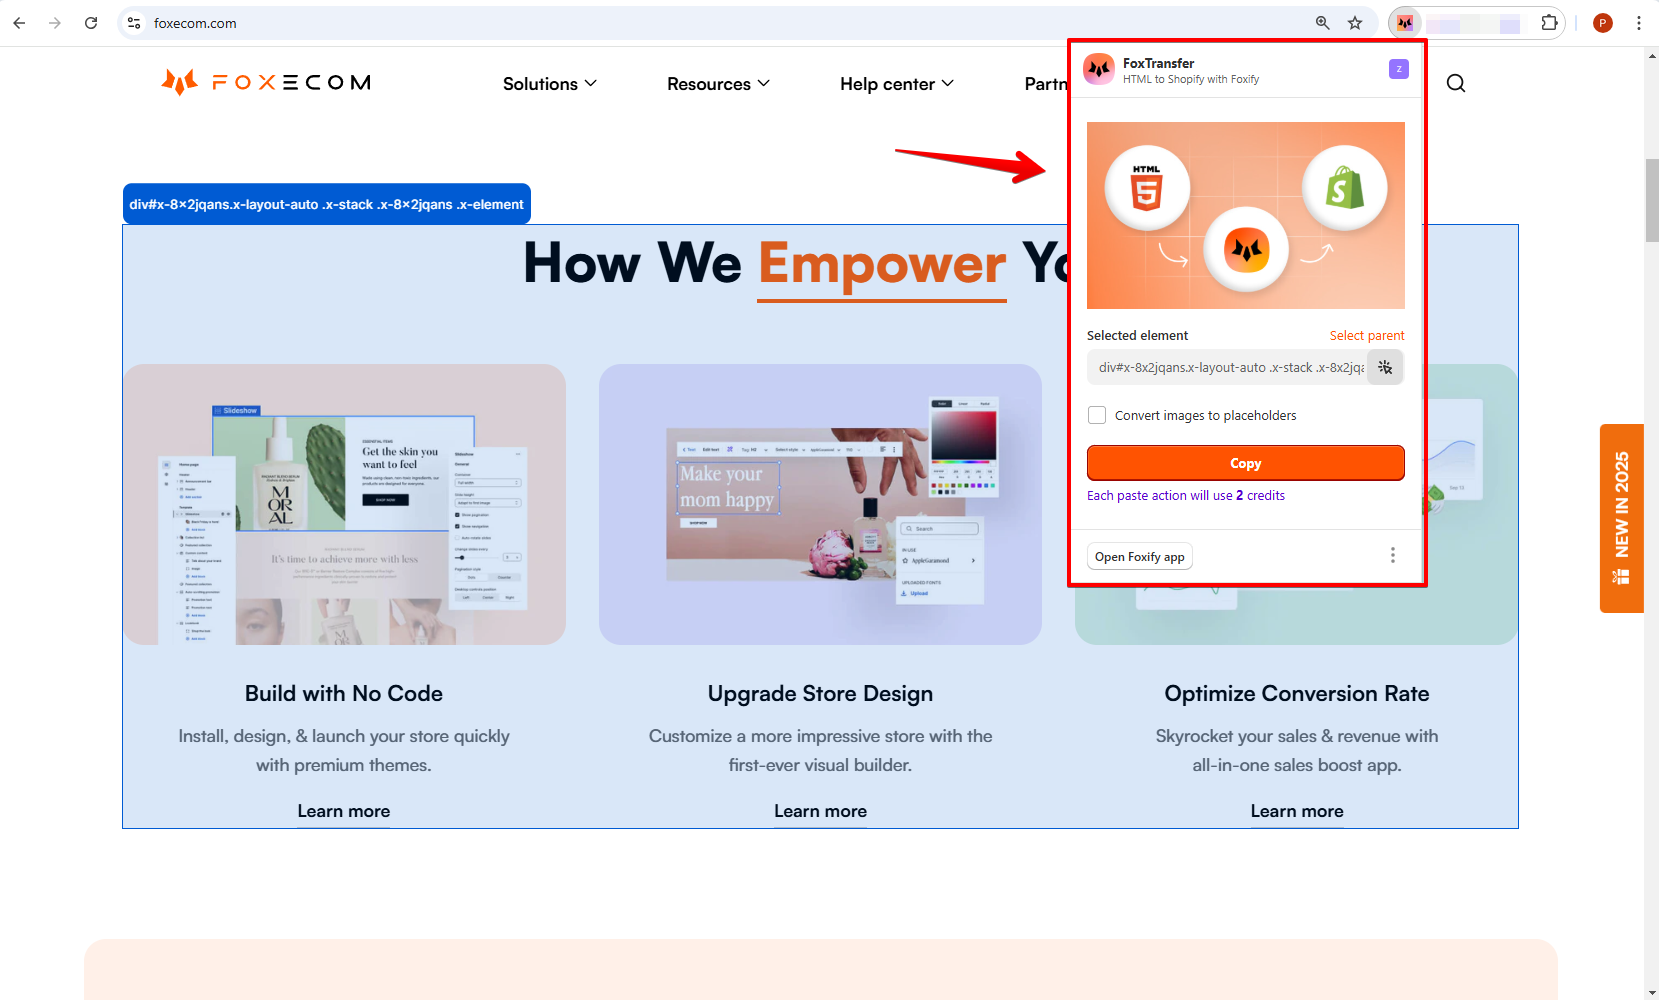
* **Images**: Images included in the element will be uploaded to the user's store or [converted to placeholders](#copy-a-design-from-a-webpage) if the user selects this option.

{% hint style="danger" %}
Users must have the appropriate licenses for premium assets like fonts or images.&#x20;

:warning: Users are responsible for any risks of using these assets without proper licensing.&#x20;

*Learn more:* [Terms & Policies](/foxify-app/getting-started/account-and-billing/terms-and-policies.md)
{% endhint %}

*Examples:*

<figure><img src="/files/4NHyYnTaDOJjyN1QyOFI" alt=""><figcaption></figcaption></figure>

<figure><img src="/files/t7VP26W3Ul03eCHEFUCJ" alt=""><figcaption></figcaption></figure>

***

<figure><img src="/files/6UH0aWBarkFEOYcMIdyd" alt=""><figcaption><p><a href="https://apps.shopify.com/xflow?utm_source=foxecom&#x26;utm_medium=help_center_foxify_foxtransfer&#x26;utm_campaign=anchor-text&#x26;utm_term=install_xflow_back_in_stock_automation-free">Install XFlow Back In Stock Automation FREE</a></p></figcaption></figure>


---

# Agent Instructions: Querying This Documentation

If you need additional information that is not directly available in this page, you can query the documentation dynamically by asking a question.

Perform an HTTP GET request on the current page URL with the `ask` query parameter:

```
GET https://docs.foxecom.com/foxify-app/foxstudio/foxtransfer-clone-web-design-to-foxify.md?ask=<question>
```

The question should be specific, self-contained, and written in natural language.
The response will contain a direct answer to the question and relevant excerpts and sources from the documentation.

Use this mechanism when the answer is not explicitly present in the current page, you need clarification or additional context, or you want to retrieve related documentation sections.
