# Save a page as a template

<div data-full-width="false"><figure><img src="/files/kcilvHtHzK8t5VOGf1nR" alt=""><figcaption><p>Foxify AI turns a prompt into a well-structured page layout in seconds. <a href="https://admin.shopify.com/apps/foxify-builder?utm_source=foxecom&#x26;utm_medium=help_center_foxify_save_a_page_as_a_template&#x26;utm_campaign=anchor-text&#x26;utm_term=try_foxify_ai"><mark style="color:orange;">Try Foxify AI</mark></a> ✨</p></figcaption></figure></div>

{% embed url="<https://youtu.be/Ae4QzPlTdBI?si=1P3TXbcuvHj_0bNU>" %}

Custom templates help you speed up your creation and design process while ensuring that all pages are consistently qualified.

In this article, you'll learn how to save a page as a pre-made template and reuse it in future projects or campaigns.

## How to save a page as a custom template

{% hint style="success" %}
Steps:

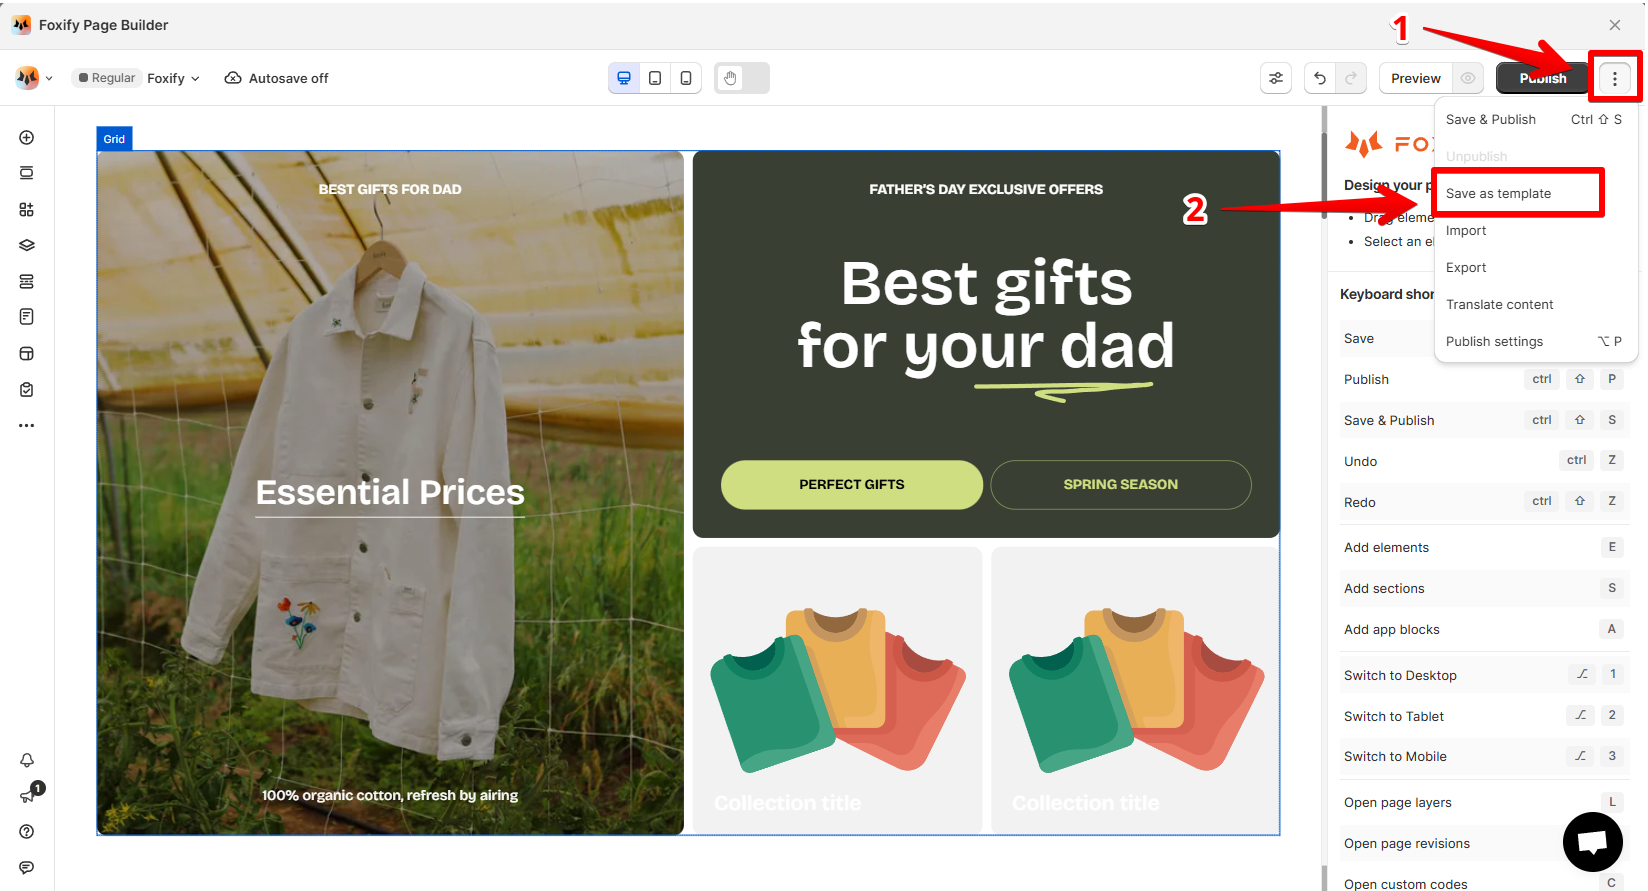
1. After creating a perfect template of any page type, hit **Save**.
2. Click on the three-dot icon next to the button > select **Save as template**.&#x20;
   {% endhint %}

<figure><img src="/files/iyWVgjxnuCdc4QTxXzGu" alt=""><figcaption></figcaption></figure>

{% hint style="success" %}
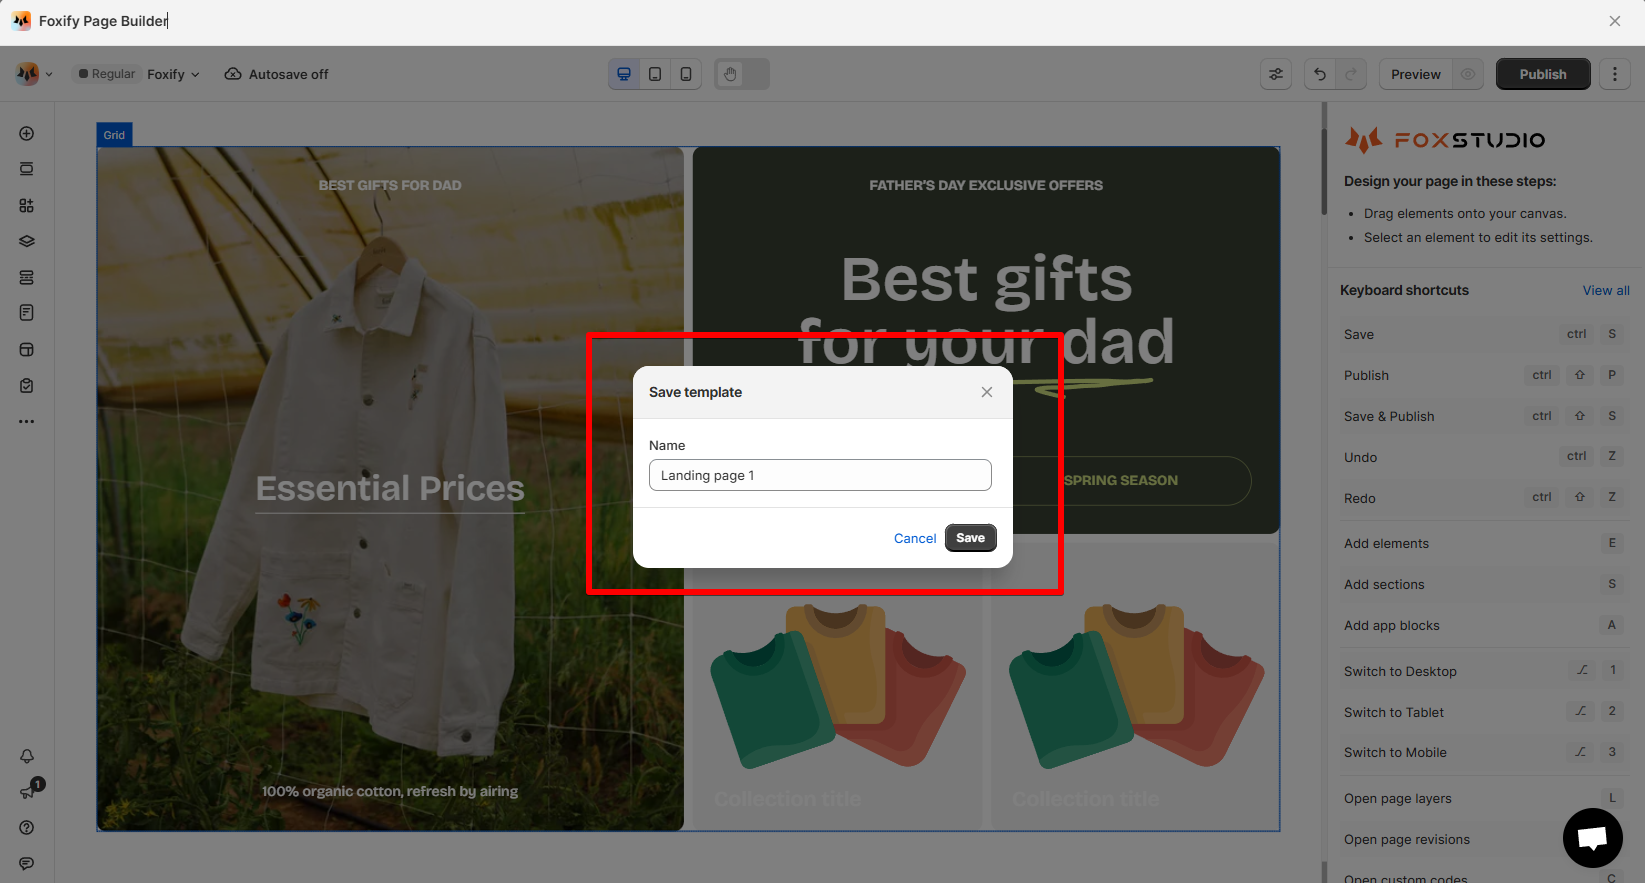
3\. You will be prompted to set a name for this template. Add a name and **Save** it.
{% endhint %}

<figure><img src="/files/ftYXoinsItGqOMRLHMe4" alt=""><figcaption></figcaption></figure>

{% hint style="success" %}
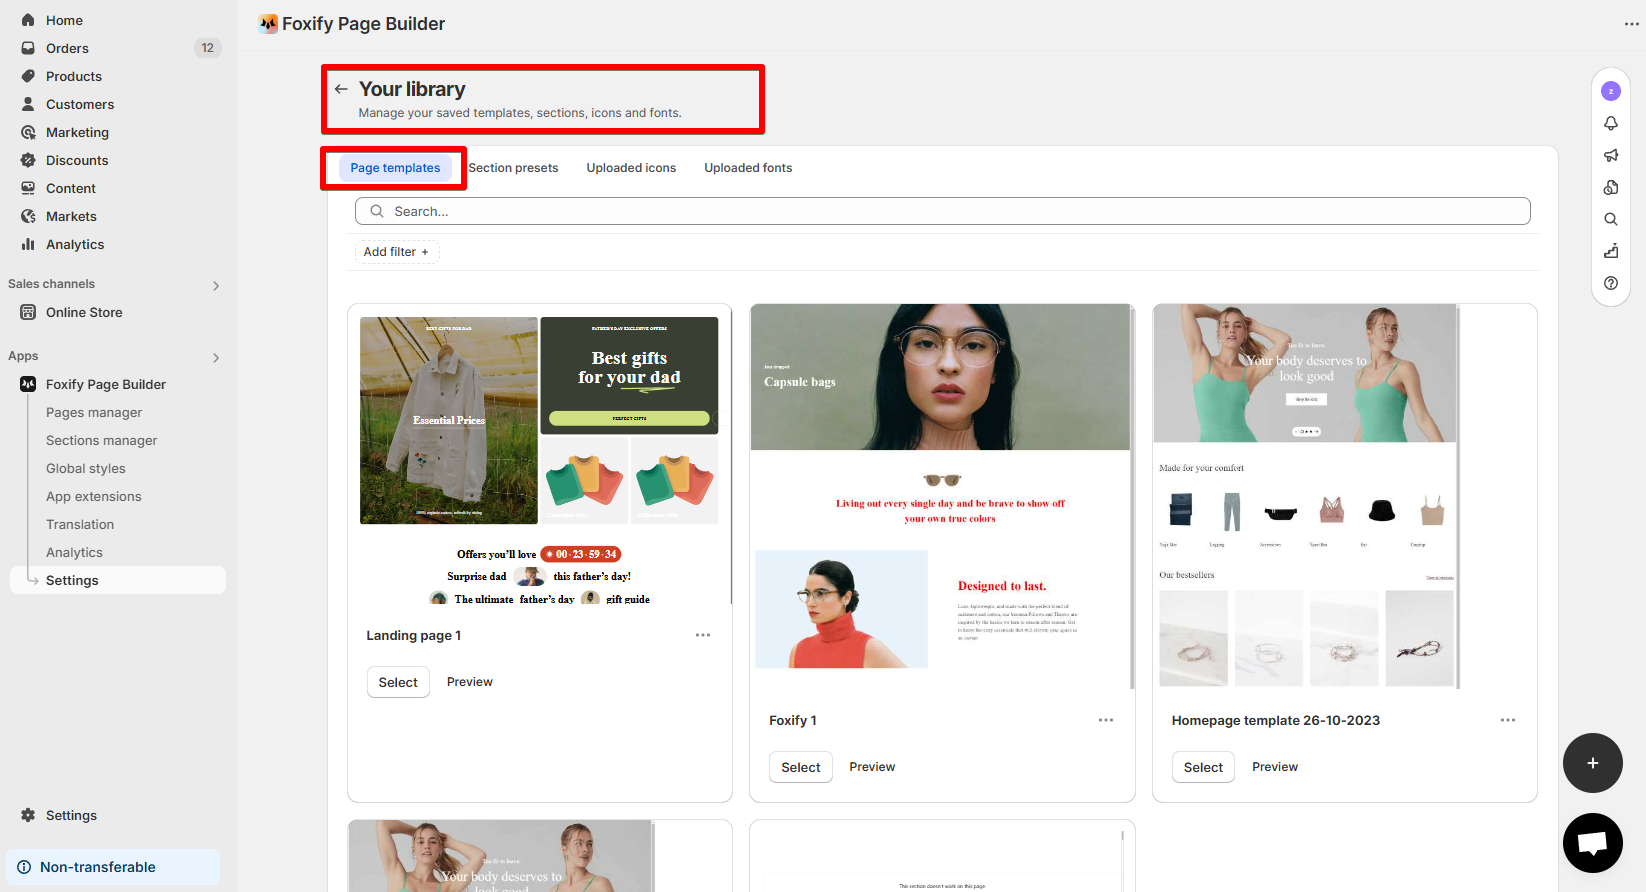
Once created, these pages will appear in the **Your library** > **Page templates.**
{% endhint %}

<figure><img src="/files/olT5BMw7GI1b0NSw9hrn" alt=""><figcaption></figcaption></figure>

## How to use your custom templates

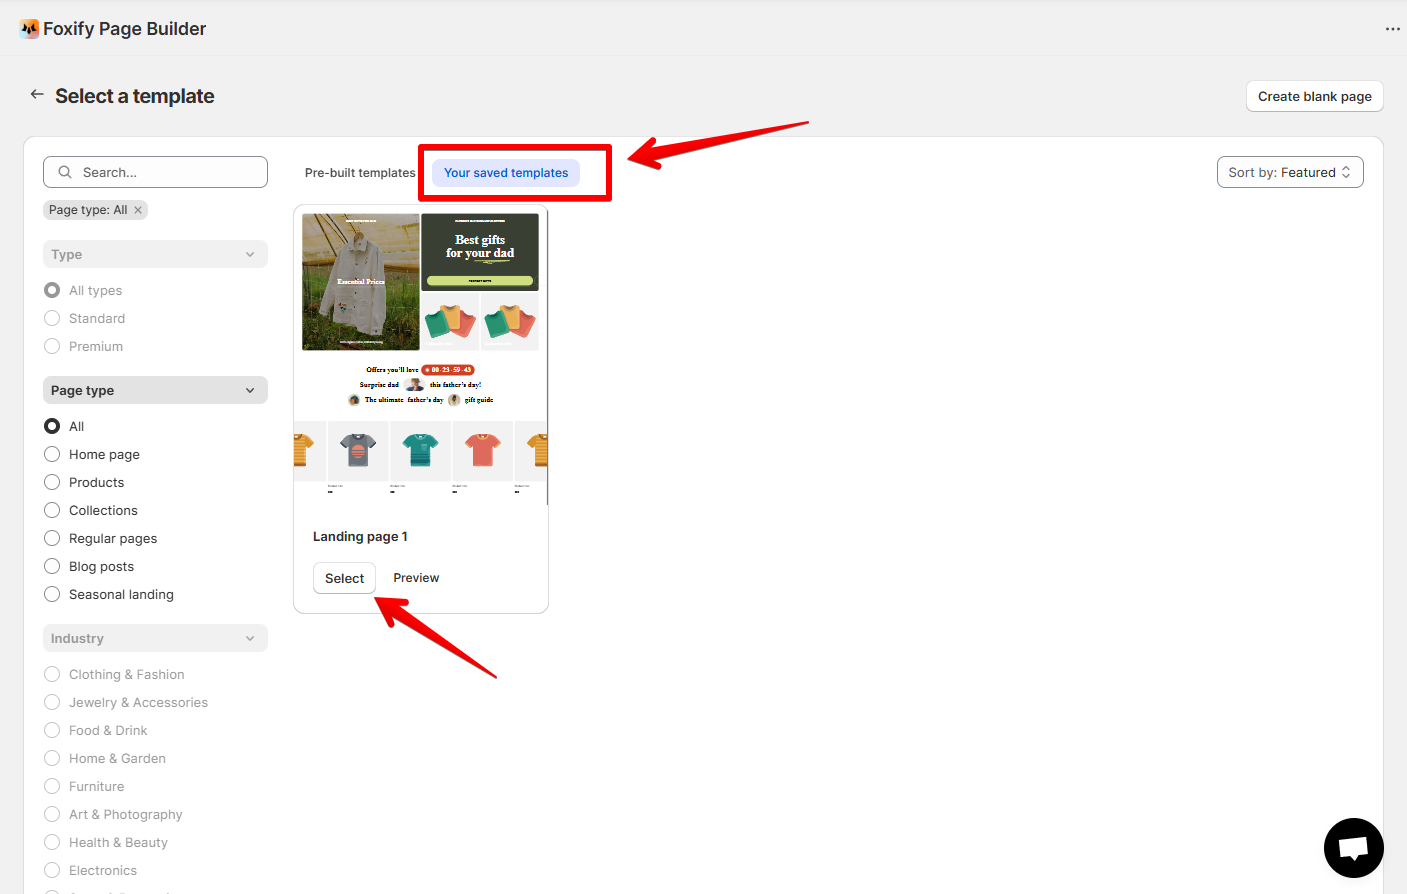
To start using our custom templates, simply create a new page and select it from the list of **Your saved templates**. Couldn't be easier!

<figure><img src="/files/aquGAolsxOYMdMmCDZYv" alt=""><figcaption></figcaption></figure>

## How to rename your custom templates

{% hint style="success" %}
Steps:&#x20;

1. In your Foxify Dashboard, navigate to **Settings >** **Your library**
2. In the **Page templates** tab, select the three-dot icon next to the template name
3. Click **Rename**
4. Fill in the new name for your template
5. Hit **Enter**, or click anywhere outside the text field to save.
   {% endhint %}

## How to delete your custom templates

{% hint style="success" %}
Steps:

1. In your Foxify Dashboard, navigate to **Settings >** **Your library**
2. In the **Page templates** tab, select the three-dot icon next to the template name
3. Hit **Delete**.
   {% endhint %}


---

# Agent Instructions: Querying This Documentation

If you need additional information that is not directly available in this page, you can query the documentation dynamically by asking a question.

Perform an HTTP GET request on the current page URL with the `ask` query parameter:

```
GET https://docs.foxecom.com/foxify-app/page-management/templates/save-a-page-as-a-template.md?ask=<question>
```

The question should be specific, self-contained, and written in natural language.
The response will contain a direct answer to the question and relevant excerpts and sources from the documentation.

Use this mechanism when the answer is not explicitly present in the current page, you need clarification or additional context, or you want to retrieve related documentation sections.