# Constraints
_C5dwD2Xm.gif)
Constraints allow you to control how elements behave in relation to their parent container. When you set constraints for an element, it ensures the element maintains a consistent position relative to the container, even when the screen size changes.
## Automatic constraints
When you add an element to a section, container, or grid cell, and drag it around, it is automatically docked:
* To the top of the parent element (container, stack, etc.).
* And to the left or right edge of the parent element - whichever is the closest.
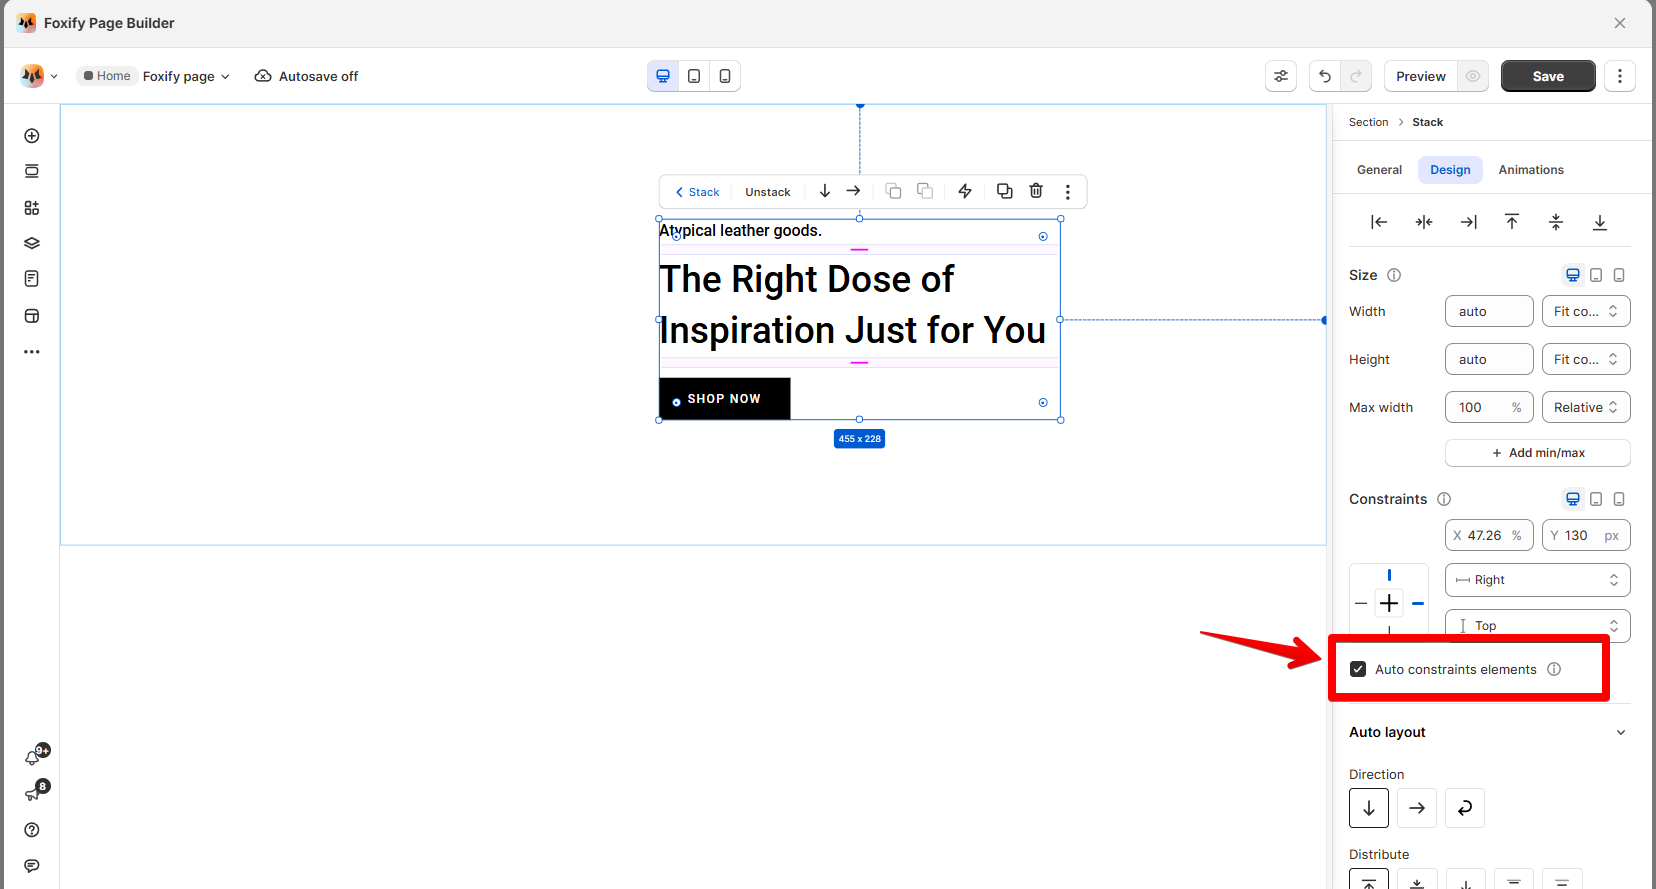
In the example below, the text element is automatically docked to the top and right sides of the container.
You can observe this when dragging the element and via the Inspector panel. The Constraints are indicated by the dashed blue lines surrounding it.
_4cAmfGdO.gif)
**Steps to enable automatic constraints:**
1. Click on the element you want to set the auto constraints to open its **Inspector** panel.
2. Under the **General** tab, click **Auto constraints elements**.
## Manual constraints
You can override the auto constraints elements feature, and set the position manually from the Inspector.
**Steps:**
1. Select the relevant element.
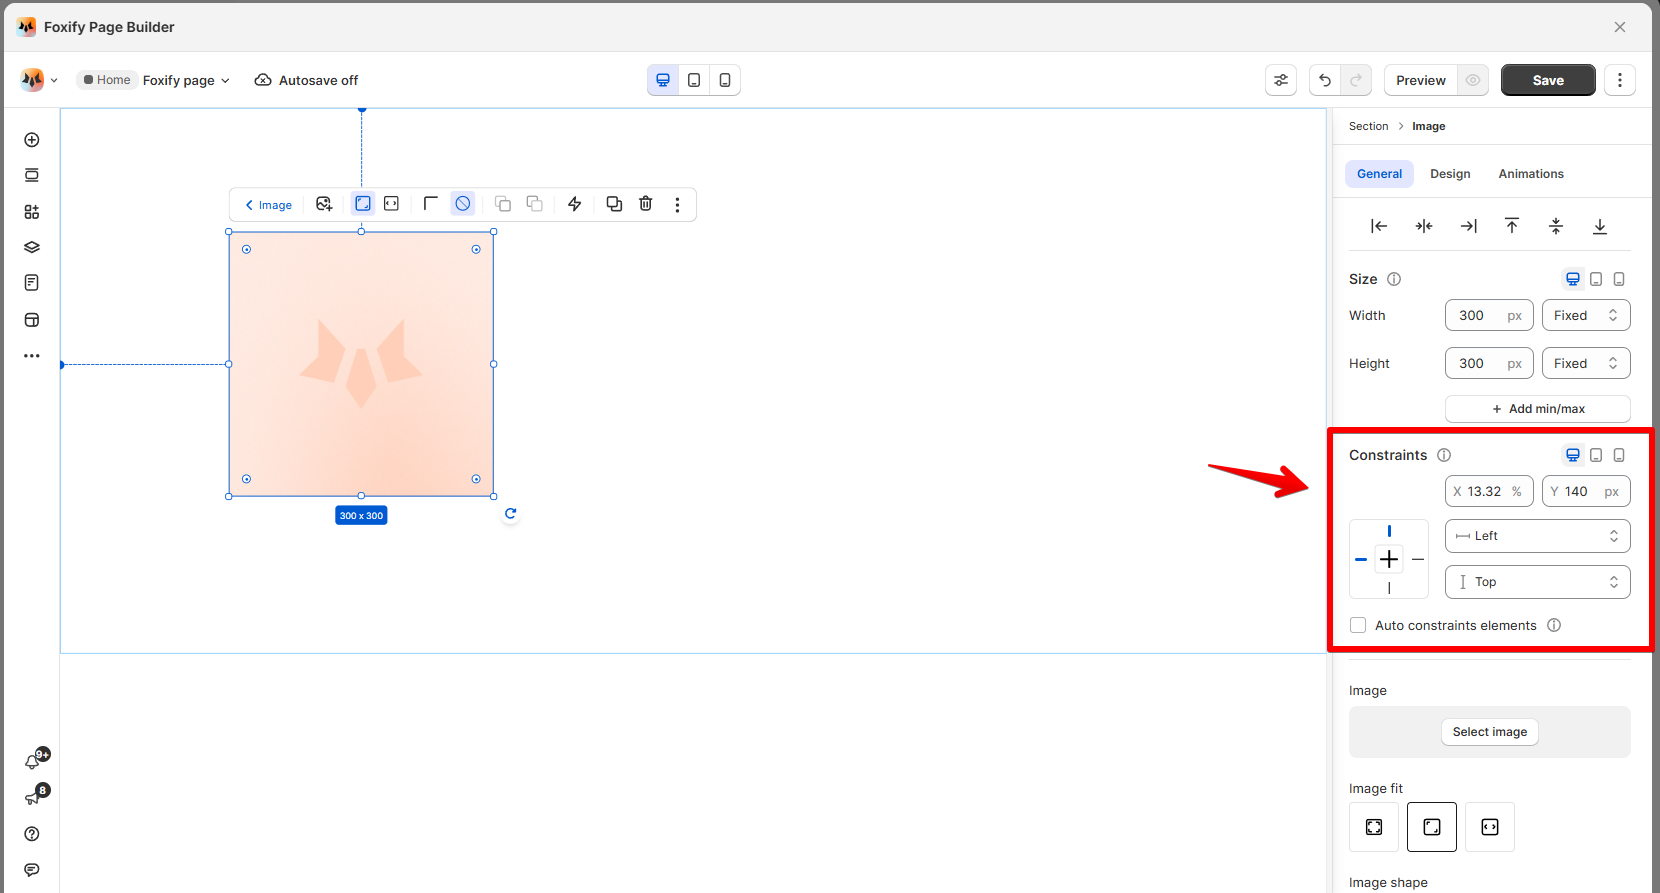
2. In the **Inspector** panel > **General** tab, locate the **Constraints** section.
3. Select the 2 constraint points (top or bottom, left or right).
Click the **Center** if you want to make the element always in the center.
4. Enter the value for constraints. **This can be considered as the margin between the selected element and the edge of its parent**.
**Measurement units for constraints**:
* Horizontal constraints (left or right): Percentage (%).
* Vertical constraints (top or bottom): Pixels (px).
For example, if a text element's constraints are set as 10% for the Left and 100px for the Top, the element will stay to the left-right even as the screen size changes:
* On a container width of 1265px, the margin between the element and the container's left edge is 126.5px, and the margin-top of the element with the container is 100px.
* On a container width is resized to 900px, the margin between the element and the container's left edge is 10% of 900 = 90px, and the margin-top of the element with the container is 100px.
You can apply constraints to any layer/element.
* You can apply constraints to [frames you have nested within other frames](https://docs.foxecom.com/foxify-app/foxstudio/layout-and-styling/frame-elements).
* You can't apply constraints to [elements included in a stack](https://docs.foxecom.com/foxify-app/foxstudio/layout-and-styling/stack-elements) with the stack border.
## Use alignment tools
To quickly align elements, you can use the option for the section's position alignment. This will override the current constraints.
_HDjg50Y6.gif)