# Main collection

<figure><img src="/files/cW94MT1cyG00h3ravvTy" alt=""><figcaption></figcaption></figure>

This article guides you on how to customize and show a list of products based on a category in a grid view on your collection page.

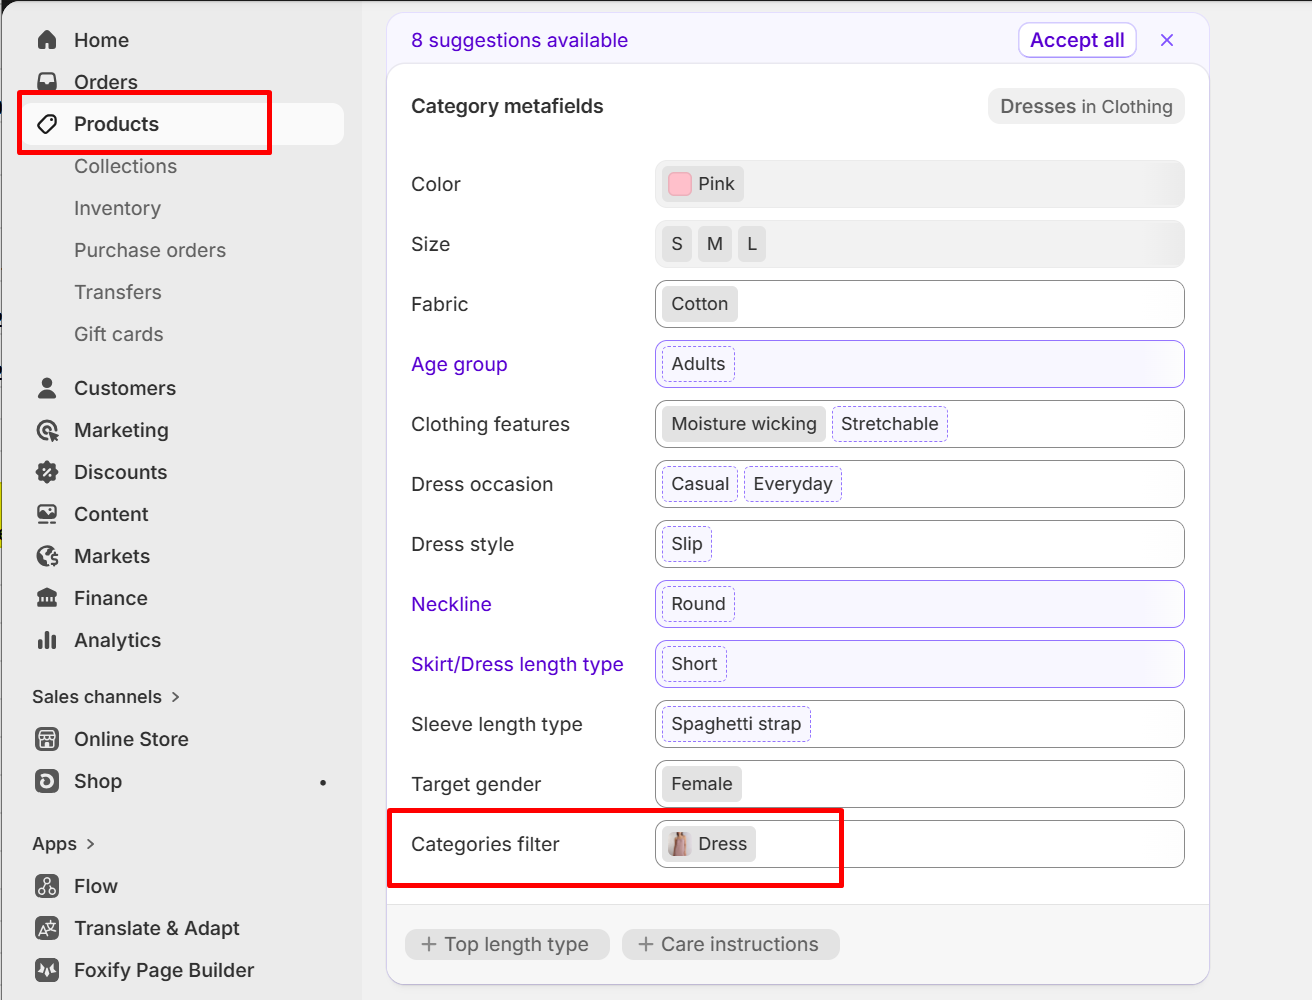
{% hint style="success" %}
Steps:&#x20;

1. In the theme editor (**Customize**), open the template selector.
2. Select **Collections**, then **Default collection.**
3. On the left-sidebar, locate **Main collection**.
4. Make necessary changes **> Save.**
   {% endhint %}

## Layout

{% tabs %}
{% tab title="Number " %}

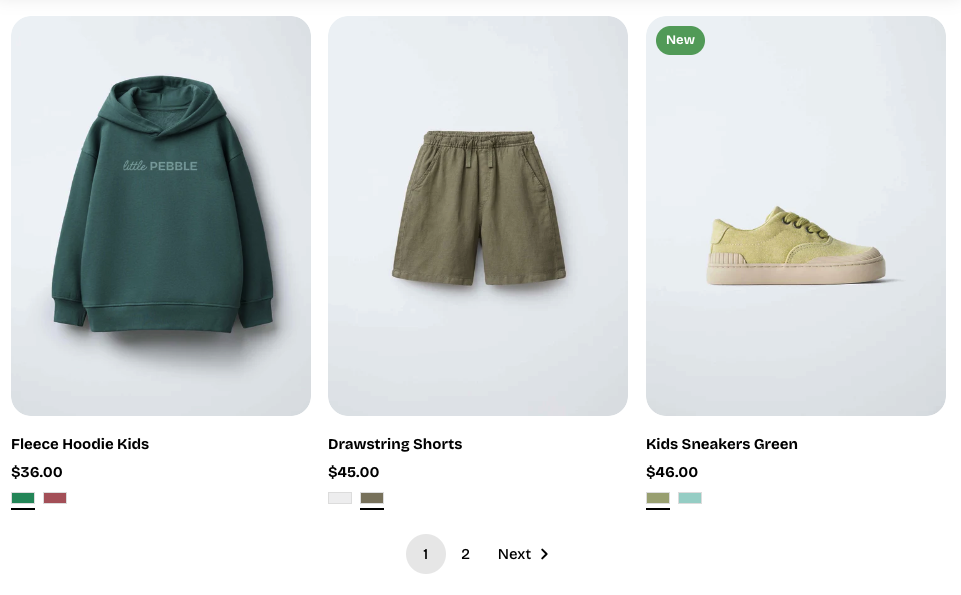
<figure><img src="/files/MRszG6qsEIe1I4MgAc53" alt=""><figcaption></figcaption></figure>
{% endtab %}

{% tab title="Infinite" %}

<figure><img src="/files/3Npc8J8VbSXtTkvdNAC9" alt=""><figcaption></figcaption></figure>
{% endtab %}

{% tab title="Load more" %}

<figure><img src="/files/MCgVhlnWWmzNUr1KhVUb" alt=""><figcaption></figcaption></figure>
{% endtab %}
{% endtabs %}

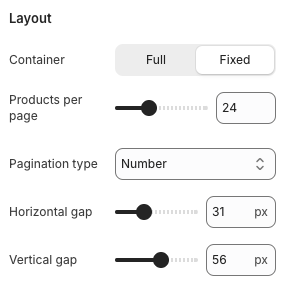
* **Products per page**: Set how many products are displayed on each page.
* **Pagination type**: Select one of three pagination styles:&#x20;

{% tabs %}
{% tab title="Number" %}

<figure><img src="/files/BHGlx4MU9voBt0vSGTMW" alt=""><figcaption></figcaption></figure>
{% endtab %}

{% tab title="Tab 2" %}

{% endtab %}

{% tab title="Untitled" %}

{% endtab %}
{% endtabs %}

* **Horizontal gap / Vertical gap**: Adjust the spacing between product cards in the grid layout.&#x20;

<figure><img src="/files/LCgghk7N3q8TMsXm6DhE" alt=""><figcaption></figcaption></figure>

## Filtering & sorting

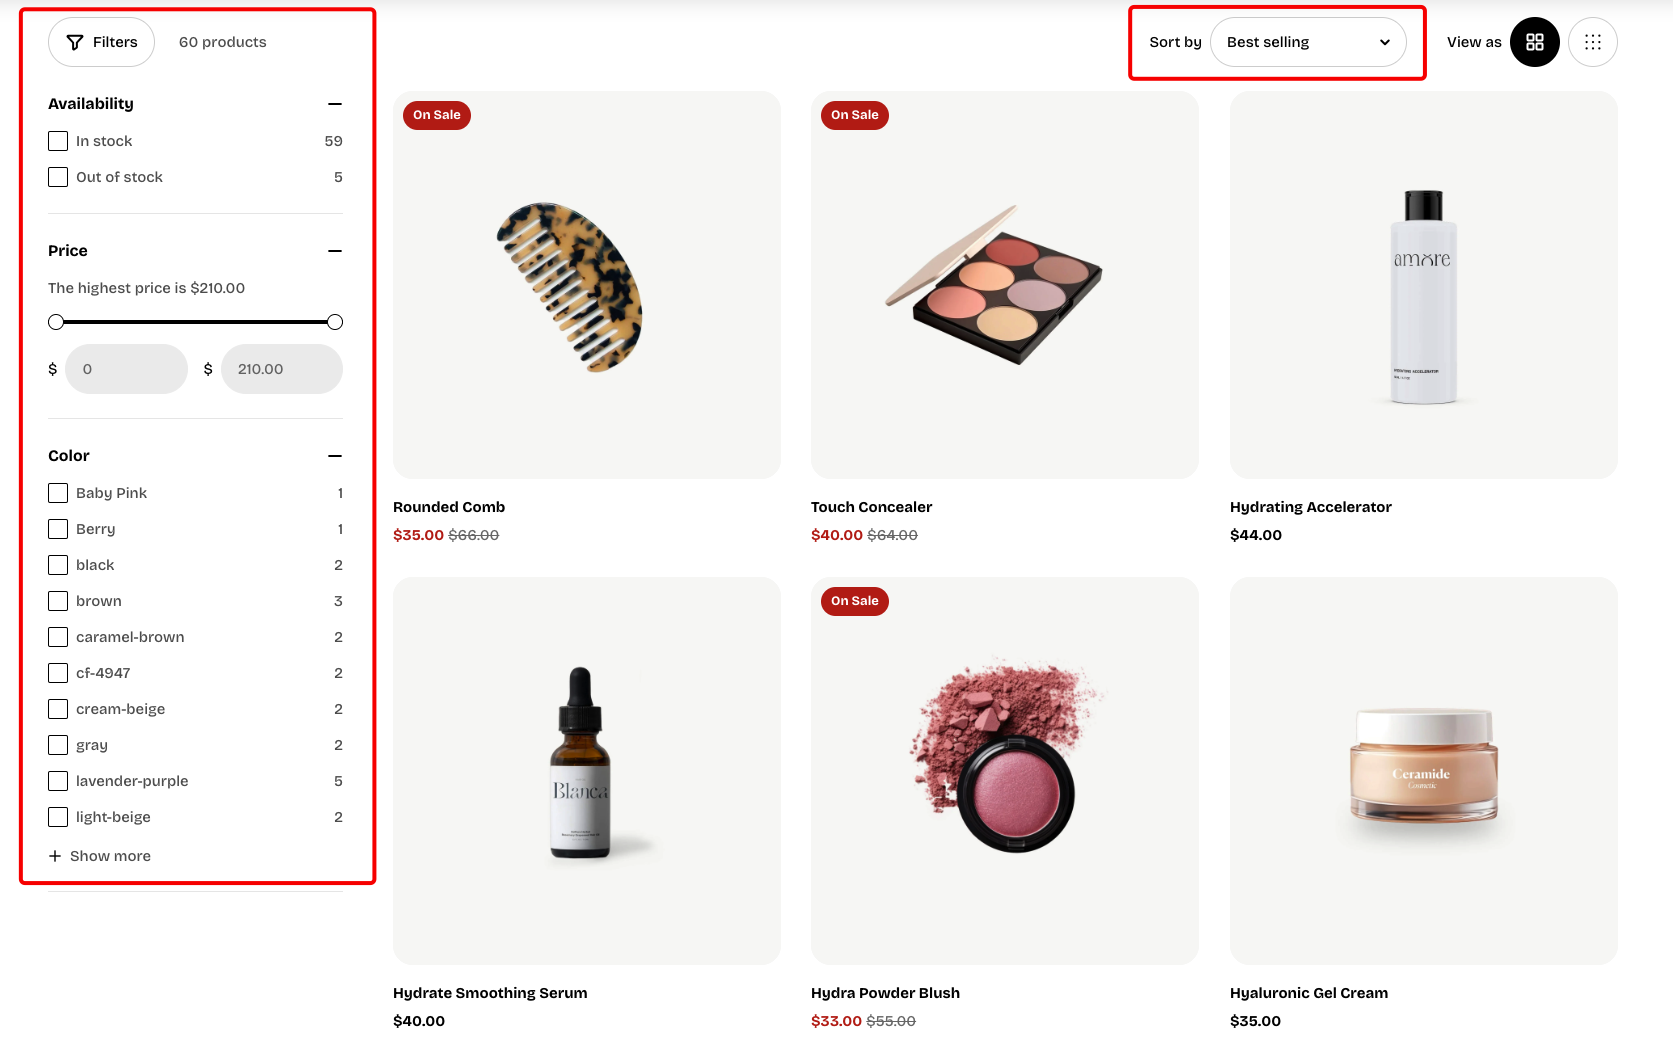
Allow your customers to filter collections and search results by product availability, price, color, and more.

<figure><img src="/files/k9JpSypLI6DZxPuQHDJX" alt=""><figcaption></figcaption></figure>

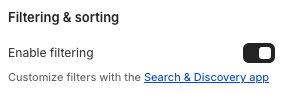
This section allows you to **Enable filtering** for the collection. You can customize filters with the **Search & Discovery** app. [Learn more](https://help.shopify.com/manual/online-store/search-and-discovery/filters)

<figure><img src="/files/foBIyvunEgQPGEOZMu4W" alt=""><figcaption></figcaption></figure>

You can also **Enable sorting** on the collection.&#x20;

<figure><img src="/files/7OV11dVOVPYLxyimUjFz" alt=""><figcaption></figcaption></figure>

If you want to switch the grid layout more easily, turn on **Grid layout control**.

<figure><img src="/files/4SXSvHgJoysUOISdXYhZ" alt=""><figcaption></figcaption></figure>

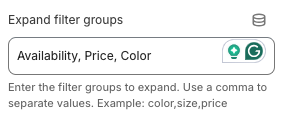
If you want the filter groups to open/expand automatically when accessing the collection page, you can insert group filter name into the **Expand filter groups** field, and each group filter is separated by a comma. Exam: Price, Color, Size.

<figure><img src="/files/MMVrDS9eMm5pDi1AUYF8" alt=""><figcaption></figcaption></figure>

## How to customize filters <a href="#how-to-customize-filters" id="how-to-customize-filters"></a>

{% hint style="info" %}
Customizing the filters in your store requires the [Shopify Search & Discovery](https://apps.shopify.com/search-and-discovery) app.

The app also allows you to customize search results and product recommendations to give you more control over how customers discover your products.

Learn how to [customize filters with the app](https://help.shopify.com/en/manual/online-store/search-and-discovery/filters).
{% endhint %}

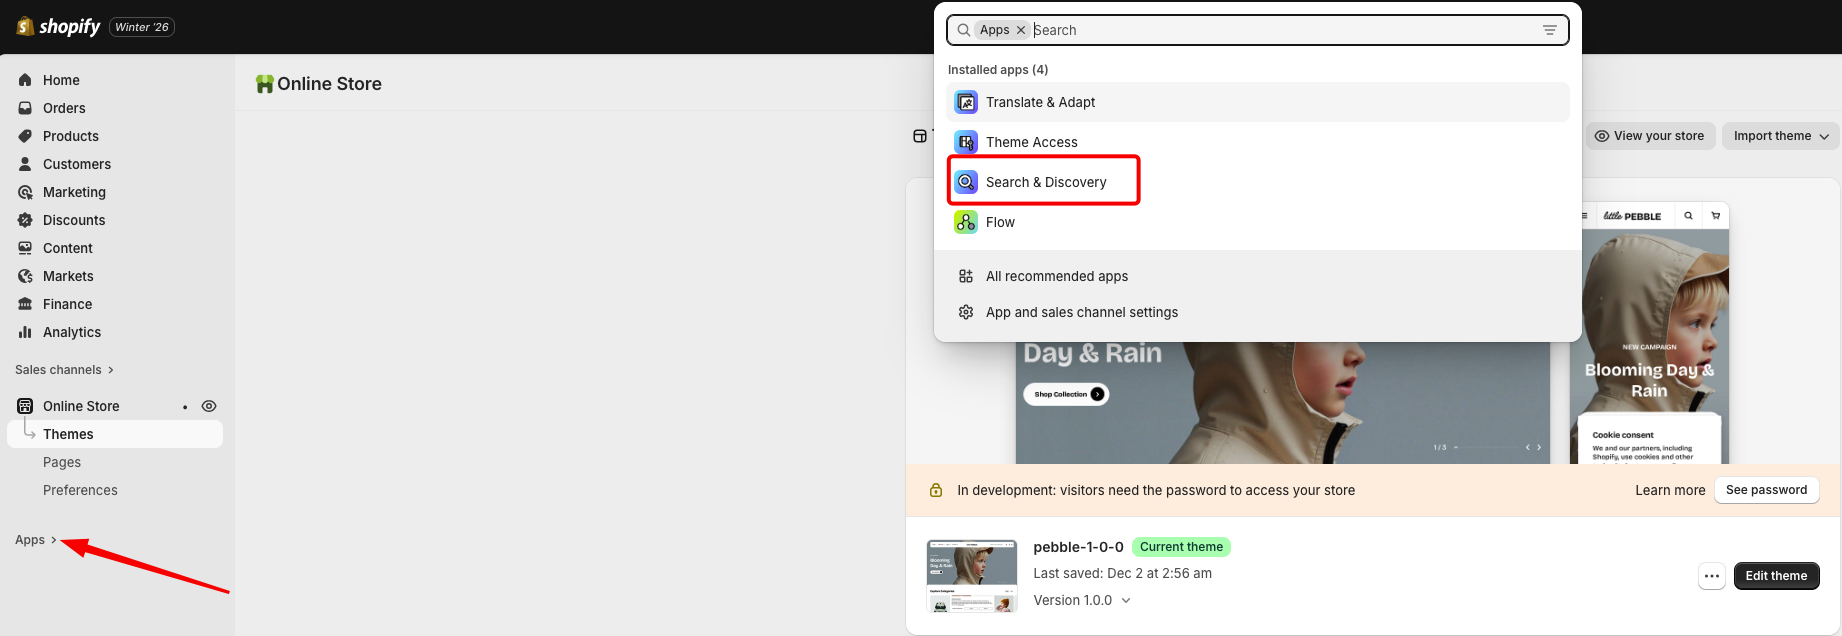
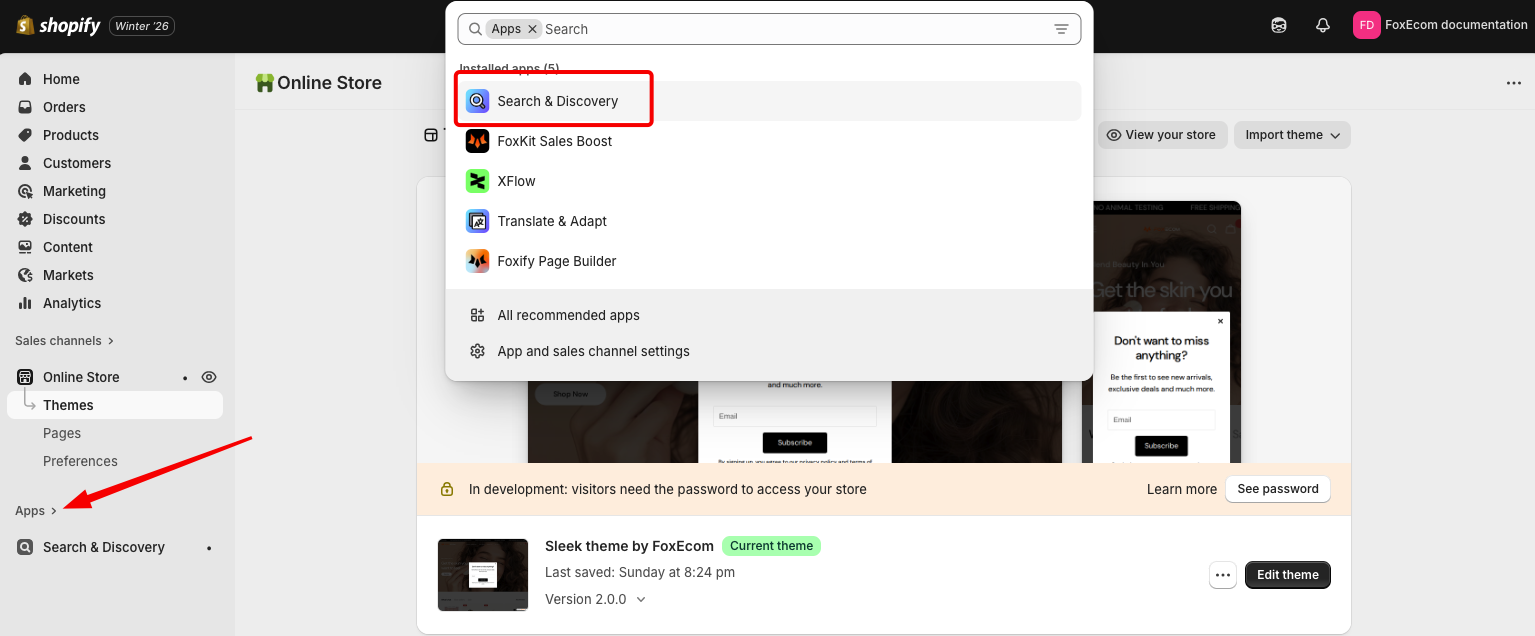
1. Go to the **Shopify admin dashboard**.
2. Click **Apps** and install the [**Shopify Search & Discovery**](https://apps.shopify.com/search-and-discovery) app for your store

<figure><img src="/files/lIEXc755FsYqf9qWF7Jg" alt=""><figcaption></figcaption></figure>

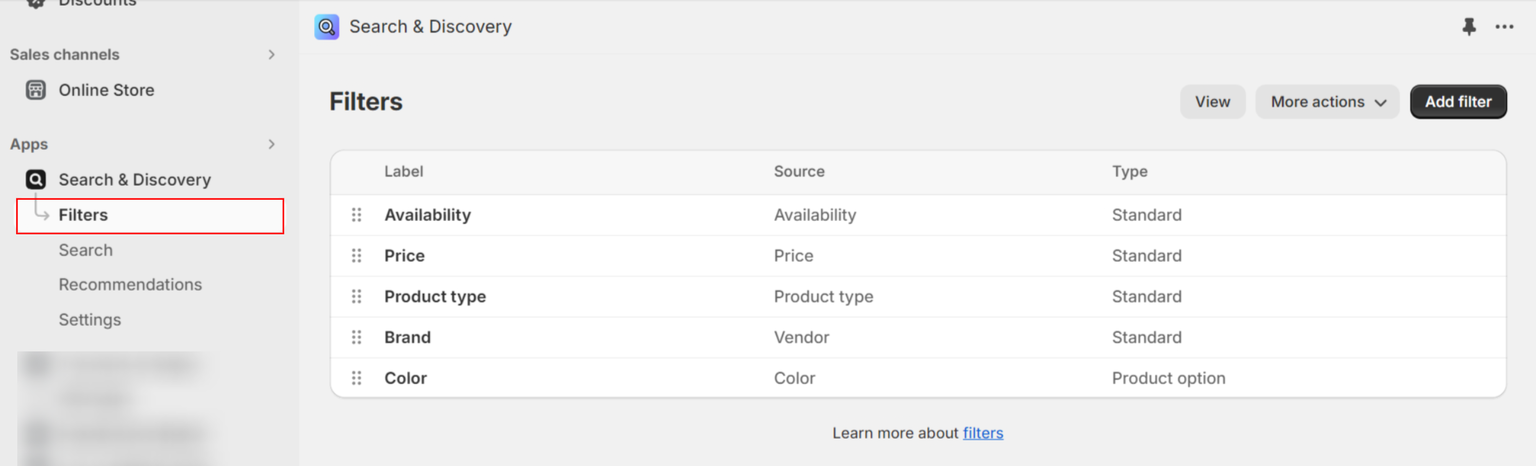
3. After the app is installed, open **Search & Discovery > Filters > Edit filters**

<figure><img src="/files/VcqndUef4MMRuLLuwOgR" alt=""><figcaption></figcaption></figure>

<figure><img src="/files/iVDIsYWxNYzeVMmSNCVF" alt=""><figcaption></figcaption></figure>

4. Add or remove filters to show/hide from the storefront filters > **Save** the settings.
5. In the theme editor (**Edit theme**), open the template selector > Select **Collections** > **Default collection.**
6. On the left sidebar, locate **Product listing** > Select **Enable filtering** checkbox
7. **Save**

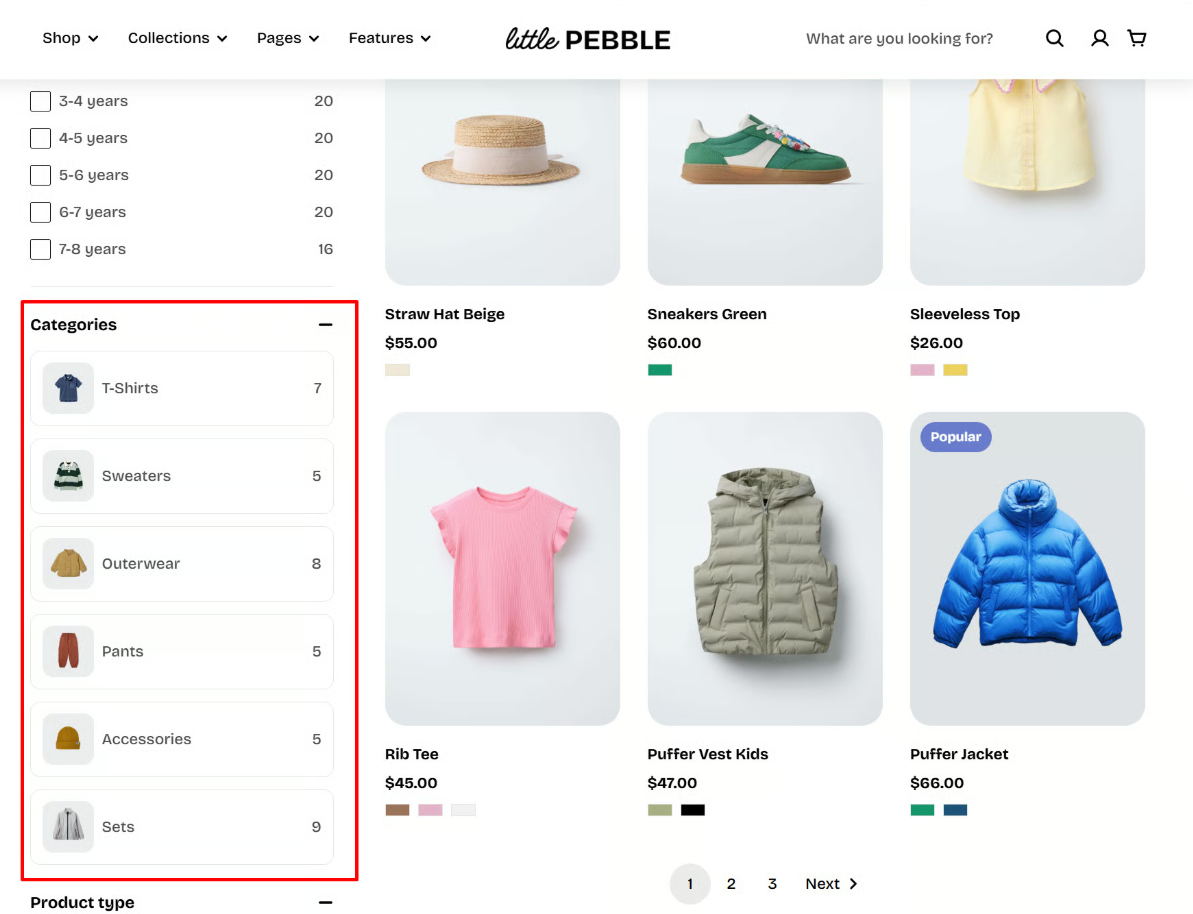
### How to set up an image categories filter like the Pebble demo
<figure><img src="/files/1sS9rAAFWczLBBhx4TtE" alt=""><figcaption></figcaption></figure>

If you want to create a **Categories filter** like in our demo, follow the steps below:

{% stepper %}
{% step %}

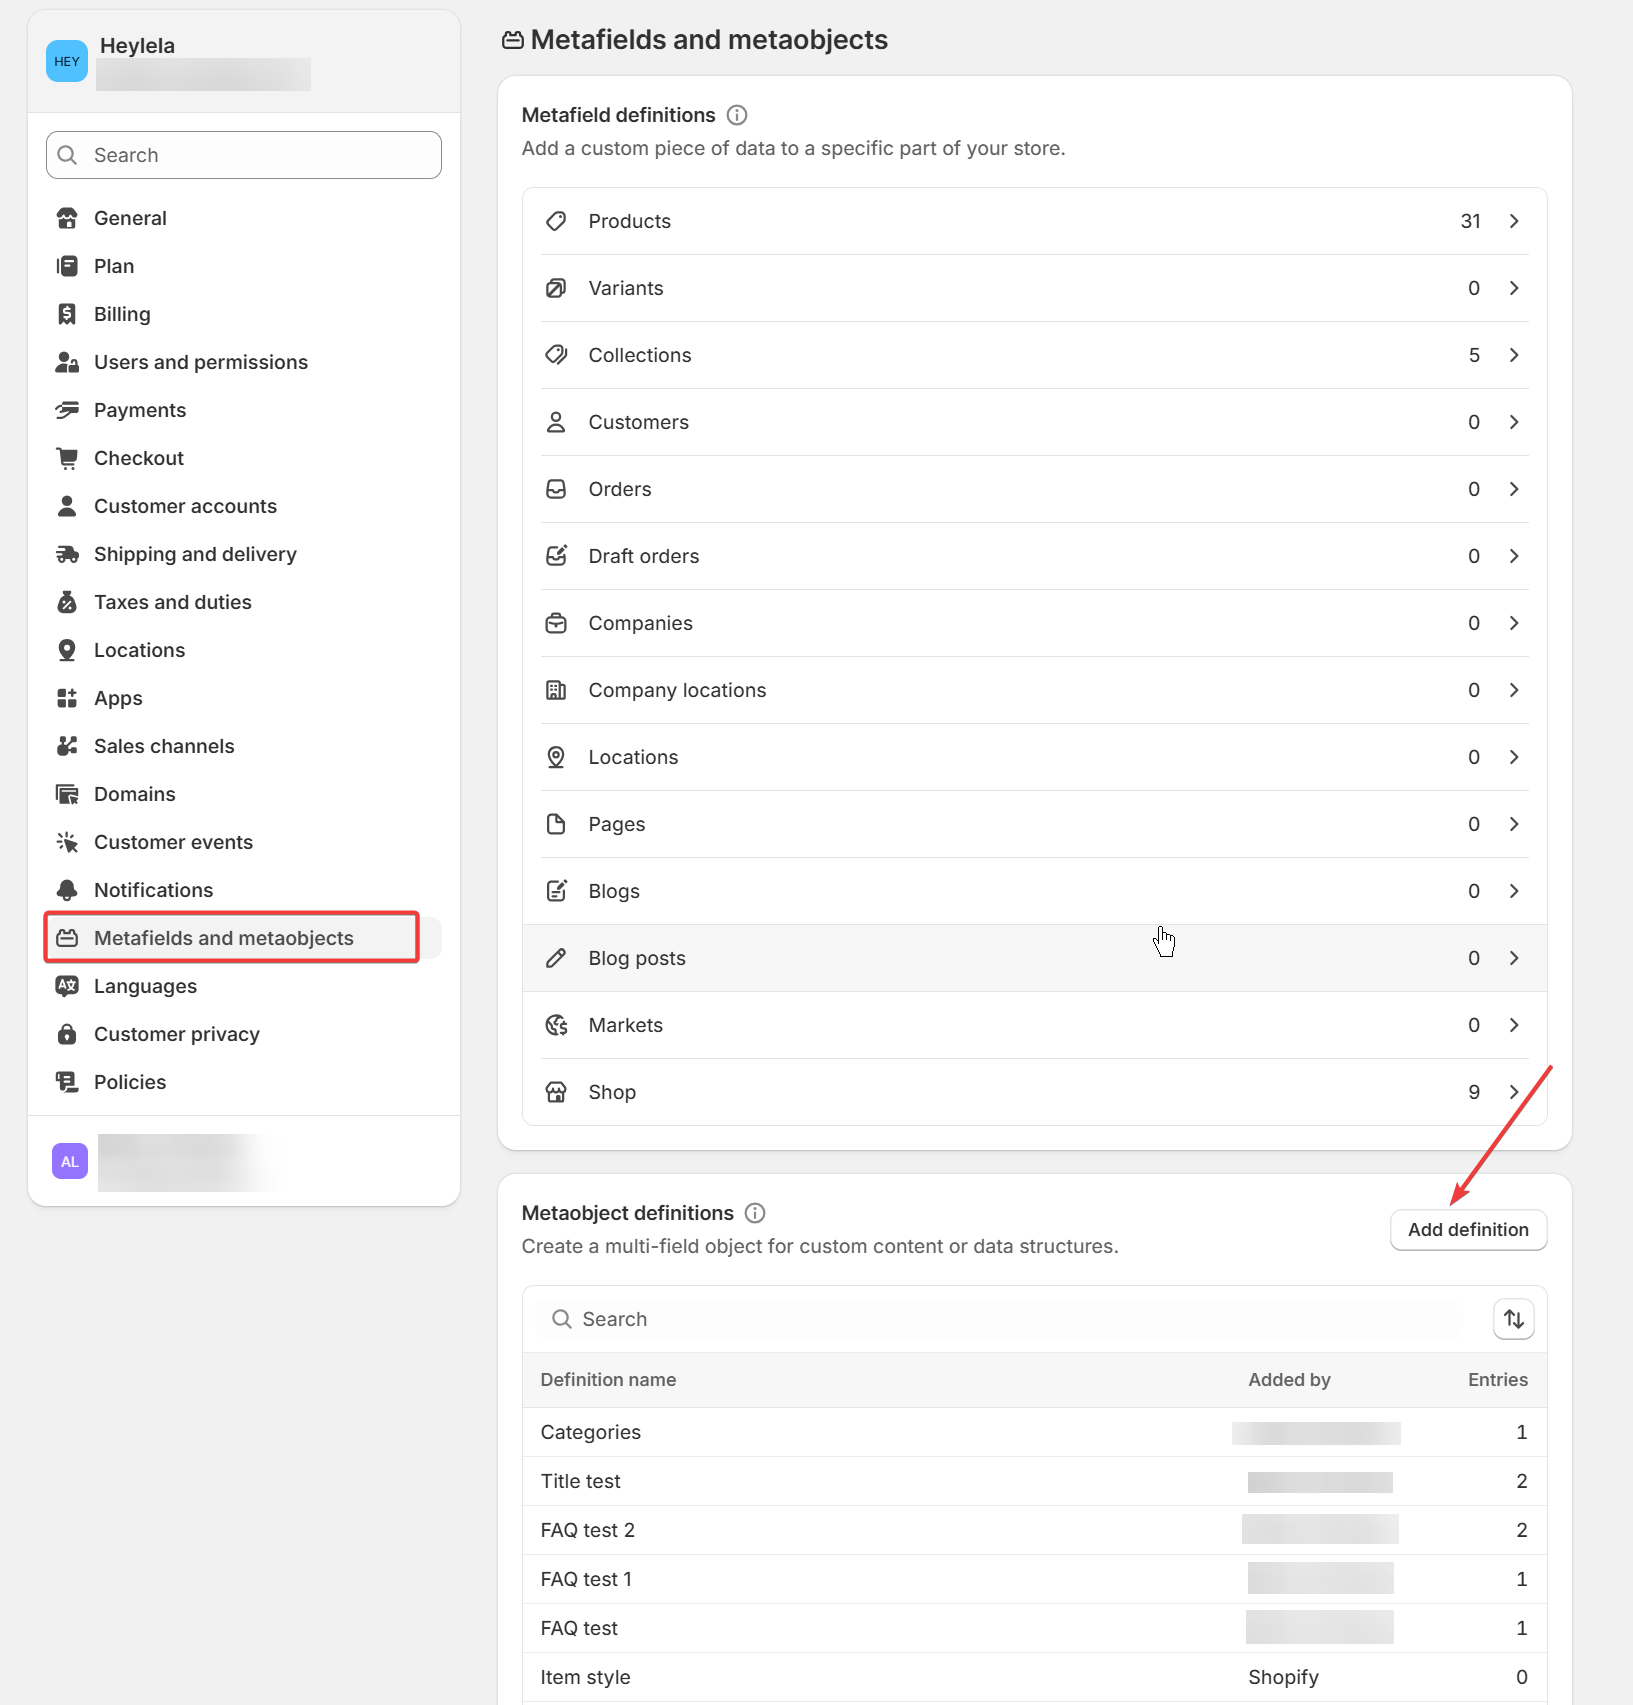
#### Step 1: Create a Metaobject (Categories)

{% hint style="success" %}

1. Go to **Settings > Metafields and metaobjects.**
2. Create a new **Metaobject.**
3. Name it: **Categories** (or any name you prefer).
4. Add fields:

* Label → Single line text
* Image → Image (File)

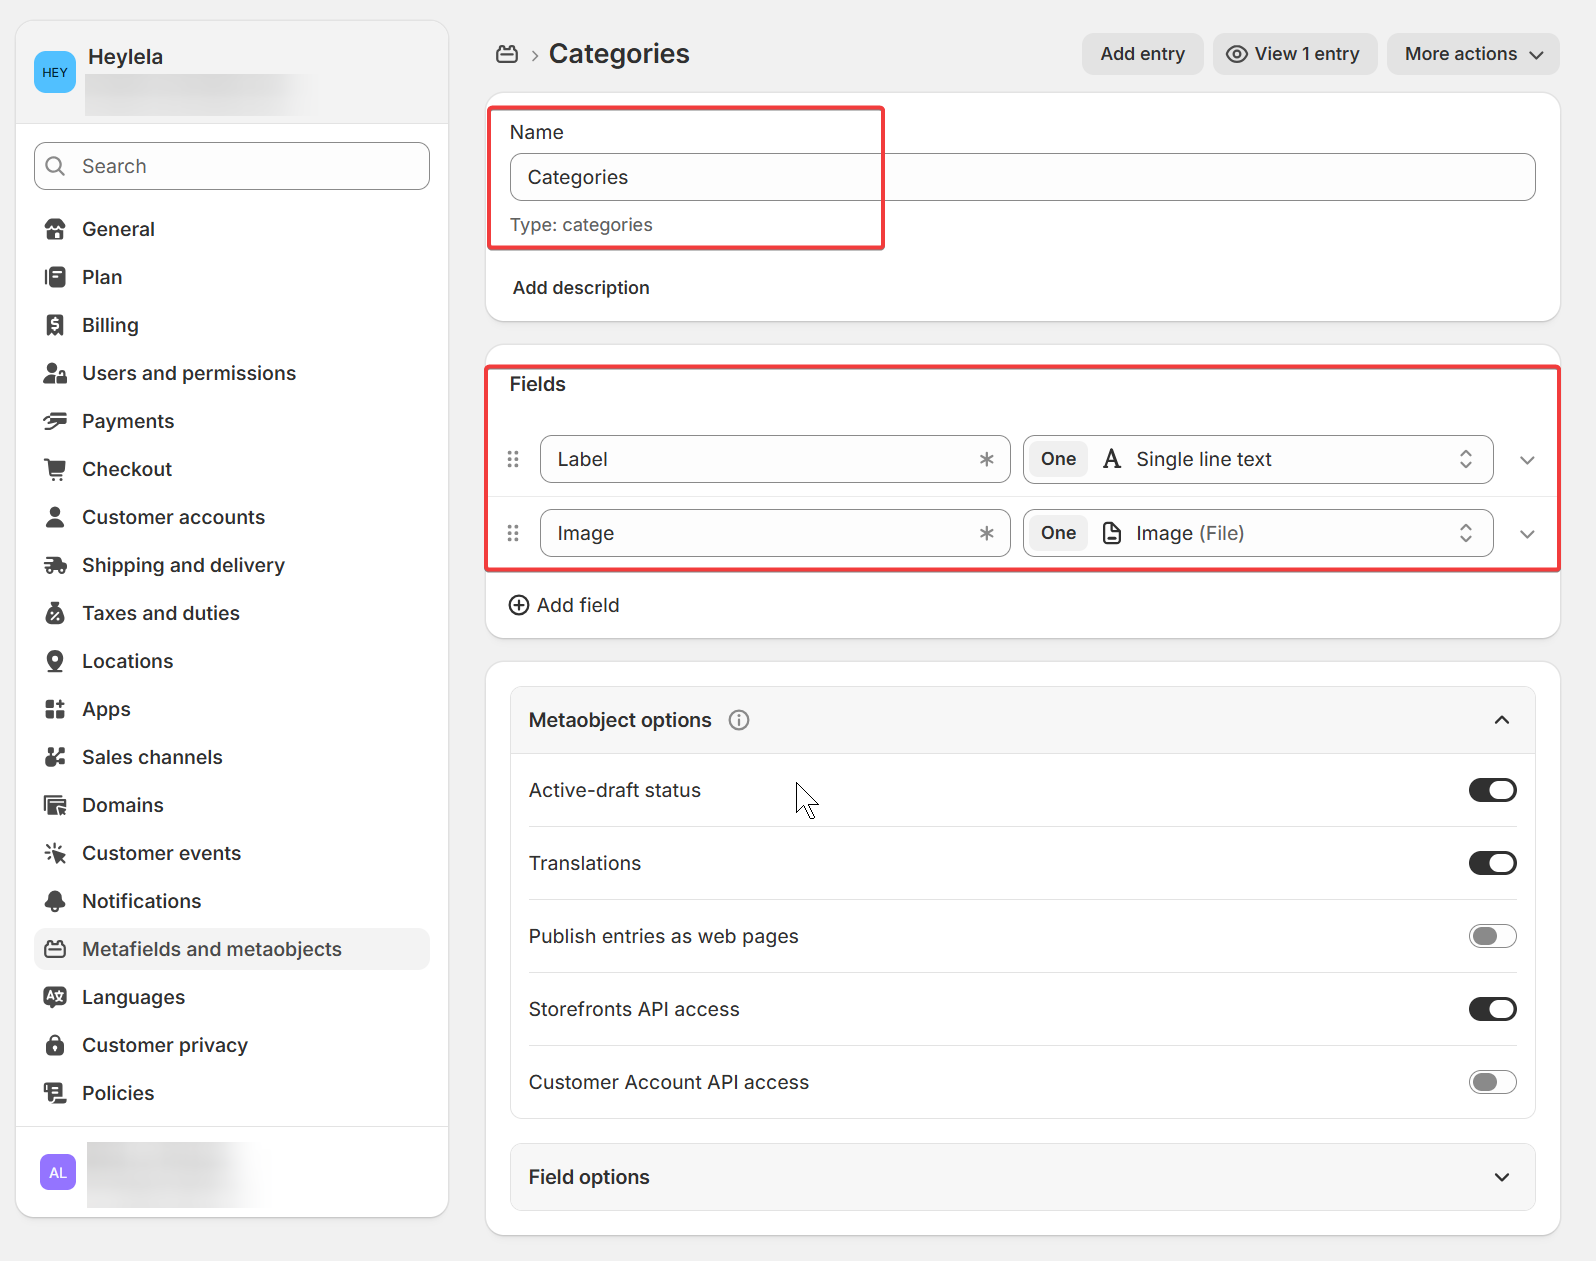
5. Click **Add entry** at the top.
6. For each entry:
   * Enter the **Label** of the category
   * Upload the **Image** you want to display in the filter
7. Click **Save.**
   {% endhint %}

<figure><img src="/files/mLxtrInFMUKfSi3QPNng" alt=""><figcaption></figcaption></figure>

<figure><img src="/files/8zCWckirqAfTIubQyTjo" alt=""><figcaption></figcaption></figure>

<figure><img src="/files/Nk3WQpLoixaILIh47DUg" alt=""><figcaption></figcaption></figure>
{% endstep %}

{% step %}

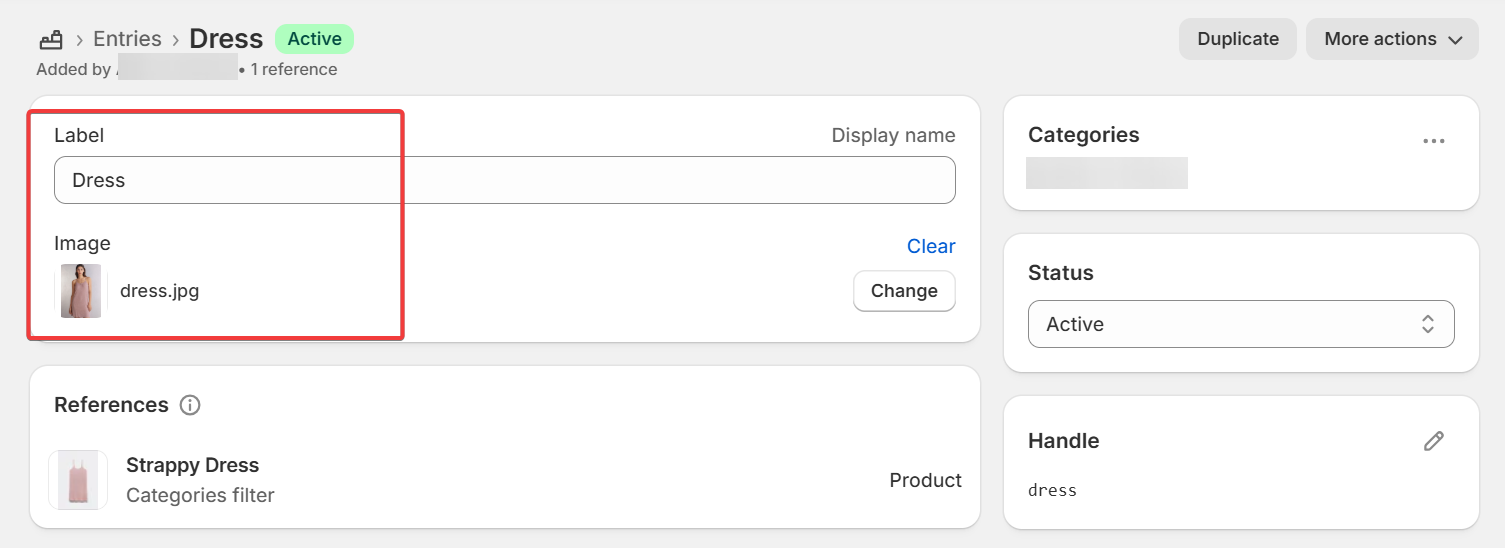
#### Step 2: Create a Metafield

{% hint style="success" %}

1. Create a new **Metafield.**
2. Name it: **Categories** (or any name you want).
3. Type: Select the **Metaobject** you've created and choose **List type** instead of **One entry.**
4. In **Category assignments**, assign categories to the **Categories filter** you want.
5. Click **Save.**
   {% endhint %}

<figure><img src="/files/zgTlvRGazY8aKEc1lmx2" alt=""><figcaption></figcaption></figure>
{% endstep %}

{% step %}

#### Step 3: Assign Categories to Products

{% hint style="success" %}

1. Go to **Products > Select a product**
2. Scroll to **Metafields** and find your **Categories** metafield
3. Add values (T-Shirts, Dress, etc.), then click **Save.**

👉 Do this for products you want included in the filter.
{% endhint %}

<figure><img src="/files/pt9iaC0Y8OgD2FFGkZ5l" alt=""><figcaption></figcaption></figure>
{% endstep %}

{% step %}

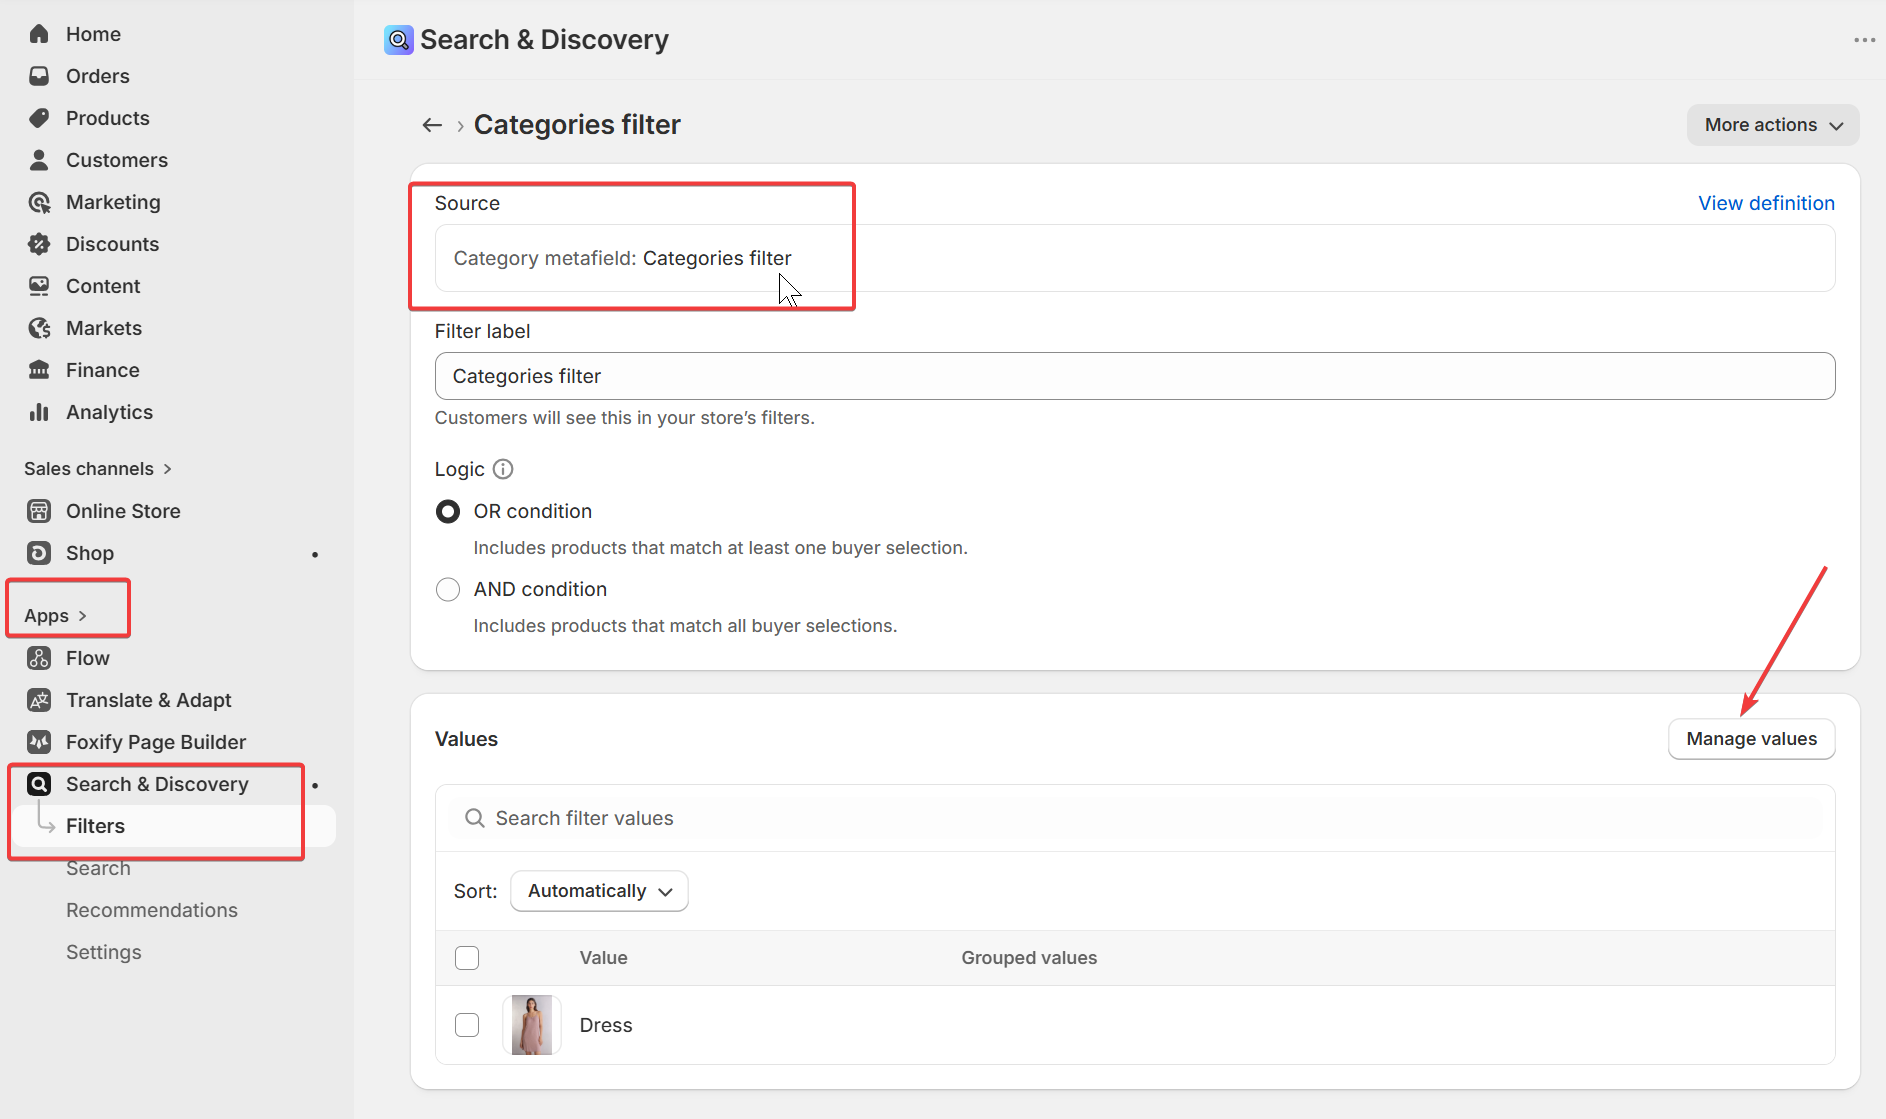
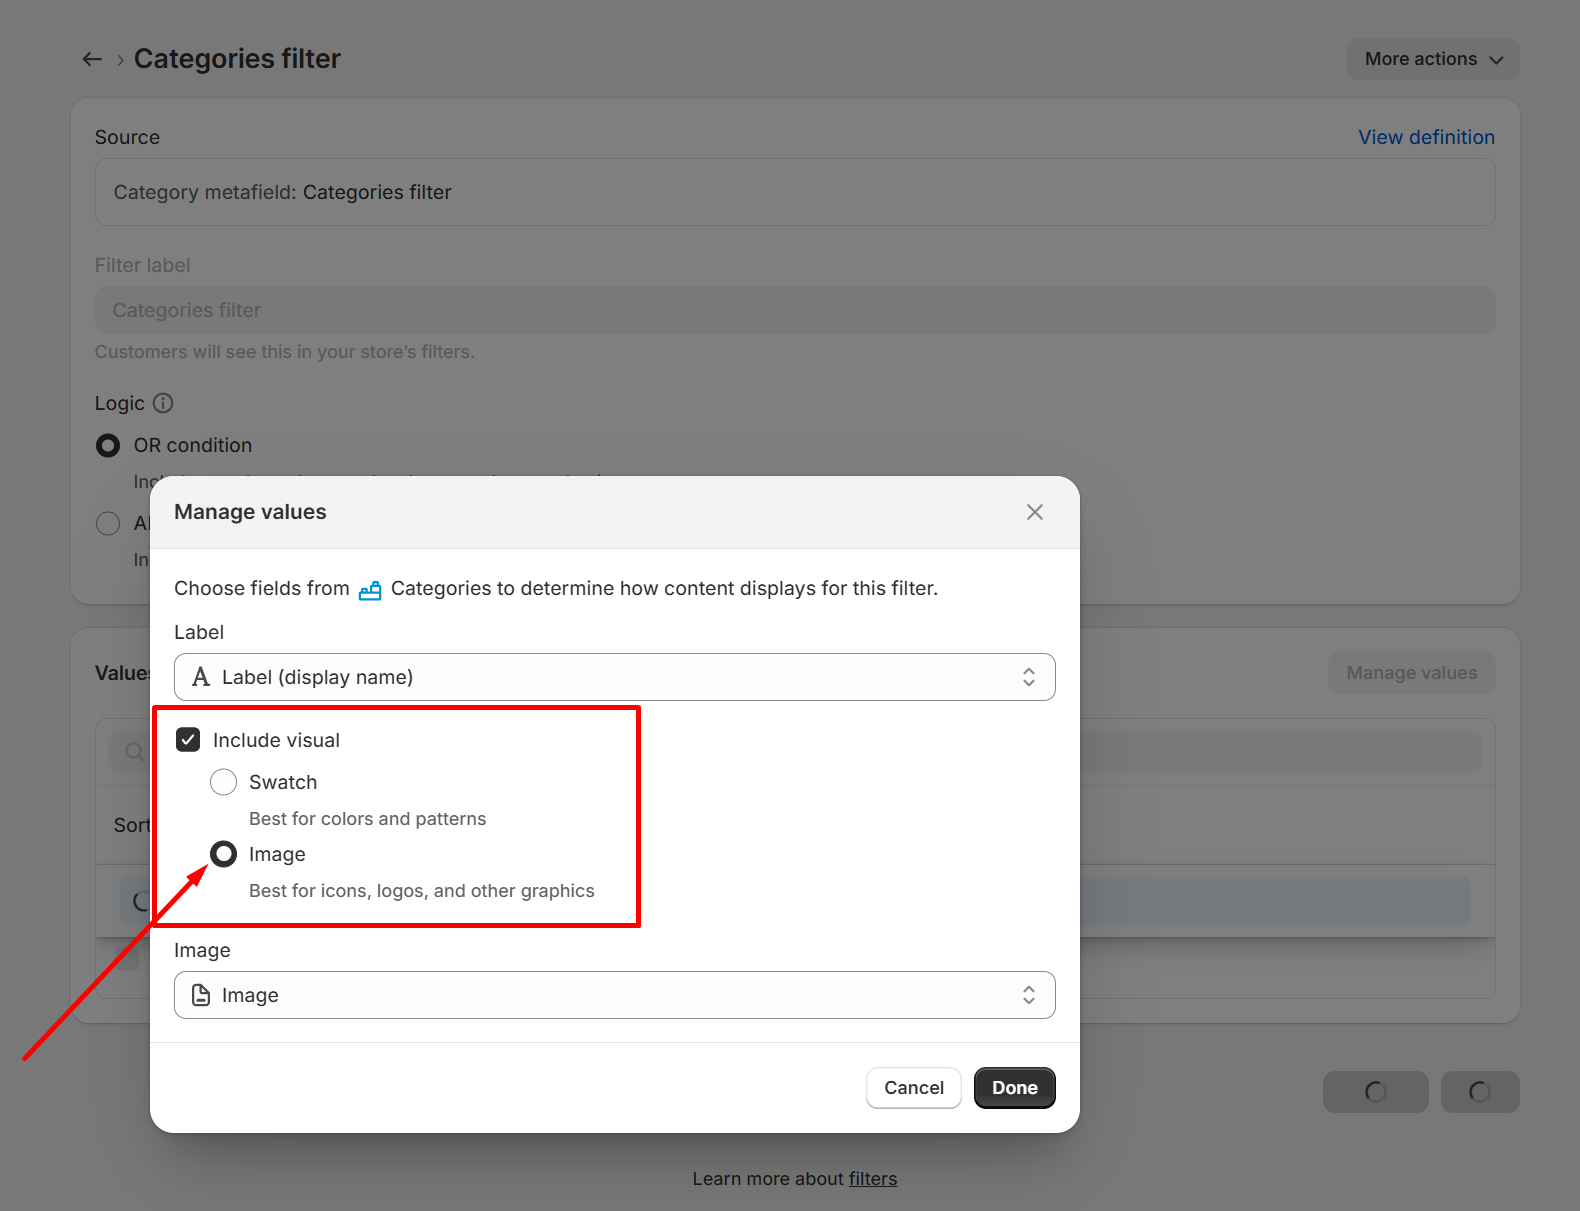
### Step 4: Add Filter in Search & Discovery App

{% hint style="success" %}

1. Go to **Apps > Search & Discovery.**
2. Open **Filters**, then click **Add filter.**
3. Select your **Categories** metafield.
4. Display settings:

* In **Manage Values**, change **“Swatch” > “Image”** (Adjust “Include visual”)
* Click **Save.**
  {% endhint %}

<figure><img src="/files/lTtqrdgSpdfMgjRclvdq" alt=""><figcaption></figcaption></figure>

<figure><img src="/files/KaDGlhkkRi3Bz7EjcQsg" alt=""><figcaption></figcaption></figure>
{% endstep %}
{% endstepper %}


---

# Agent Instructions: Querying This Documentation

If you need additional information that is not directly available in this page, you can query the documentation dynamically by asking a question.

Perform an HTTP GET request on the current page URL with the `ask` query parameter:

```
GET https://docs.foxecom.com/pebble-theme/collections-and-products/collection-page/main-collection.md?ask=<question>
```

The question should be specific, self-contained, and written in natural language.
The response will contain a direct answer to the question and relevant excerpts and sources from the documentation.

Use this mechanism when the answer is not explicitly present in the current page, you need clarification or additional context, or you want to retrieve related documentation sections.