
Collections And ProductsProduct page
Product information
8 min read
_74NNtJbH.jpg)
How to add a Product information section to your Shopify store
- In the theme editor (Customize), open the template selector.
- Locate Products, and select a product template you want to make changes to.
- On the left-sidebar, add Product information section.
- Make necessary changes > Save.
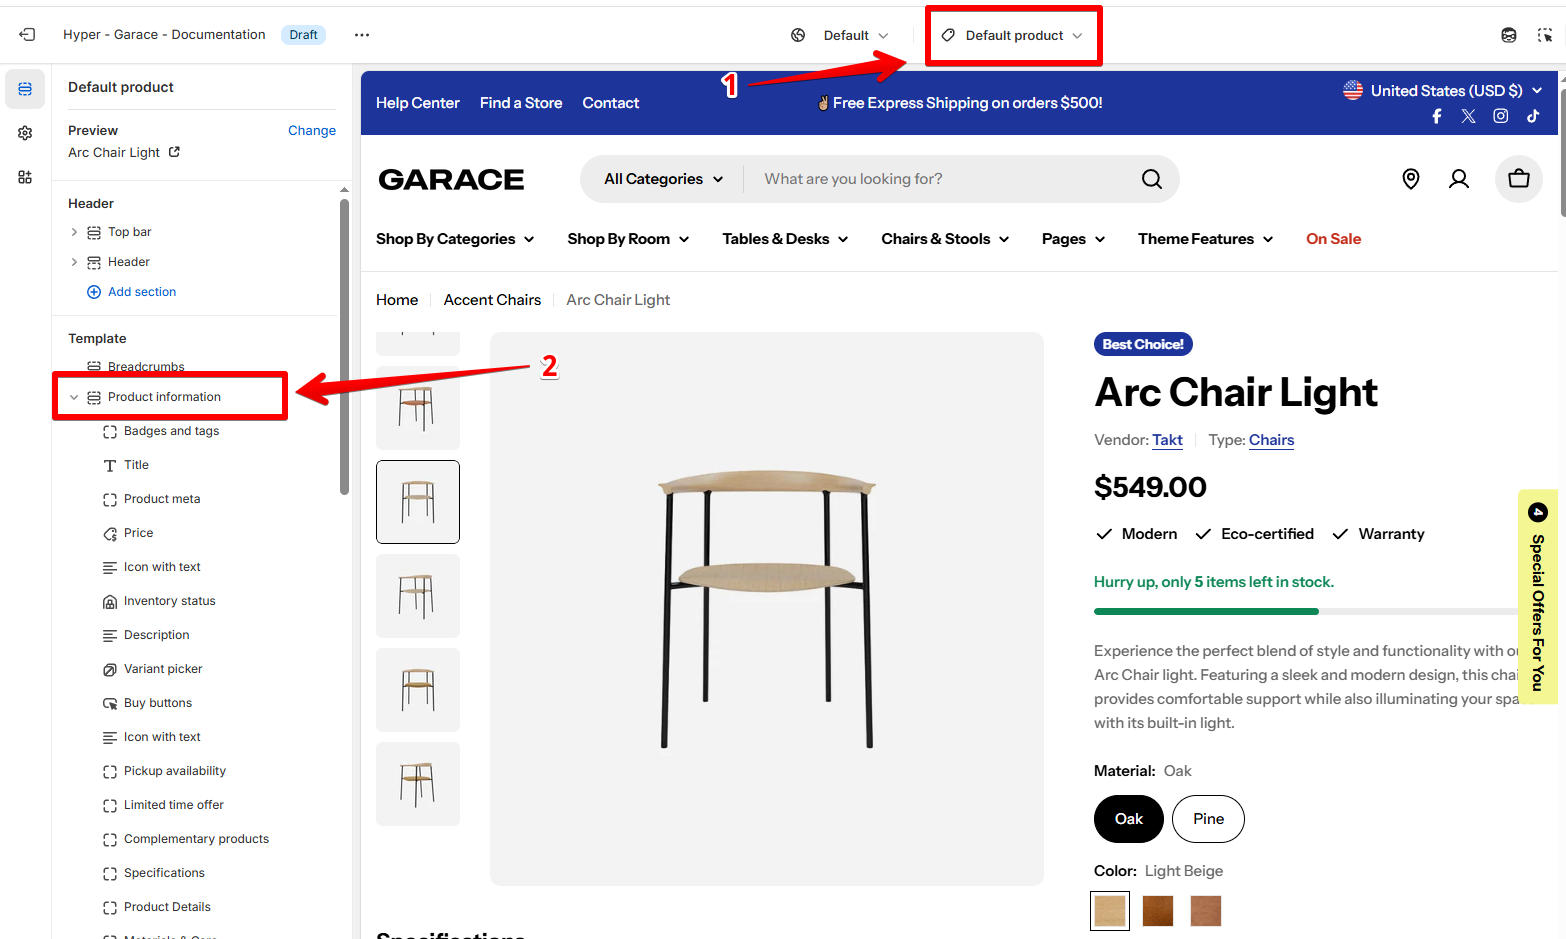
How to edit the Product information section
General Settings
Sticky content on desktop
Media settings
To know more about media, see Product media.
- Desktop media width:
- Small: Media width takes 45% of the container.
- Medium: Media width takes 50% of the container.
- Large: Media width takes 58.5% of the container.
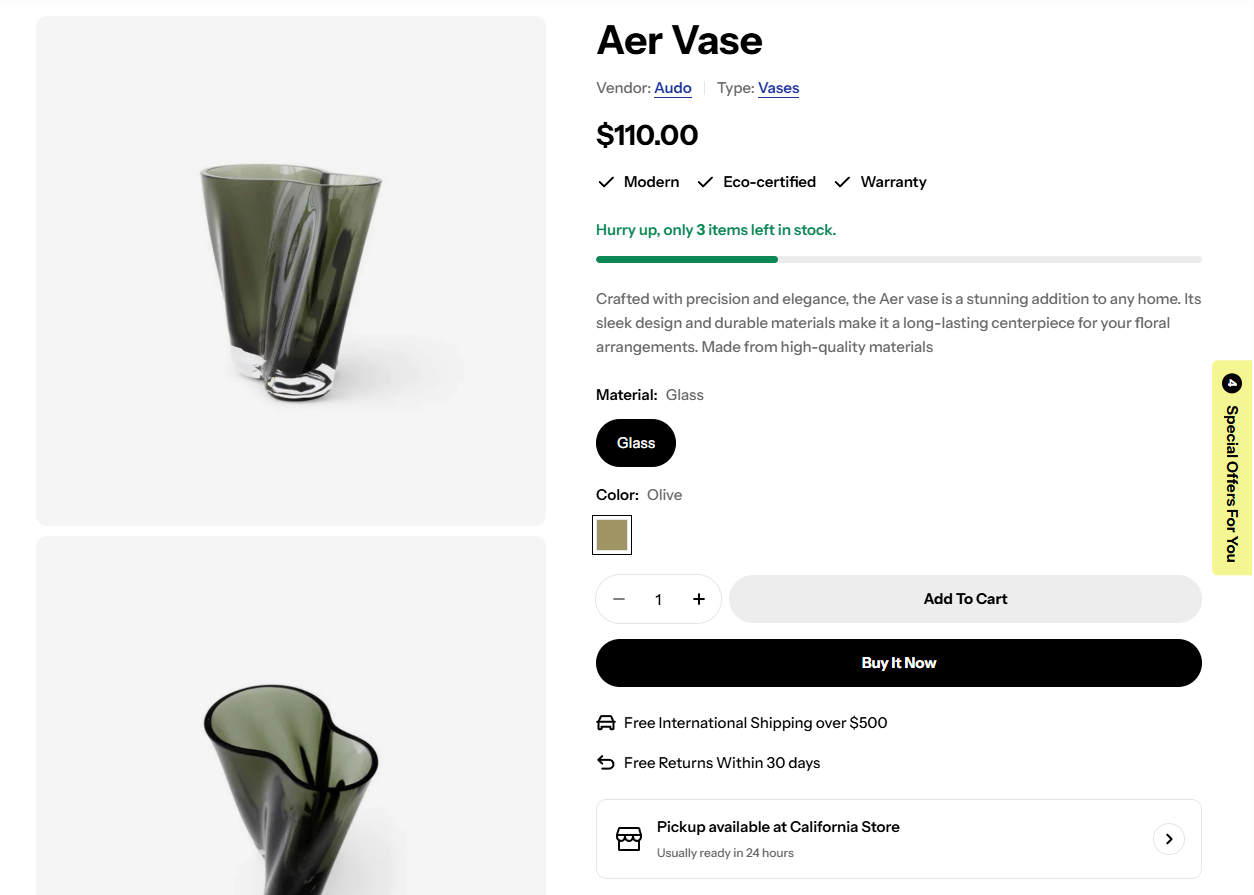
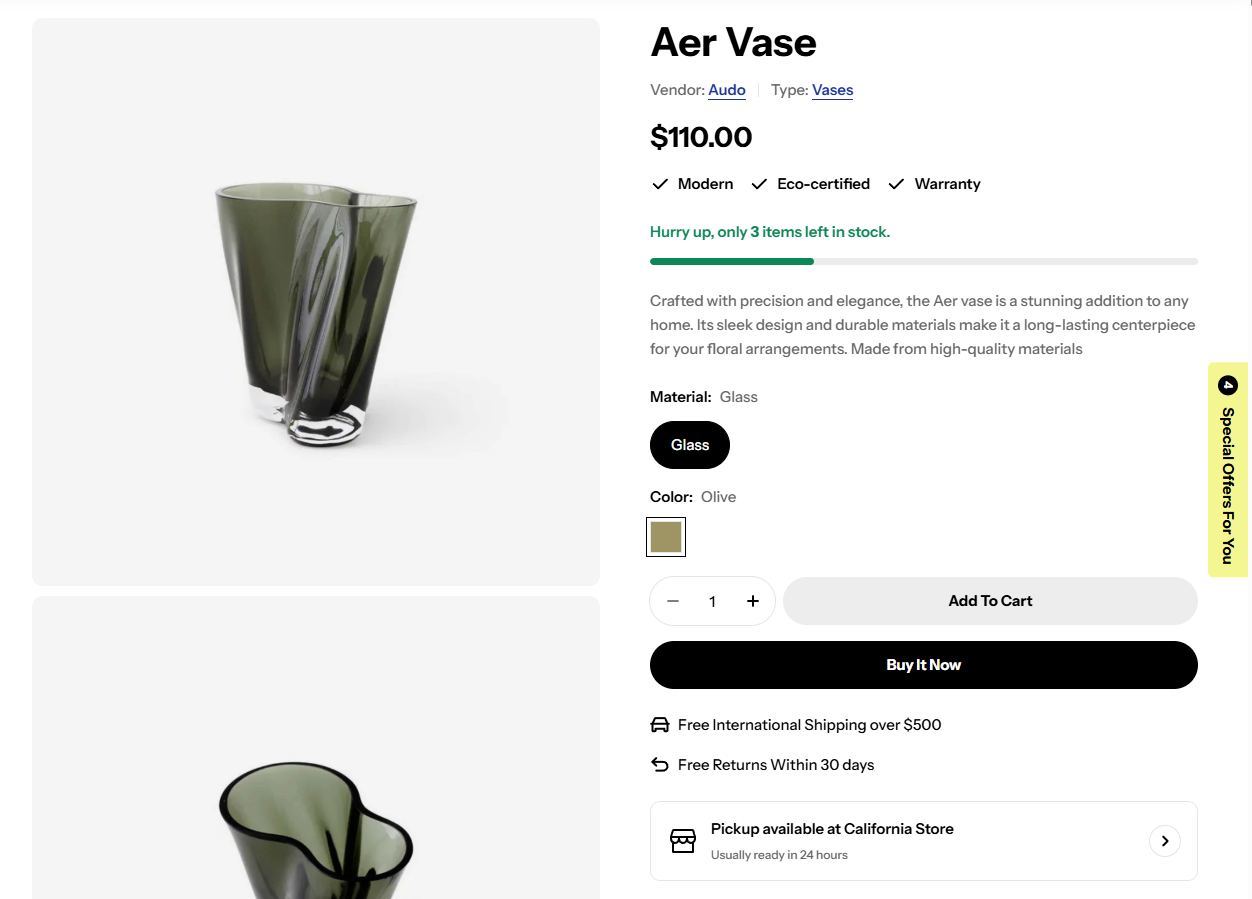
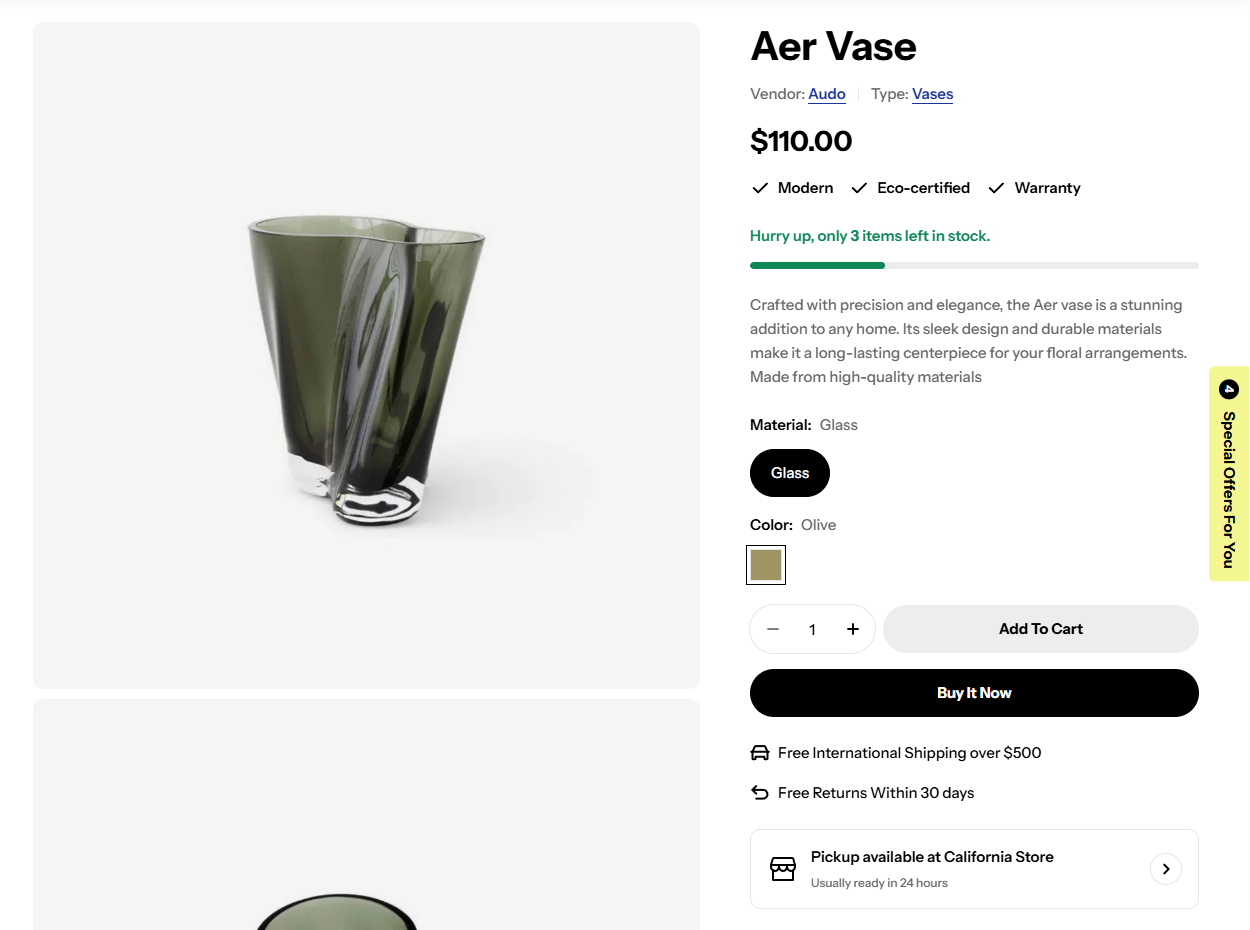
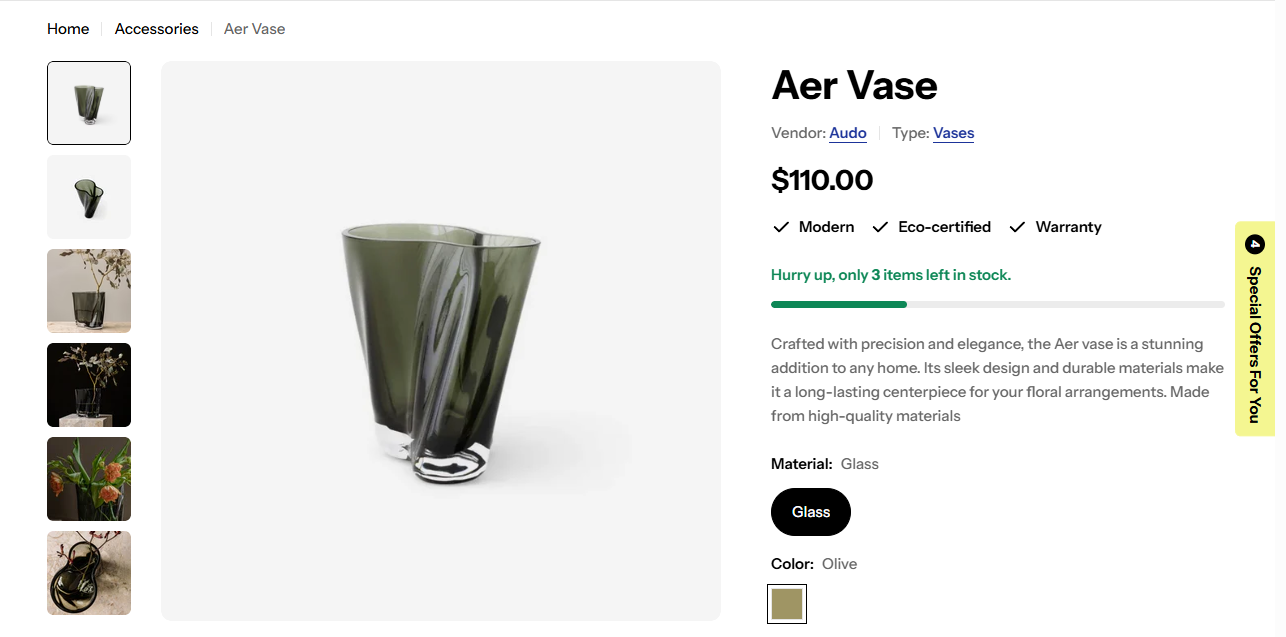
- Desktop layout: Set how the media is displayed on the desktop.
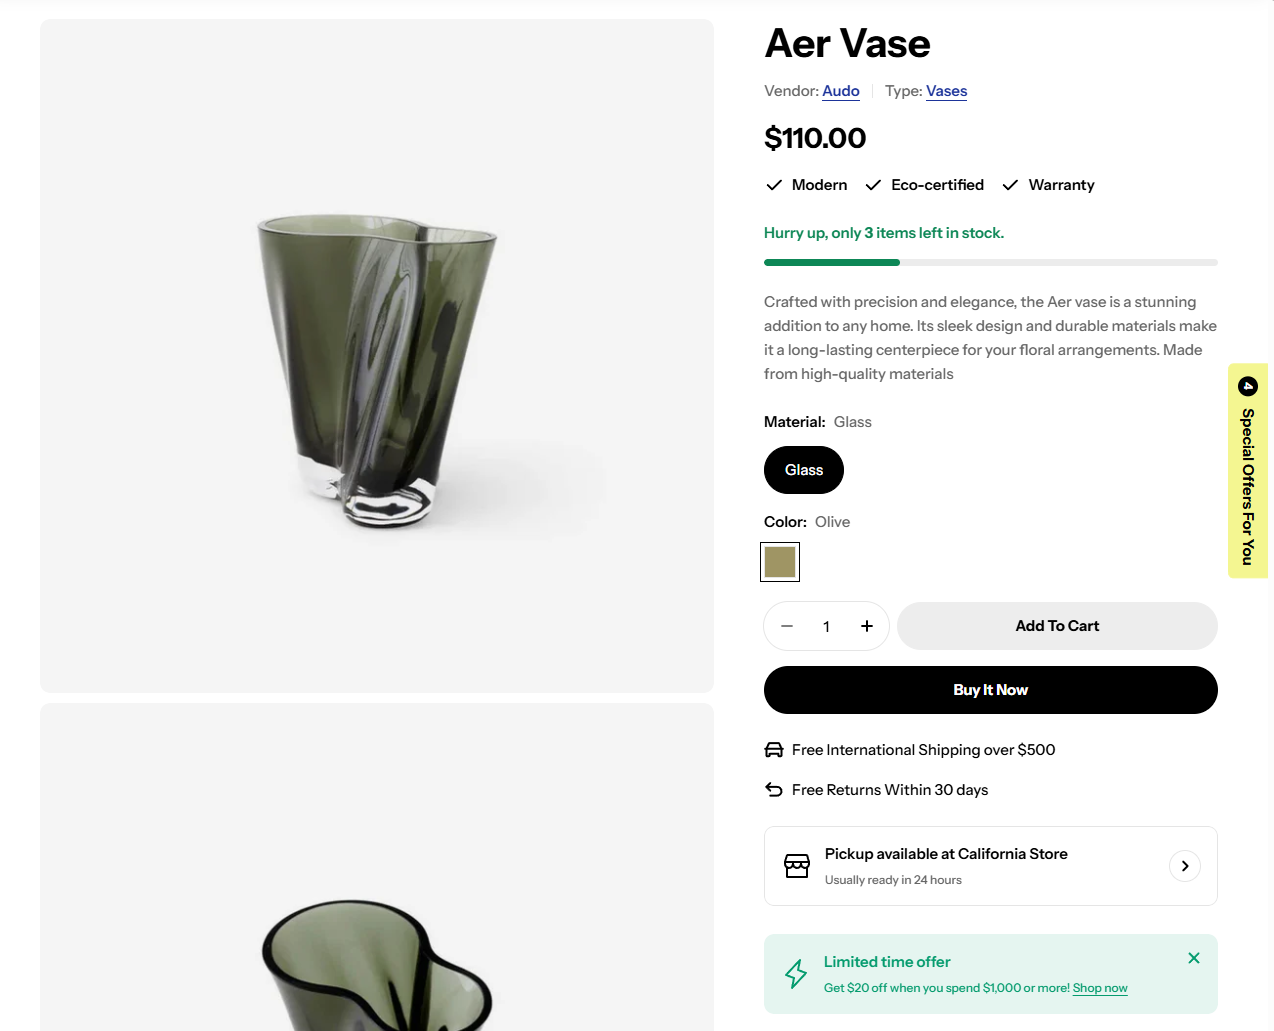
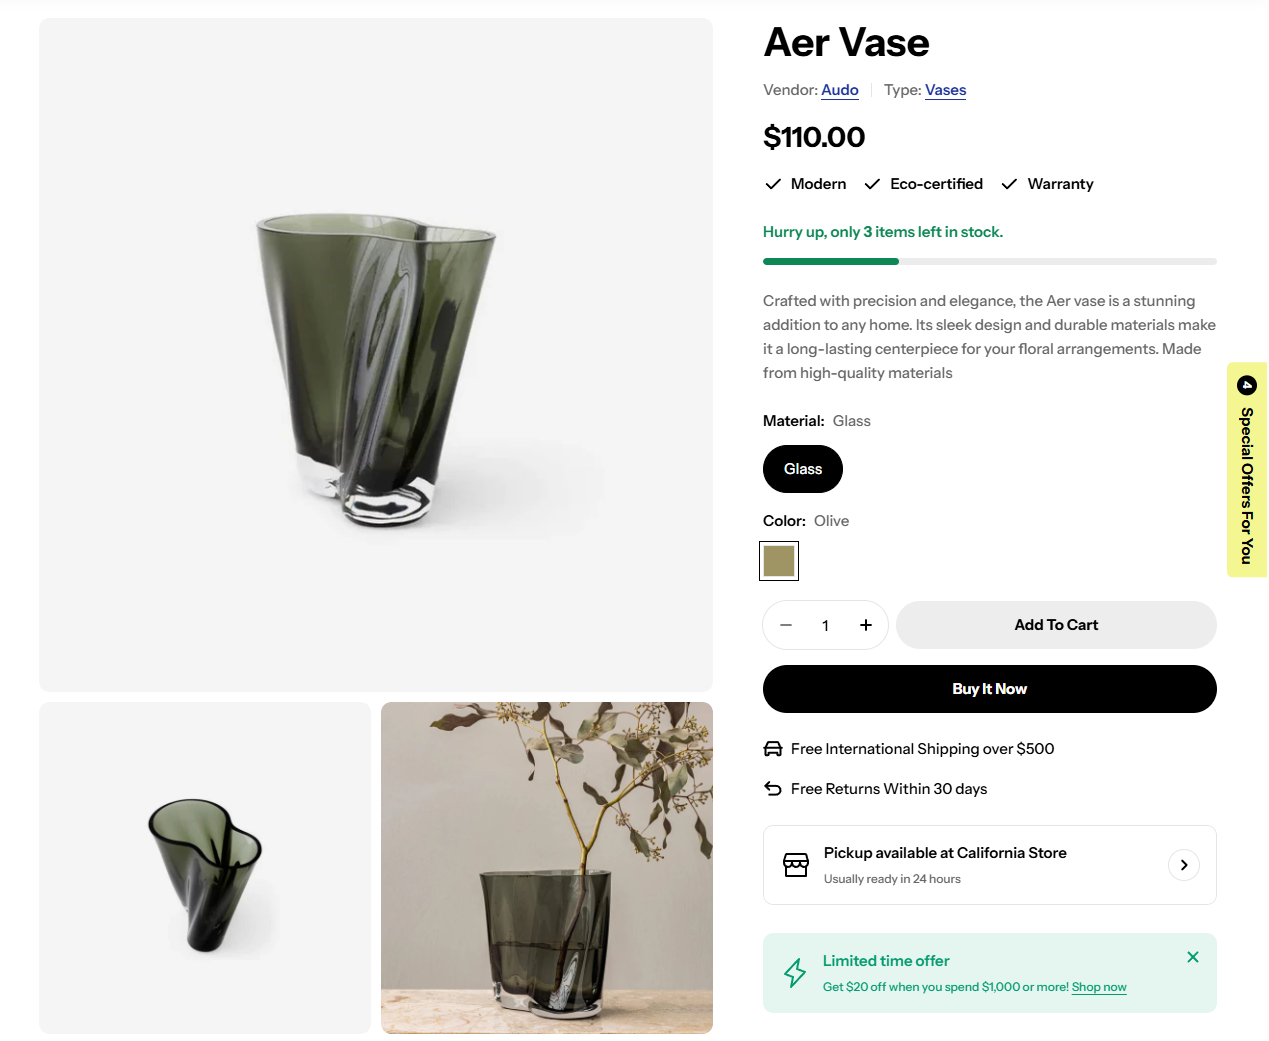
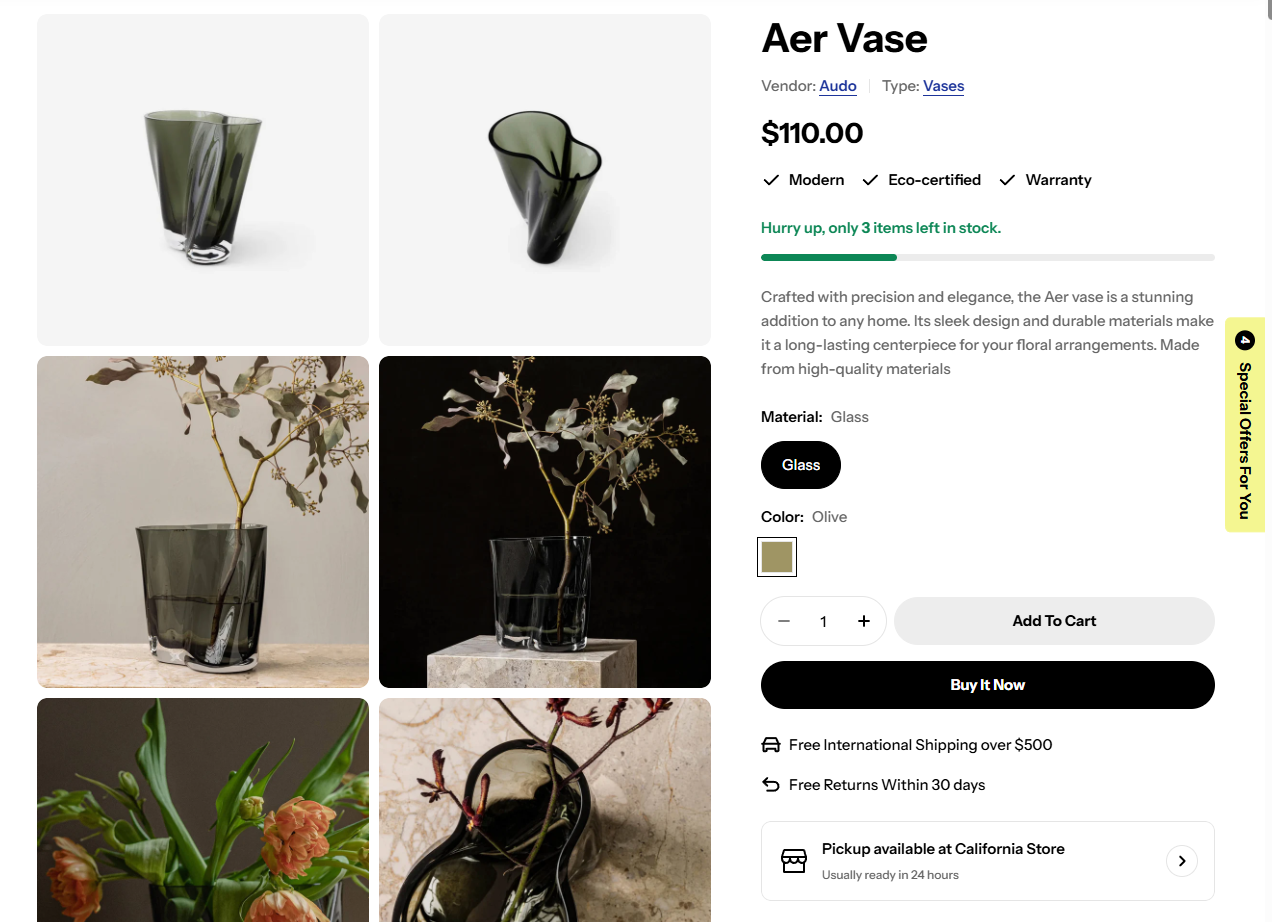
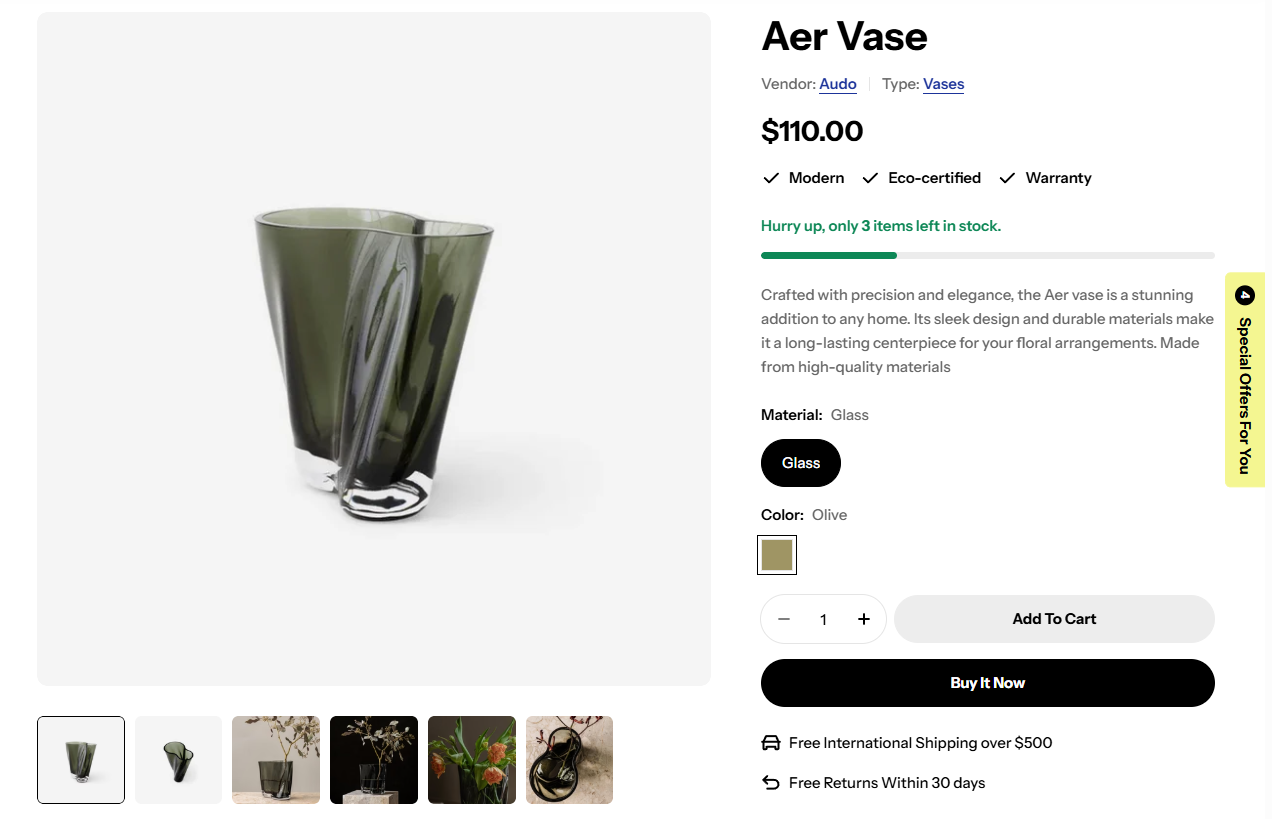
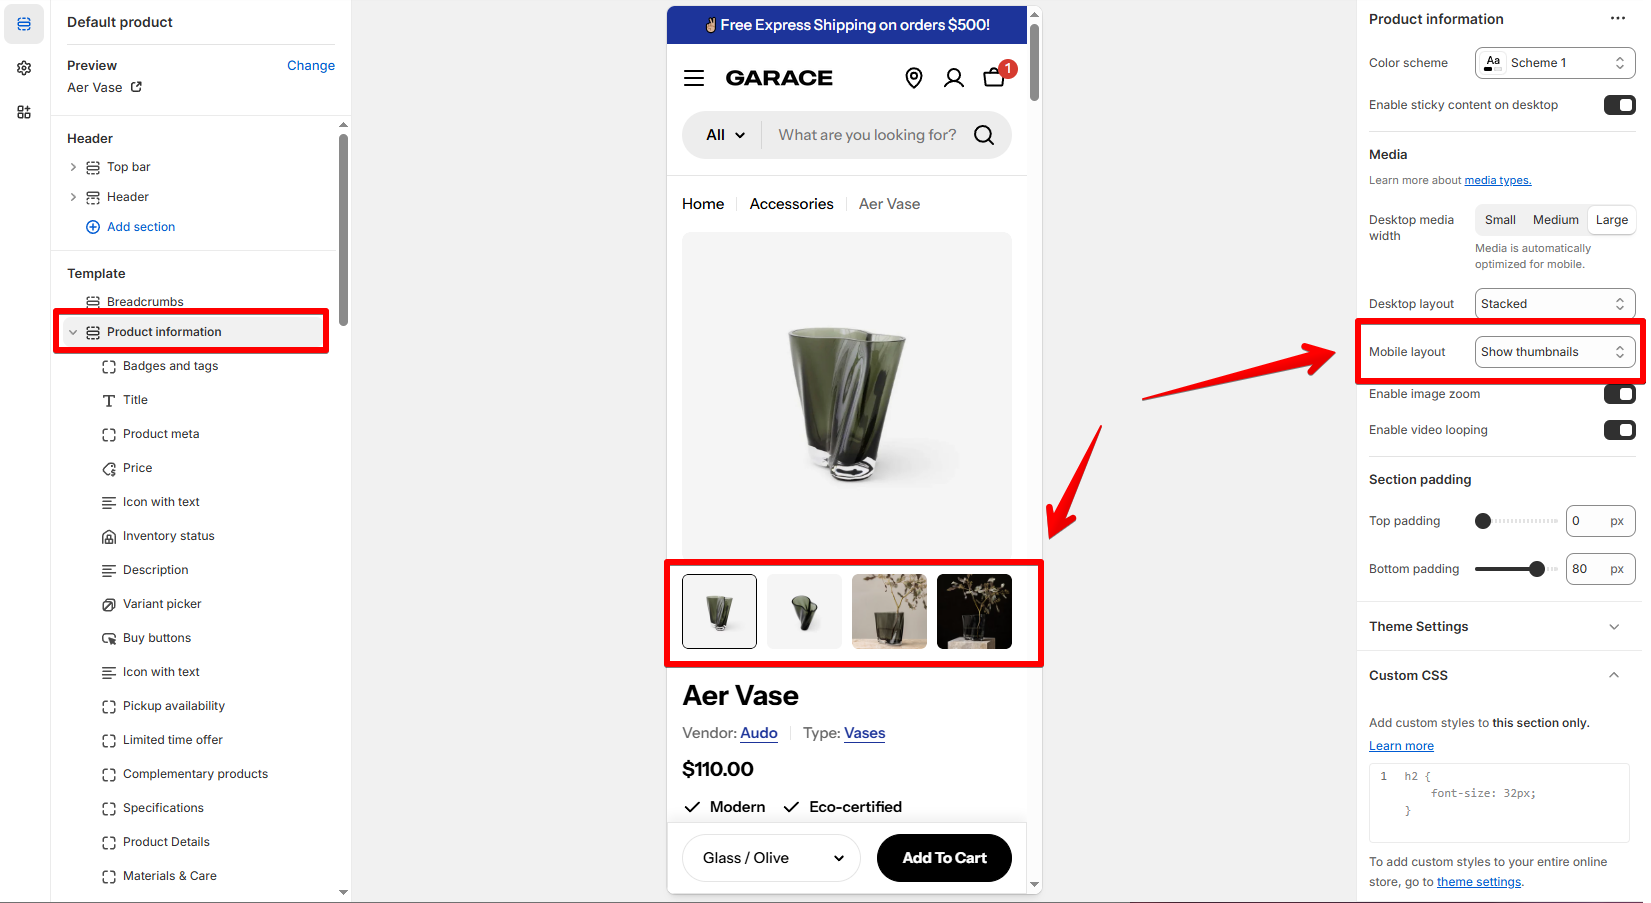
- Mobile layout: Show or hide thumbnails in the mobile view.
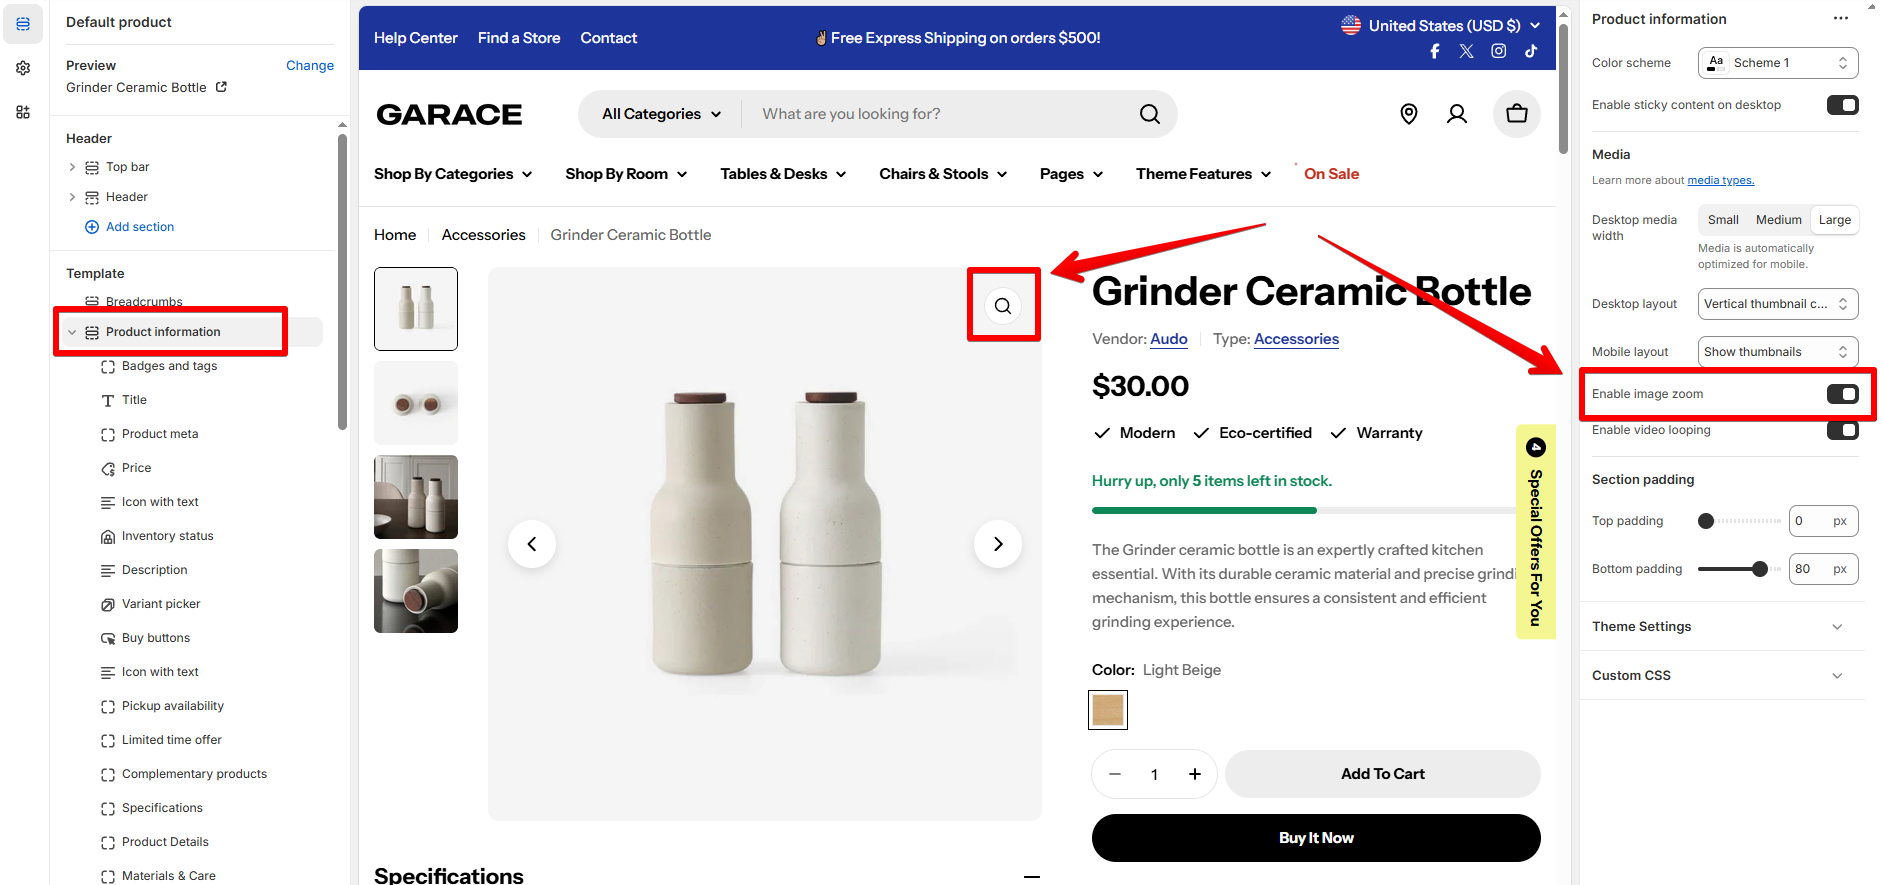
- You can also enable/disable image zoom and video looping to your product information section.
Product Information blocks
| Block | Description | Example |
|---|---|---|
| Title | Display the product title. Change the Heading size as you like. | 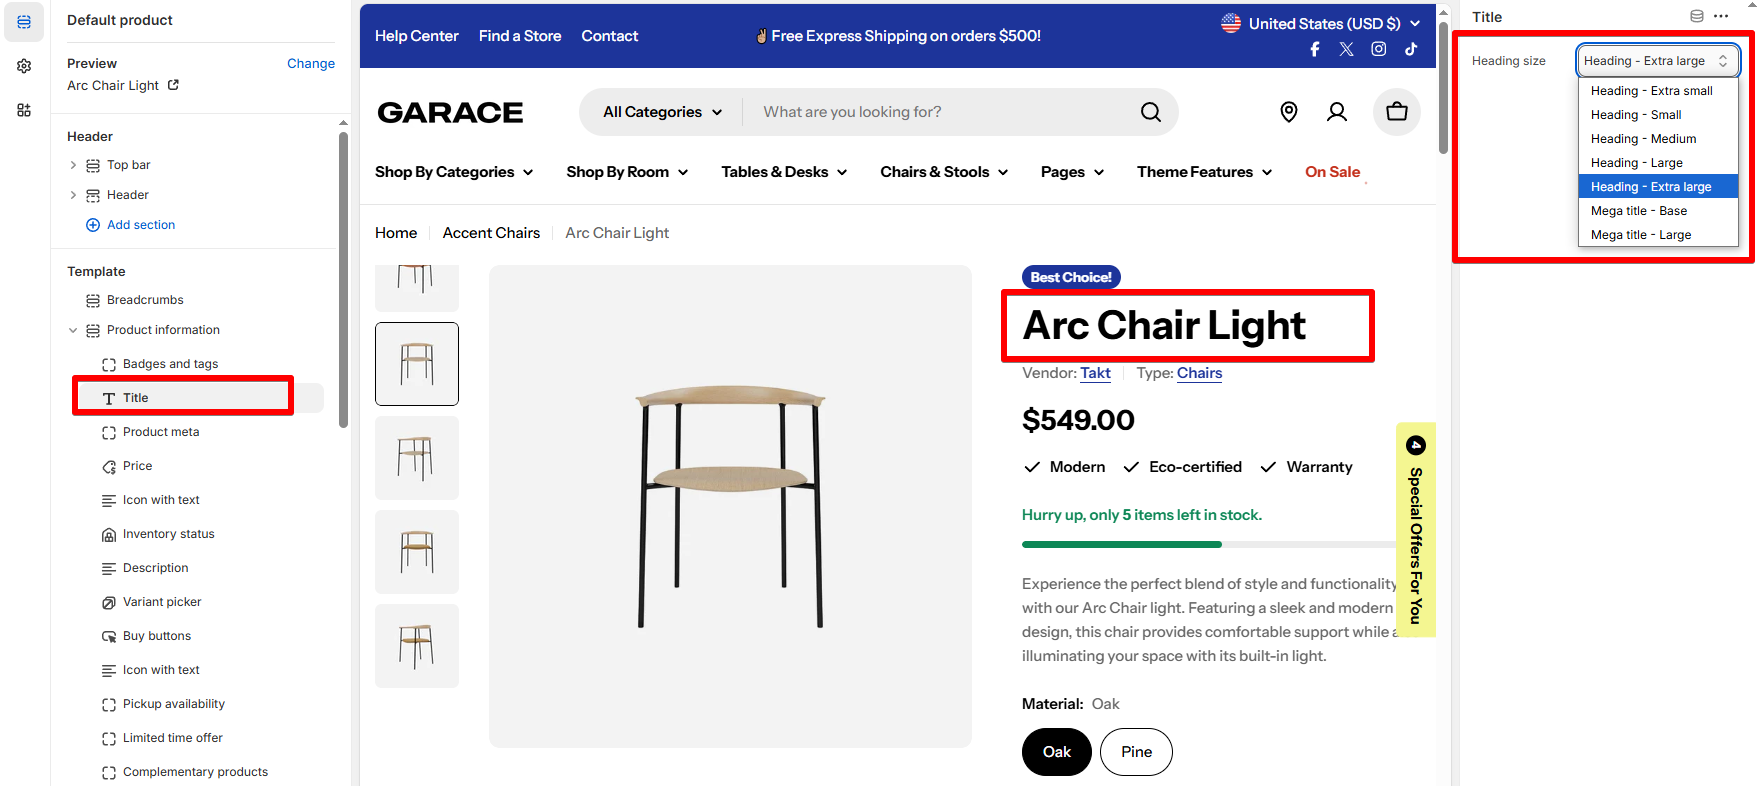 |
| Price | Display the product price. | 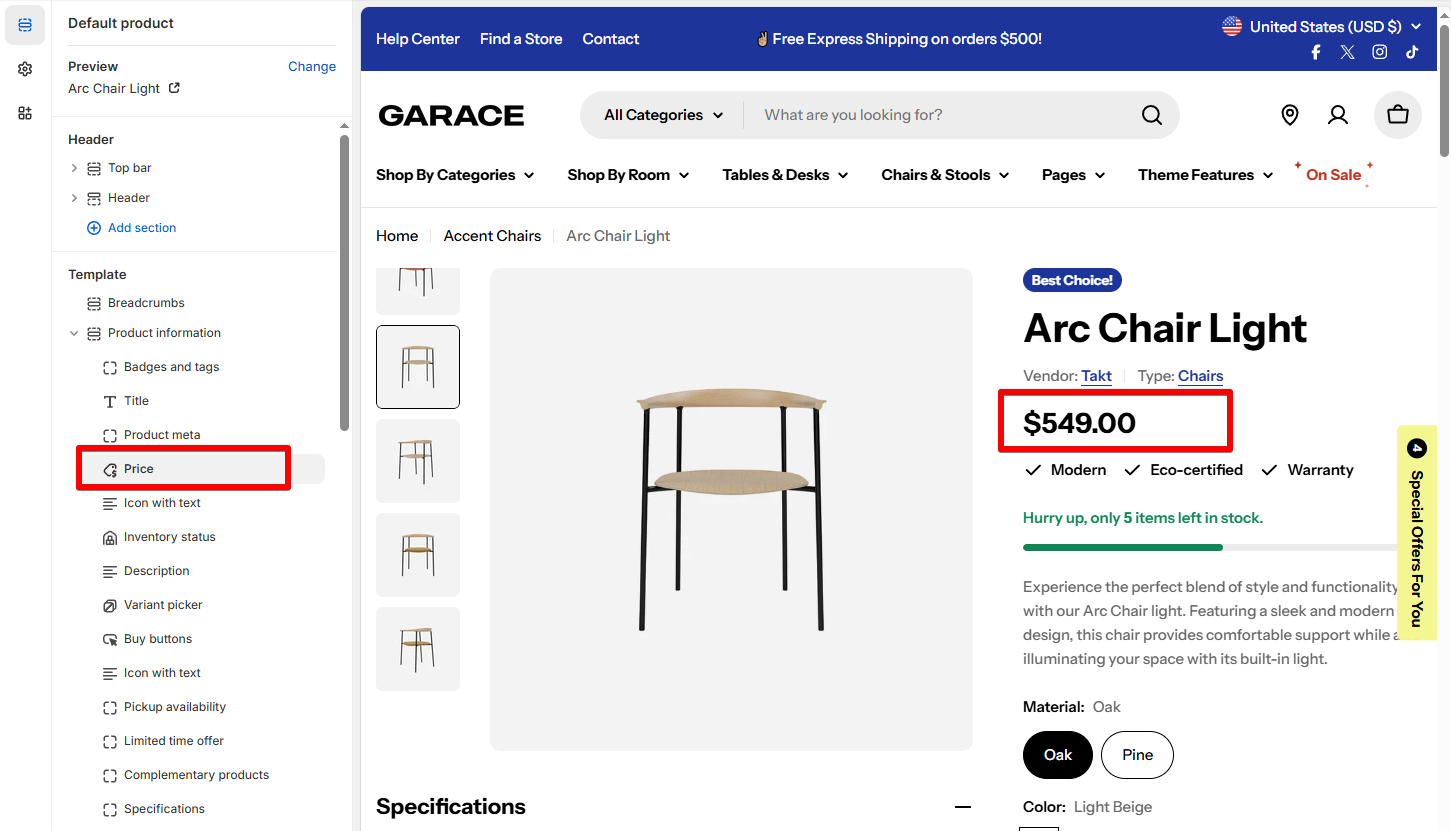 |
| Description | Display the product description. ✍️ Not sure how to add a description to your product? See our tutorial here. | 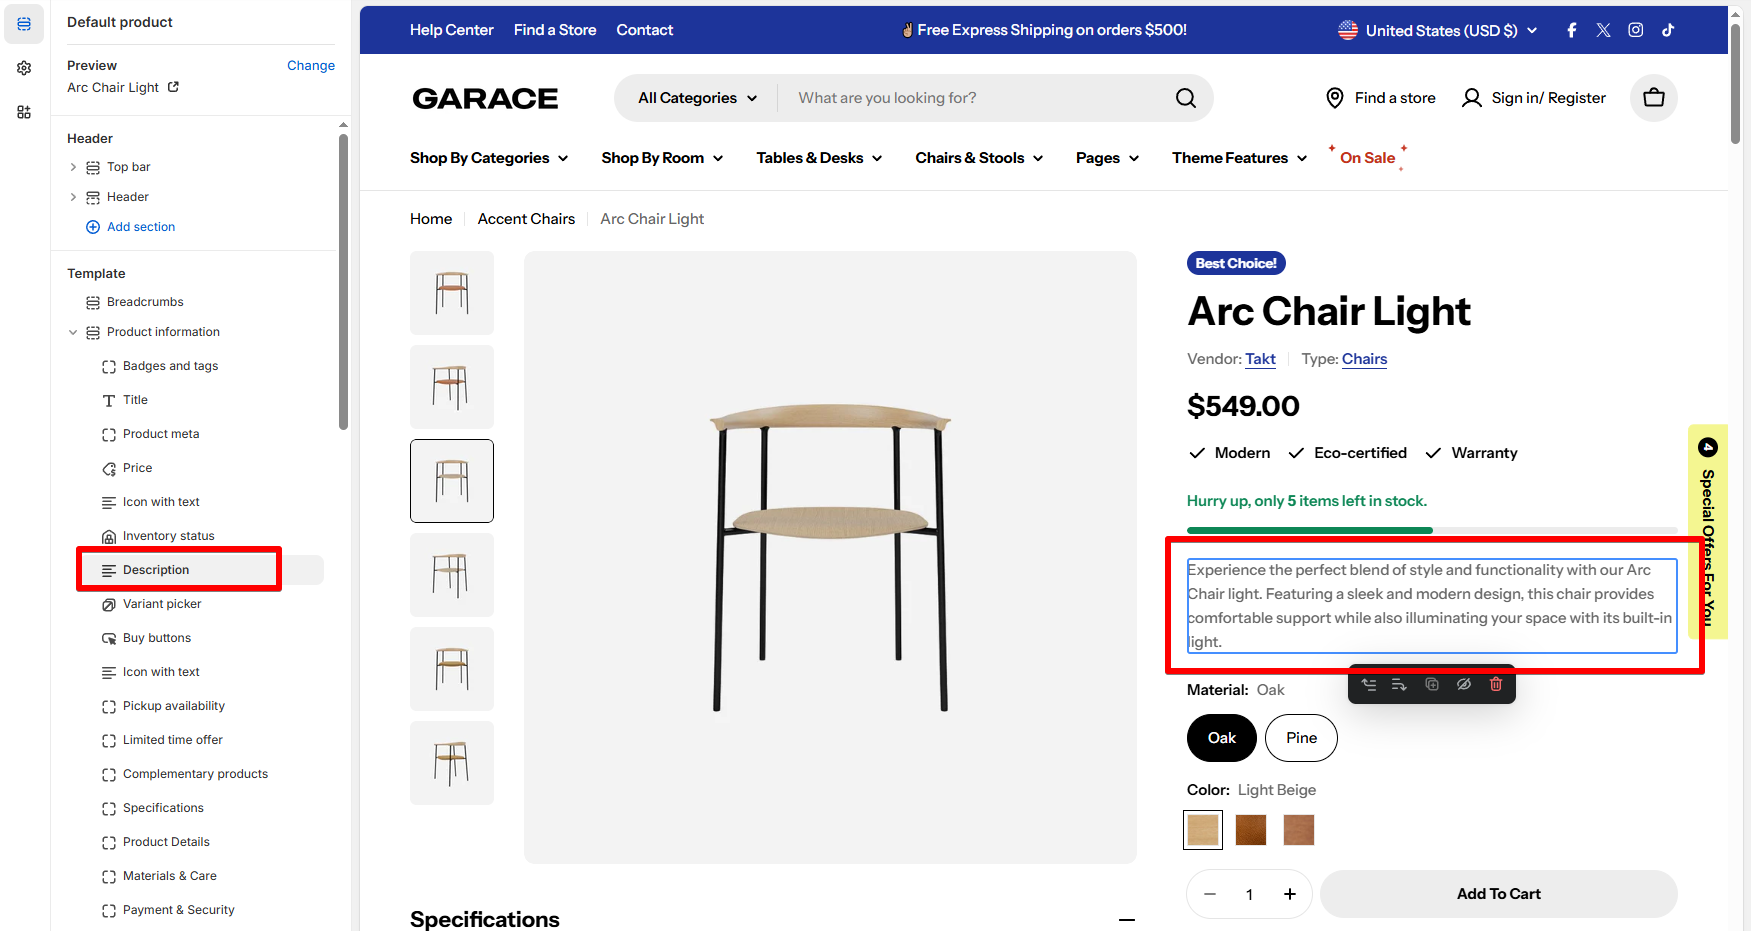 |
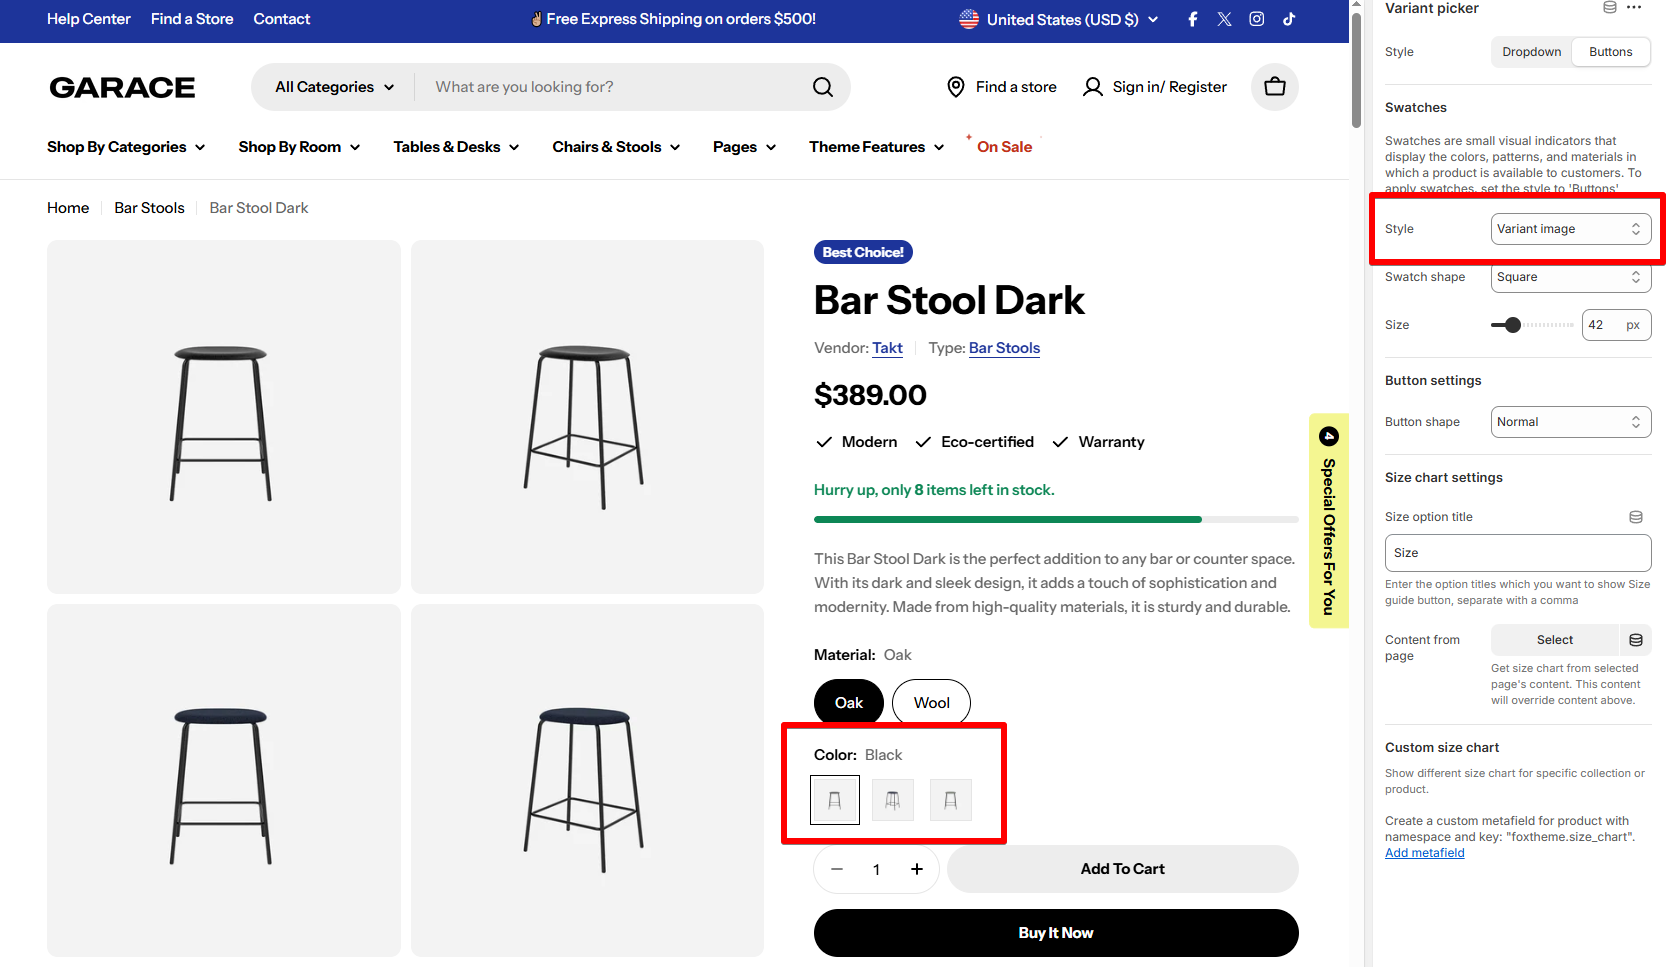
| Variant picker | • Style: Change how the product options show as Dropdown/ Buttons. • Swatches: To enable swatches: Your variant picker's Style must be 'Button'. You must enter the Color swatch trigger in Theme settings > Color swatches Select the swatches Style as Color swatches/Variant image. | 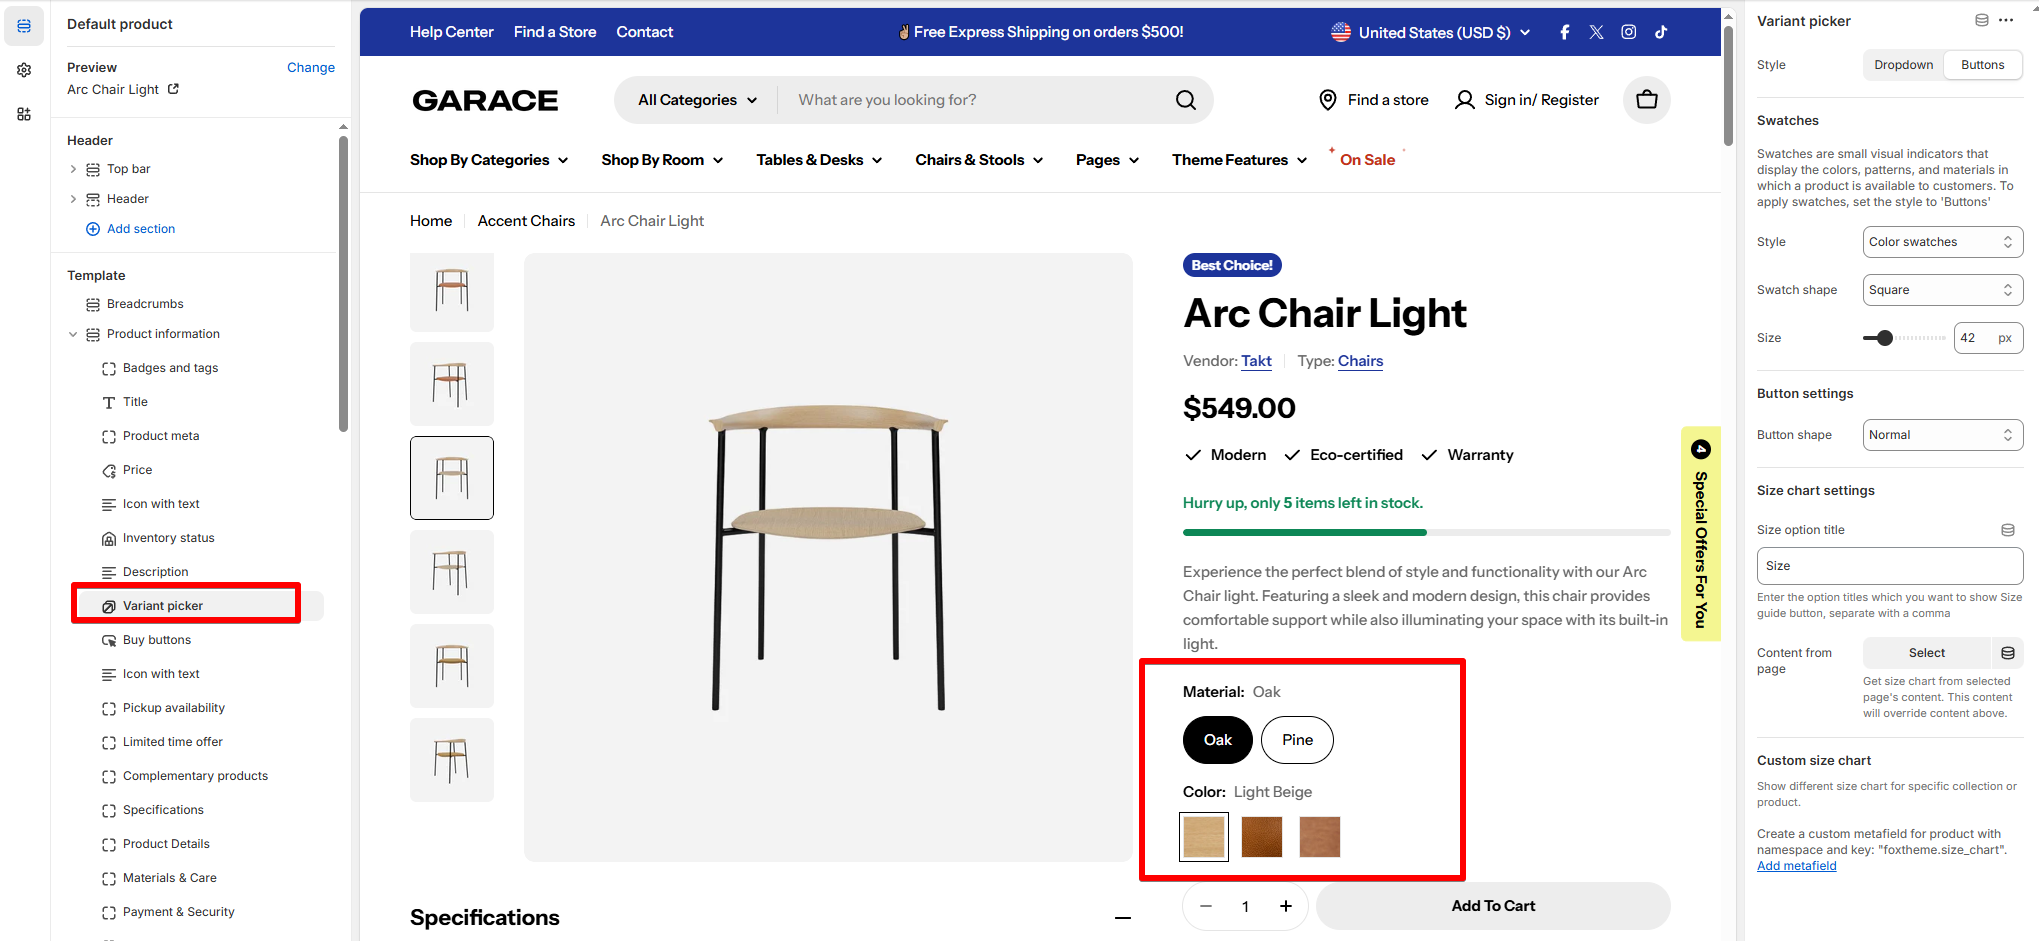 |
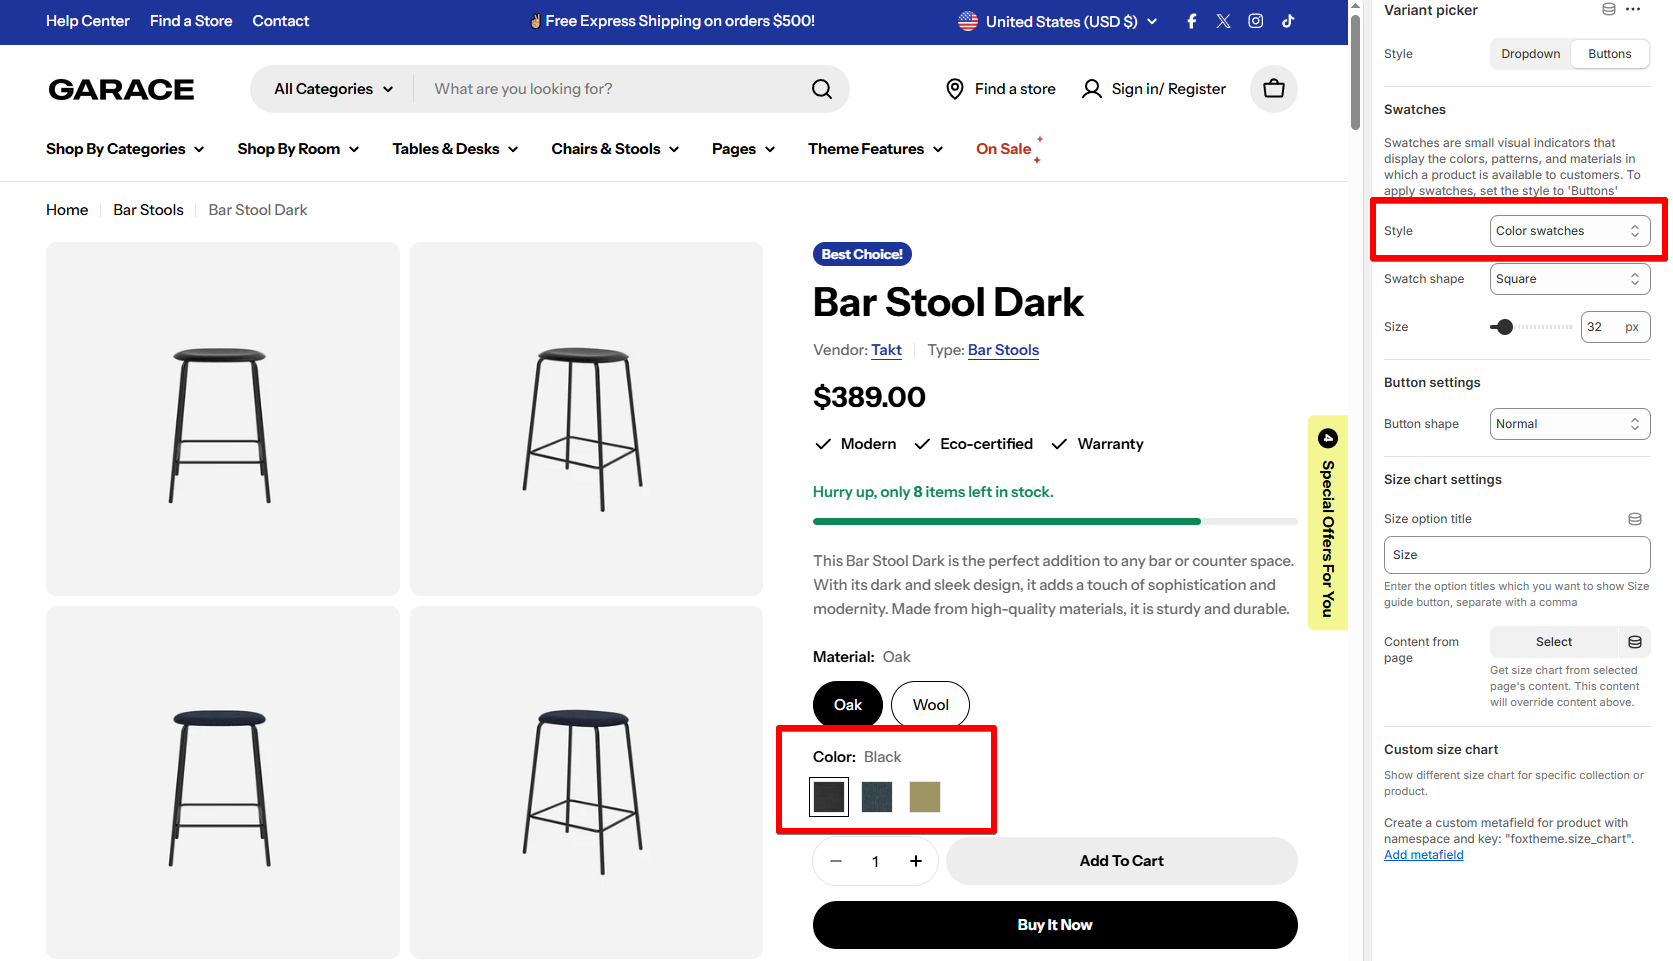
Make sure you have associated your product variants with their images in Shopify Products > Variants.
| Block | Description | Example |
|---|---|---|
| Variant picker | Display a size chart in the Variant picker. 🎥 Watch our tutorial: Adding a Size chart to your products • Size option title: Enter the product option name you want to show the size chart button next to. • Size chart content: - Select a page created in Shopify Pages - Use metafields with namespace and key: "foxtheme.size_chart" to display dynamic content.Learn more about Shopify Metafields. 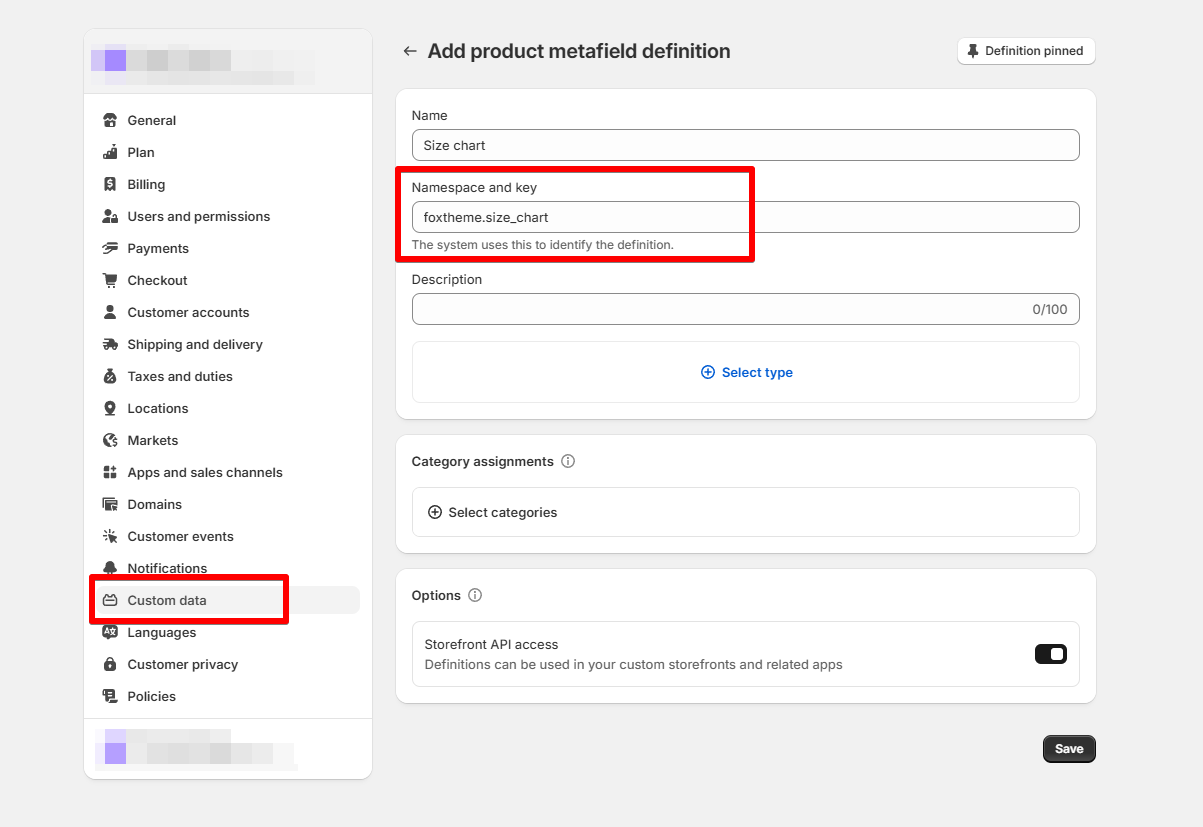 | 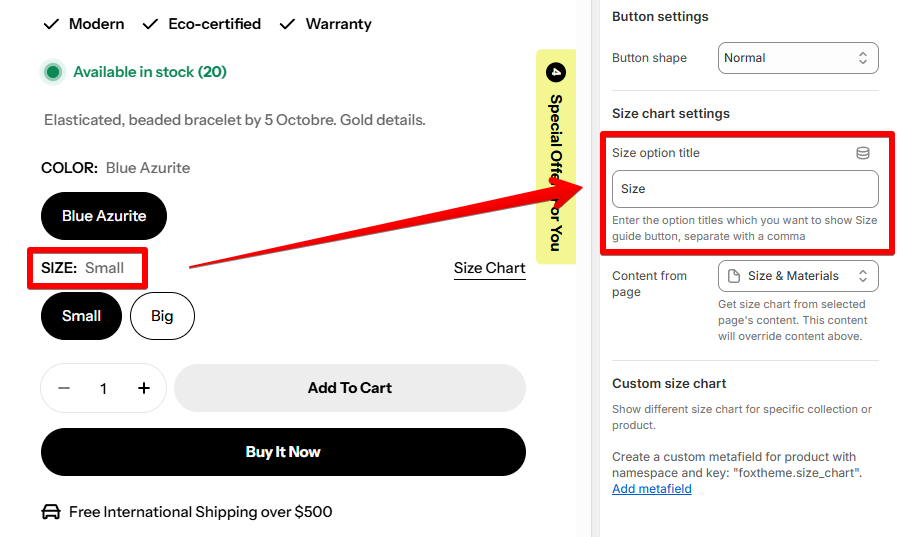 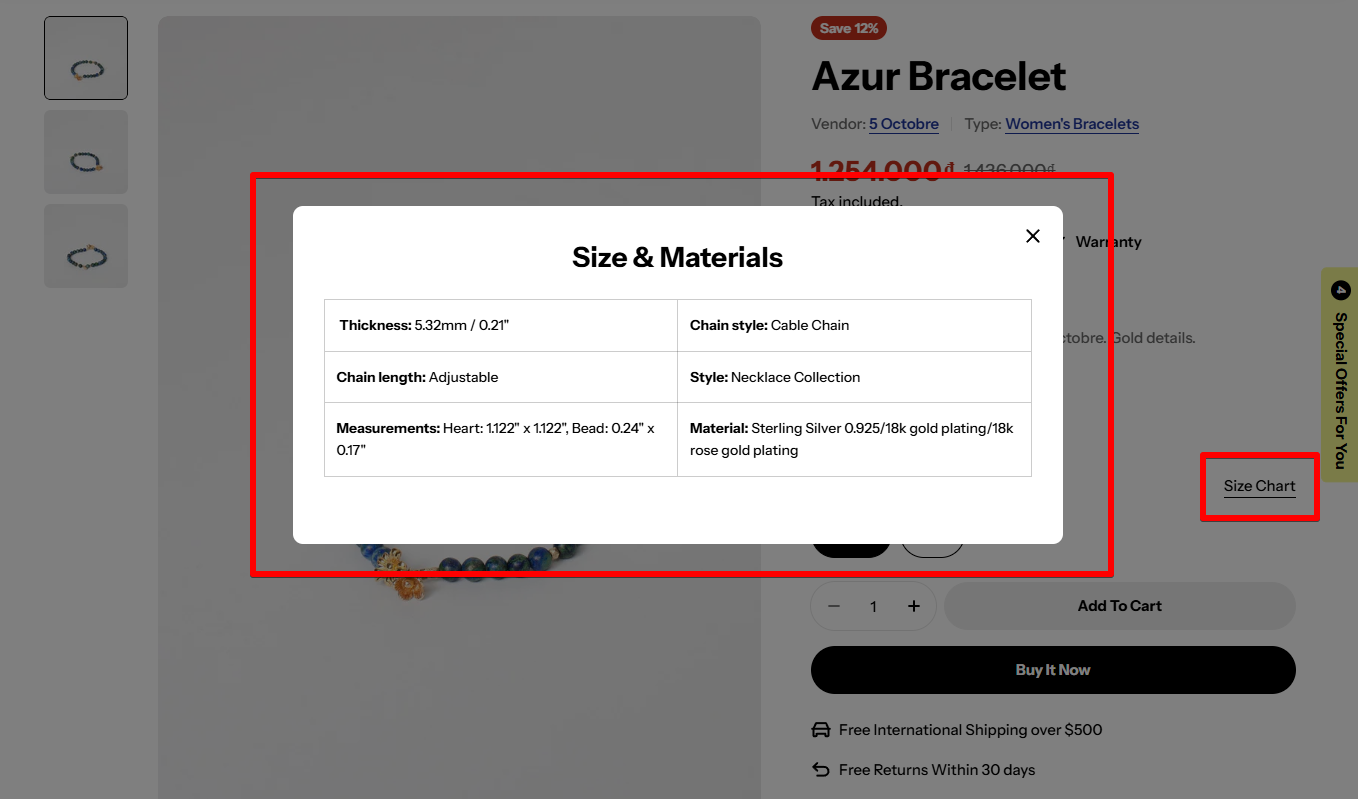 |
| Buy buttons | • Show quantity selector • Show Dynamic checkout buttons • Show recipient information form for gift cards👀 Learn more about Shopify Dynamic checkout buttons. 🎁Learn more about gift cards. | 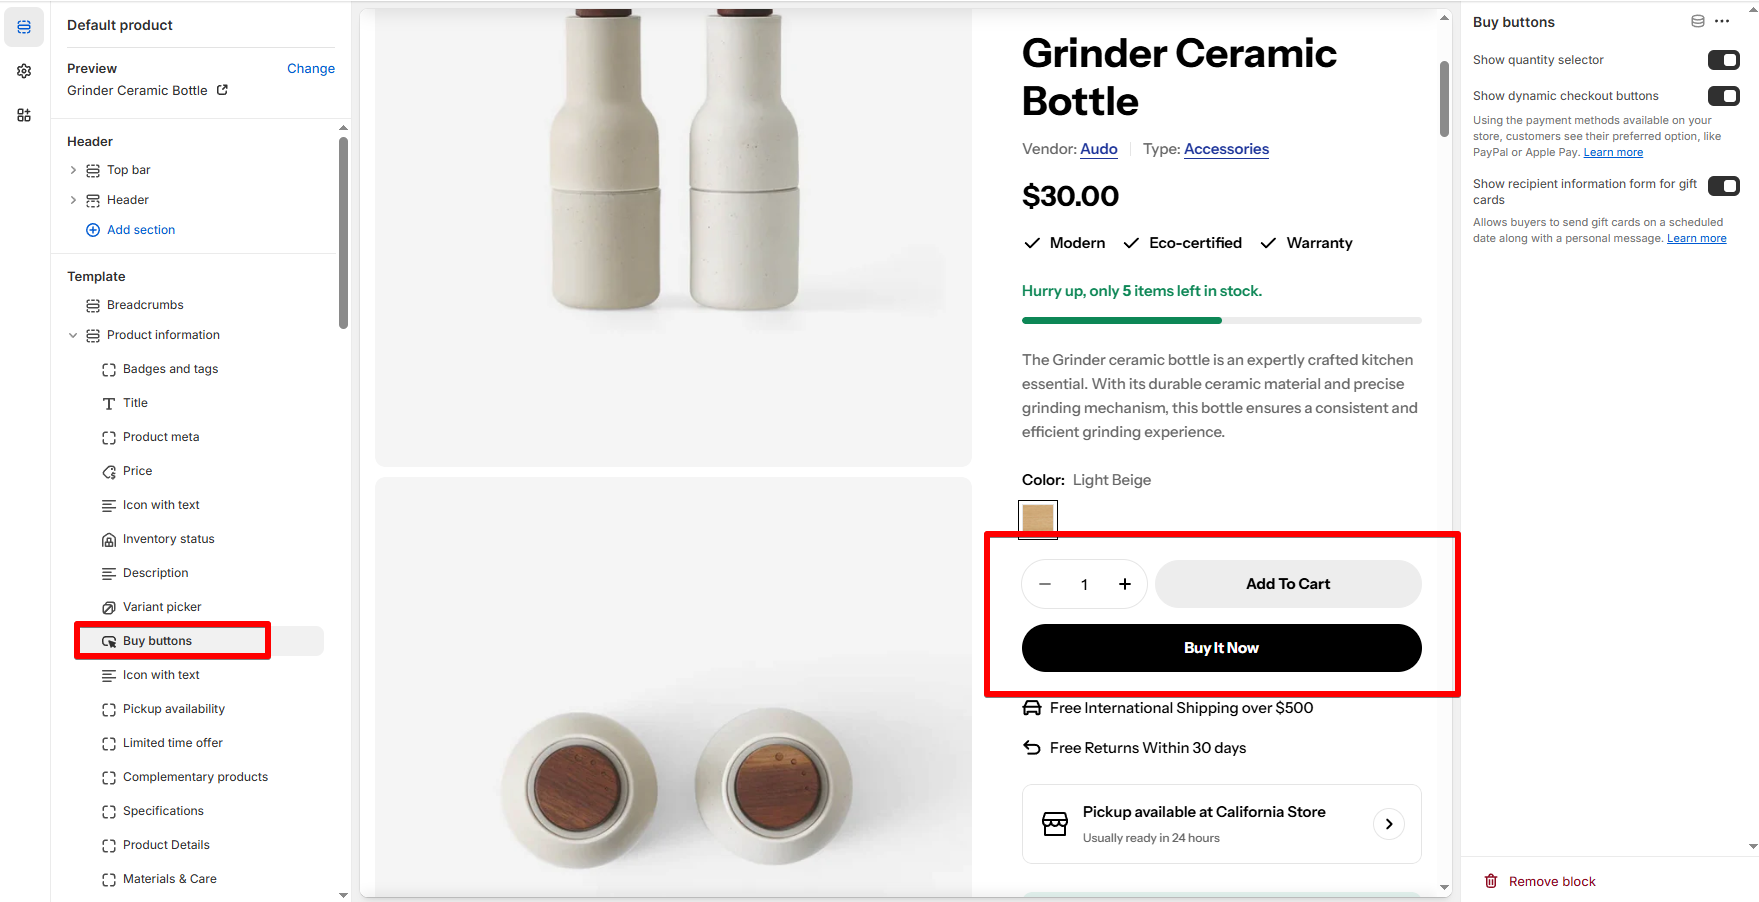 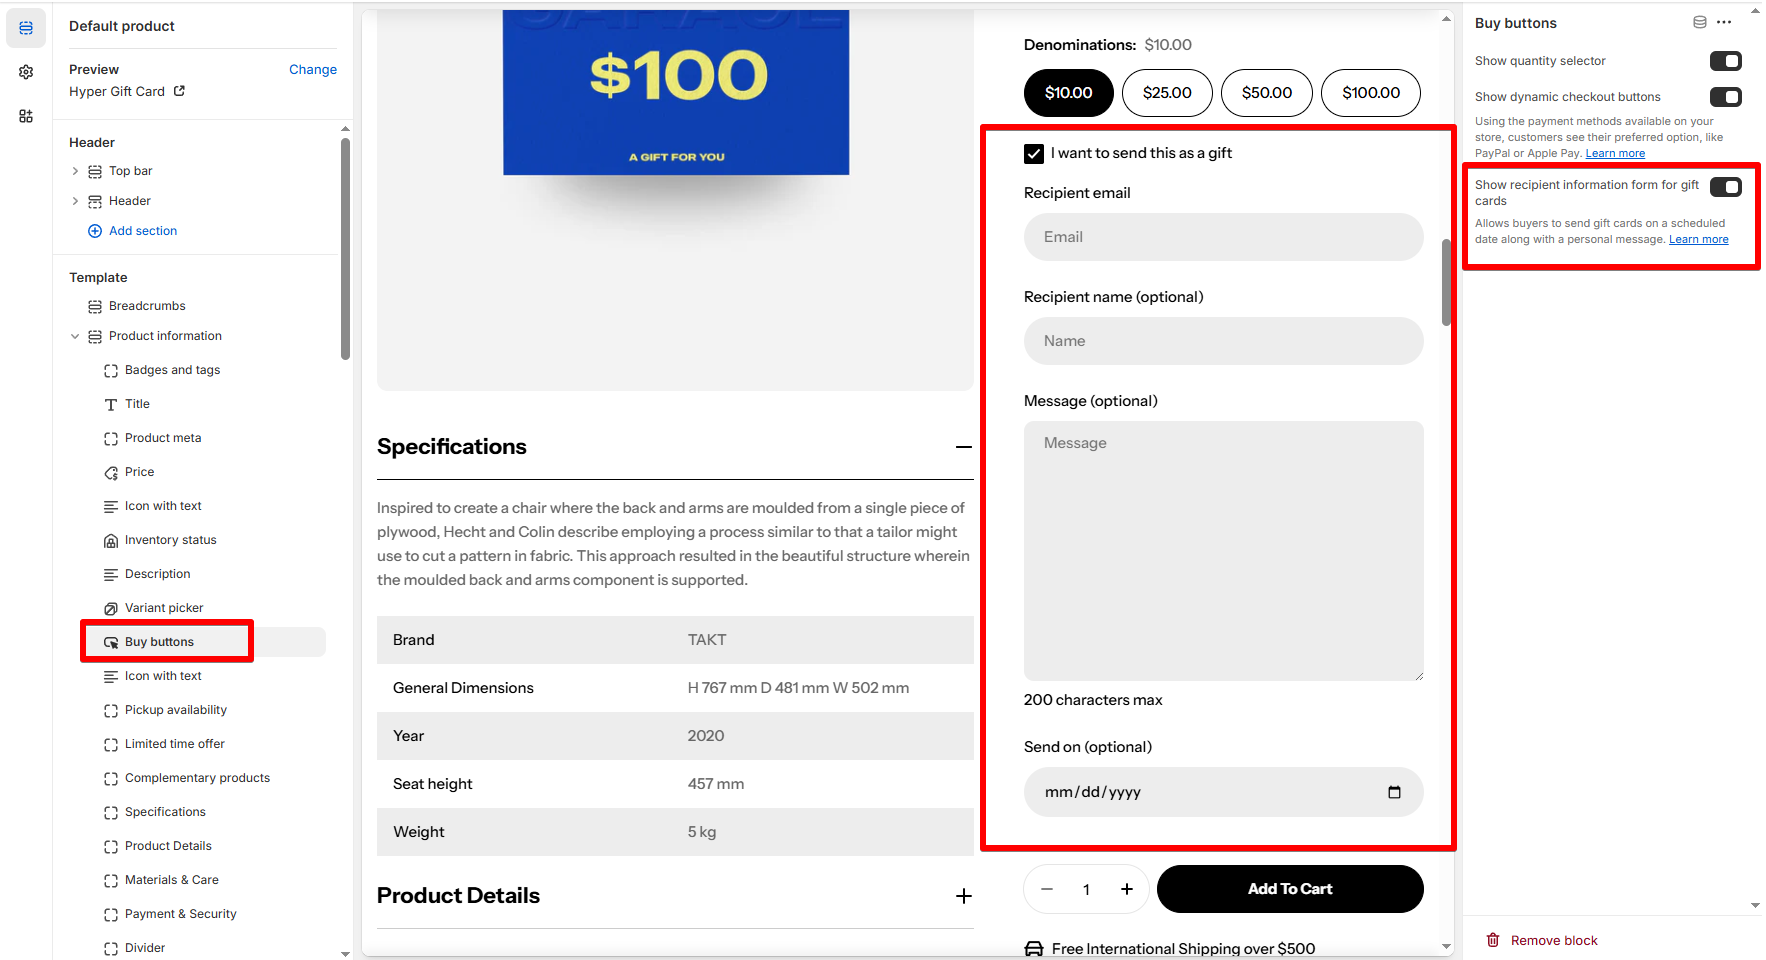 |
| Text | Add text to your product details. | 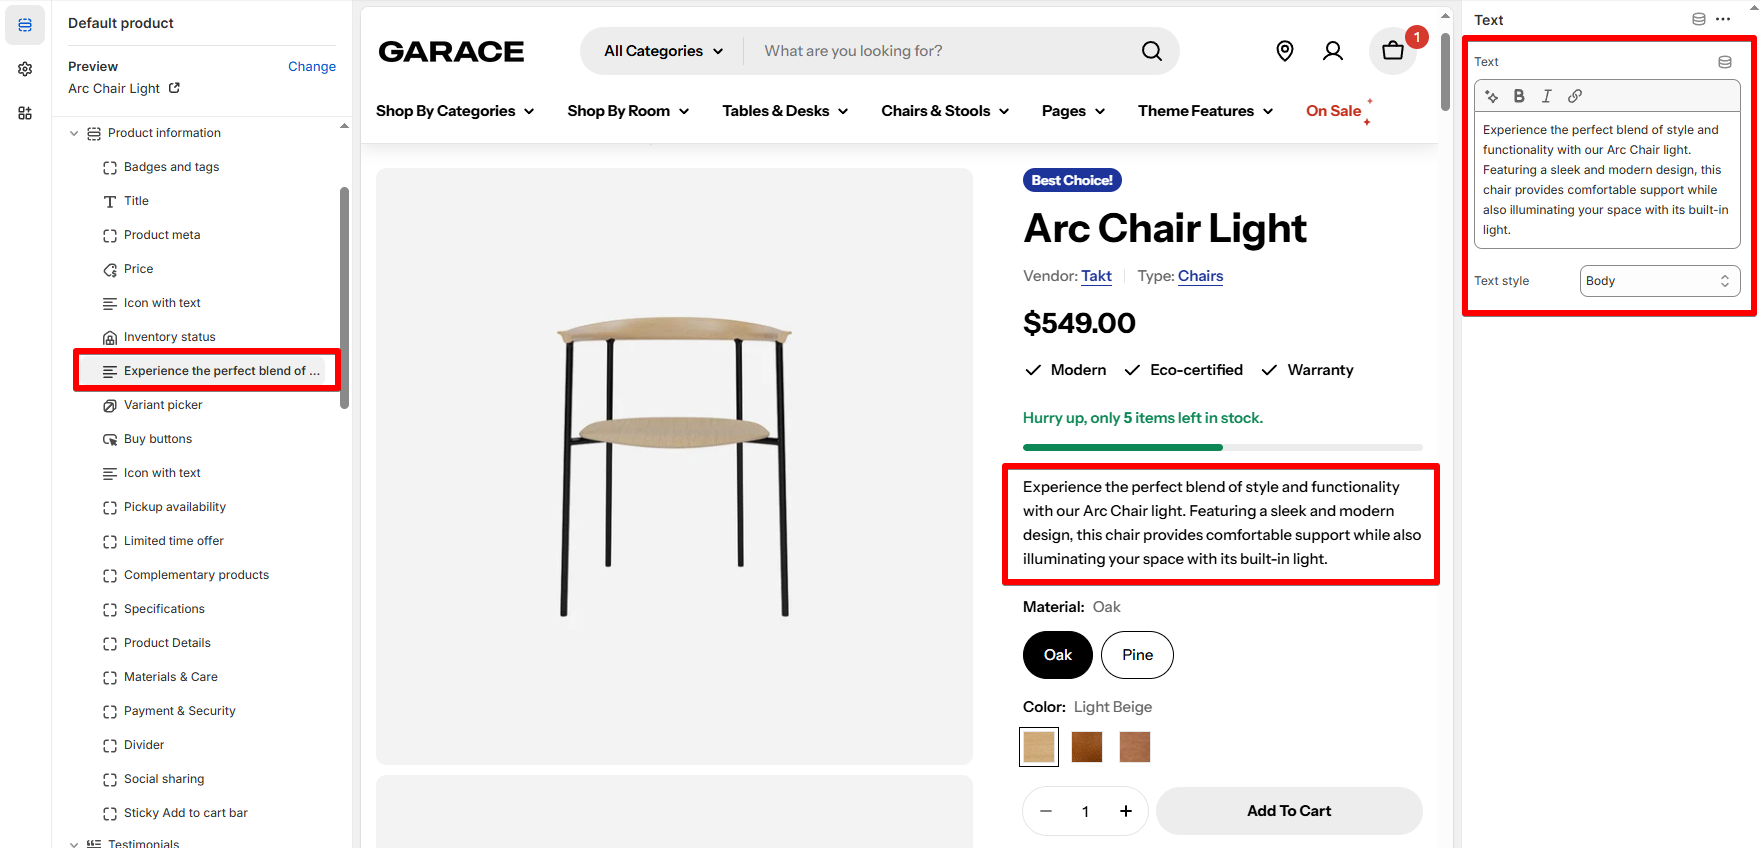 |
| Icon with text | Add your content/promotion in a horizontal/ vertical layout. You can add up to 3 messages. Each comes with an icon/image and a text. | 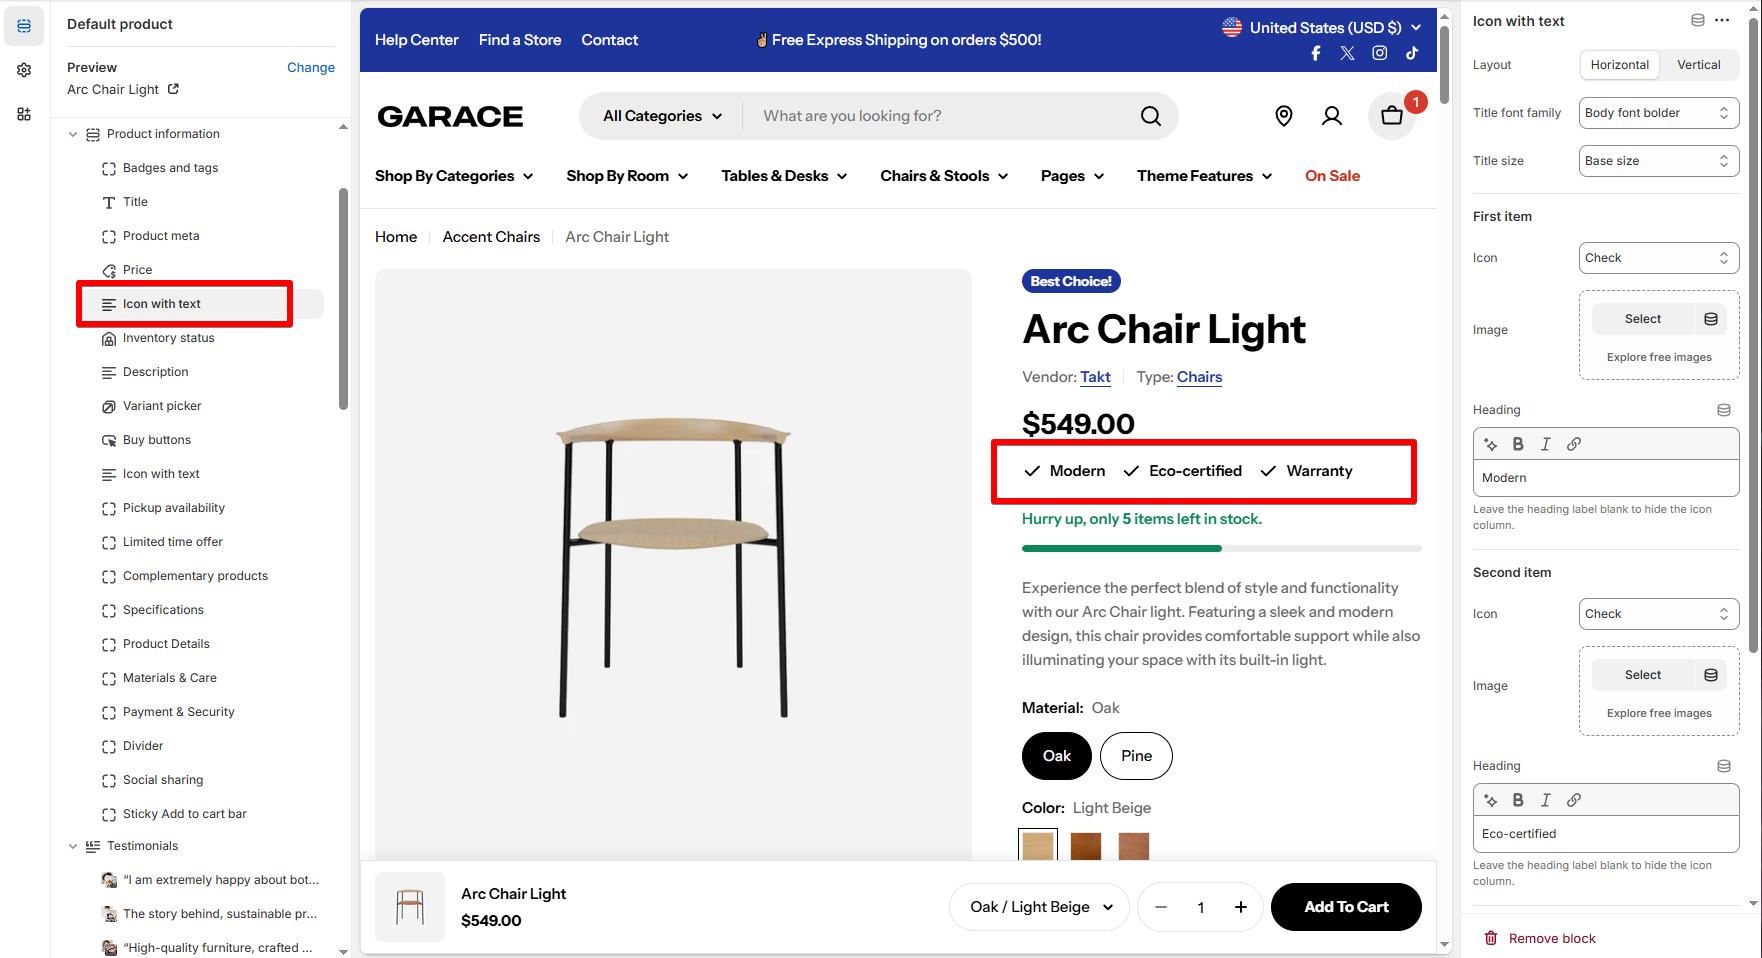 |
| Collapsible row | Display information in an expandable format, keeping your product pages clean and organized. • Heading: Include a heading explaining the content. • Icon: Add an icon before the block's heading. • Row content: To add the tab content. The copy can be added: • manually via the theme editor: 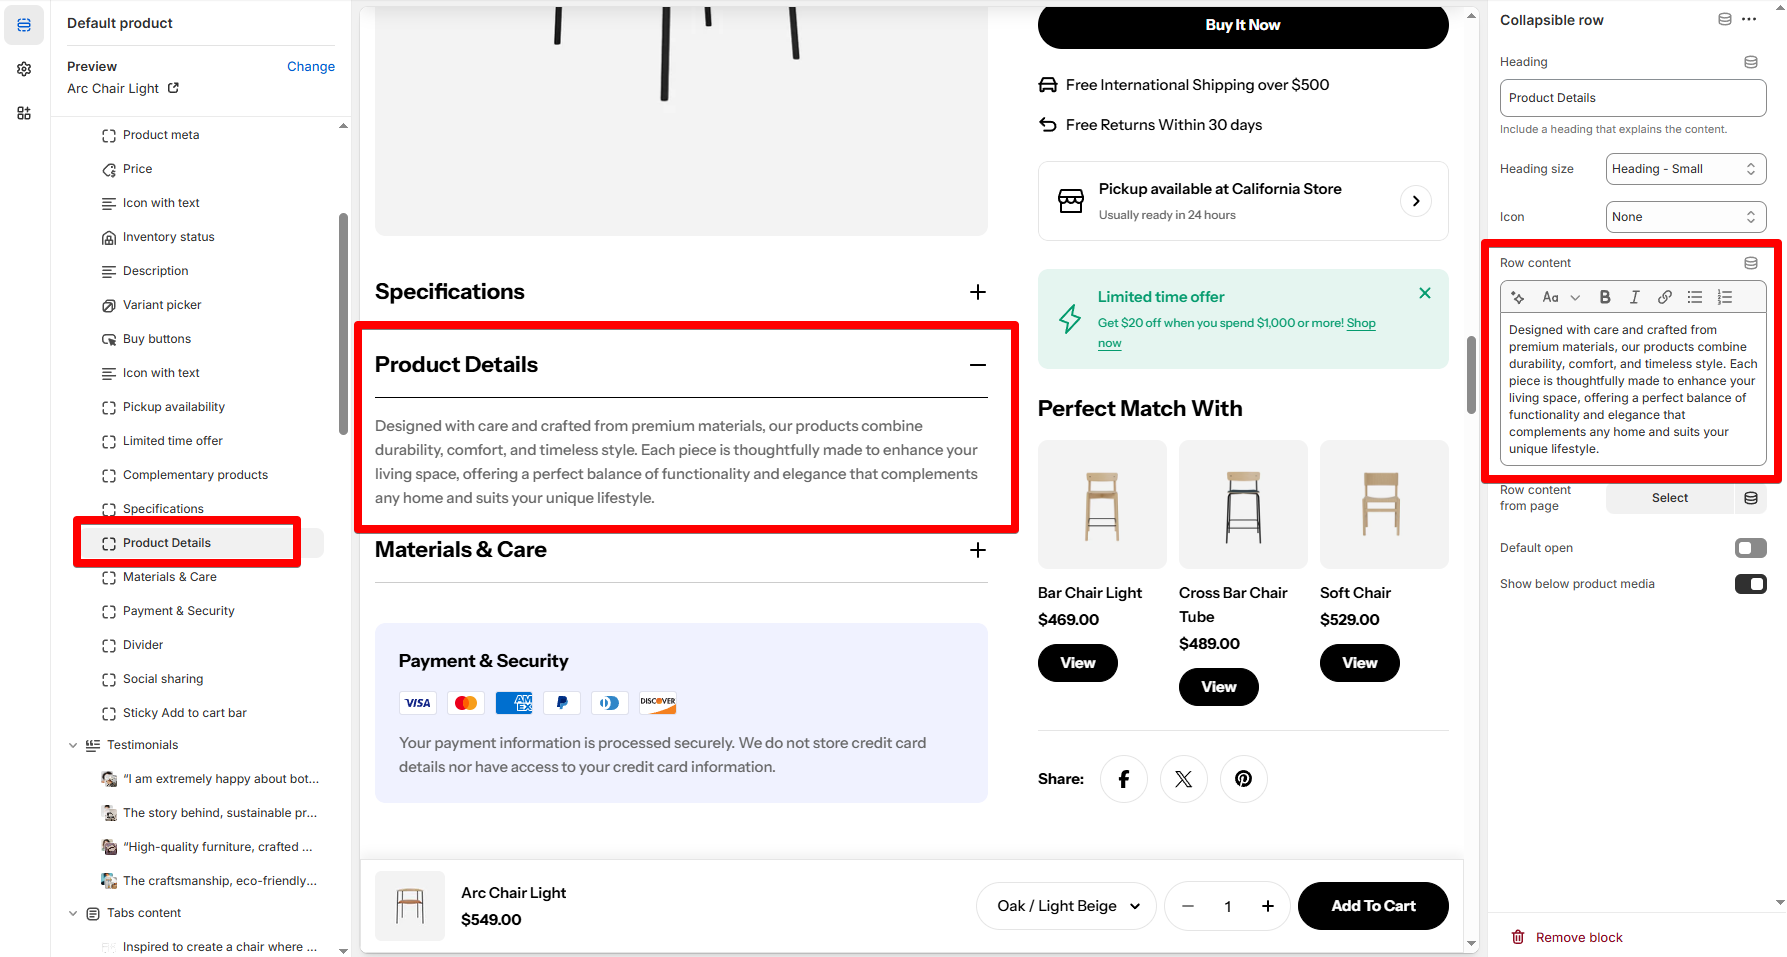 ✍️ When you edit a product template, your changes apply to every product that uses the template. Learn more about Templates. ✍️ When you edit a product template, your changes apply to every product that uses the template. Learn more about Templates.• **via dynamic source:**Connect with Shopify Metafields/ Metaobjects to show dynamic content across products.👉 Watch our tutorial: Customize Product Pages for Unique Content with Metafields (No Code!) • or: • from a page in Shopify Pages 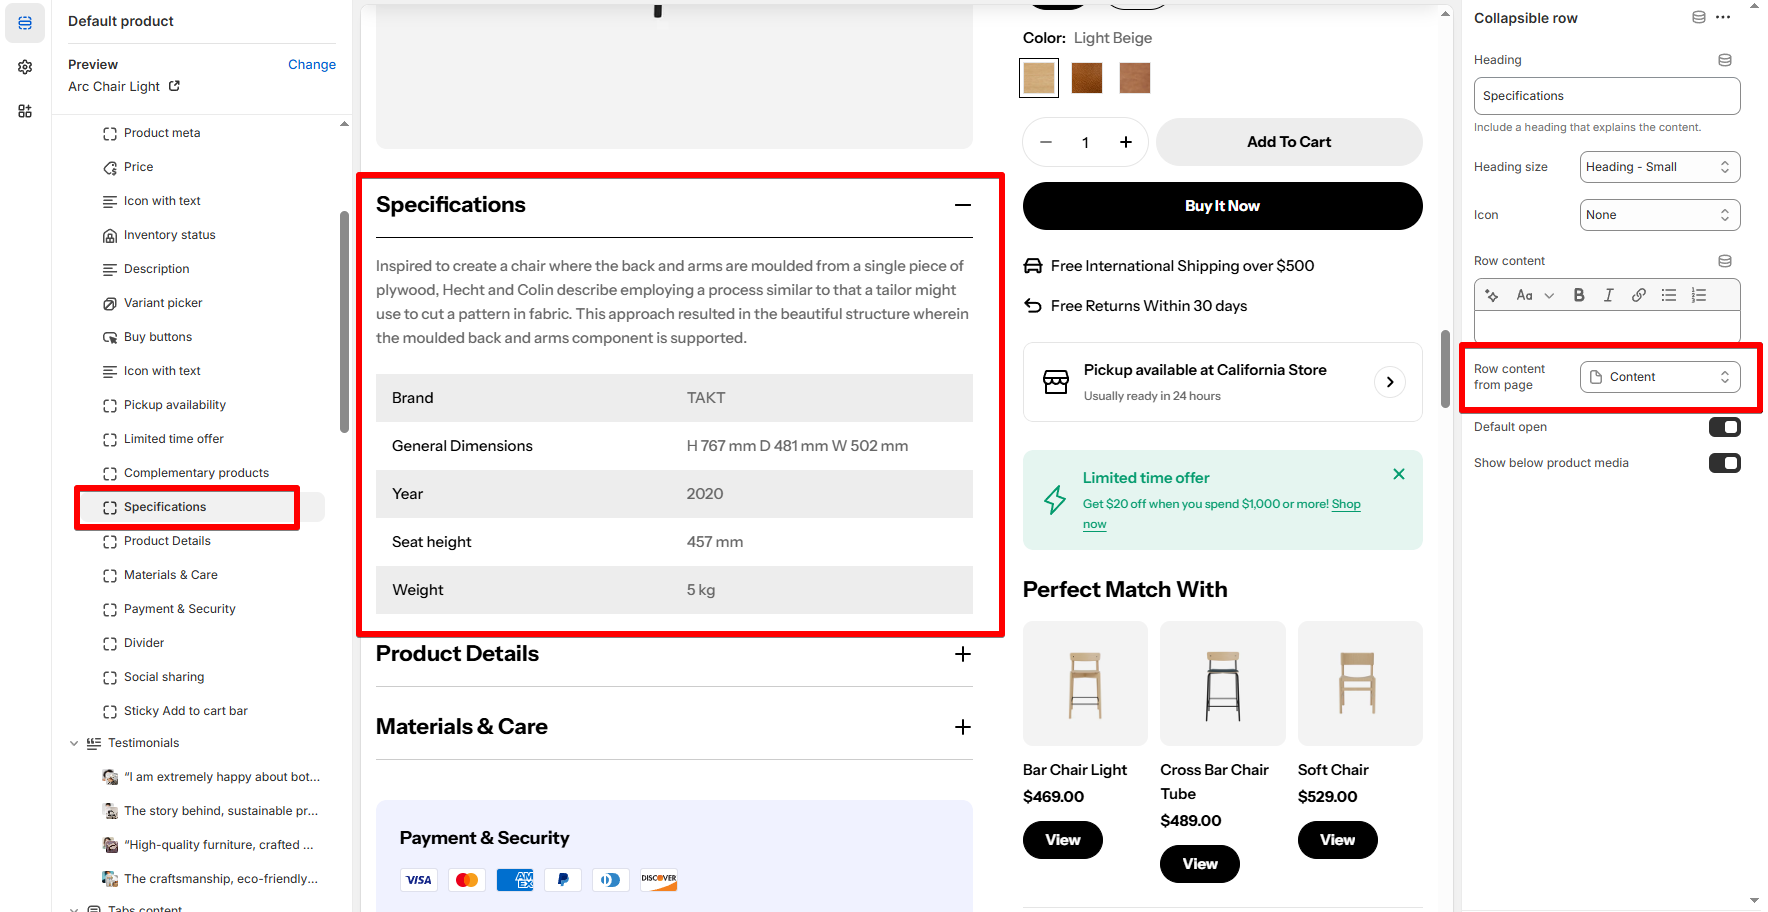 • Select option Default open to have the row expanded when the page loads.💡 Best practice: Keep it closed by default unless the information is crucial. • Select option Show below product media to position the row below product images.If not, the block stays in its default placement within the product details area. 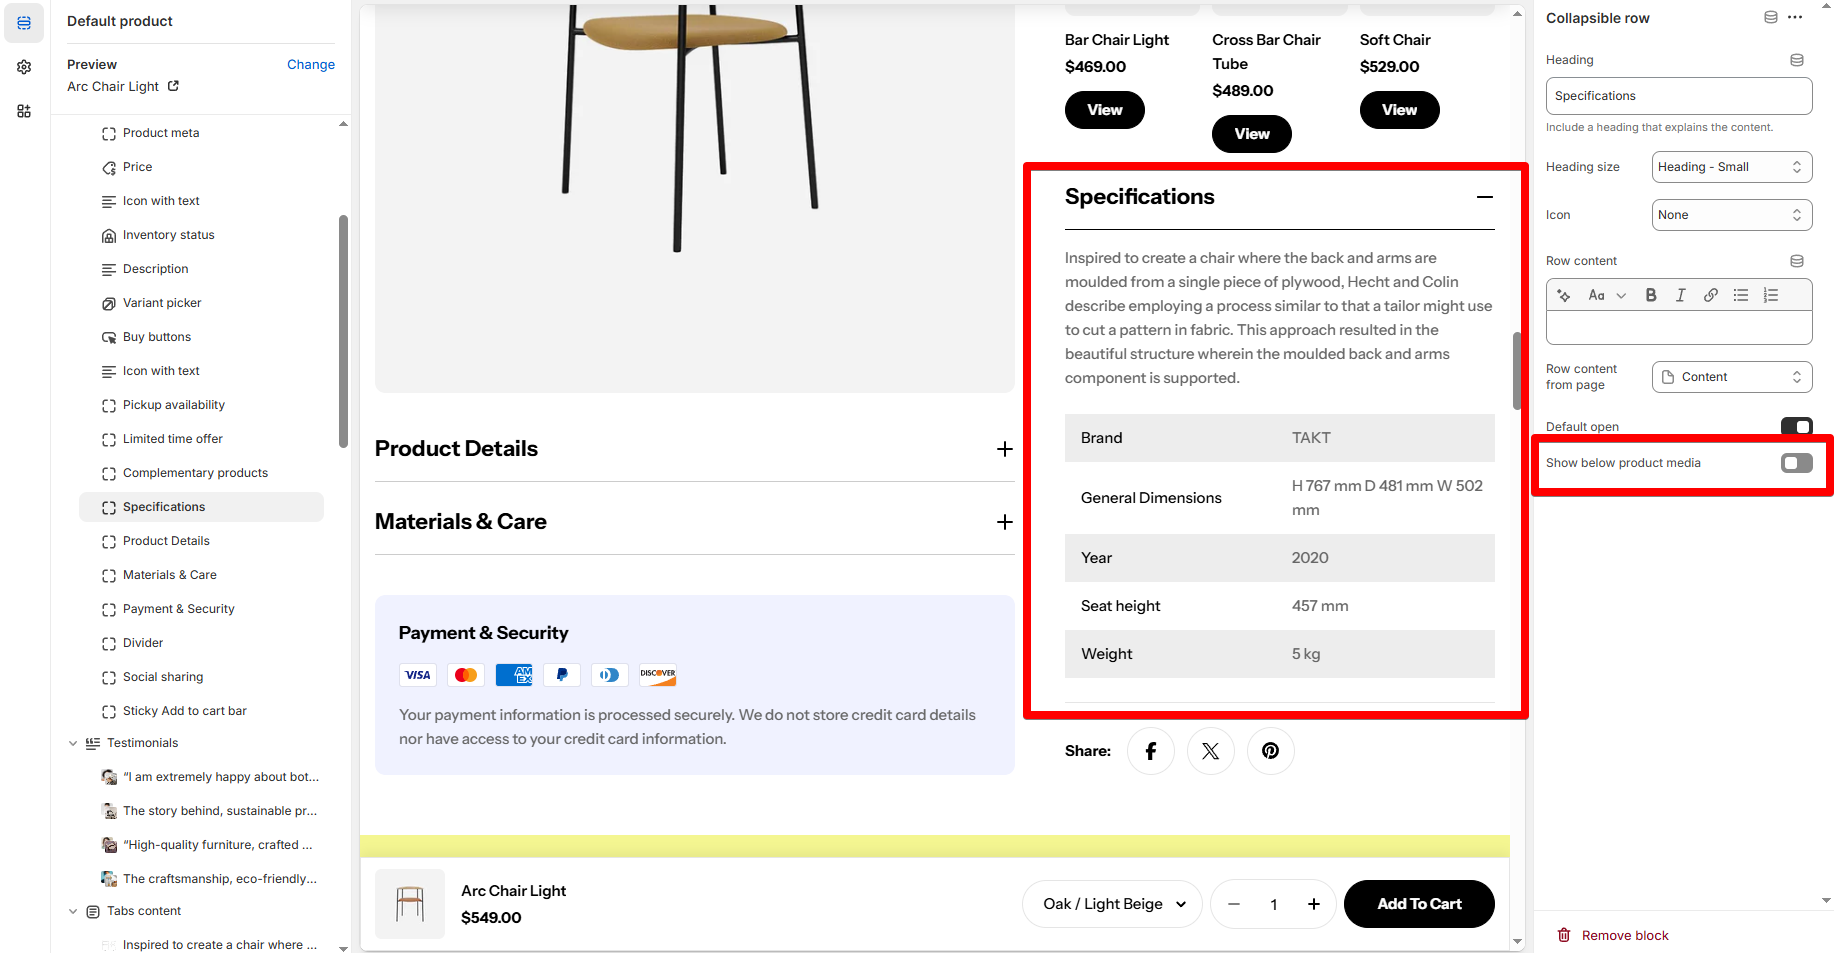 | 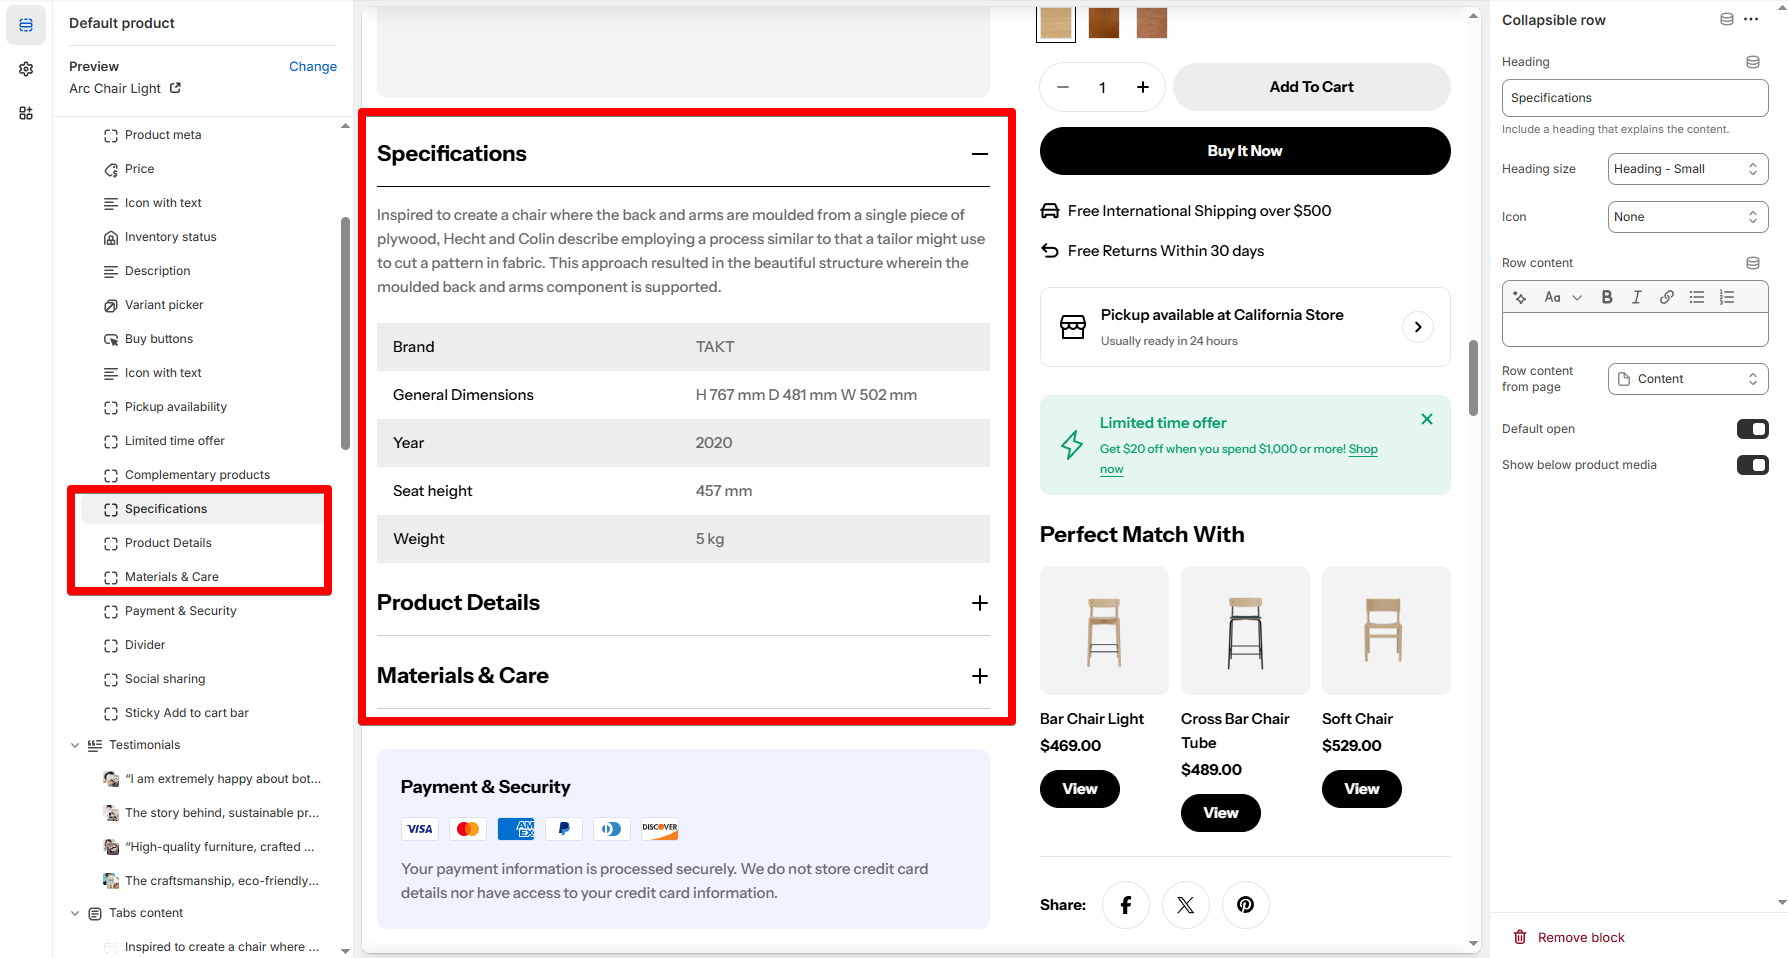 |
| Inventory status | Create urgency and improve conversion rates by displaying stock availability dynamically. Select the Low inventory threshold by tweaking the slider (between 0 and 100). ✅ To show the Inventory status as in stock and low stock alerts on your product page, in Shopify Products > Variants: • check the option Track quantity; • uncheck Continue selling when out of stock. 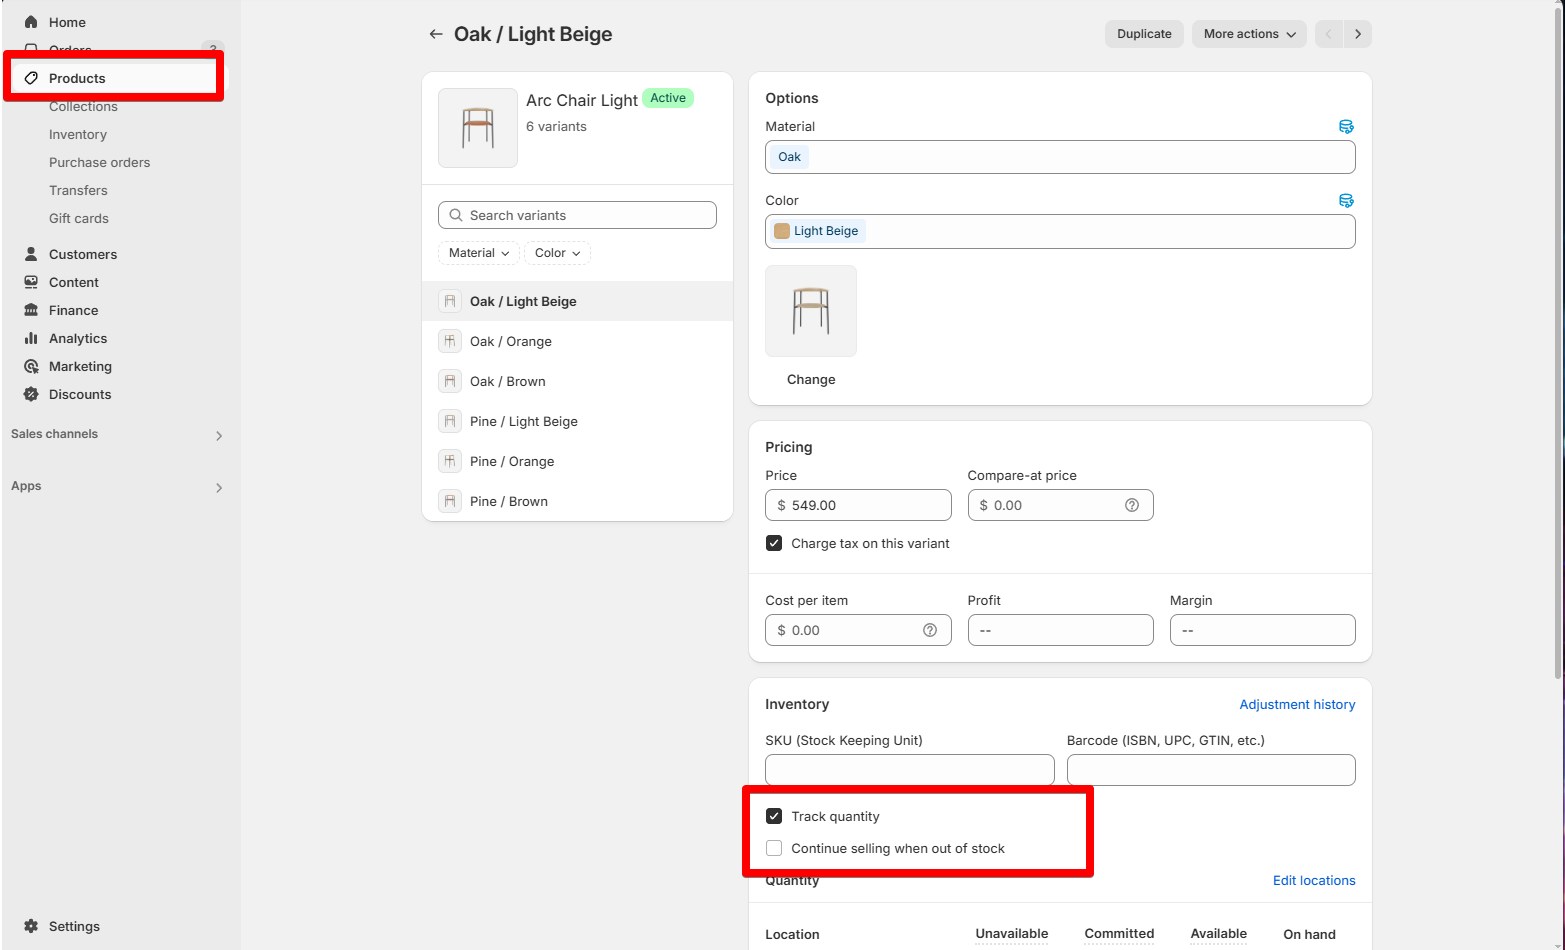 | 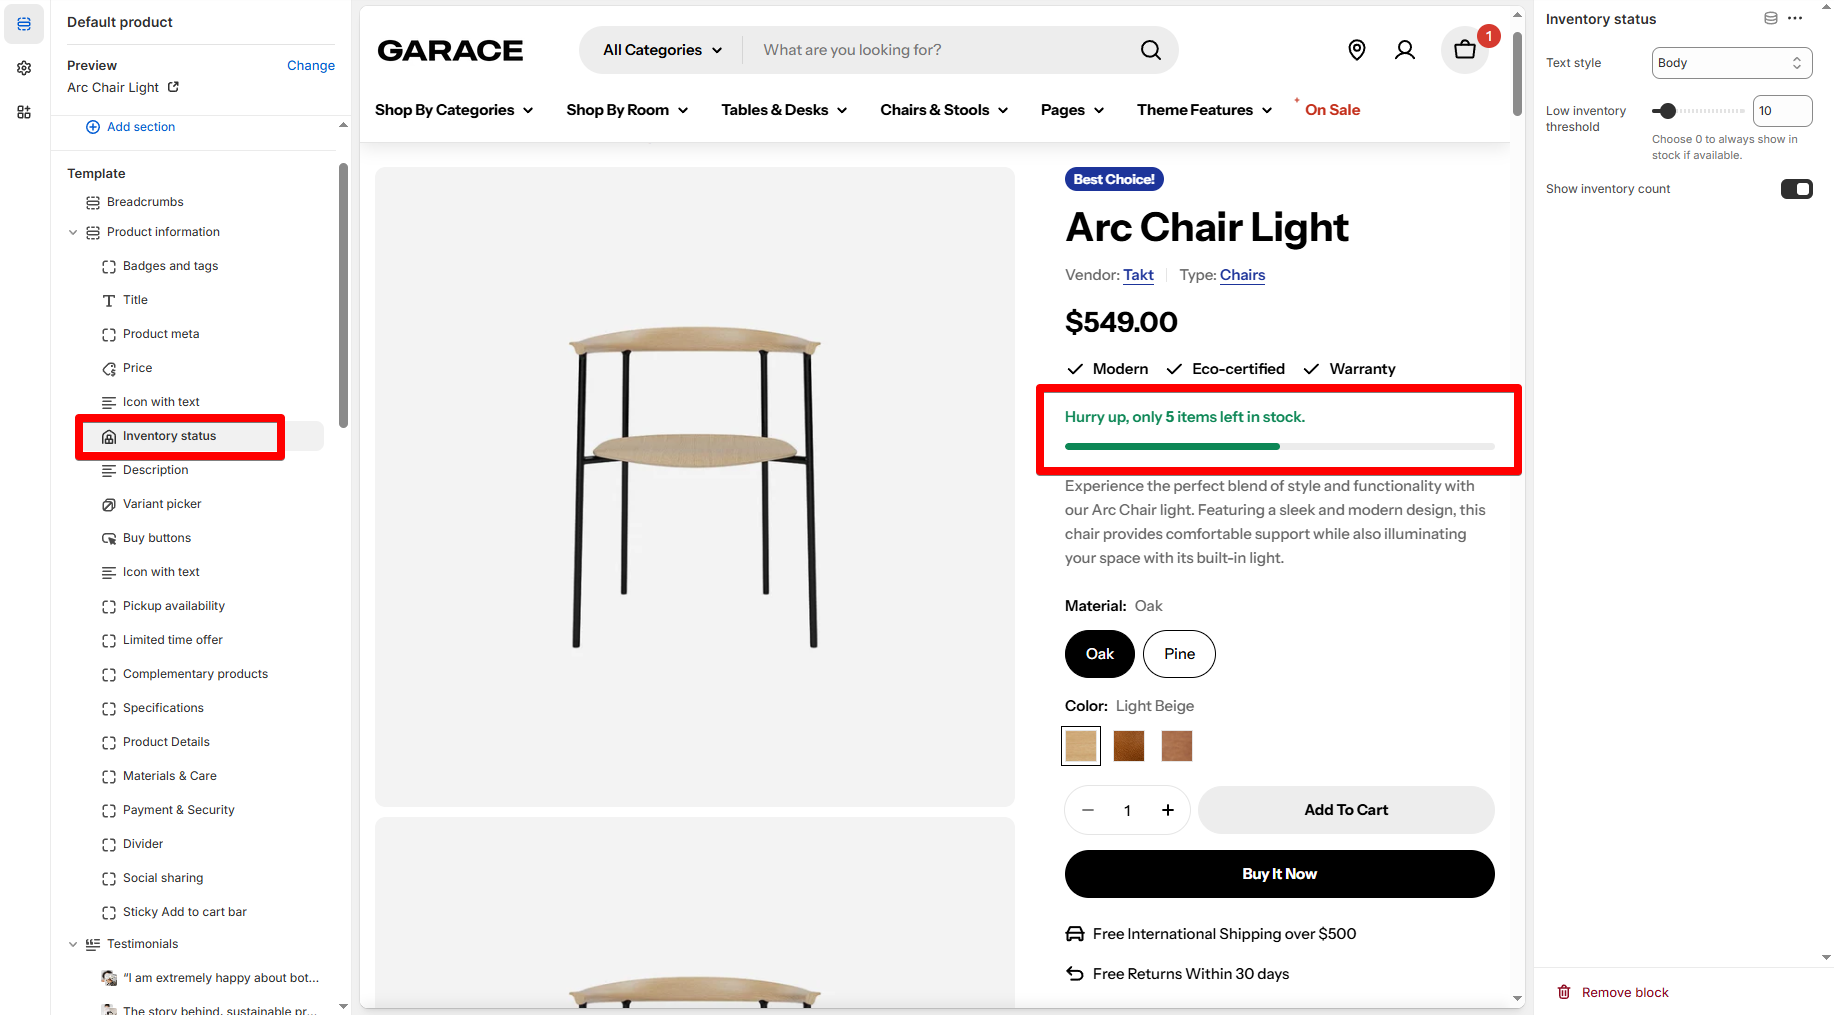 |
| Pickup availability | Show customers whether a product is available for local pickup. ✍️ Learn Set up Local Pickup option | 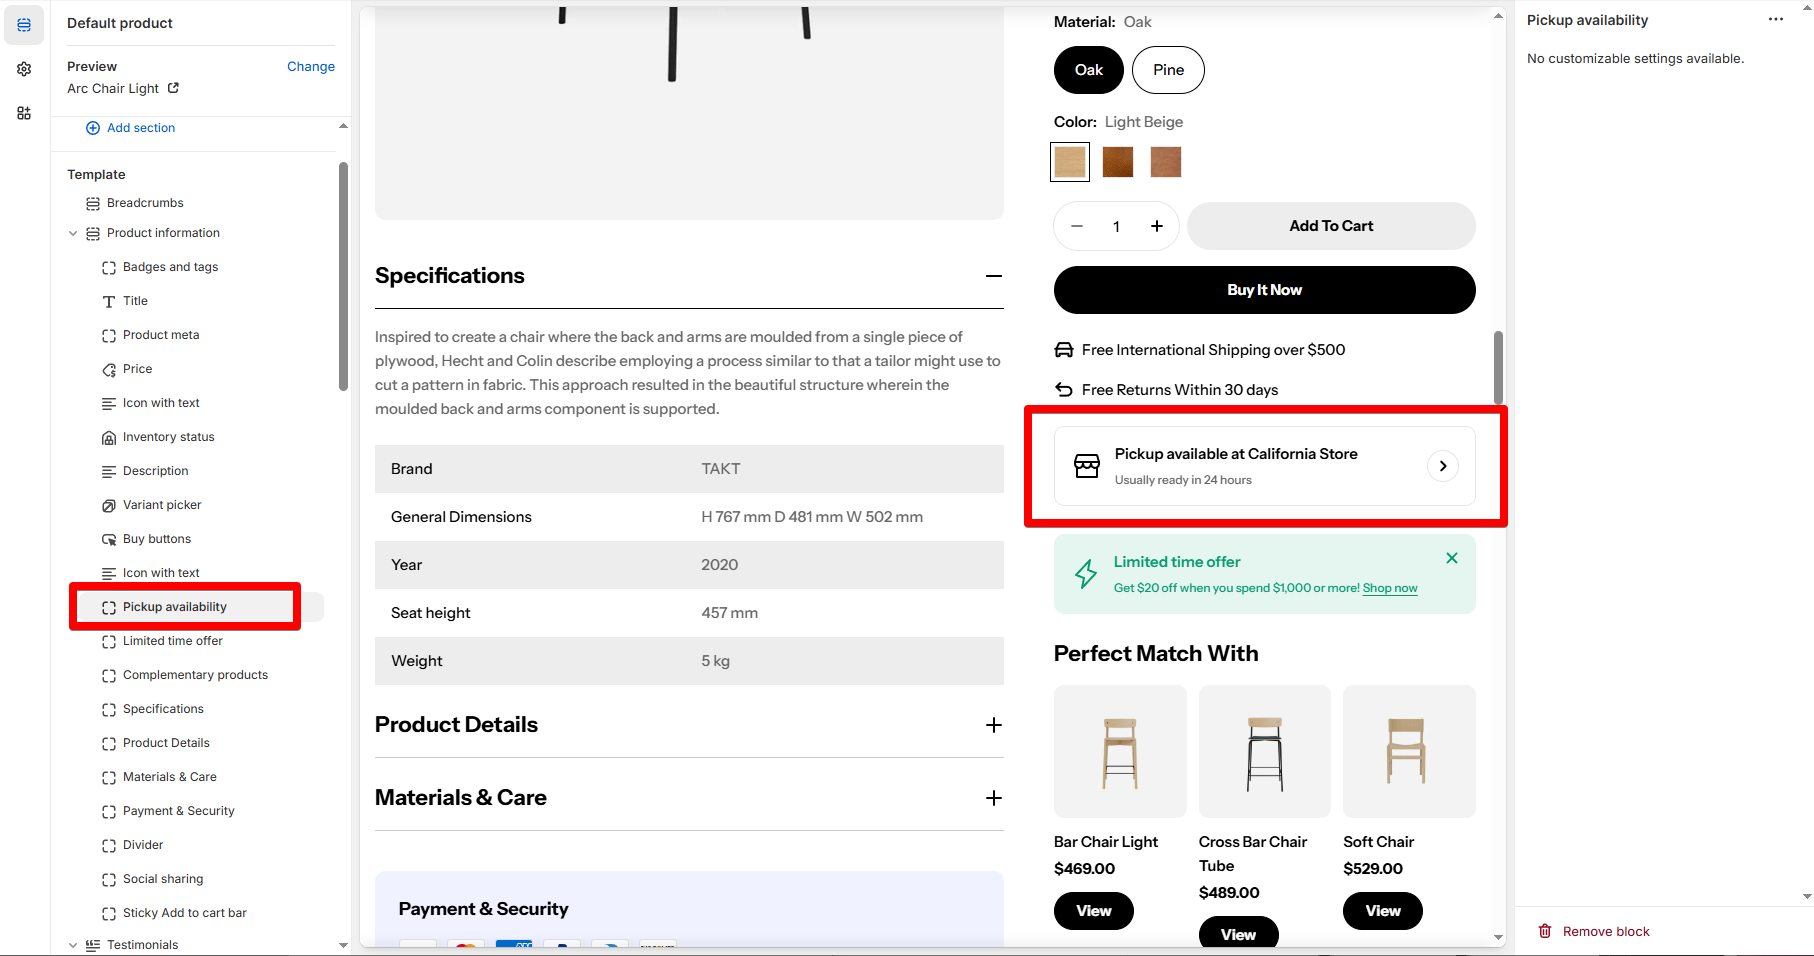 |
| Shipping information | Display estimated delivery dates dynamically, providing customers with clear expectations about when they will receive their orders. his feature helps reduce cart abandonment and enhances customer trust. • Deliver text: Customizable text that appears before the estimated delivery date. • Deliver in: Specify the expected delivery timeframe. • If set to 6, the estimated delivery date will be today +6 days. • The (+/- 2 days) means the range could fluctuate within that window.Example: The current date is March 23 >> Deliver in: 23 + 6 = March 29 >> Date range: Mar 27 - Mar 31 • Date format: Define how the date appears.Example format: • Mar 28 - Apr 01 (from %b %d)• March 28 - April 1 (from %B %d)⚙️ Find more about the available date format here. | 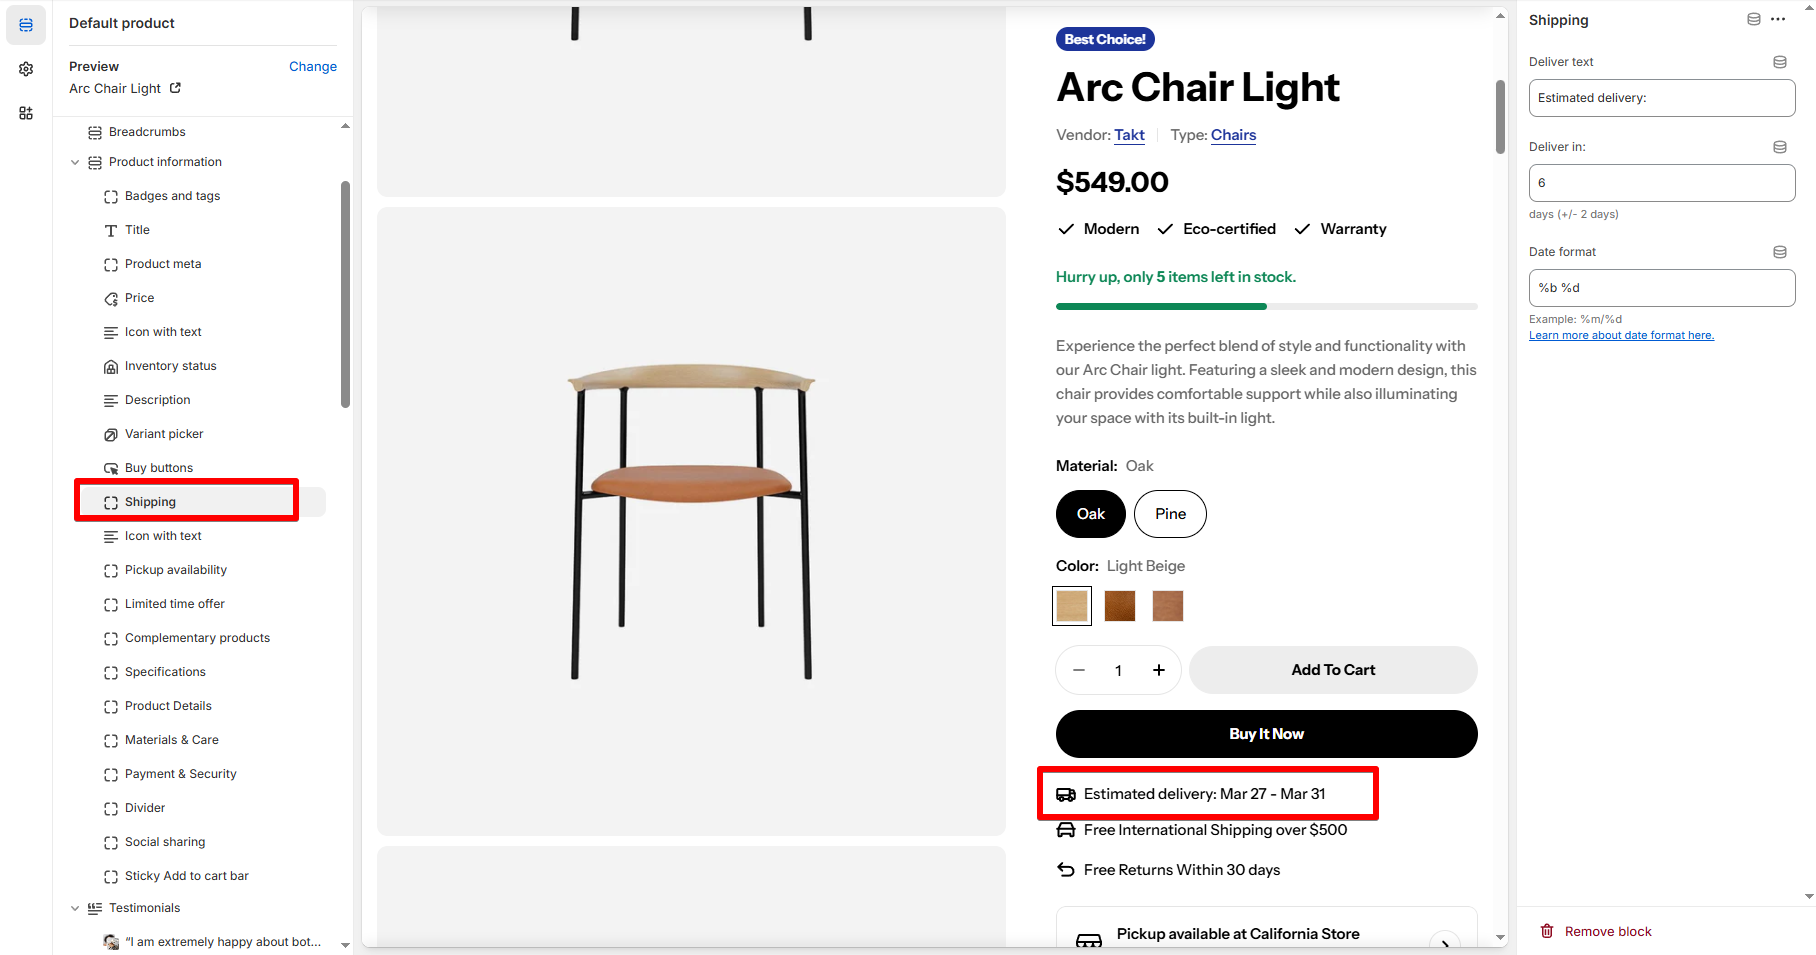 |
| Pop-up | Display additional information without redirecting customers to another page. • Link label: Add a clickable text that triggers the pop-up. • Link style: Set how the link appears on the page. • Content from page: The pop-up pulls content from a specific Shopify page. | 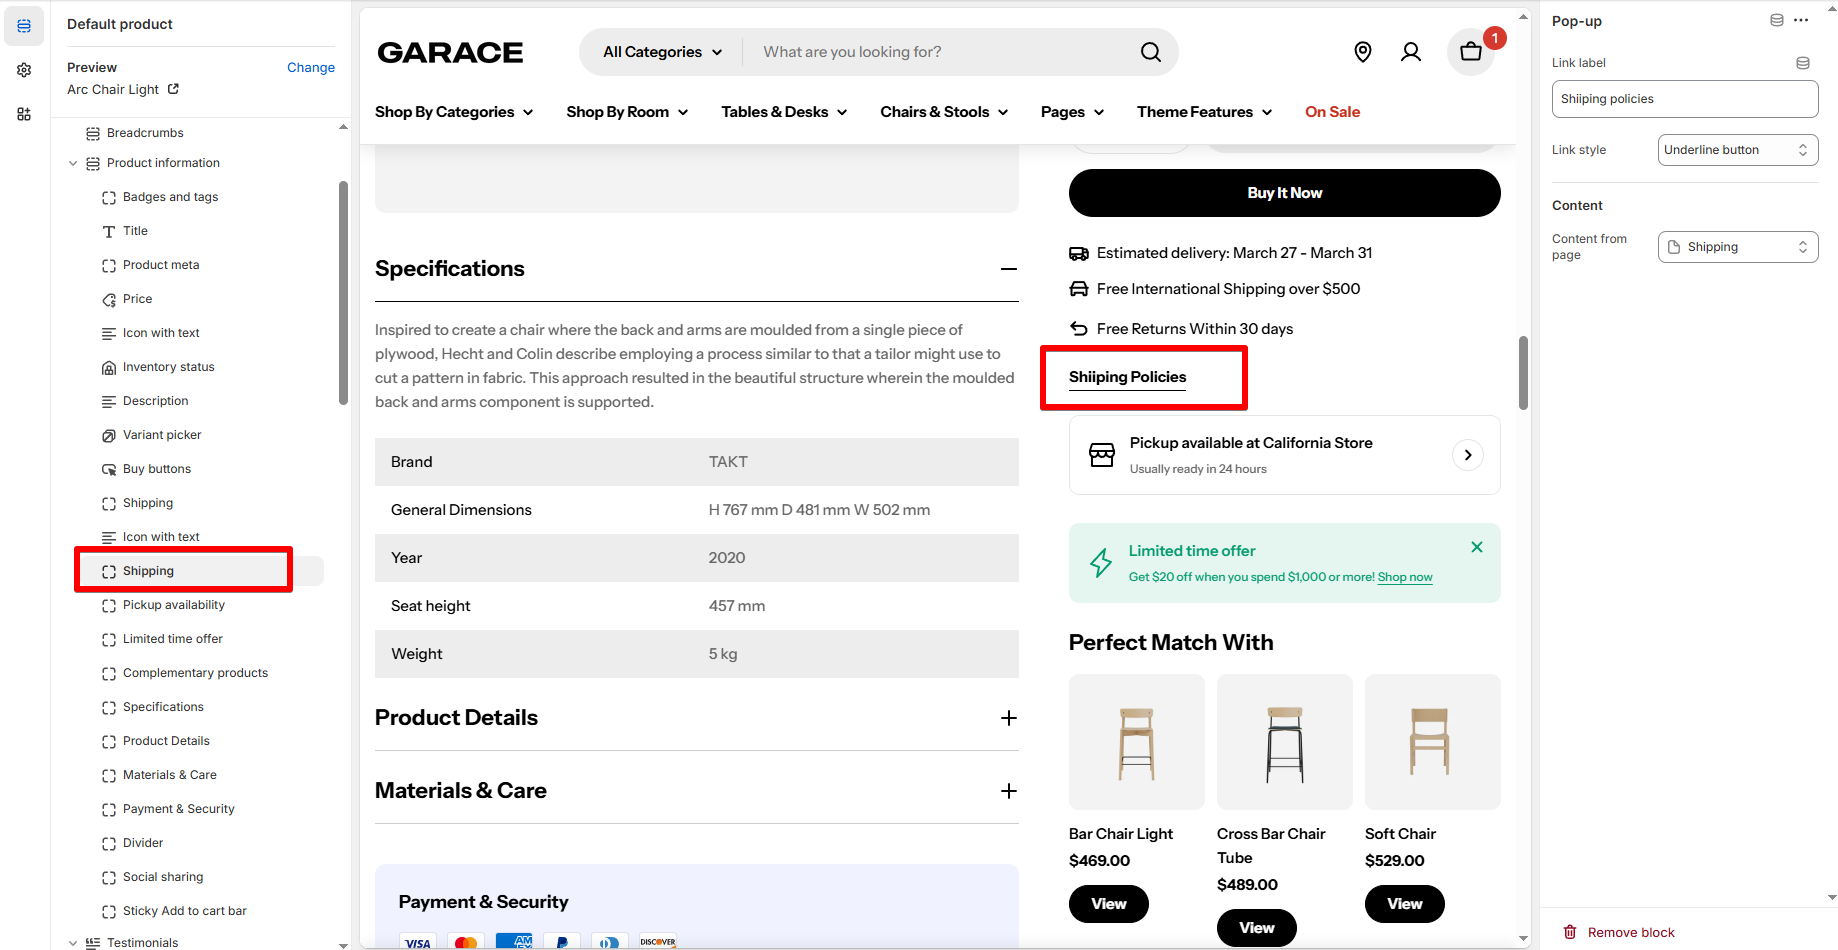 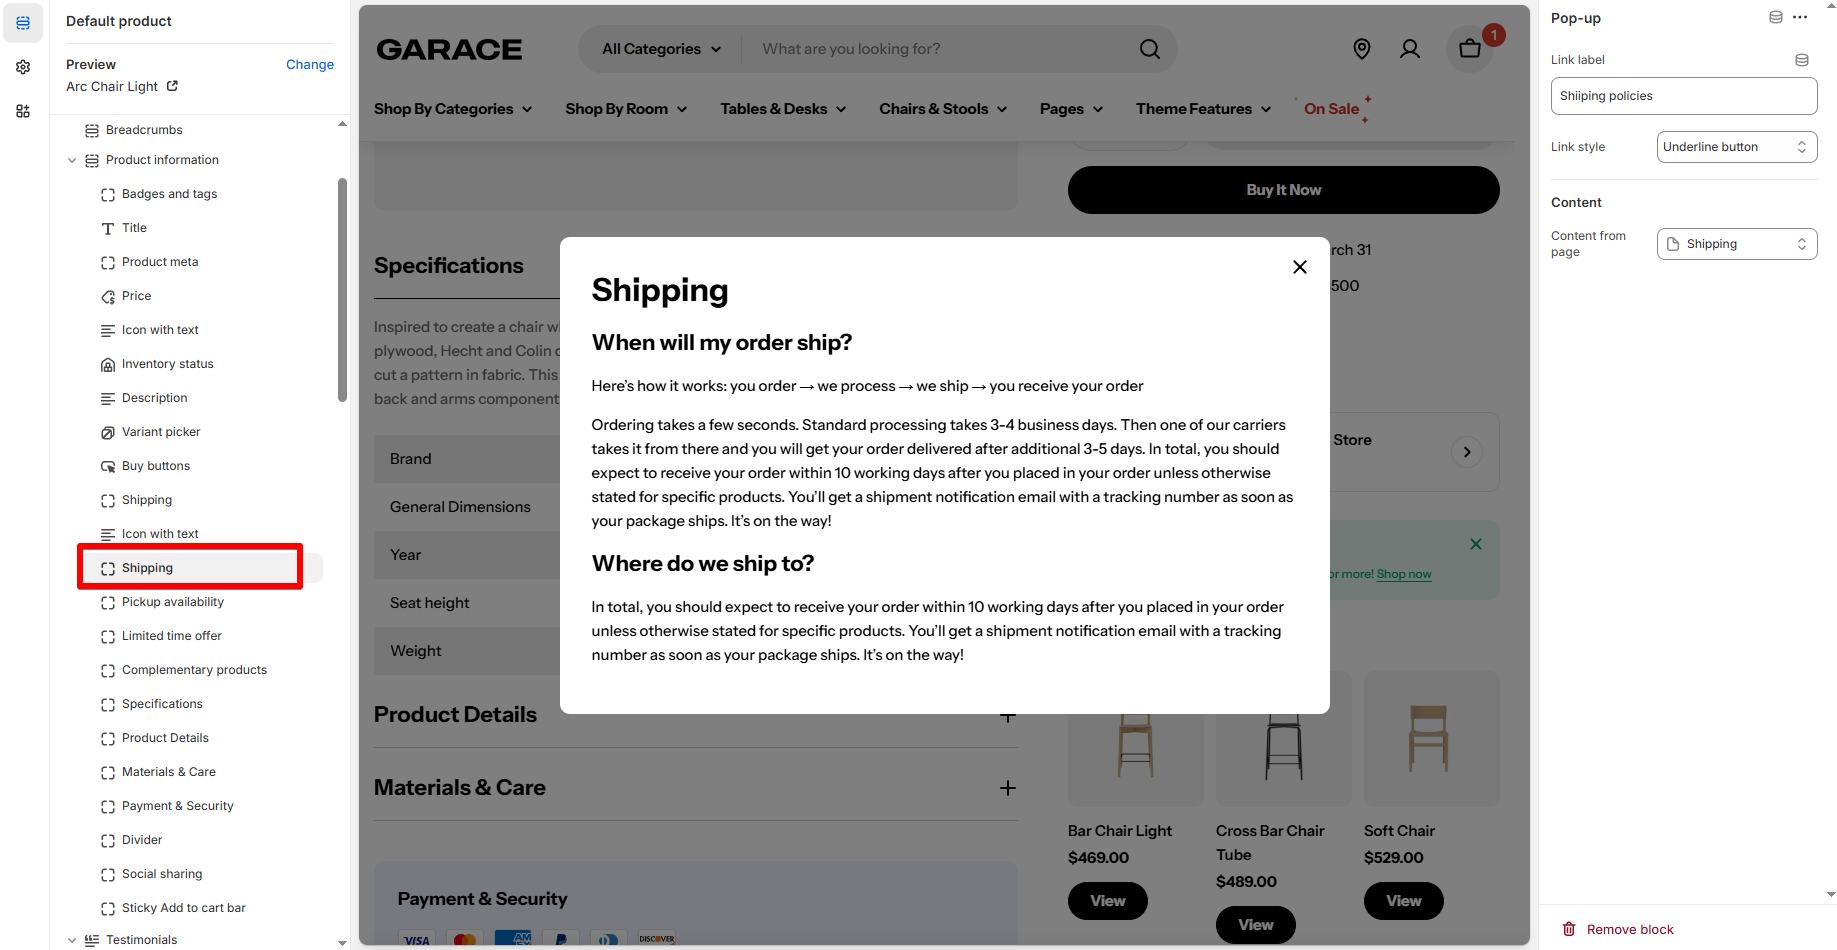 |
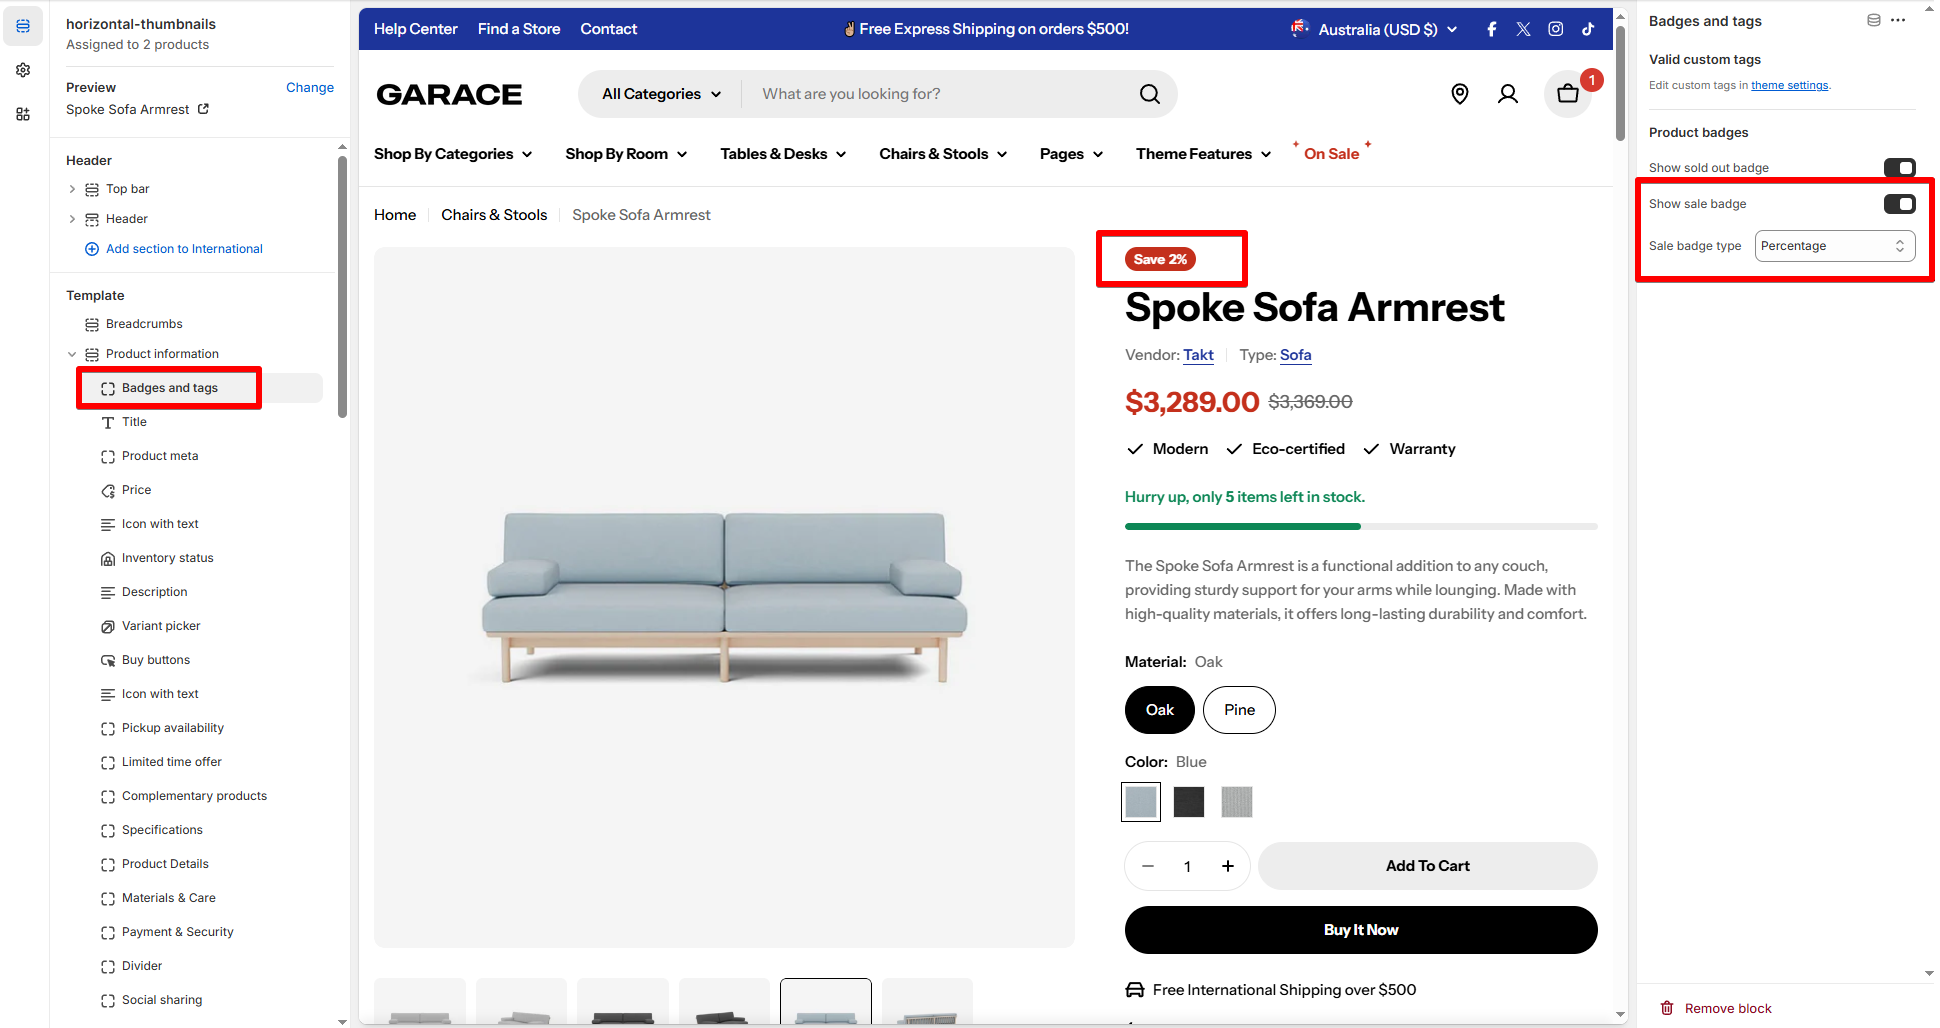
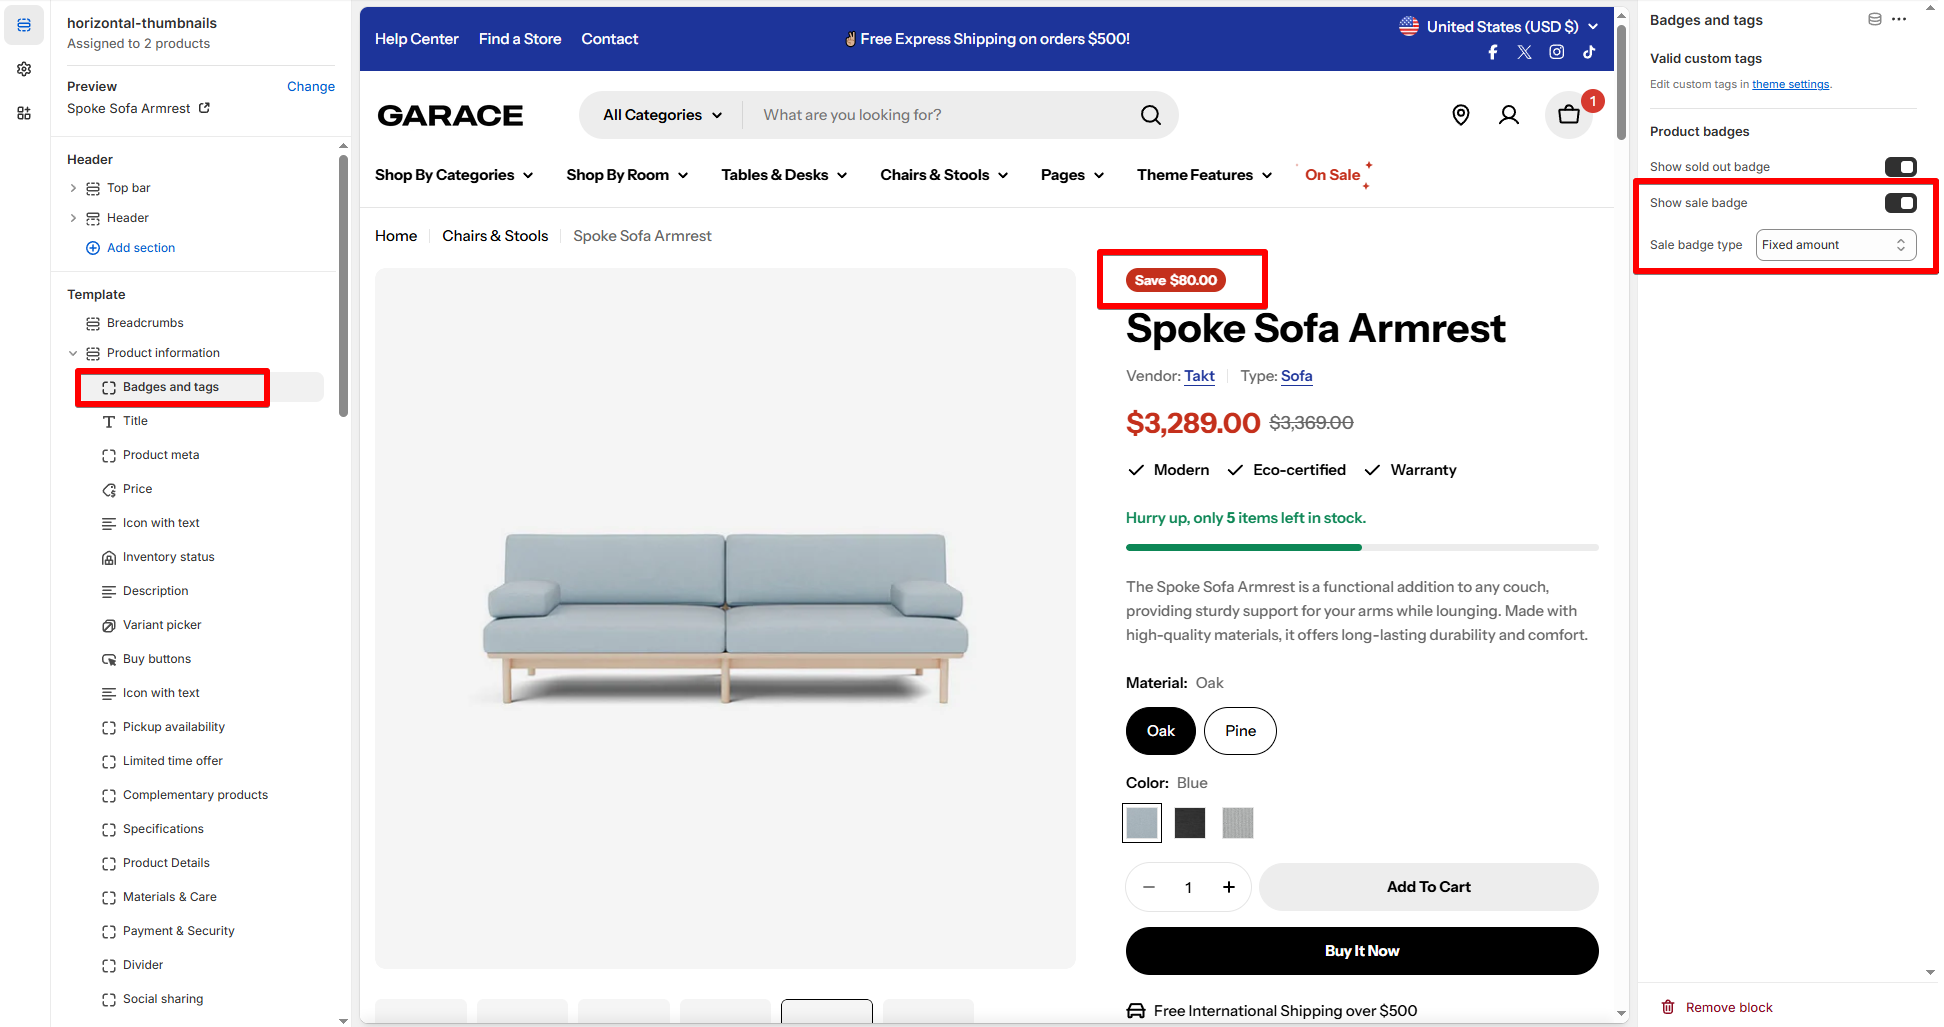
| Badges and tags | ✍️ Learn how to add custom tags: Product badges The Sale badge type can be set as Text/ Percentage/ Fixed amount. Go to Theme settings > Colors to change the badges' color. | 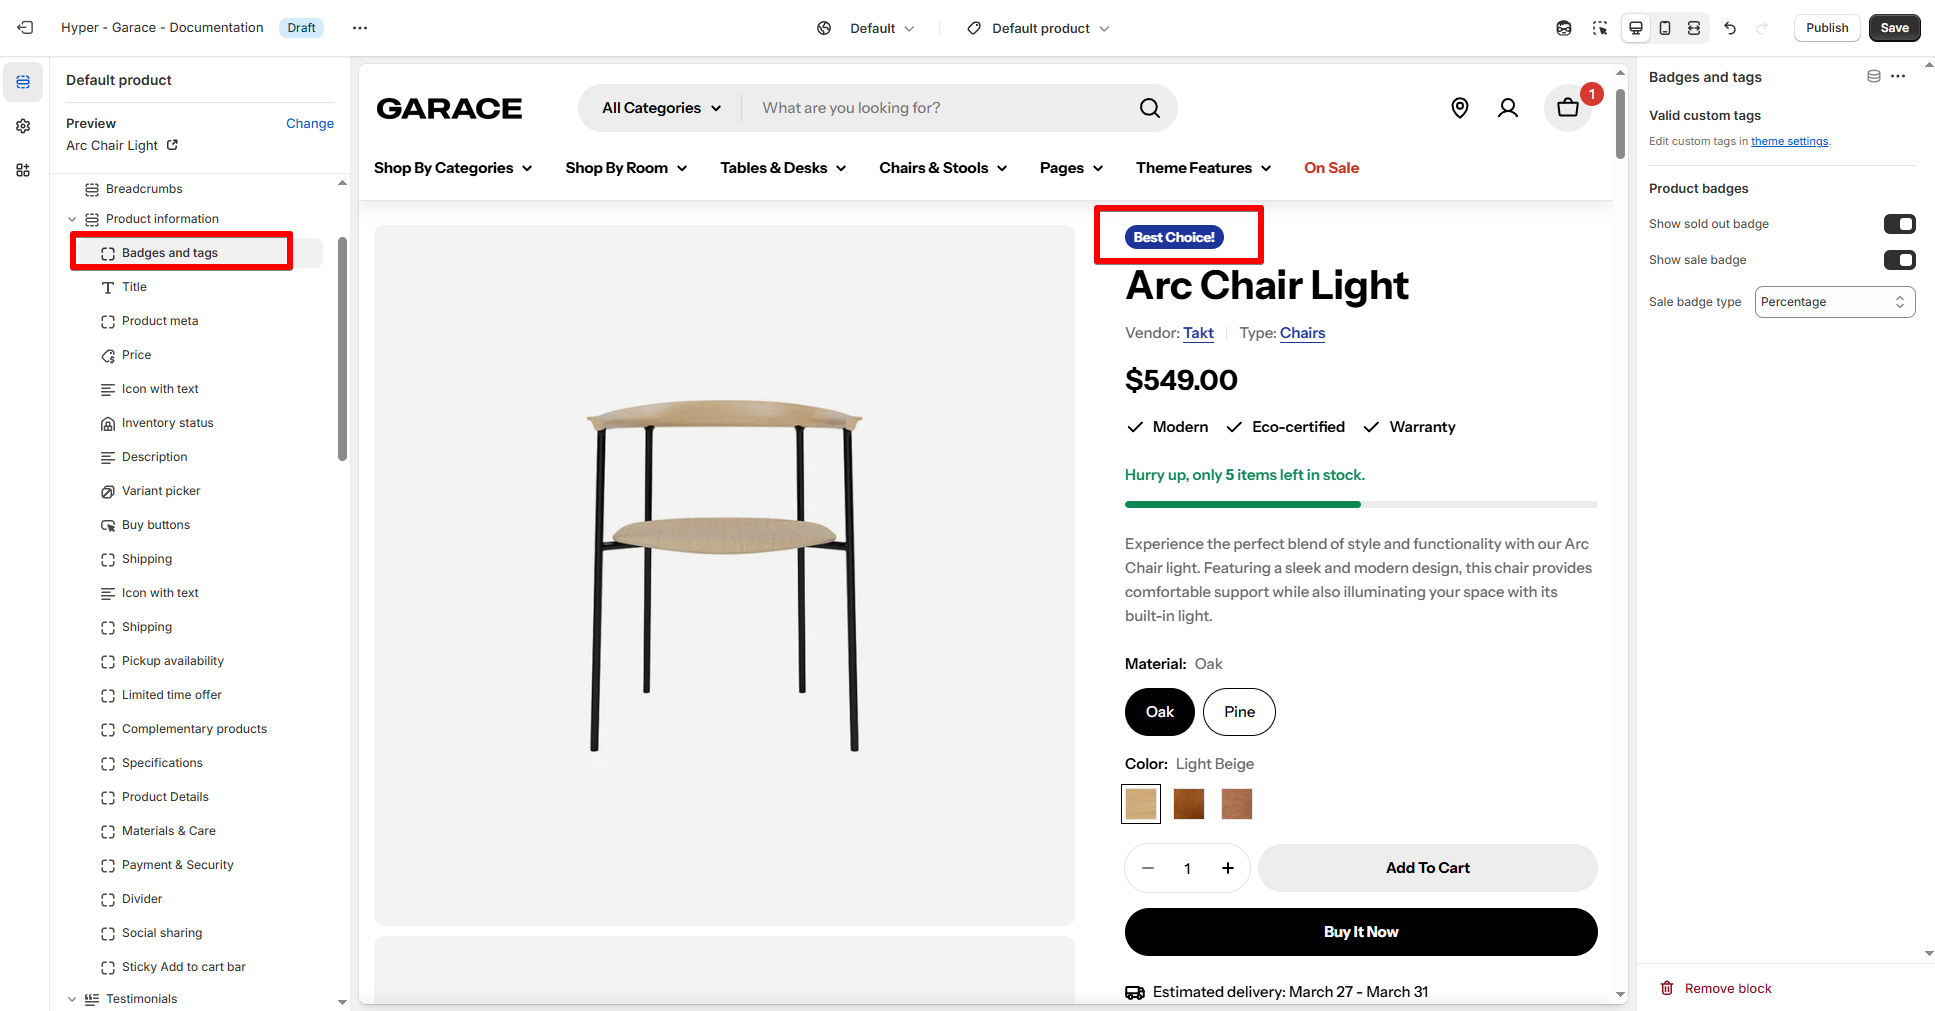 |
| Block | Description | Example |
|---|---|---|
| Complementary products | Displaying complementary products to customers makes it easier for them to discover new products, and can help increase online store sales. ✍️ Learn how to use the Shopify Search & Discovery app to choose complementary products for your website’s product pages. • Enable quick add button: Let customers add a product to their cart directly.If the product has variants, then the button becomes View button and opens the Quick viewwhen clicked. | 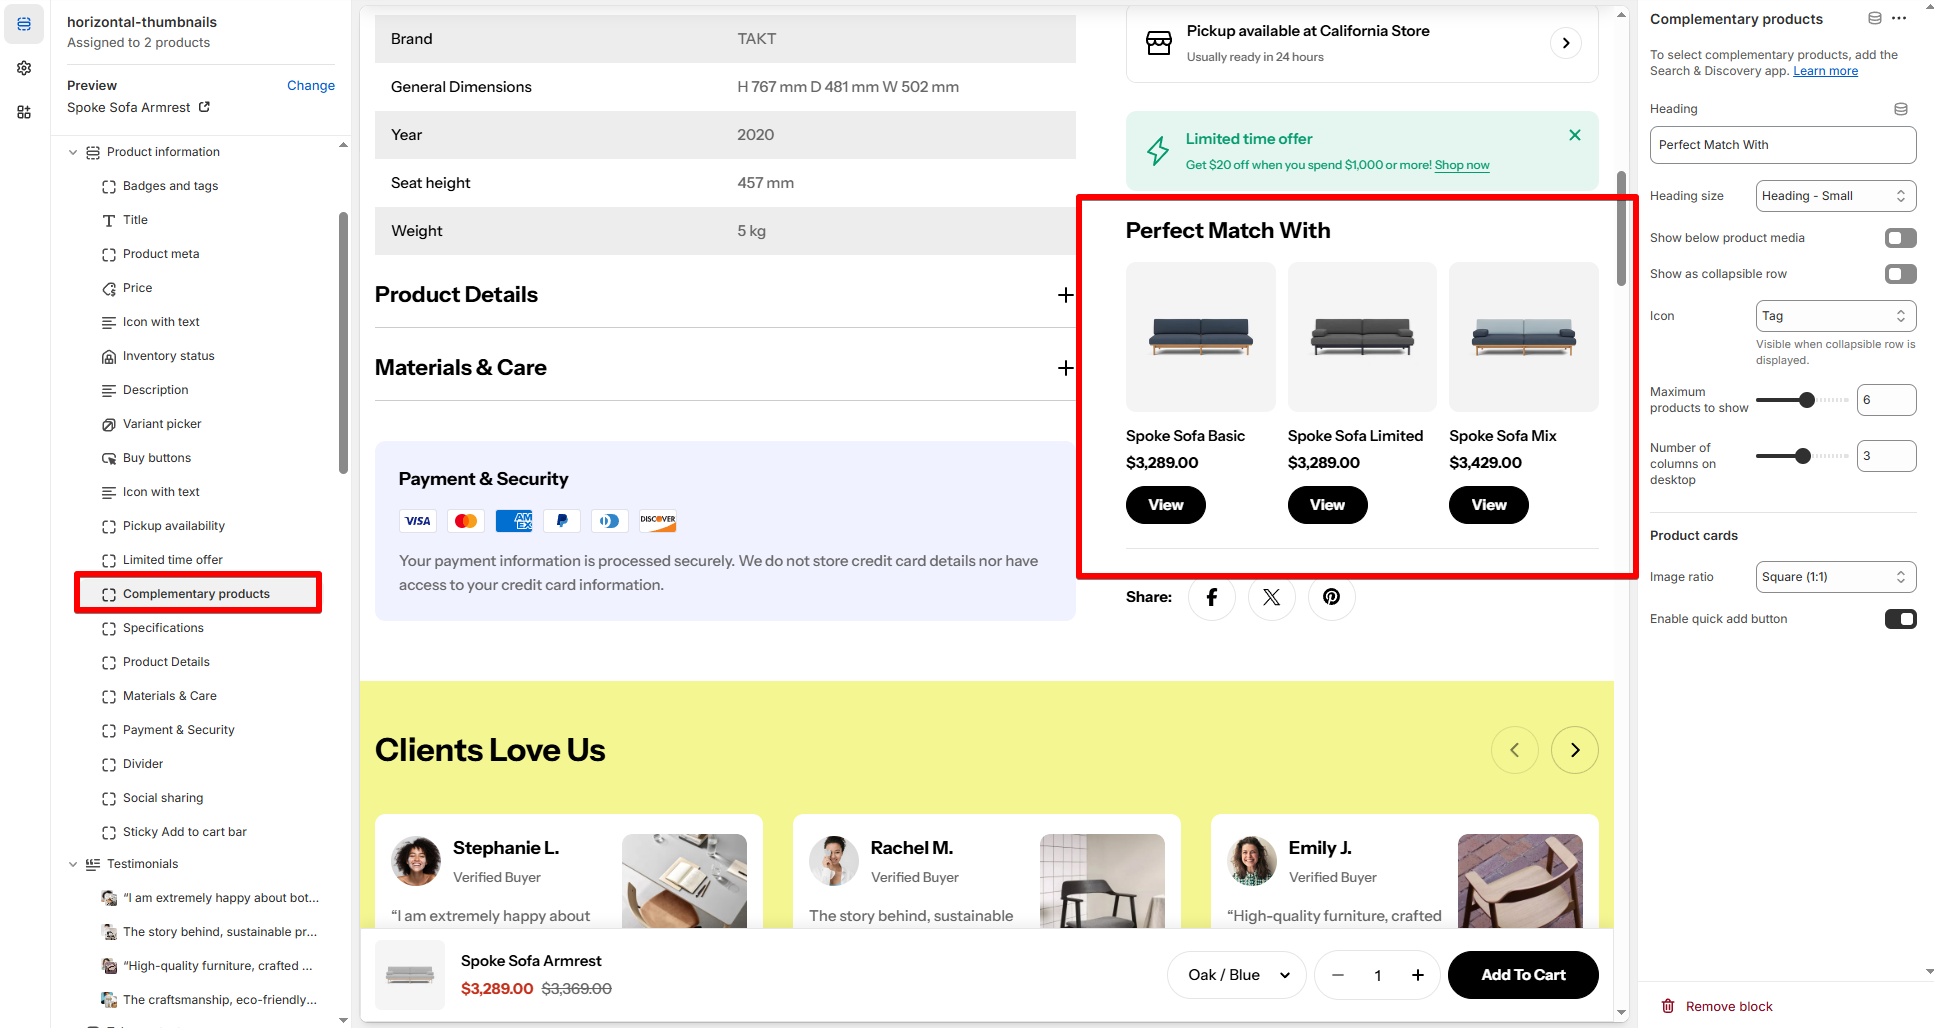 |
| Payment info | Reassure customers about the security of their transactions by displaying available payment methods. Your payment icons not showing? ✍️ See more Show Payment icons | 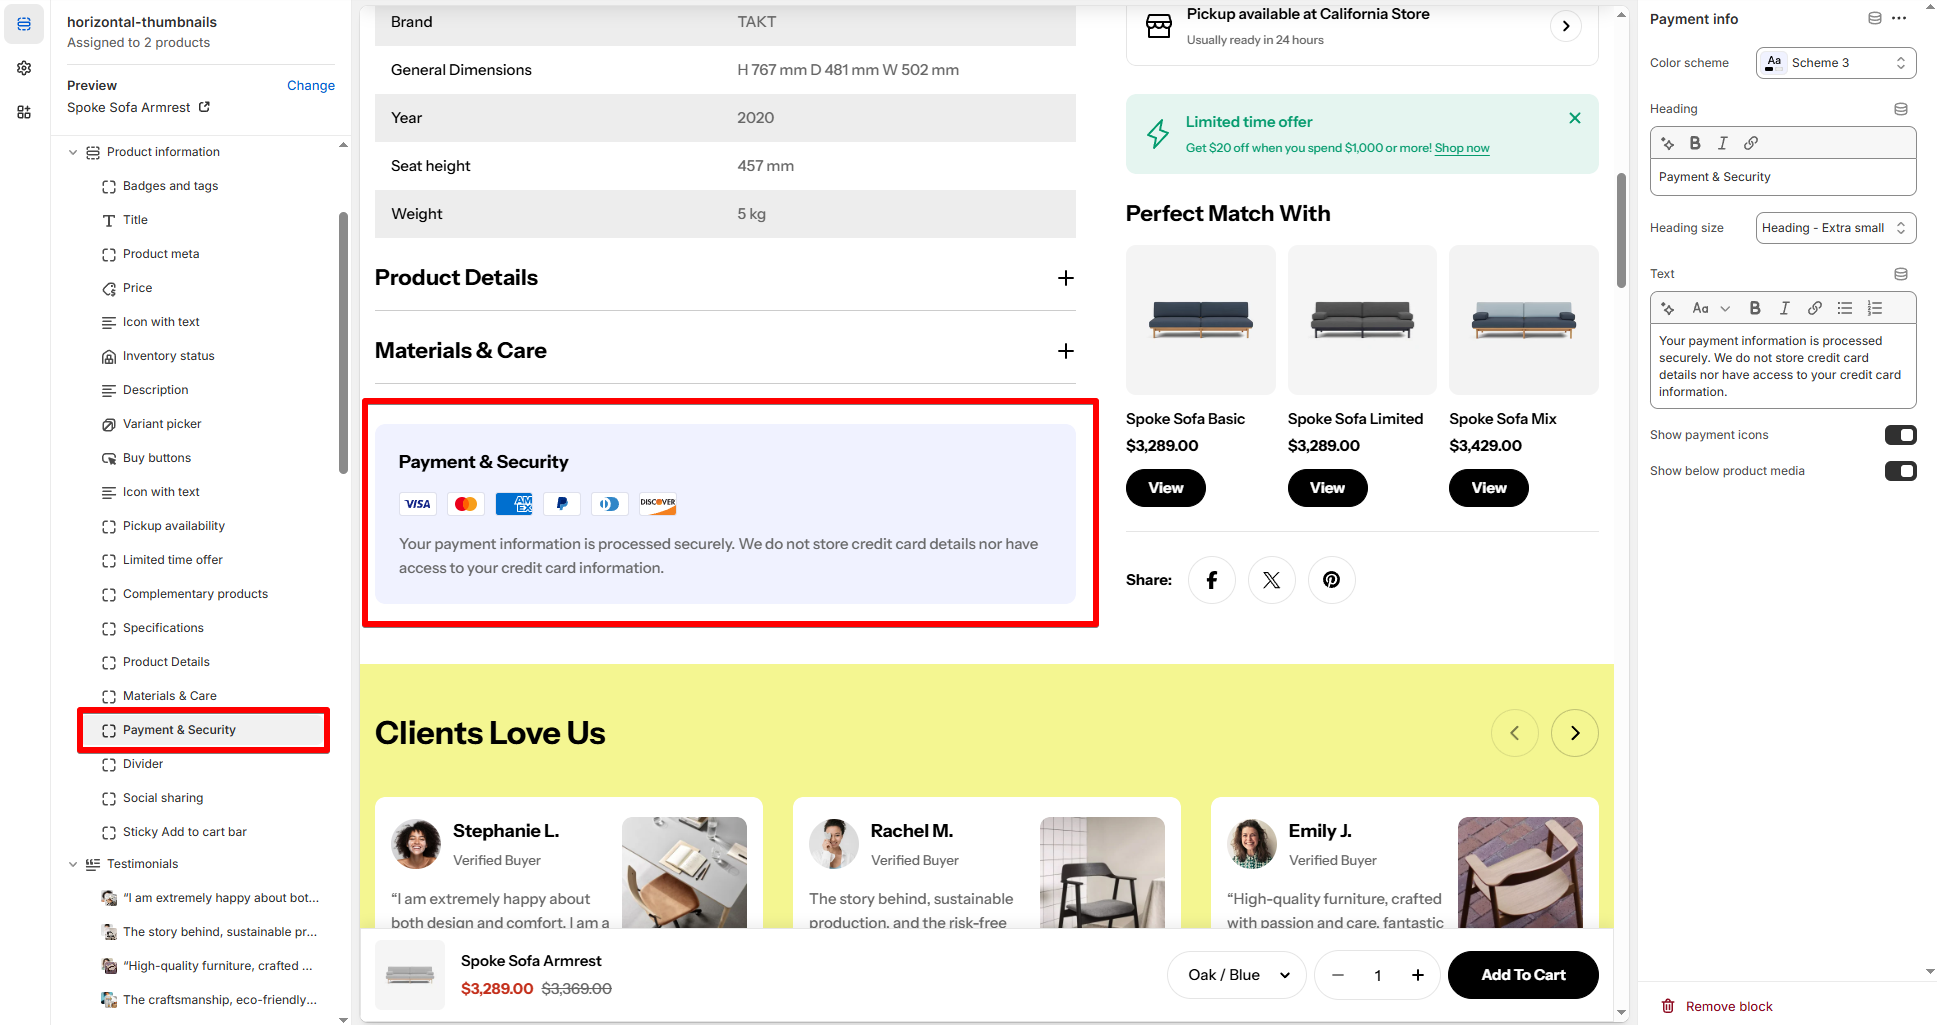 |
| Promotion alert | Display a promotional element that highlights special discounts or deals on a product page | 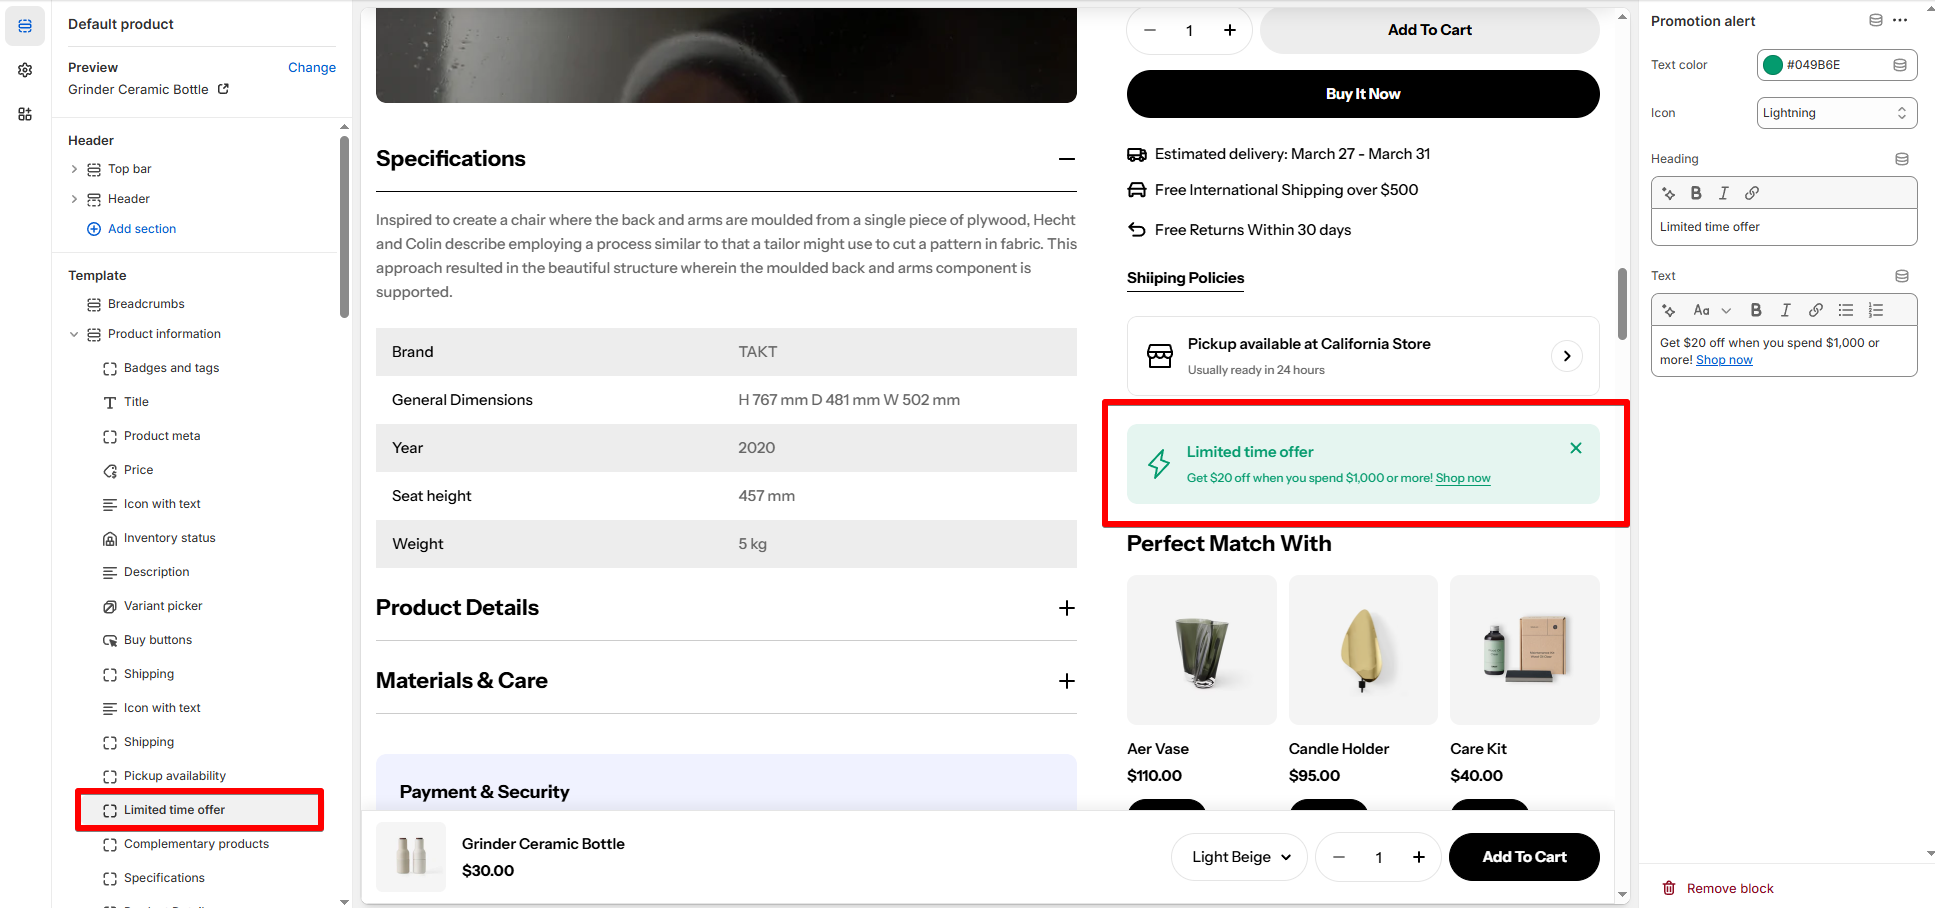 |
| Countdown timer | Add urgency to your product page by displaying a real-time countdown for promotions, limited-time offers, or product availability. There are two types of countdowns: • Evergreen (Repeating daily or at set intervals) • Fixed Time (Ends at a specific date & time). Evergreen settings • Duration: Sets how long the countdown runs before resetting. • Example: Every 12 hours. • Useful for automated, recurring urgency Fixed time settings• Ends time: Defines the exact date & time when the countdown expires. • Format: YYYY/MM/DD HH:MM or YYYY/MM/DD HH:MM AM/PM. • Example: • 2025/08/20 03:45 PM • 2025/08/20 15:45 • Best for limited-time sales or product launches. | 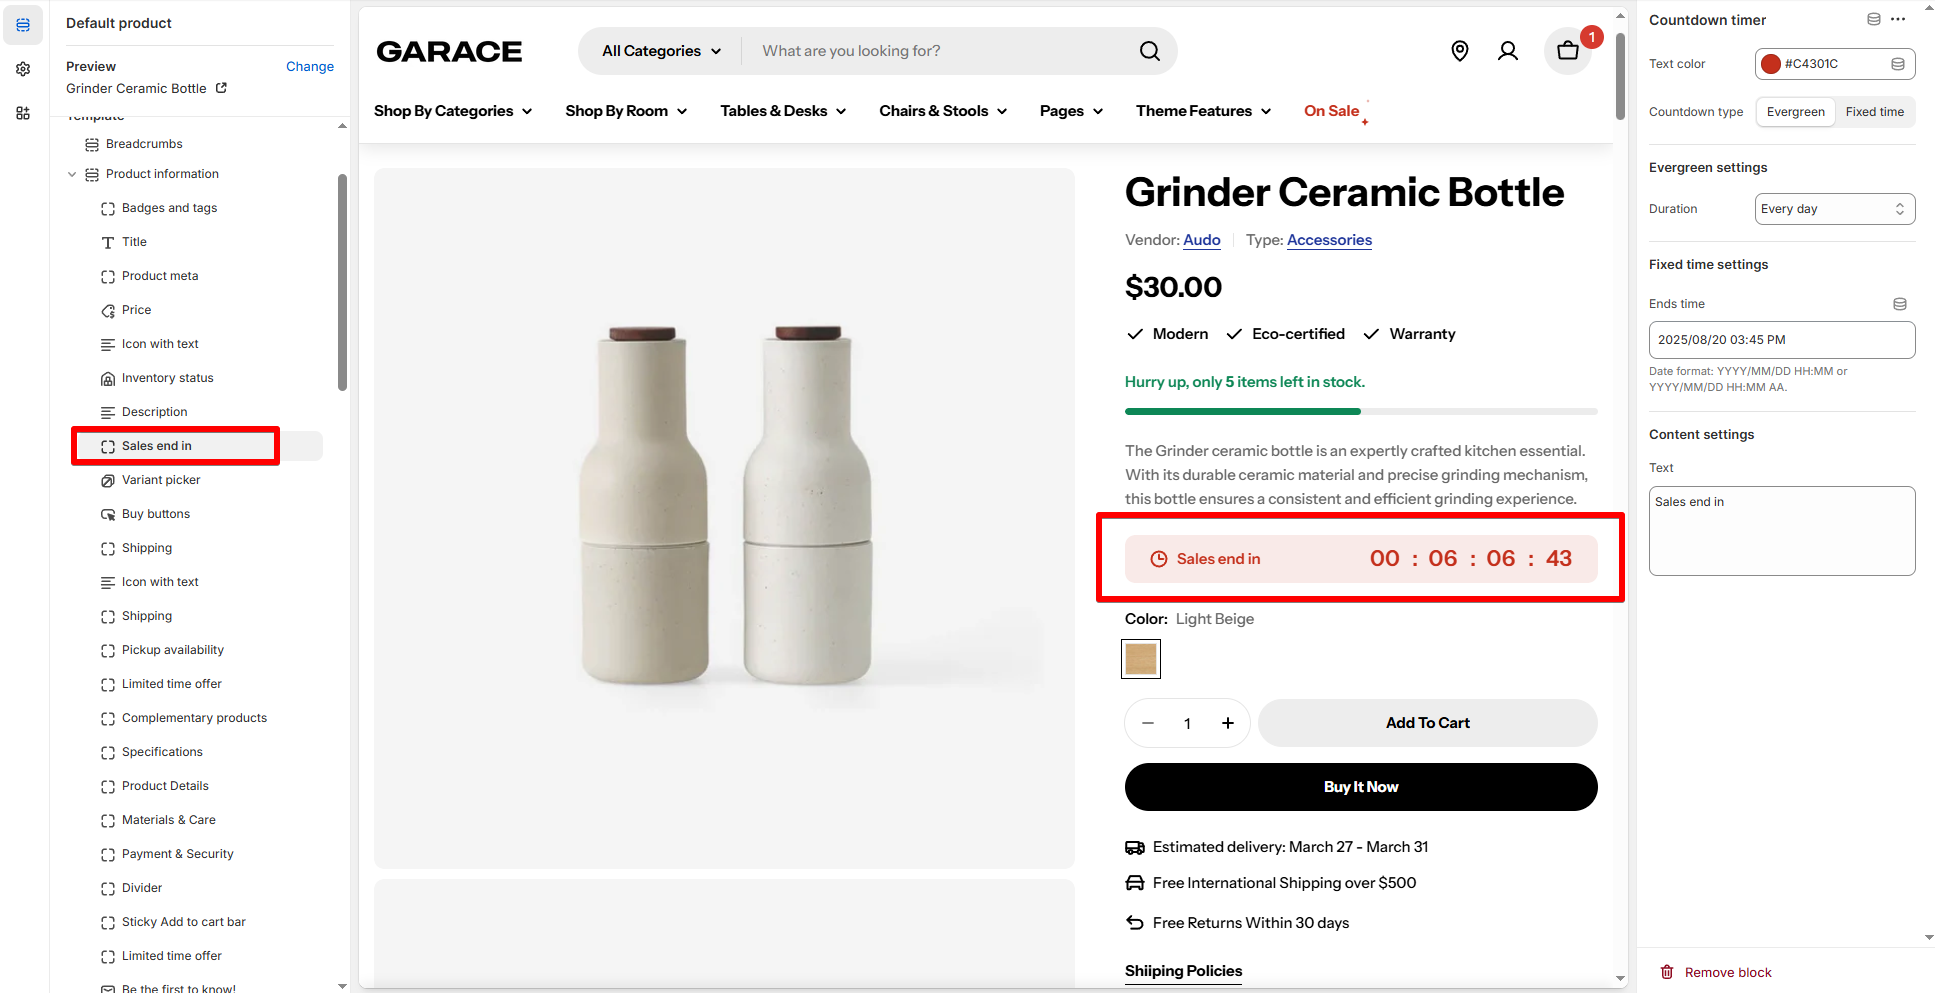 |
| Newsletter | Let customers subscribe to your email list directly from the product page. ✅ Newsletter submissions are saved in Shopify Customers. | 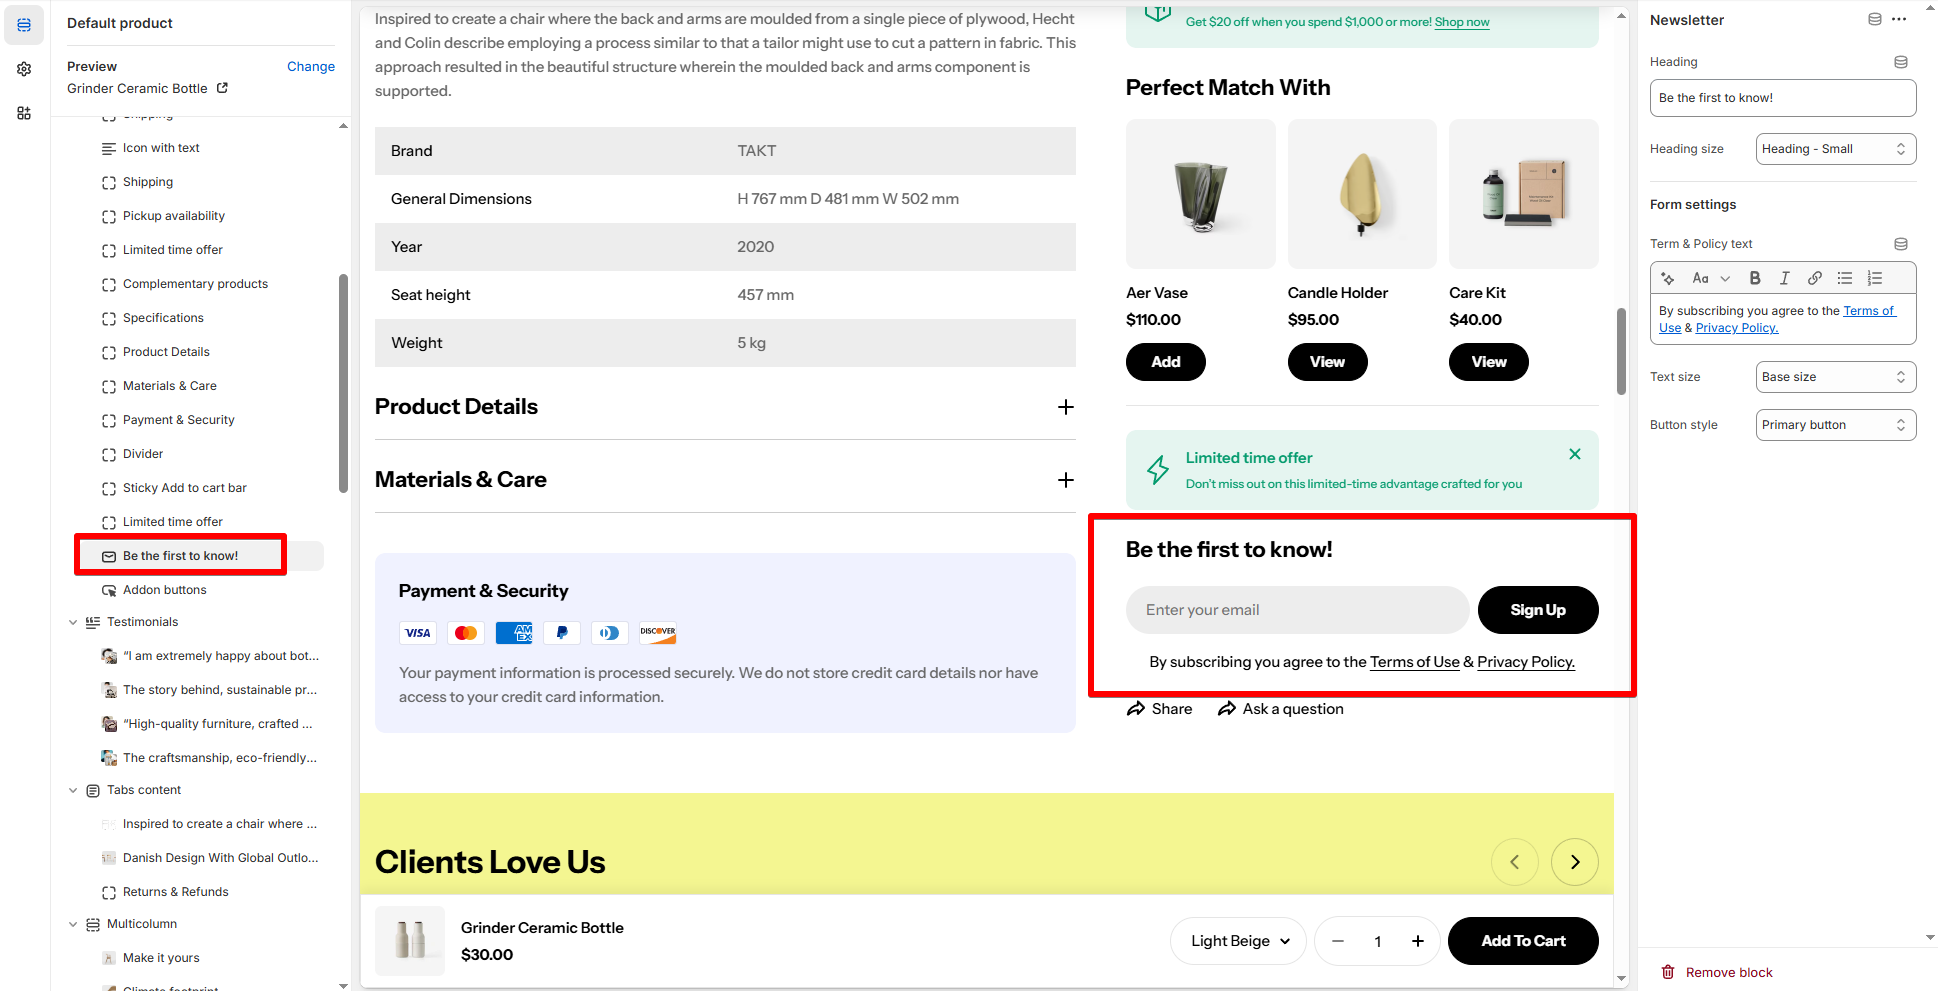 |
| Addon buttons | • Show social sharing: Let customers share the product on Facebook, Twitter, and Pinterest. • Show ask question form: Collect queries from customers on the product.✅ The Ask a question form sends all submissions to the Sender email address of your store. You can change the sender email address in the Store details settings page of your Shopify admin. | 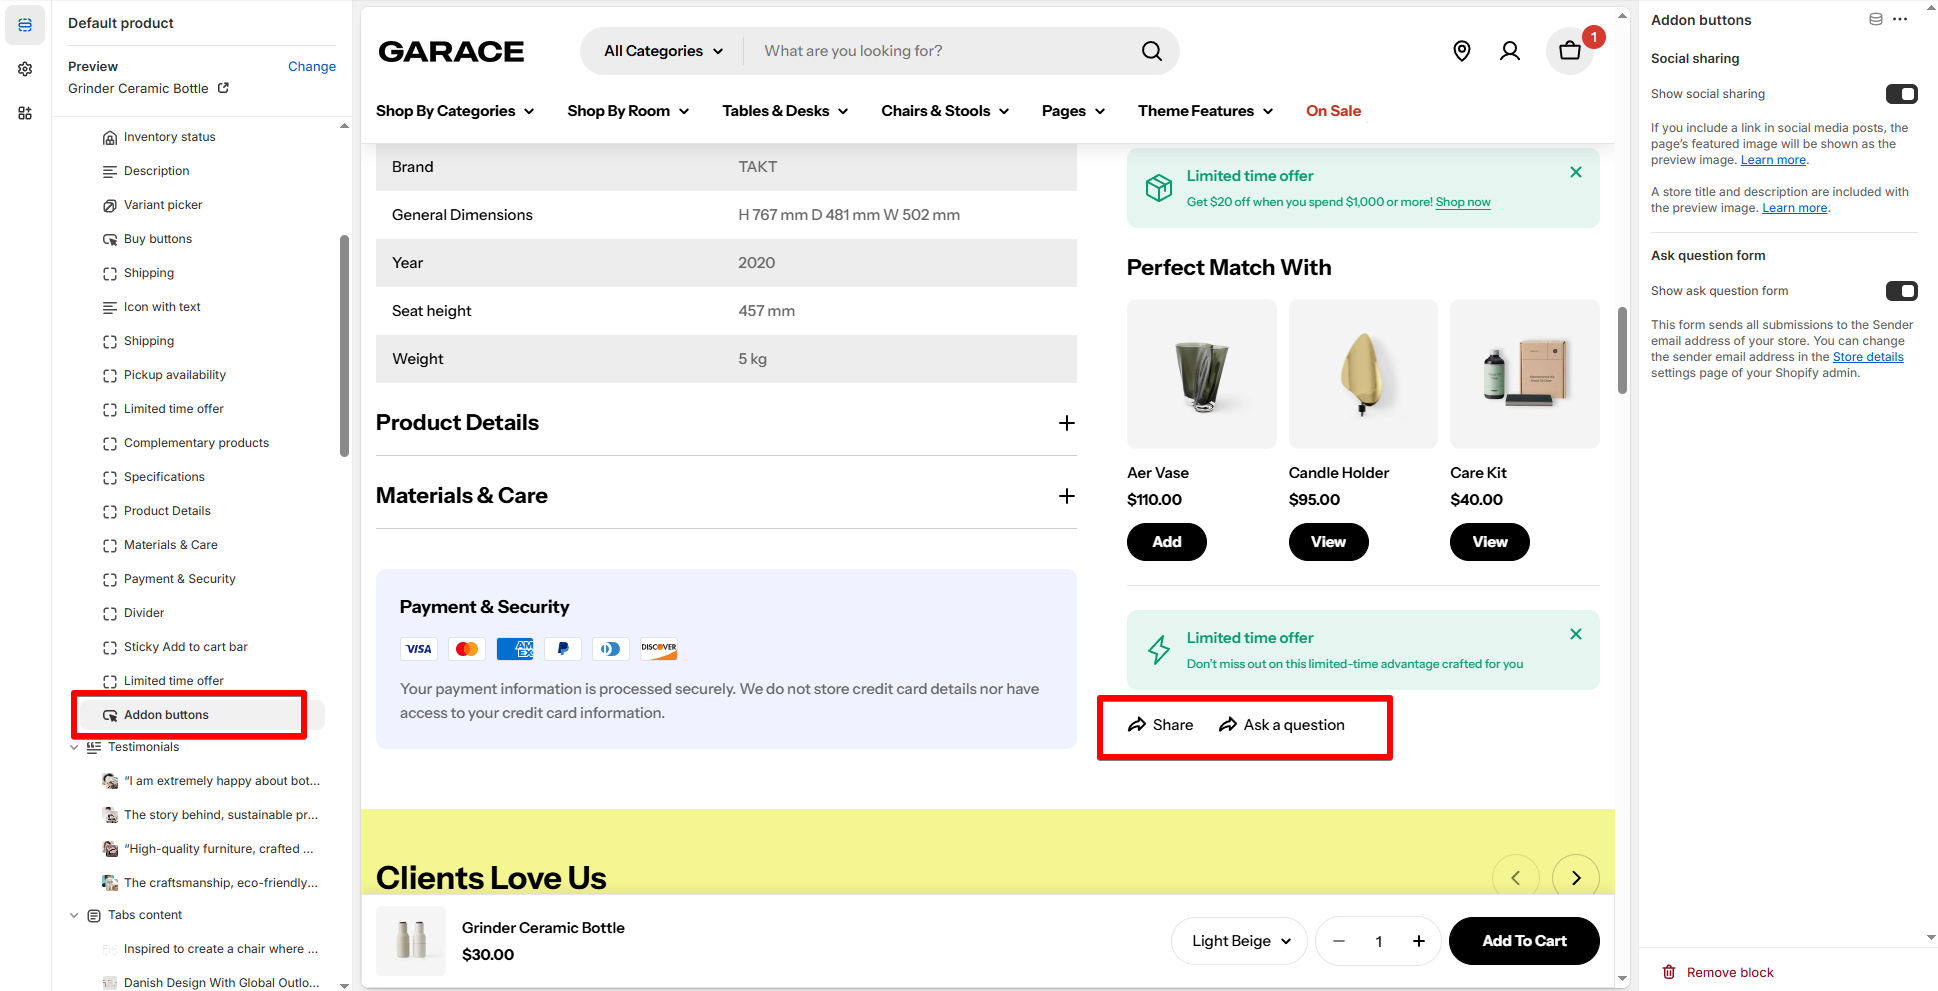 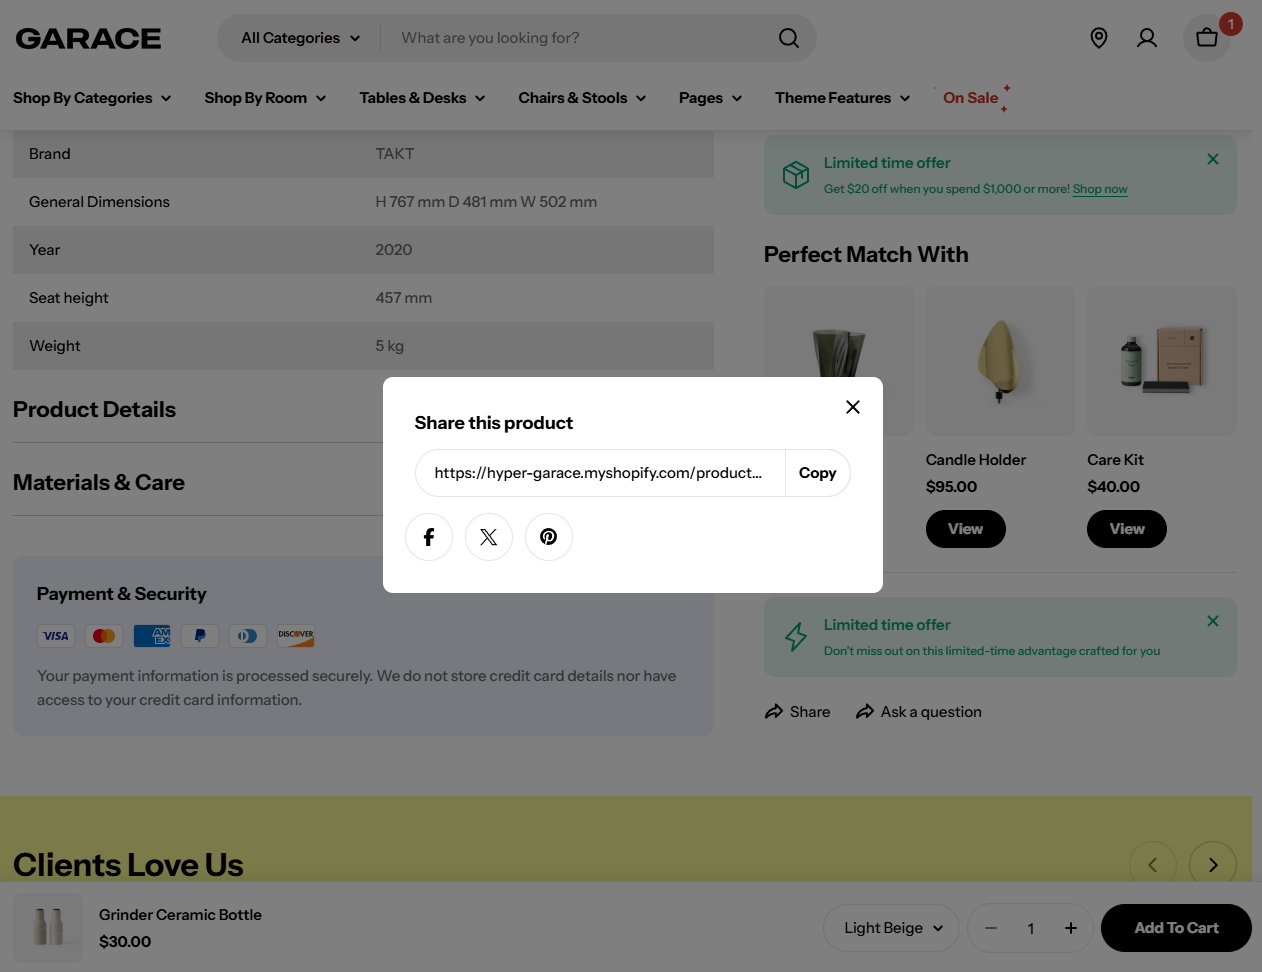 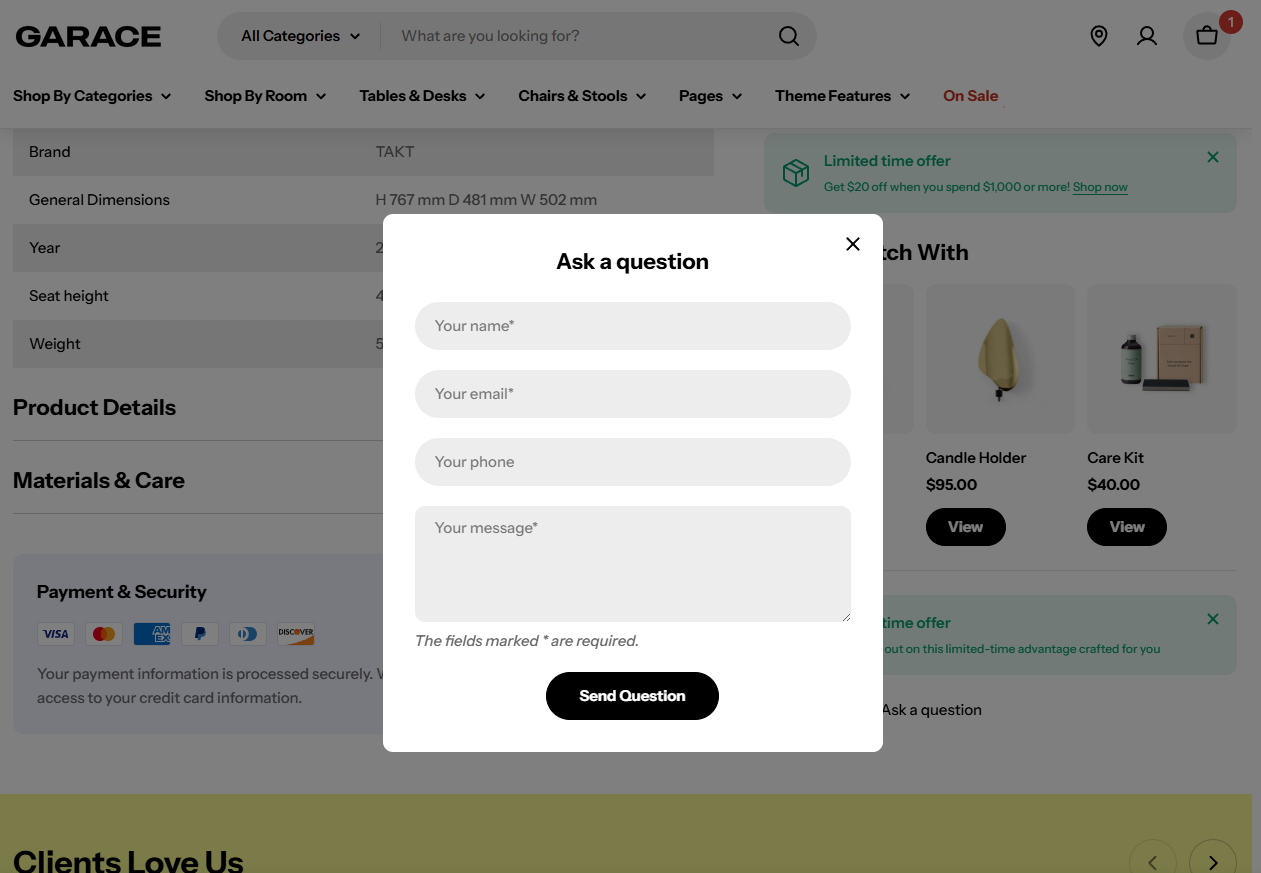 |
| Social sharing | Let customers share the product on Facebook, Twitter, and Pinterest. A store title and description are included with the preview image. Learn more. | 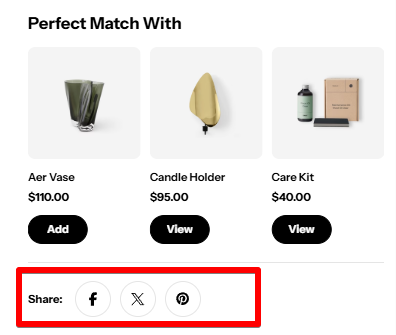 |
| Sticky Add to cart bar | Keep the product’s purchase options visible as customers scroll, making it easier for them to buy without having to scroll back up. 💡 The feature is enabled when the block is added. Choose where the sticky bar appears: • All devices (default) • Mobile only • Desktop only • Hidden.Choose the style of sticky add to cart: • Standard • Minimalist | 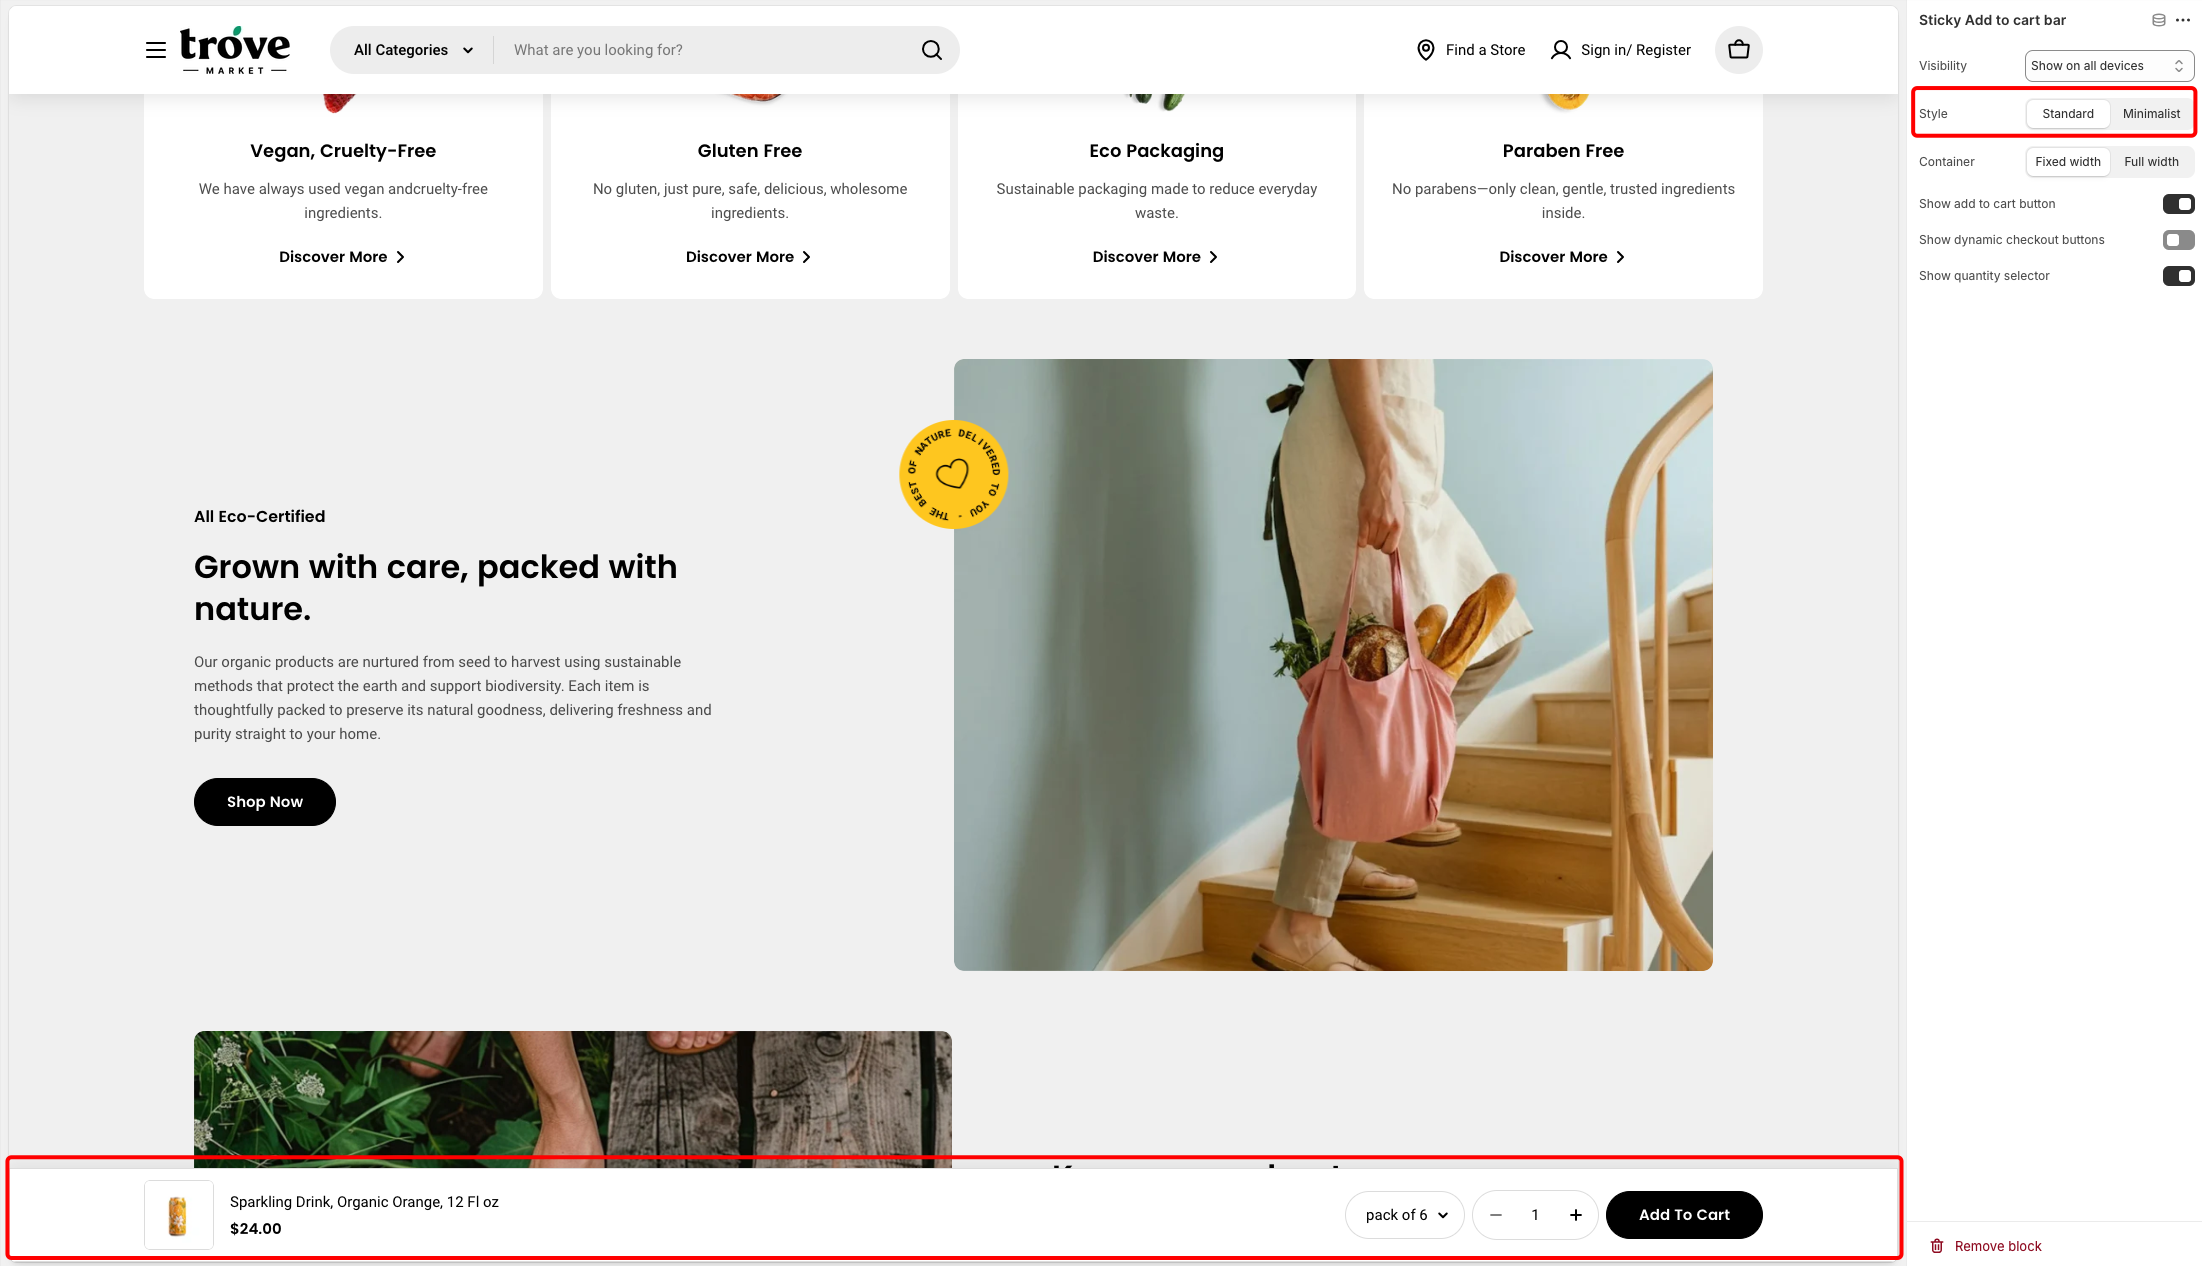 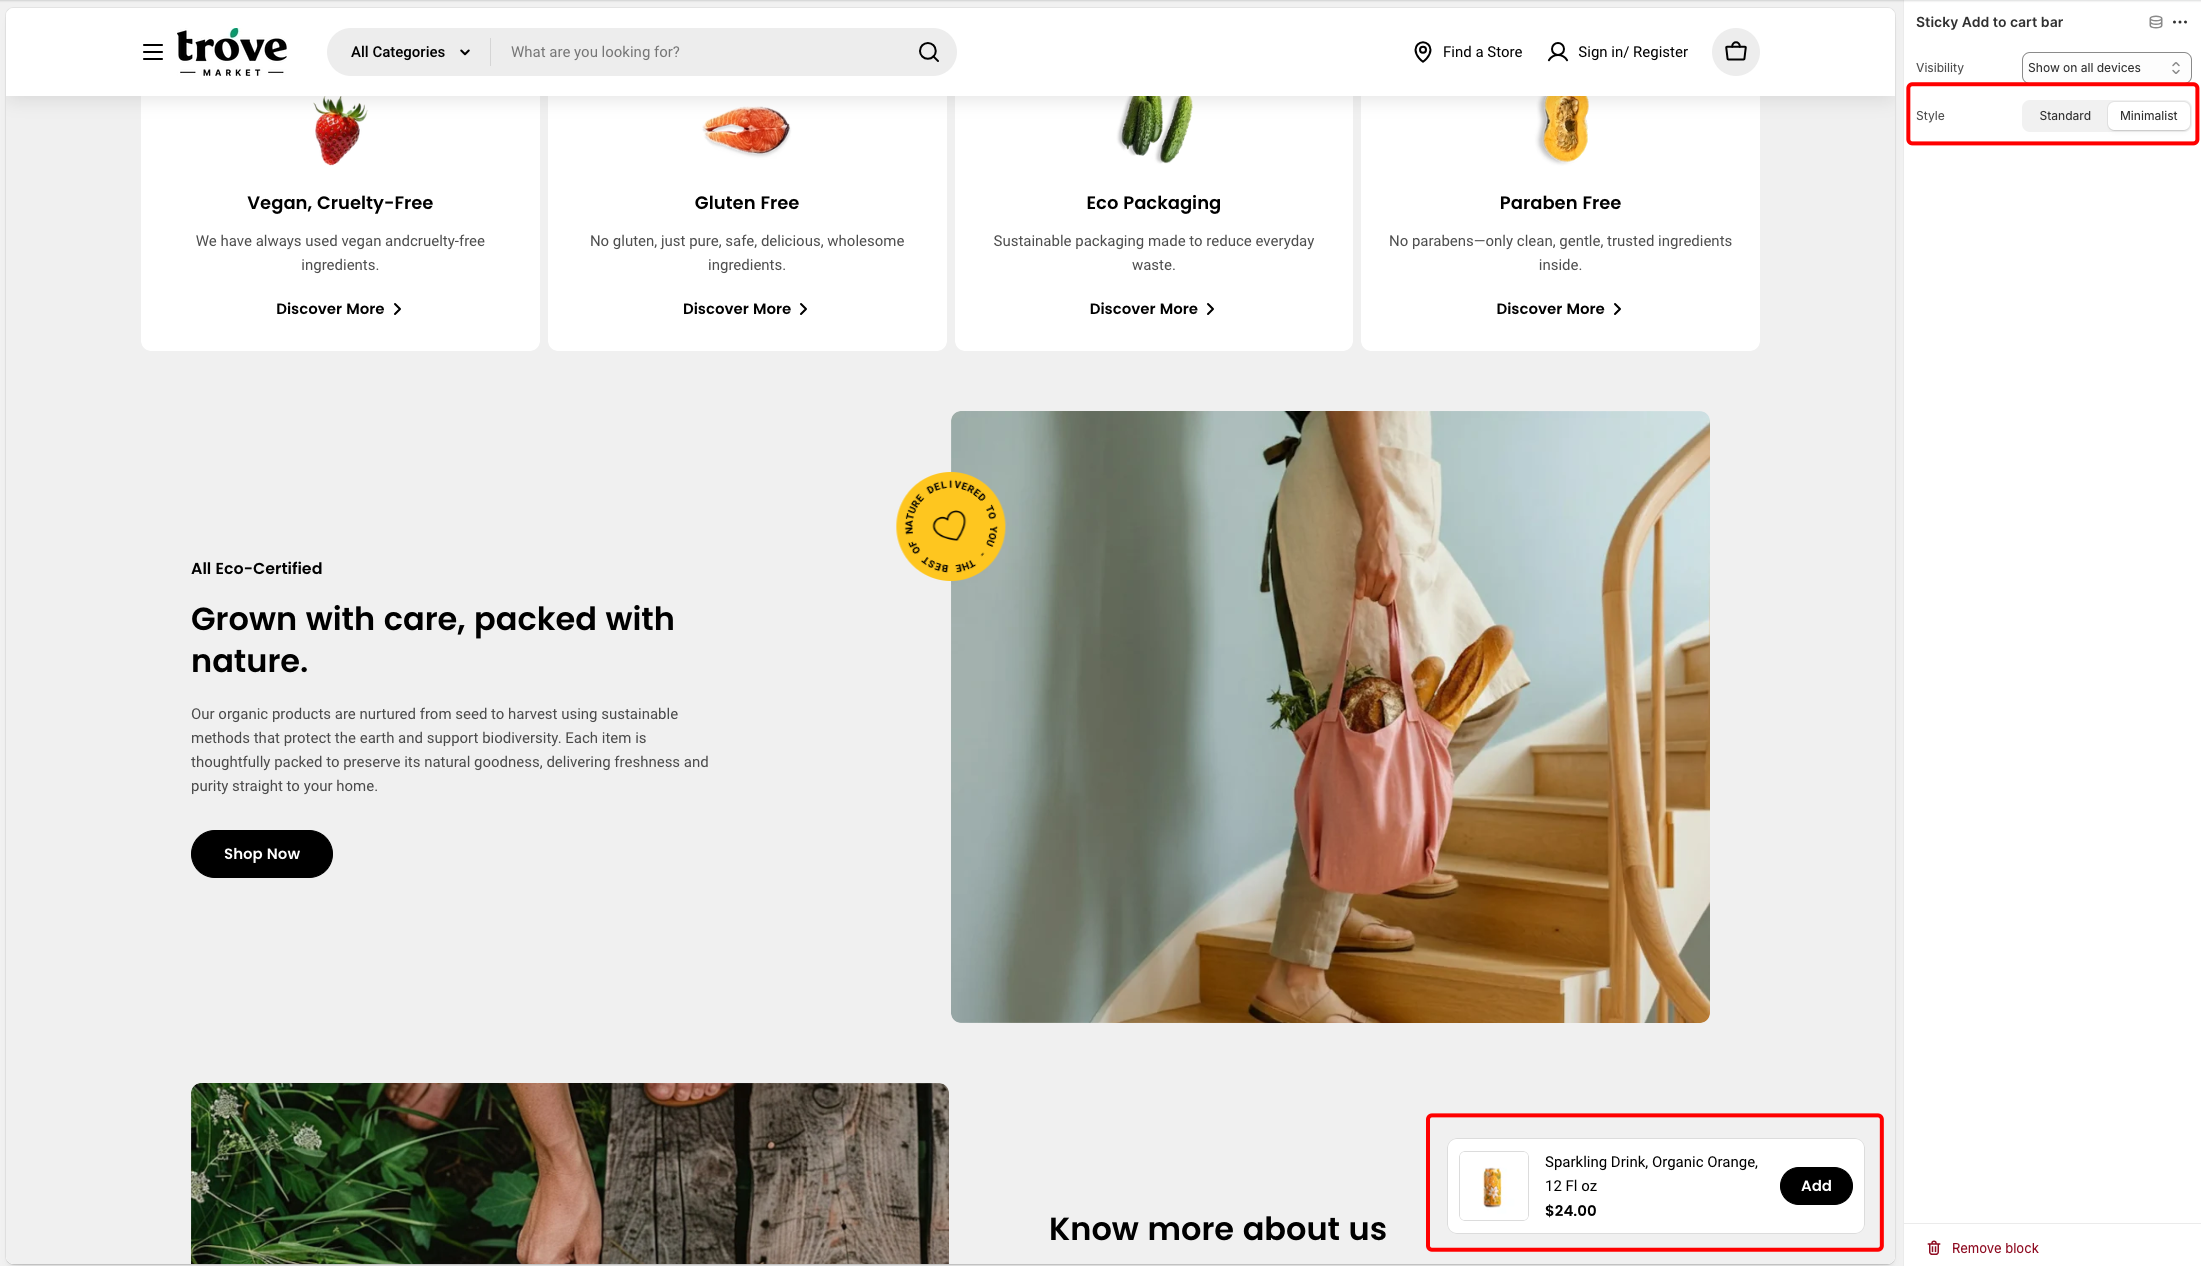 |
| Grid icon box | Display key selling points or value-added services that your store offers. It helps build trust, communicate benefits quickly, and improve the overall customer experience on the product or homepage. • Show below product media: Display below product media on the product page. Grid settings: • Number of columns on desktop: Set how many boxes appear in a row on desktop (2–4) • Column gap: Adjust the horizontal spacing between boxes • Row gap: Adjust the vertical spacing between boxes Mobile layout: • Number of columns on mobile: Set how many boxes appear in a row on mobile (1–3) • Enable swipe on mobile: Activate horizontal scroll behavior for mobile users. Icon box (1-8): • Icon: Select the icon for this box • Heading: Enter the title or label for this box | 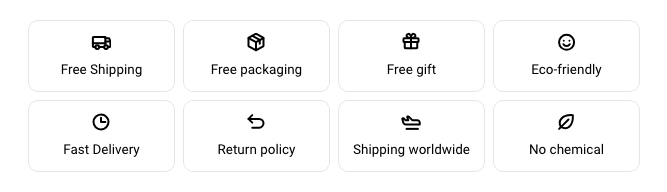 |
Last updated