# Featured blogs

<figure><img src="https://3026705042-files.gitbook.io/~/files/v0/b/gitbook-x-prod.appspot.com/o/spaces%2FAJrvmfqcj9TMoPkl3bNc%2Fuploads%2FpXeAXE0BYCUlWBK4imk1%2FHyper%20docs%20screenshot%20do%20not%20delete%20(18).jpg?alt=media&#x26;token=7342f84d-af85-4fa8-9ef7-c3c902e8d274" alt=""><figcaption></figcaption></figure>

A blog acts as your brand’s direct voice to the outside world. It helps build, reaffirm, and strengthen your brand name online while attracting more traffic to your website.&#x20;

This article will show you how to add and customize your blog posts section in Sleek.

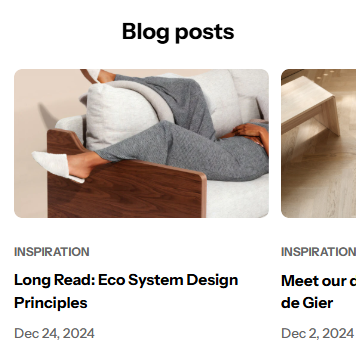
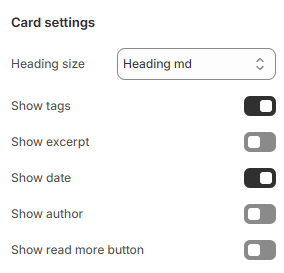
## How to add a Featured blogs section to your Shopify store

{% hint style="success" %}
Steps:

1. In the theme editor **(Customize)**, click the **Add section**
2. Locate **Featured blogs** section
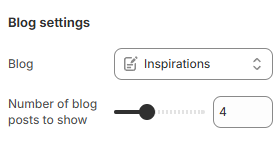
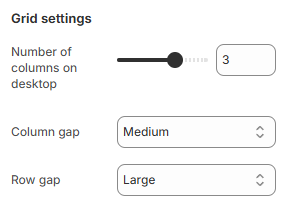
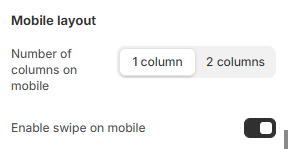
3. Make necessary changes
4. **Save**
   {% endhint %}

To know more about how to add a blog to your online store, see [Blogs](https://help.shopify.com/en/manual/online-store/blogs).

## How to edit a Featured blogs section

### **Section header**

Customize the text and alignment to ensure the sectioneffectively communicates your message and encourages engagement.

<details>

<summary>See settings</summary>

* **Subheading**: Add a short, secondary heading to complement the main heading. This can provide additional context or detail.
* **Heading**: Enter the primary title for your banner.
* **Heading size:** Adjust the size to fit your design preference and ensure readability. Choose from available heading sizes.
* **Description:** Add a detailed explanation or summary for the banner. Use rich text formatting like **bold**, *italic*, links, and lists for better visual emphasis.
* **Description size:** Select the size of the description text.
* **Button label:** Input the text for the call-to-action button.
* **Button link:** Add a link to the button to direct users to a specific page, product, or collection.
* **Button style:** Choose a style for the button.
* **Text alignment:**
  * Align the text in the section to the **Left**, **Center**, or **Right**.
  * Adjust alignment based on your banner’s design and layout.
* **Text alignment on Mobile:** Override desktop alignment settings specifically for mobile devices if needed.

</details>

### **Blog settings**

This section is for adding your preferred blog. You can use the slider to adjust the **Number of blog posts to show** (between 2 and 8).

<figure><img src="https://3026705042-files.gitbook.io/~/files/v0/b/gitbook-x-prod.appspot.com/o/spaces%2FAJrvmfqcj9TMoPkl3bNc%2Fuploads%2F3yxmB08Atn6LeoZ0p9RM%2Fimage.png?alt=media&#x26;token=5dcf44db-ec0c-4862-9f0f-72fc197465da" alt=""><figcaption></figcaption></figure>

### **Grid settings**

Use the slider to adjust the **Number of columns on desktop** (between 1 and 4).

You can also modify the **Column gap** and **Row gap** of the blog list.

<figure><img src="https://3026705042-files.gitbook.io/~/files/v0/b/gitbook-x-prod.appspot.com/o/spaces%2FAJrvmfqcj9TMoPkl3bNc%2Fuploads%2FKkyVft5d2JeaLyaWLdhG%2Fimage.png?alt=media&#x26;token=bcccdd4b-90be-40da-8ea9-a3bc23b46dda" alt=""><figcaption></figcaption></figure>

### **Mobile layout**

You can adjust the **Number of columns on mobile** to **1 column** or **2 columns.**

<figure><img src="https://3026705042-files.gitbook.io/~/files/v0/b/gitbook-x-prod.appspot.com/o/spaces%2FAJrvmfqcj9TMoPkl3bNc%2Fuploads%2Fop1PGgyvJbH7vXYA6xku%2Fimage.png?alt=media&#x26;token=de8bda89-1bb0-4477-b2ad-337965ece18a" alt=""><figcaption></figcaption></figure>

If you are not into the grid layout, you can use the carousel layout by selecting the **Enable swipe on mobile**.

<figure><img src="https://3026705042-files.gitbook.io/~/files/v0/b/gitbook-x-prod.appspot.com/o/spaces%2FAJrvmfqcj9TMoPkl3bNc%2Fuploads%2Fe6cOVK0wZbgnte2SSbTj%2Fimage.png?alt=media&#x26;token=0e8b665f-24d6-4074-afac-721db040cccd" alt=""><figcaption></figcaption></figure>

### **Card settings**

Change the **Heading size** of the card. Furthermore, you can also enable/disable the card elements if needed:

* **Show tags**: Display the blog tags. See [how to add tags](https://help.shopify.com/en/manual/shopify-admin/productivity-tools/using-tags).
* **Show excerpt**: Display a short summary of the post.
* **Show date**: Display the date that the blog is issued.
* **Show author**: Display the author name.
* **Show read more button**: Lead the customers to the full blog post.

<figure><img src="https://3026705042-files.gitbook.io/~/files/v0/b/gitbook-x-prod.appspot.com/o/spaces%2FAJrvmfqcj9TMoPkl3bNc%2Fuploads%2F73gnPjMOV0E95vqweokg%2Fimage.png?alt=media&#x26;token=aabf84bd-f6ef-4d26-9865-dab268b984a6" alt=""><figcaption></figcaption></figure>

{% hint style="info" %}
To change the **Image ratio** of the blog posts, go to **Theme settings > Blog cards**.
{% endhint %}

{% content-ref url="../theme-settings/blog-cards" %}
[blog-cards](https://docs.foxecom.com/hyper-theme/theme-settings/blog-cards)
{% endcontent-ref %}

***

<figure><img src="https://3026705042-files.gitbook.io/~/files/v0/b/gitbook-x-prod.appspot.com/o/spaces%2FAJrvmfqcj9TMoPkl3bNc%2Fuploads%2FkUIzEsJKOeRiz891zyf5%2Flivechat883x471%20(1).png?alt=media&#x26;token=90cbed2c-e791-49c8-9f43-49a08bed6f1f" alt=""><figcaption><p><a href="https://apps.shopify.com/xflow?utm_source=foxecom&#x26;utm_medium=help_center_hyper&#x26;utm_campaign=banner">Install XFlow Back In Stock Automation FREE</a></p></figcaption></figure>
