
Theme Sections
Products bundle selection 🔥
4 min read
See: Changelog
_SbRqnb6A.jpg)
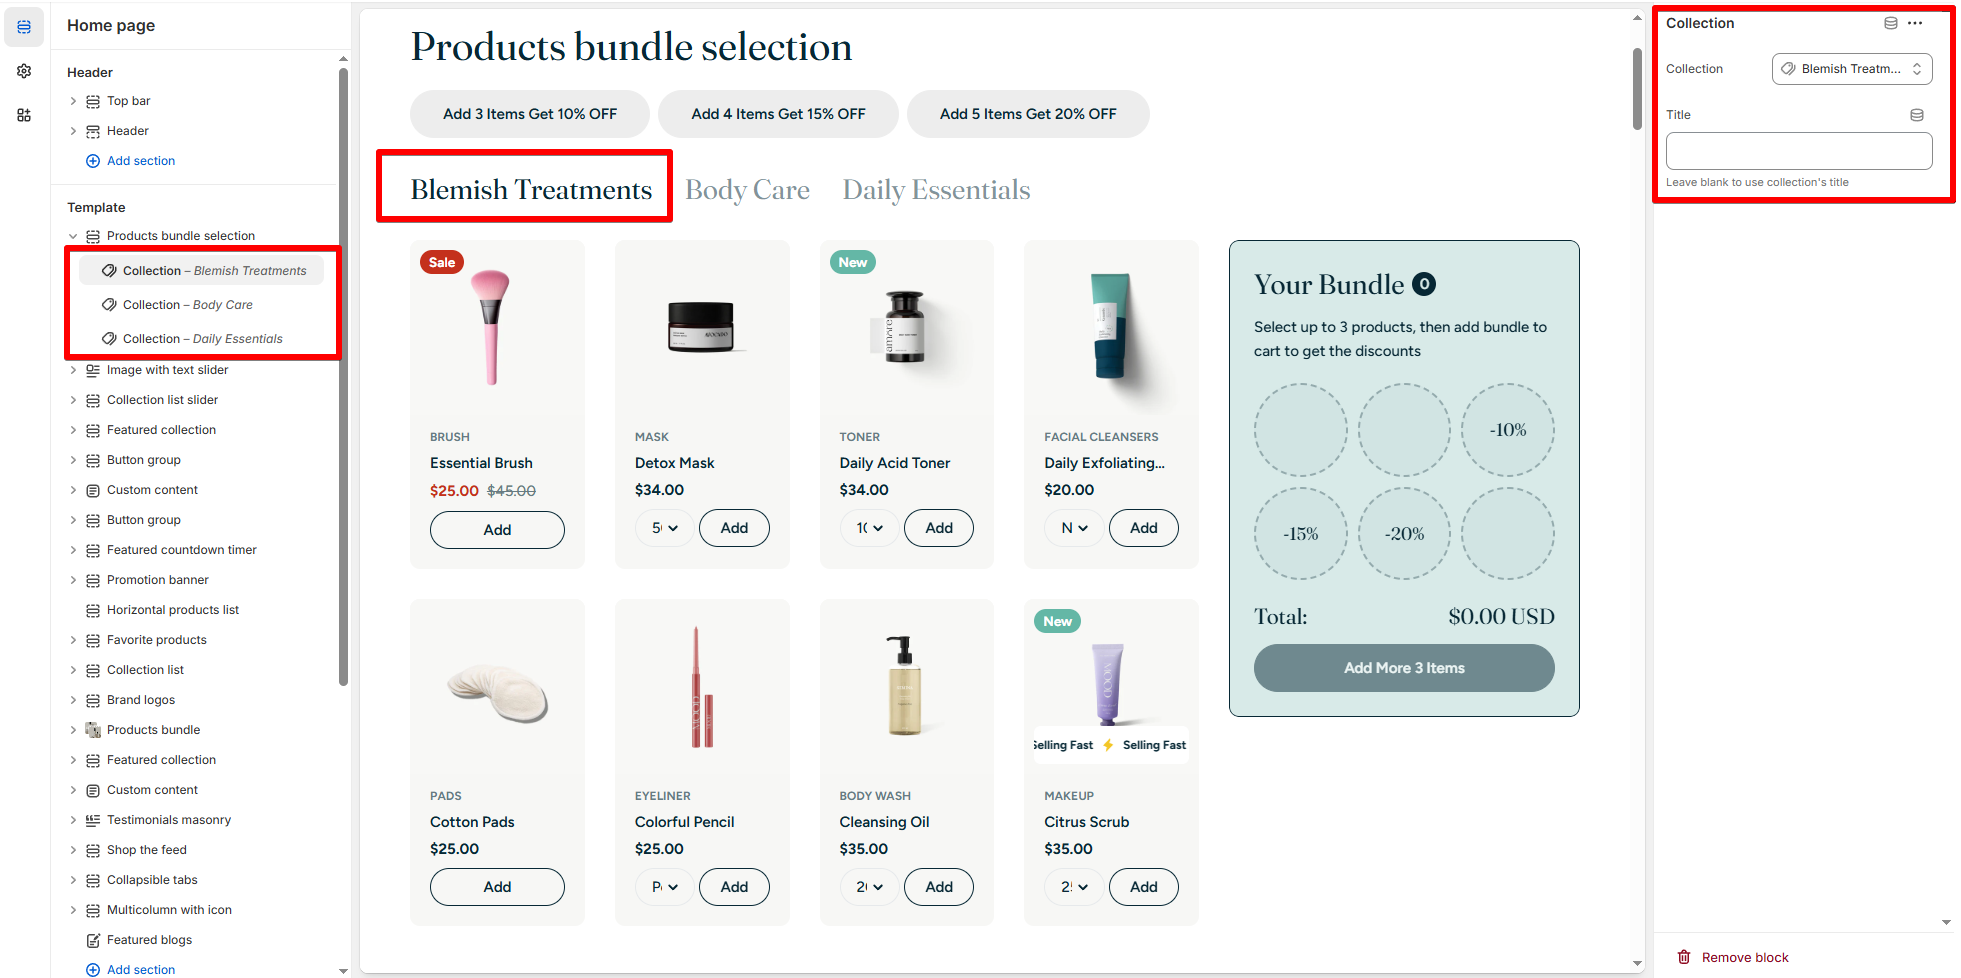
How to add a Products bundle selection section to your Shopify store
- In the theme editor (Customize) > click Add section
- Select Products bundle selection.
- Make necessary changes.
- Save.
How to edit a Products bundle selection section
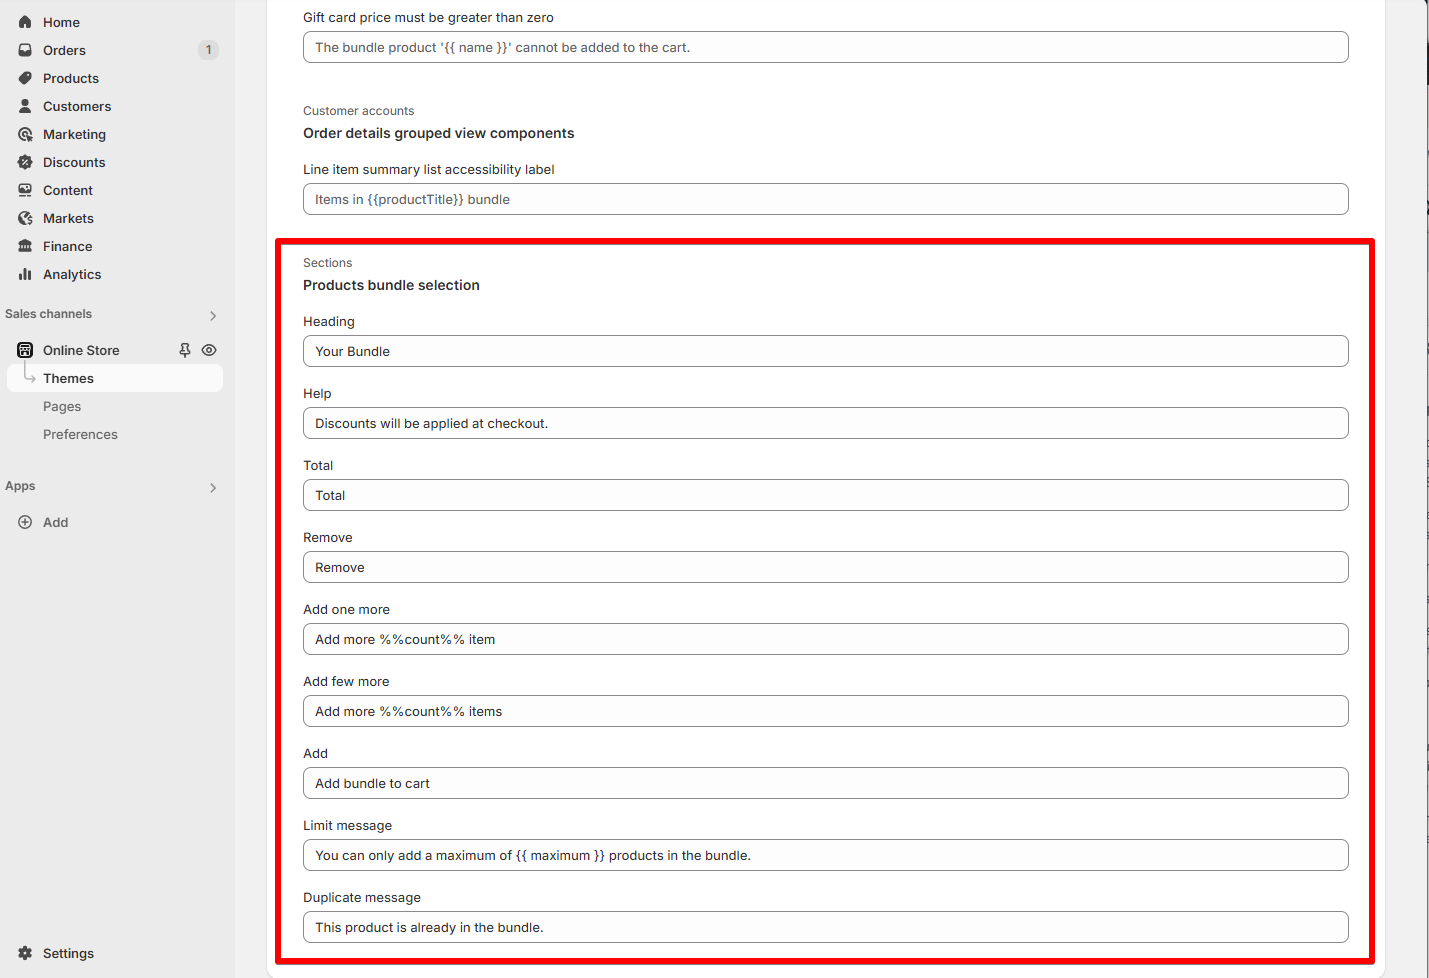
Section settings
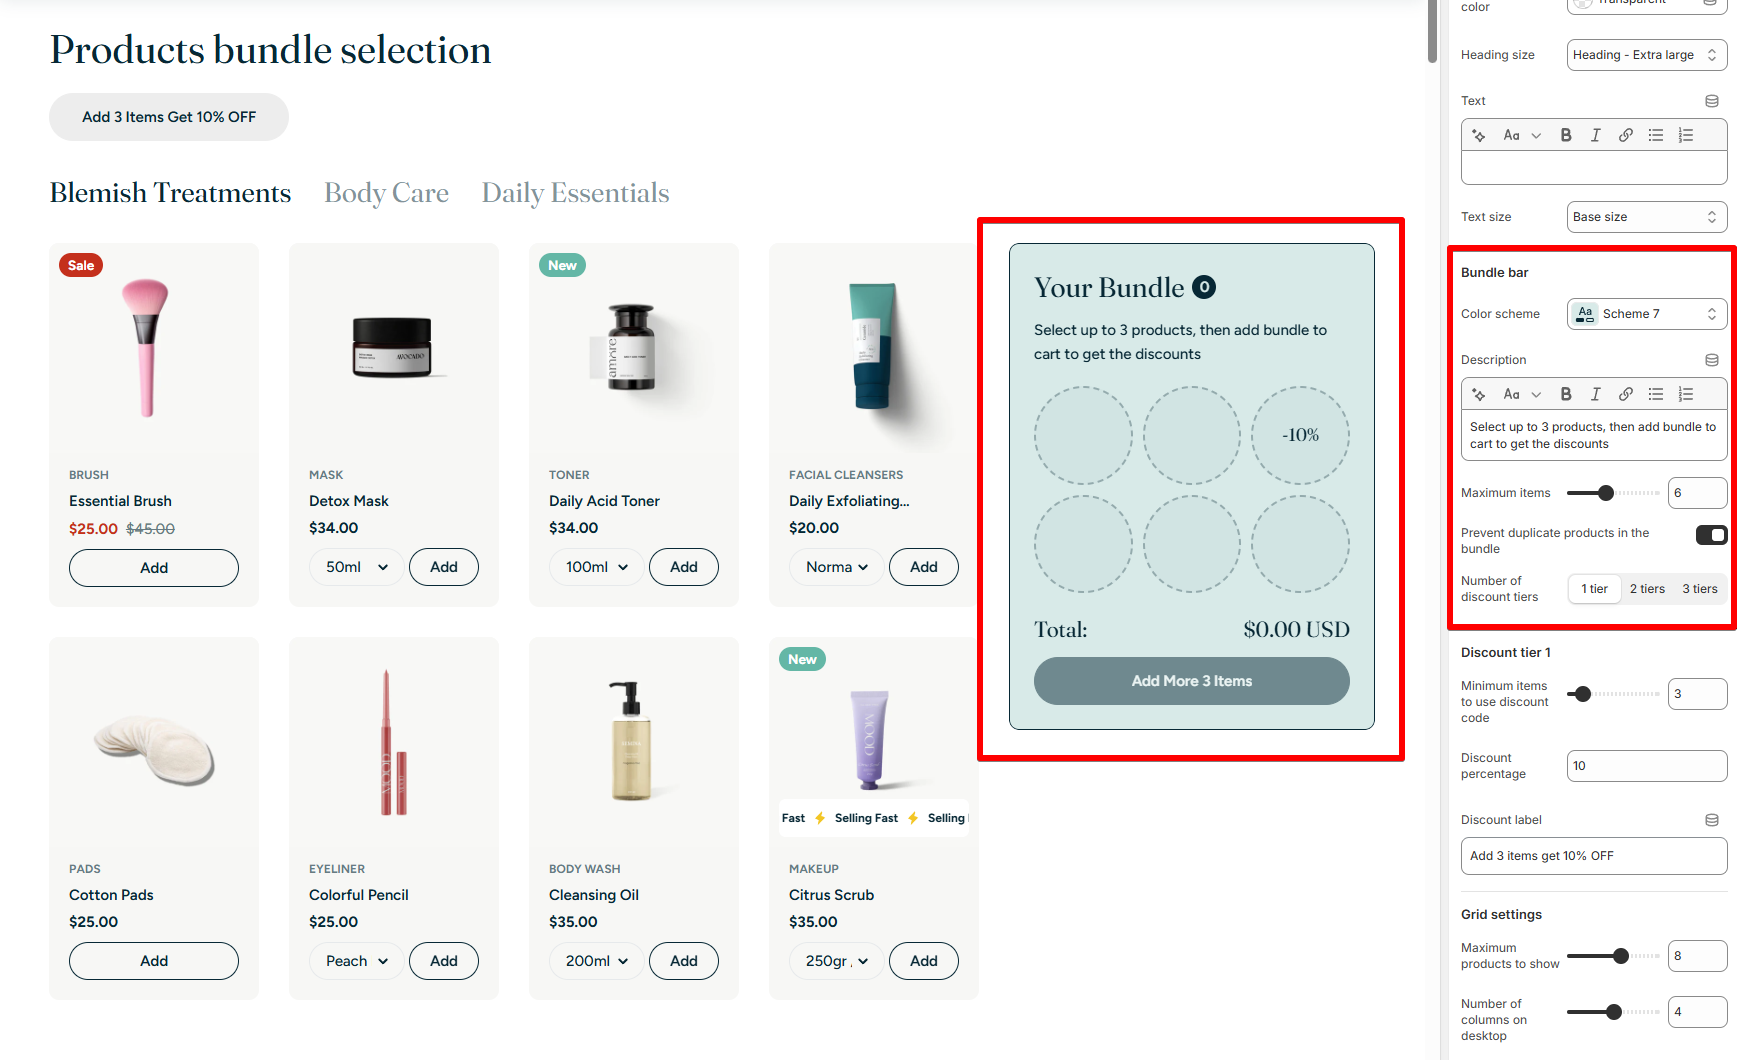
- Description: Customize instructional text.
- Maximum items: Set the max number of products users can bundle (up to 6).
- Prevent duplicate products: Toggle ON to disallow adding the same item multiple times.
- Number of discount tiers: Choose
1 tier,2 tiers, or3 tiersfor scaling offers.
- Minimum items to use discount code
- Discount percentage
- Custom label (e.g., “Add 3 to get 10% OFF”)
- Tier 1: Add 3 items → get 10% off
- Tier 2: Add 5 items → get 15% off
- Tier 3: Add 6 items → get 20% off

- Maximum products to show: Limit the number of products shown per collection tab.
- Number of columns on desktop: Set the grid layout (e.g., 4 columns).
- Column gap and Row gap: Adjust spacing between items.
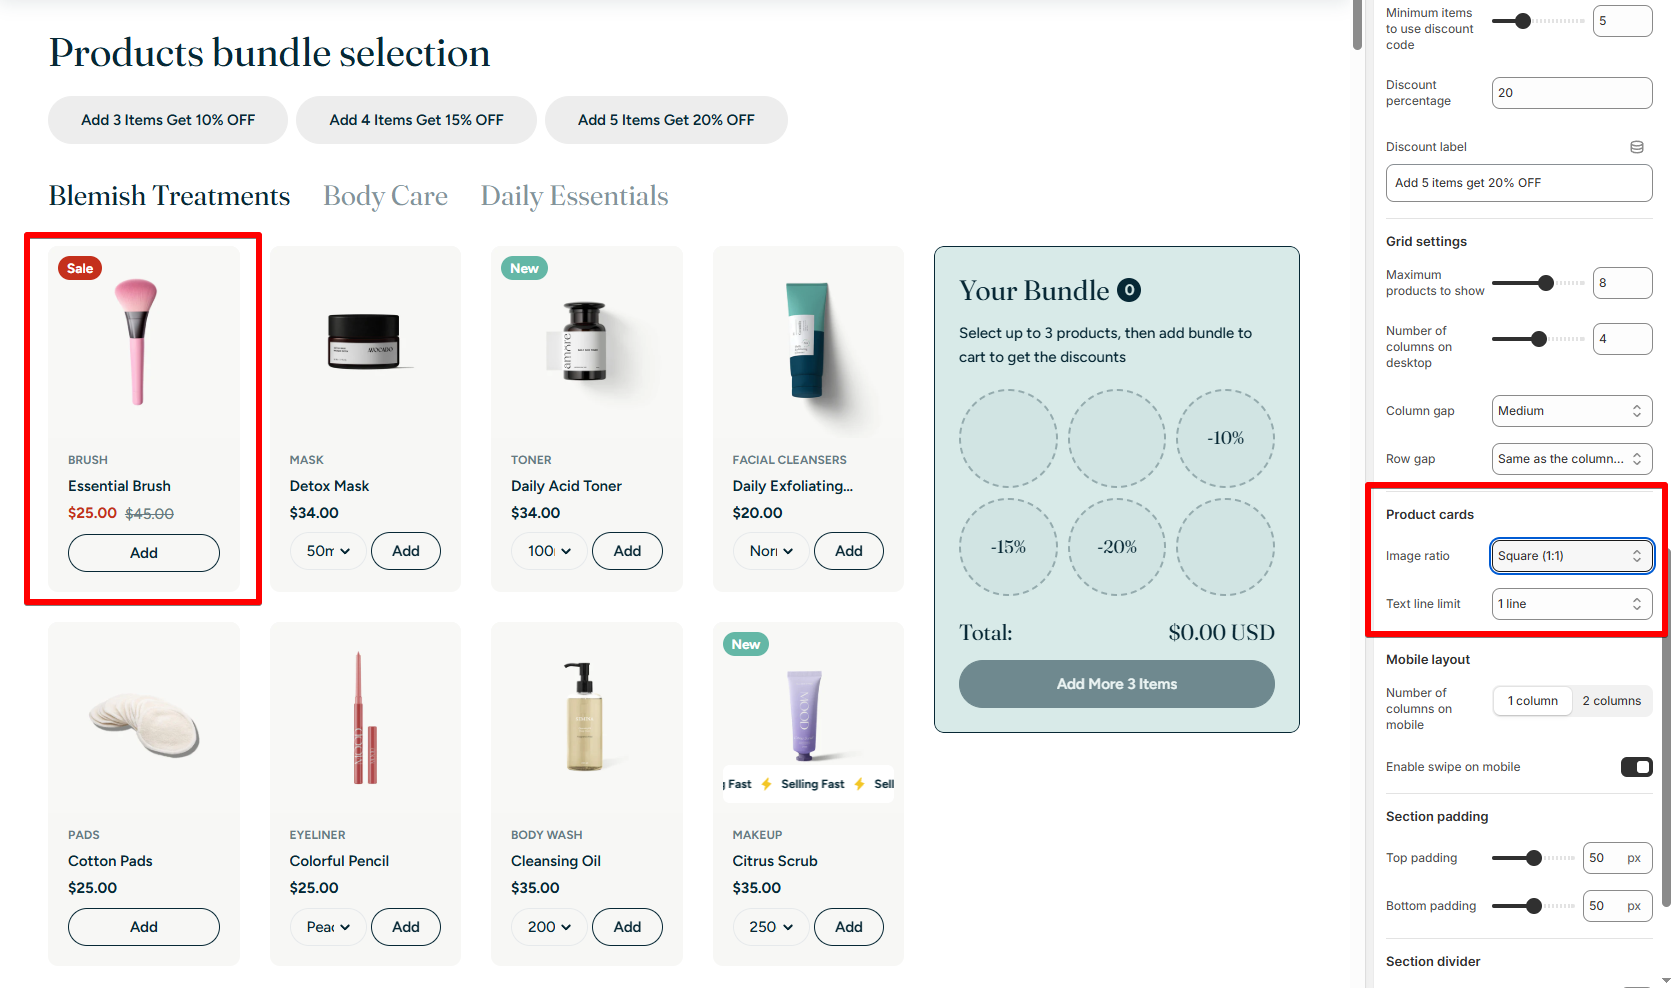
- Image ratio: Choose a custom image ratio for the product cards in this section or use the global setting.
- Text line limit: Define how many lines of product title to display.
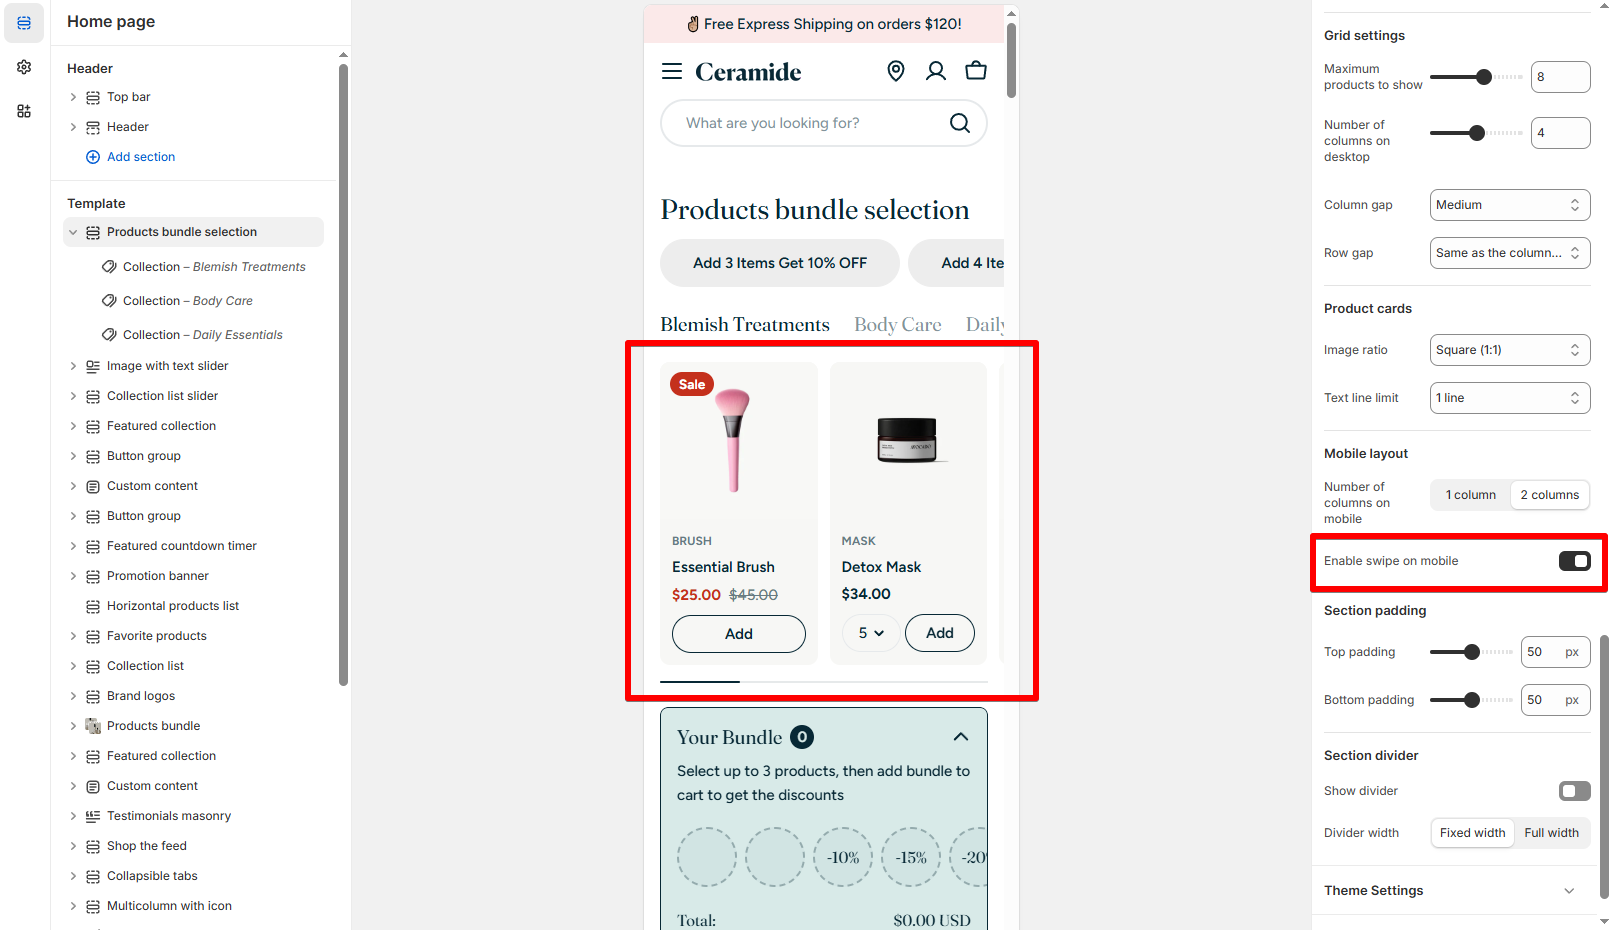
- Number of columns on mobile: Choose 1 or 2 product cards per row.

- Enable swipe on mobile: Toggle ON to allow horizontal swiping for a smoother user experience.

Block settings
- Collection: Choose the specific collection you want to feature.
- Title: Optional override for the tab name. Leave blank to use the collection’s default title.
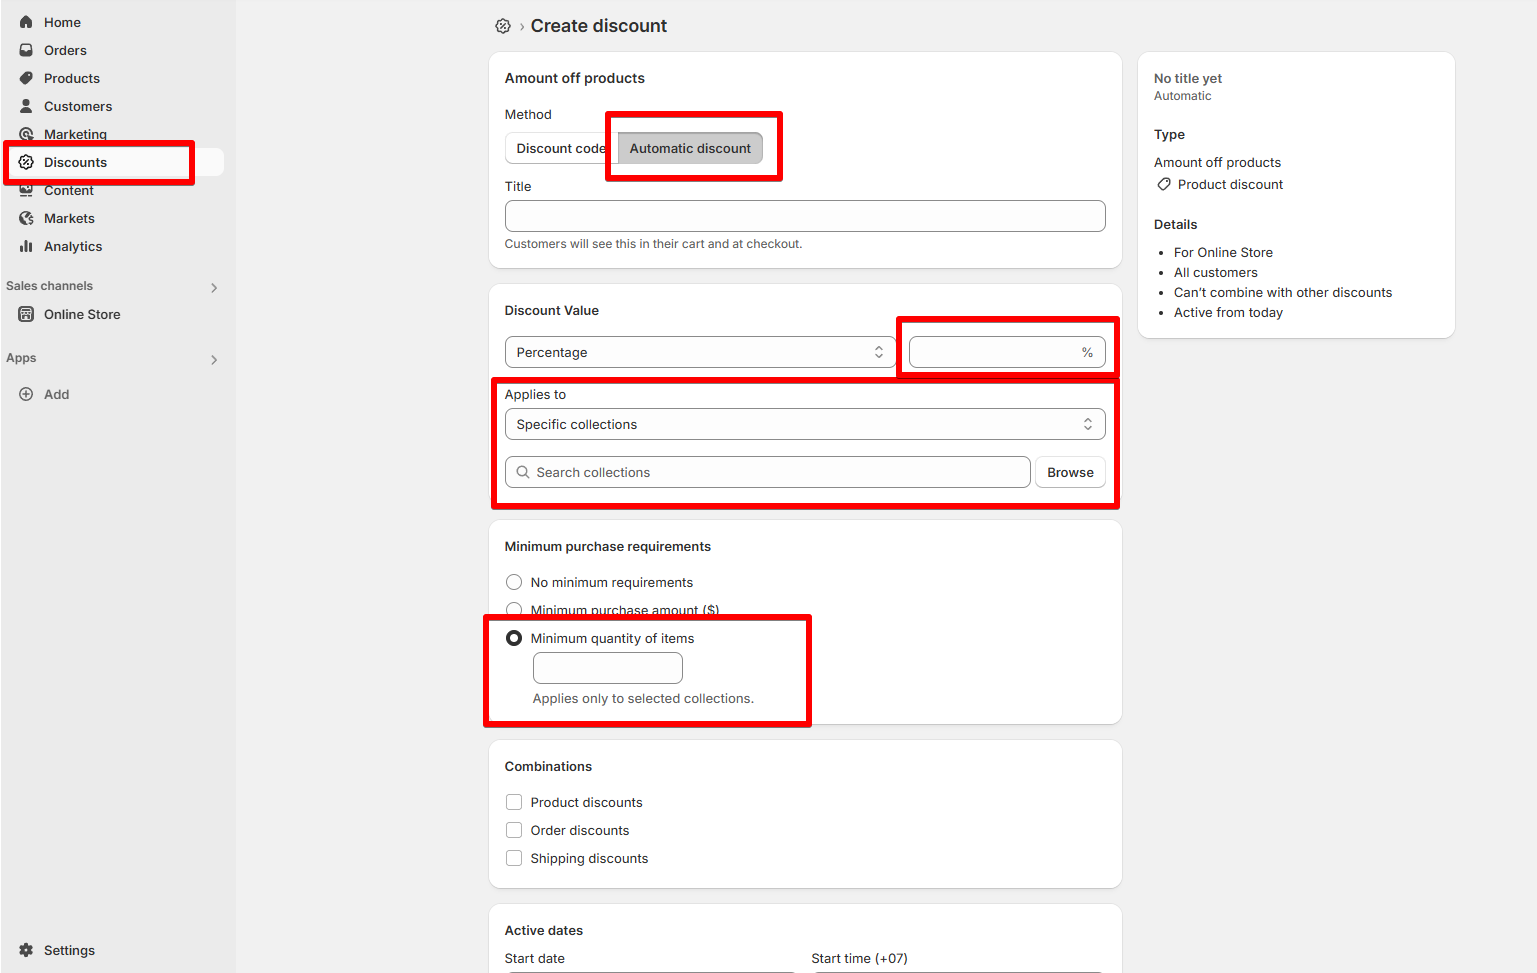
📌 How to set up the discount
Create the discount in Shopify admin:
- Go to Shopify Admin > Discounts
- Click Create Discount
- Choose:
- Type:
Amount off products - Method:
Automatic discount
- Type:
- Set Discount value: e.g., 10%
- Under Applies to, select Specific collections → Choose collections used in the section.
- Set Minimum quantity of items: Match the tier settings (e.g., 3 items minimum).
- Do the same with other discount if you offer different discount tiers.
Last updated