
Theme Sections
Layered images with text 🔥
3 min read
_aNtIaibL.jpg)
How to add a Layered images with text section to your Shopify store
- In the theme editor (Customize), click Add section.
- Locate Layered images with text section.
- Make necessary changes.
- Save.
How to edit a Layered images with text section
Section settings
Section header

Block settings
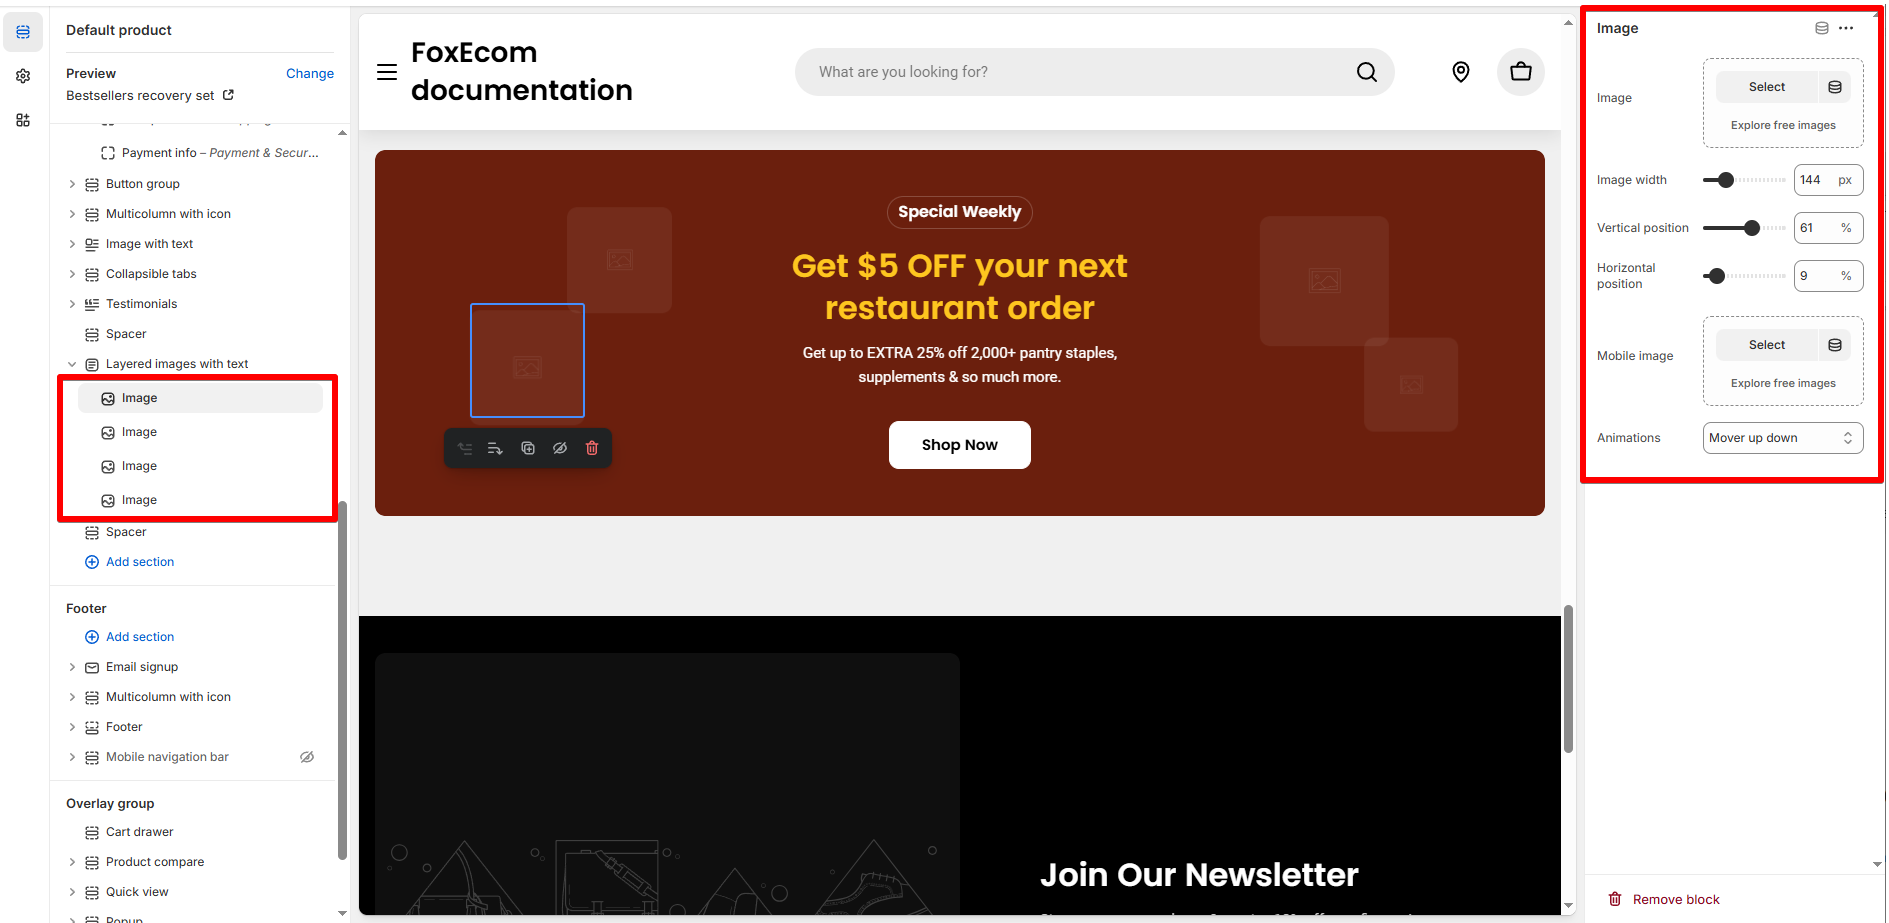
- Image upload: Upload or select an image to showcase. This is the main visual element that will be layered within the section.
- Image width: Control the width of the image in pixels to fit your design preferences.
- Vertical position: Move the image up or down relative to the container.
- Horizontal position: Move the image left or right within the container.
- Mobile image: Upload an alternative image to be displayed on mobile devices for optimal responsiveness and layout control.
- Animations: Add dynamic effects to your image.
- None: The image remains static and does not animate.
- Move up down: The image will move vertically up and down, creating a subtle and engaging animation effect.
- Move up down reverse: This effect reverses the vertical movement, making the image move up and down in a contrasting direction for a unique animation style.
Last updated