# Color swatches
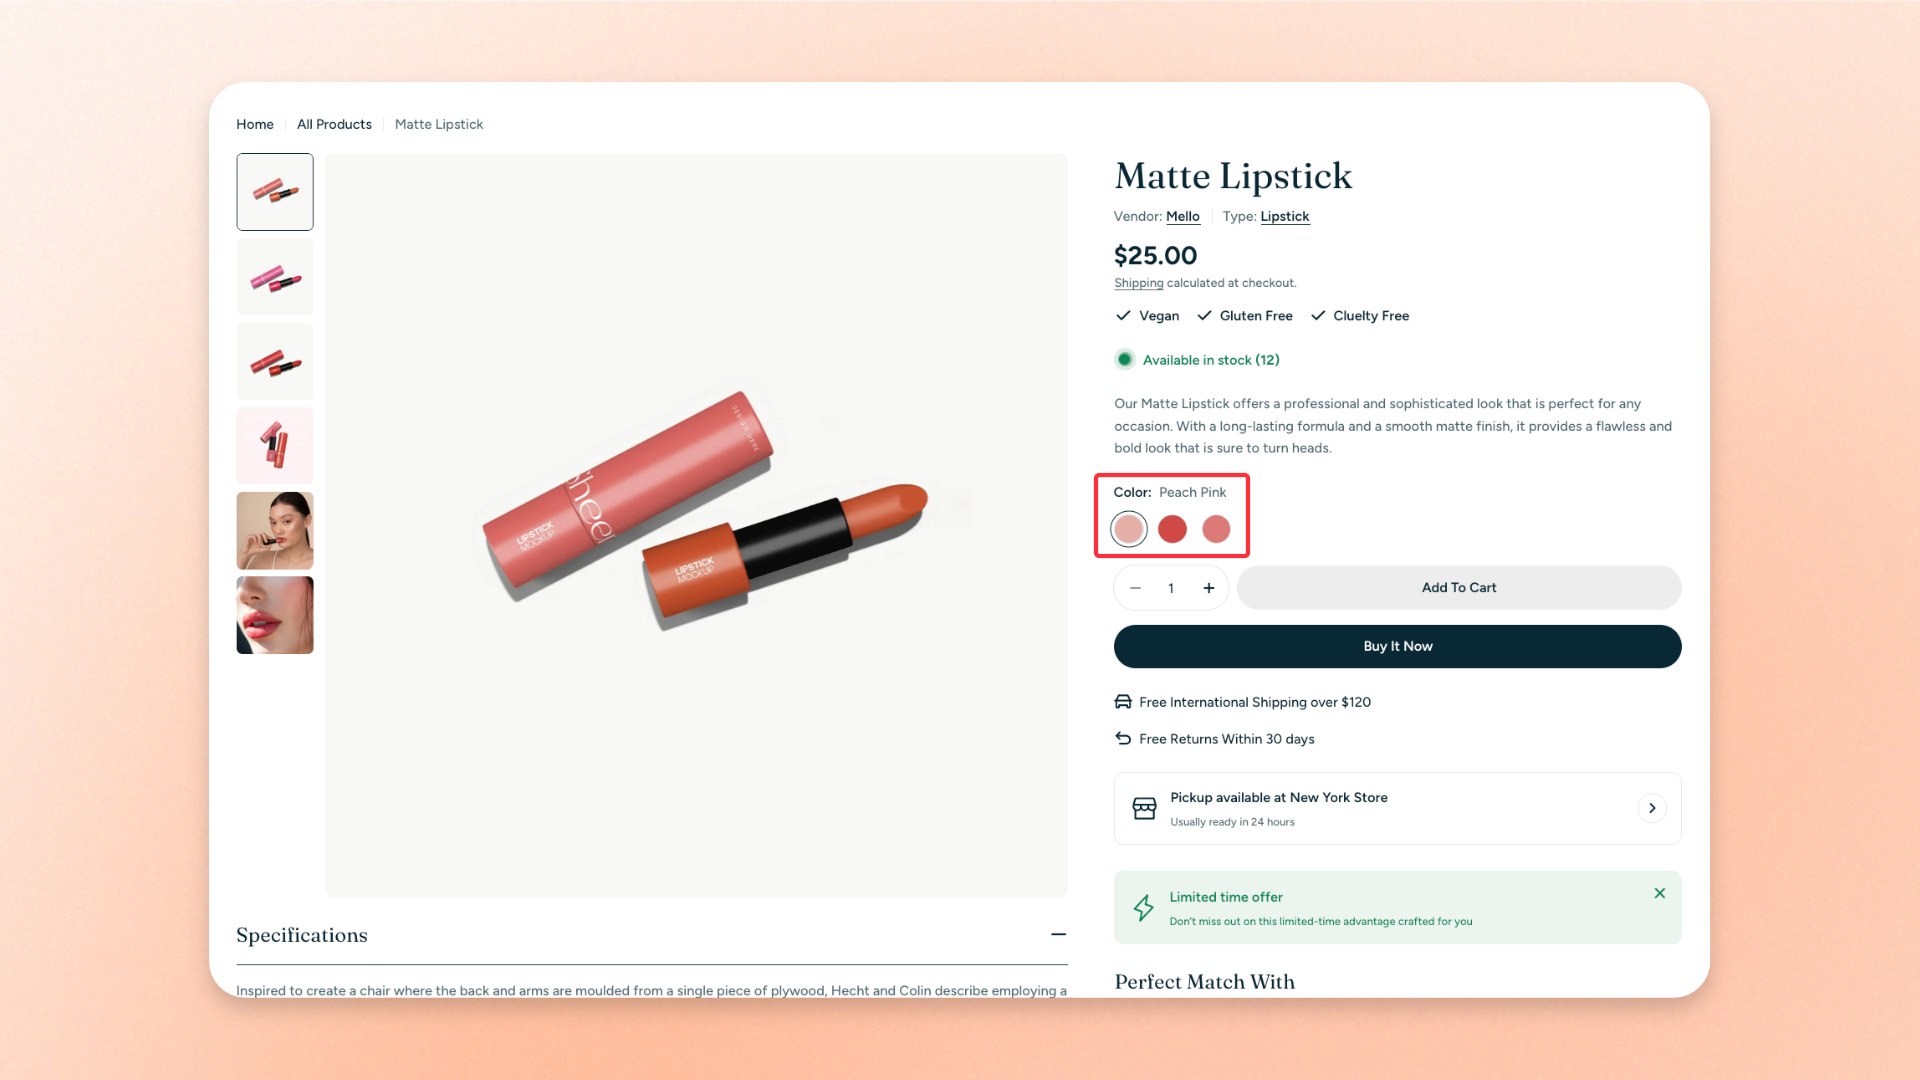
Show your product colors as swatches, so customers see each color at a glance instead of reading color names. The **Color swatches** settings tell Hyper which product option holds your colors and which color each value shows.
## How to edit Color swatches
1. Go to **Online Store > Themes** in your Shopify admin.
2. Click **Edit theme** next to Hyper.
3. Click the **Theme settings** icon in the left sidebar.
4. Click **Color swatches**.
5. Adjust the settings described below.
6. Click **Save**.
## Settings
| Setting | Description | Options |
| ------------------------ | ------------------------------------------------------ | -------------------------------------------------------------------------------------------------------------- |
| **Color swatch trigger** | The name of the product option that shows as swatches. | Enter the option name as it appears in your products. Separate names with a comma, for example `Color,Colour`. |
| **Swatches list** | The color that each option value shows. | Enter each rule on its own line, as the value and a HEX code, for example `Red:#ff0000`. |


Swatches show only for a product option whose name is in **Color swatch trigger**. If your products use another name, such as **Colour**, add it to the trigger.
## Set swatch colors with Shopify category metafields
You can also set swatch colors, patterns, and images in your Shopify admin, using the product's **Category metafields**. Make sure the variant option's name, such as **Color**, is in **Color swatch trigger**.
When a color is set in both the category metafield and the **Swatches list**, Hyper uses the metafield color.
1. Go to **Products** in your Shopify admin.
2. Open the product you want to edit.
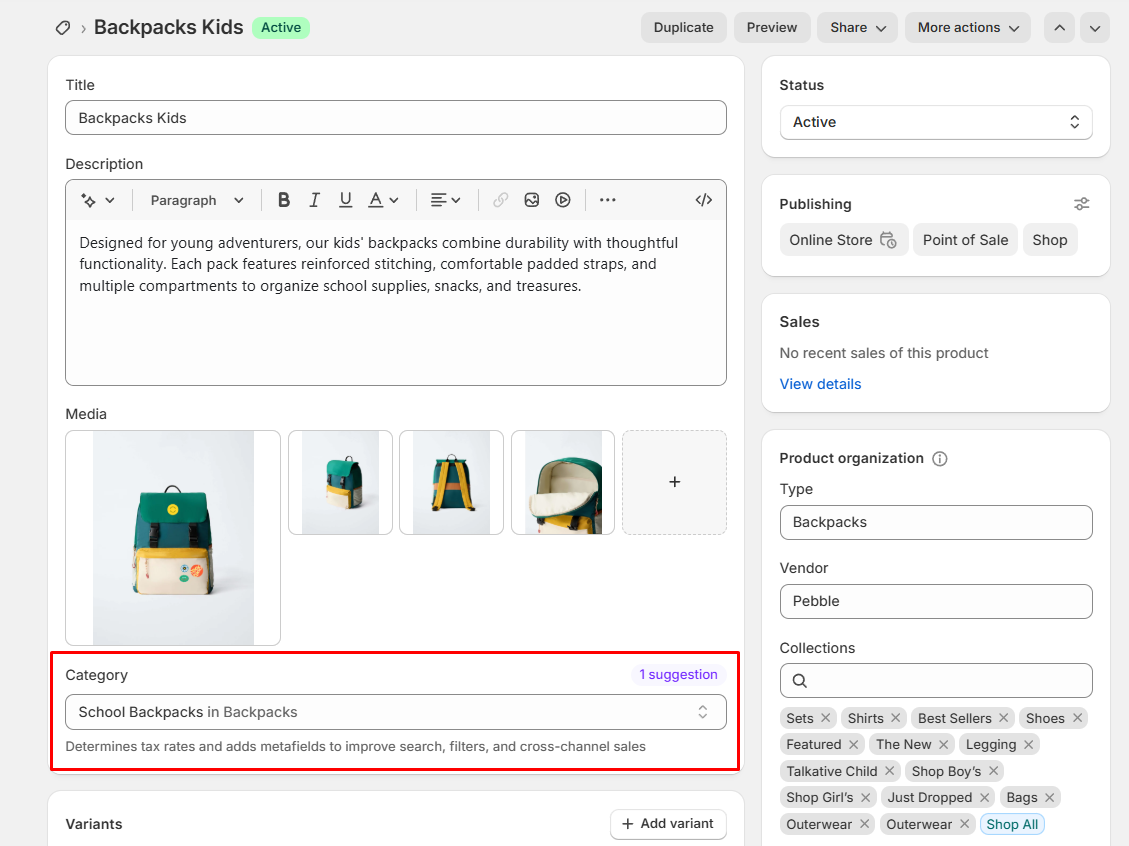
3. Select a category from Shopify's Standard Product Taxonomy in **Category**, such as *Apparel & Accessories > Clothing > Tops > Shirts*.
4. Click **Save**.
Choose a category that supports the attribute you want to use for swatches, such as **Color**. The category makes its category metafields available for the product.
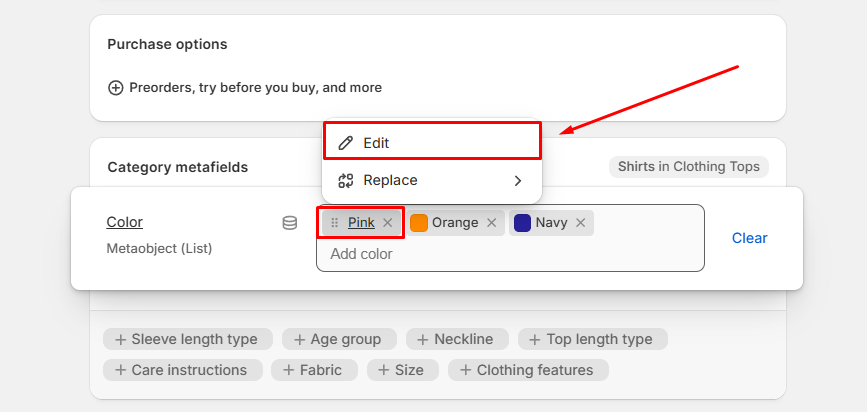
Find the **Category metafields** section of the product, and open the metafield you want to use, such as **Color**.
To edit an existing entry:
1. Open the category metafield.
2. Select the entry you want to edit.
3. Click **Edit**.
4. Make your changes.
5. Click **Save**.
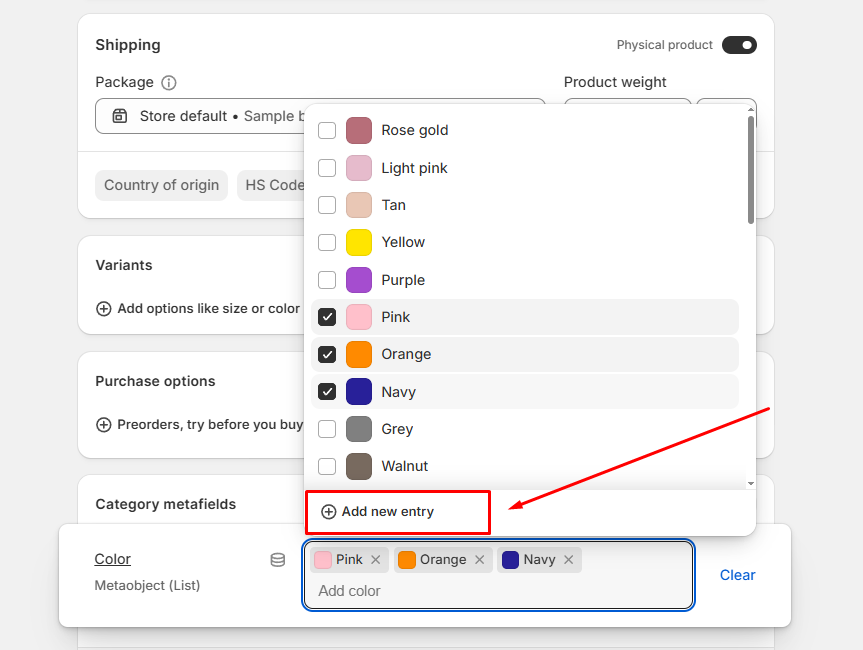
To create a new entry:
1. Open the category metafield.
2. Click **Add new entry**.
3. Fill in the fields, such as the label, color value, or image.
4. Click **Save**.
5. Save the product again.
A color entry can include:
| Field | Description |
| ---------------- | --------------------------------------------------------------------------- |
| **Label** | The customer-friendly name of the swatch, such as Navy/Blue. |
| **Color** | A HEX or RGB value used to show a solid-color swatch. |
| **Image** | An optional image for patterns, textures, prints, or other visual swatches. |
| **Base color** | The main color family of the swatch. |
| **Base pattern** | The general pattern type, such as Solid or Striped. |
| **References** | The products that use this entry. |
| **Handle** | The internal reference that Shopify creates for the entry. |
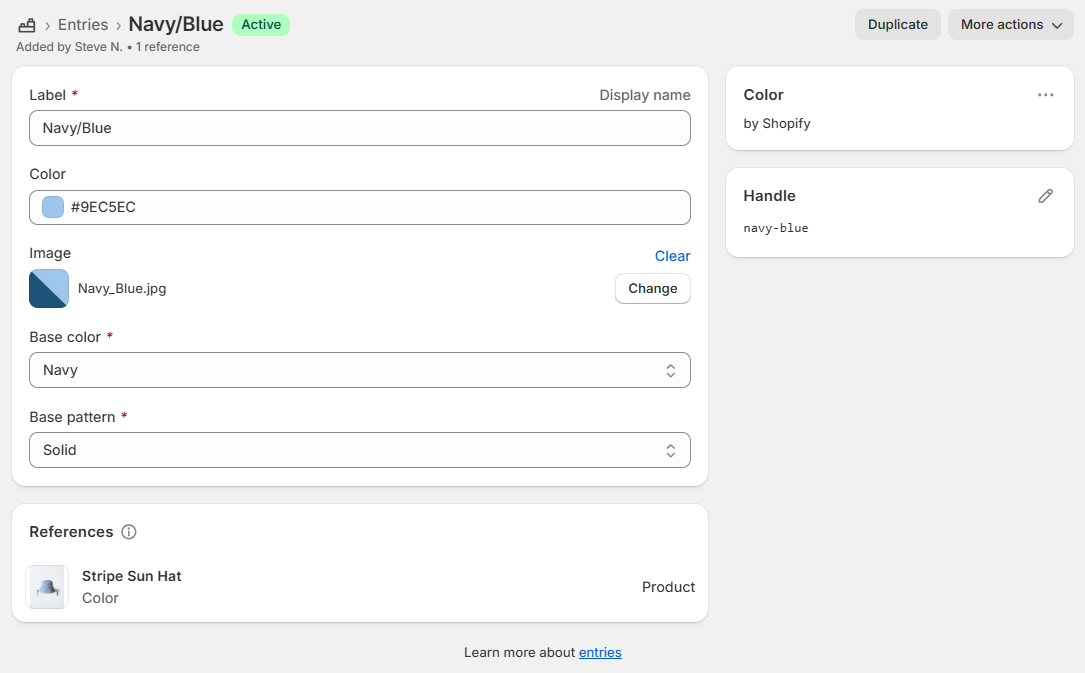
If an entry has both an **Image** and a **Color** value, the image shows as the swatch. The color value is used when there's no image.
1. Go back to the product in your Shopify admin.
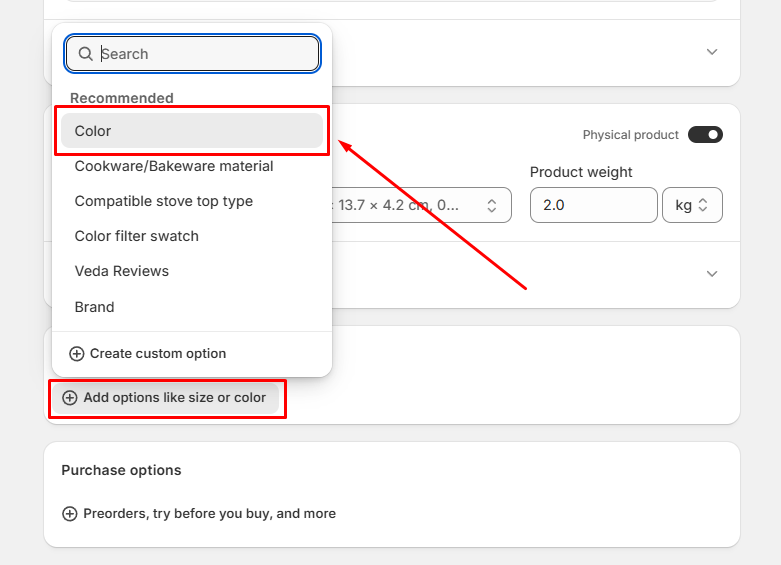
2. Click **Add options like size or color** in the **Variants** section, or edit an existing option.
3. Select the category metafield, such as **Color**. Shopify fills in the option values with the metafield's entries.
4. Click **Save** on the product.
If you need a value that isn't in the list yet:
1. Select the custom option value.
2. Click **Add new entry**.
3. Fill in the entry.
4. Click **Save**.
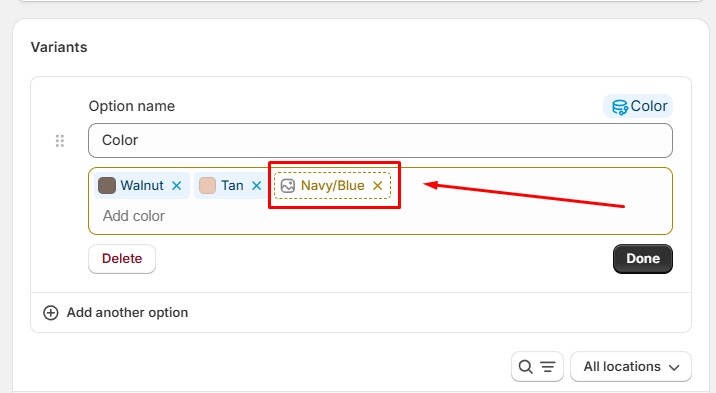
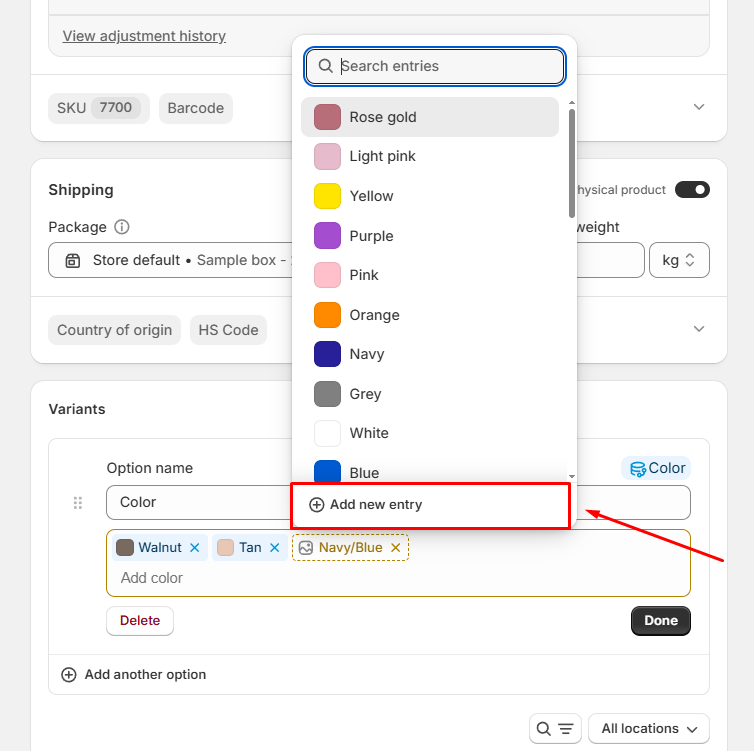
If the product already has a color option, connect it to the category metafield instead of creating it again.
To connect an existing option, click the metafield icon next to **Option name**, then select **Color**.
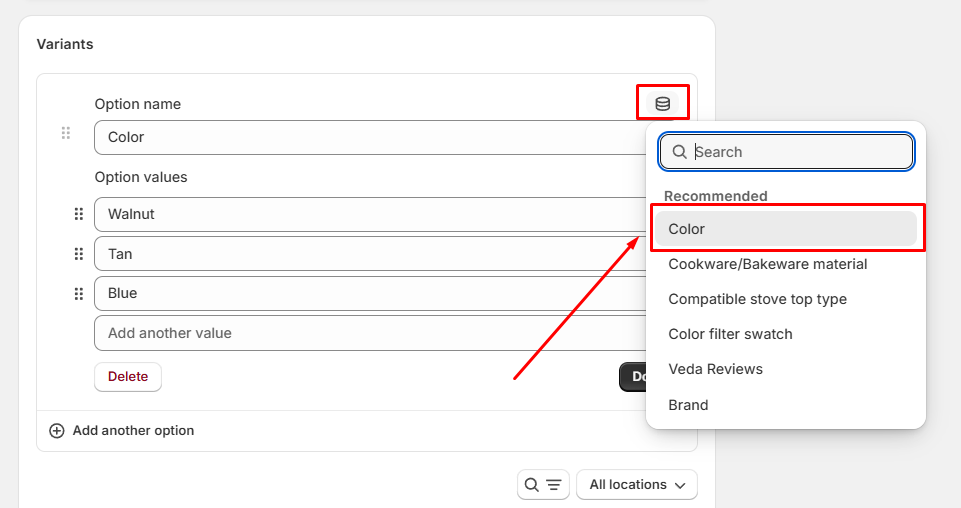
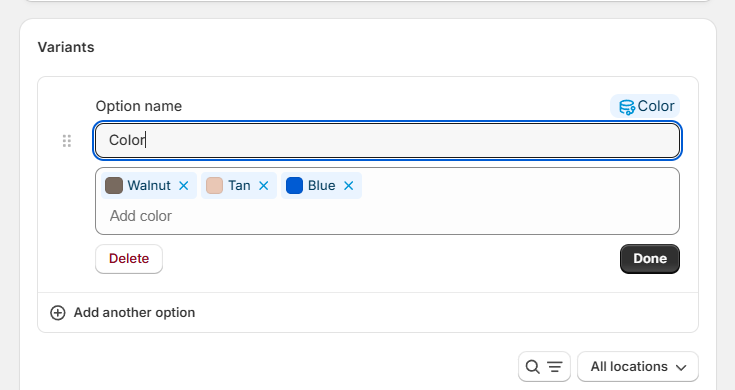
Using category metafields gives you:
* Swatch definitions you set up once and reuse across products.
* The same labels and colors on every product.
* Easier filtering and swatch display in your theme.
Learn more in [Shopify Help: Using category metafields](https://help.shopify.com/en/manual/custom-data/metafields/category-metafields/using-category-metafields).
## Show swatches on your store
1. Open your product template in the theme editor.
2. Click the **Variant picker** block in the **Product information** section.
3. Select **Color swatches** in **Style**, under **Swatches**.
4. Click **Save**.

1. Go to **Theme settings > Product cards** in the theme editor.
2. Turn on **Enable color swatches**.
3. Click **Save**.

To set how many swatches show (1–6) and the swatch type, see [Product cards](https://docs.foxecom.com/hyper-theme/theme-settings/product-cards).
Your product pages and product cards show color swatches for the option you set in **Color swatch trigger**.
## Related articles
Product cards
Product information