# Update Hyper theme
Get the latest Hyper features, bug fixes, and compatibility improvements without losing your store's design. The latest version of Hyper is always available on the Shopify Theme Store.
There are two ways to update Hyper:
* [Update from your Themes page](#update-from-your-themes-page) (recommended): use this when you see an **Update** button next to your Hyper theme.
* [Update manually](#update-manually): use this when there's no **Update** button.
Code customizations in your current theme don't move to the new version automatically. You need to copy any custom code to the updated theme yourself.
## Update from your Themes page
Shopify adds an updated copy of Hyper to your **Draft themes**, so you can review it before you publish. Your current theme stays as it is. The copy includes your **content**, **sections**, and **templates**.
1. Go to **Online Store > Themes** in your Shopify admin.
2. Find your Hyper theme. If a new version is available, you'll see an **Update** button next to it.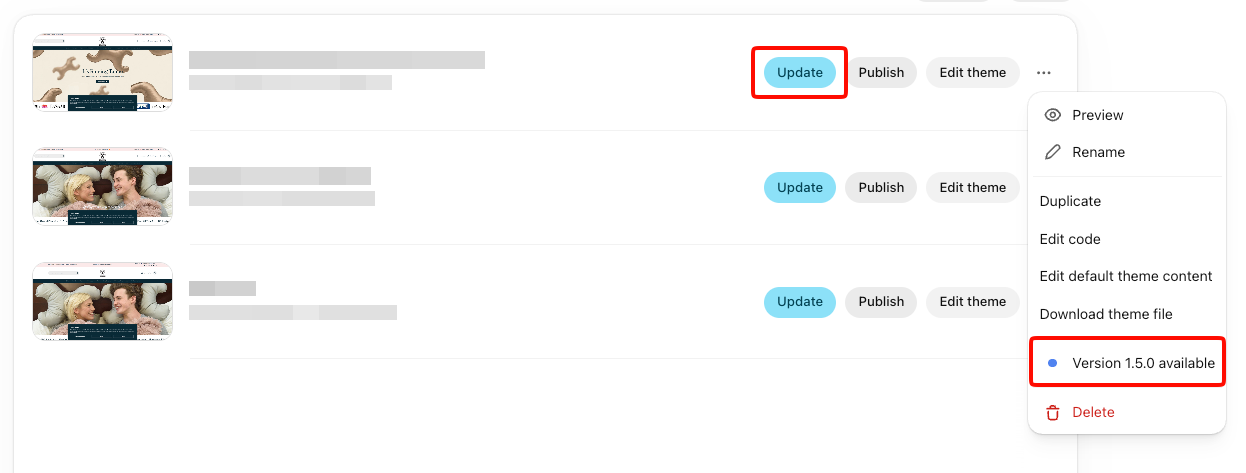
You can also see the new version in the theme's **⋯** menu, shown as **Version … available**.
1. Click **Update**. A popup window shows your current version and the new one.
2. Click **View release notes** to read what's new in this version.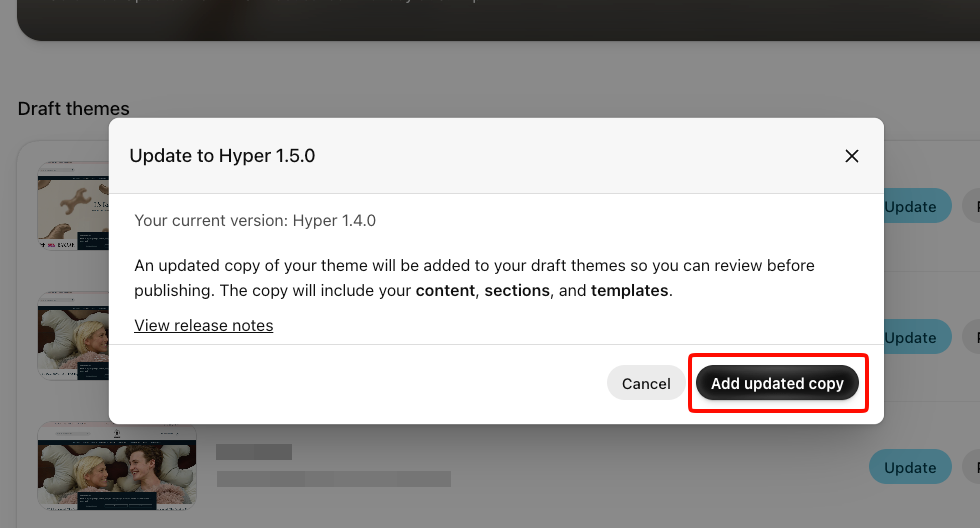
Click **Add updated copy**.
The updated copy of Hyper appears in your **Draft themes**, ready to review and publish.
## Update manually
If you don't see an **Update** button, code customizations in your theme may be blocking Shopify's update system. In this case, install the latest Hyper version yourself and move your settings over.
A backup lets you restore your store if something goes wrong.
1. Go to **Online Store > Themes** in your Shopify admin.
2. Click the **⋯** menu next to your current theme.
3. Select **Duplicate**.
4. Rename the duplicated theme so you can find your backup easily.
1. Open [Hyper on the Shopify Theme Store](https://themes.shopify.com/themes/hyper/presets/hyper?utm_source=foxecom\&utm_medium=help_center_hyper_update_theme\&utm_campaign=cta_button).
2. Select **Add a new copy**.
Copy your settings and edited templates so the new version looks like your current store.
1. Click the **⋯** menu next to your current theme.
2. Select **Edit code**.
3. Copy the `settings_data.json` file in the `config` folder.
4. Paste it into the `config` folder of the new version.
5. Copy each JSON template you've customized in the `templates` folder, such as `index.json`.
6. Paste each one into the `templates` folder of the new version.
7. Re-create your custom templates, if you have any.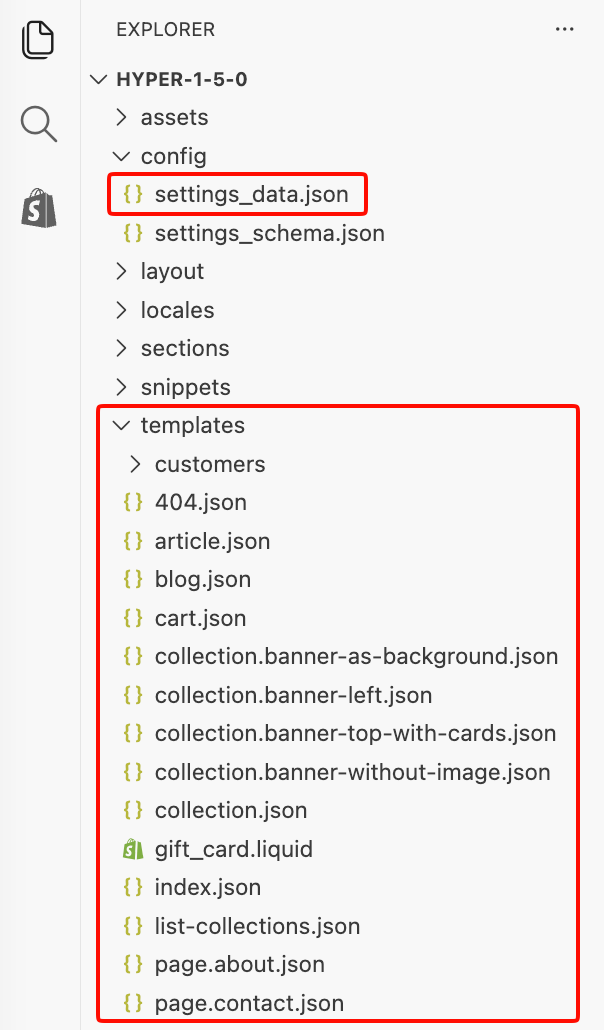
Custom templates don't exist in the new version by default, so you need to create their JSON templates again. Follow Shopify's guide to [create a new template](https://help.shopify.com/manual/online-store/themes/theme-structure/templates#create-a-new-template).
Any app that adds code to your theme files needs to be re-installed on the new version. Depending on the app, this happens automatically or by hand.
1. Find the app's documentation on the [Shopify App Store](https://apps.shopify.com/).
2. Follow its installation instructions for the new version.
Ask the app's developer whether removing and adding the app again is enough to connect it to the new version. To find their support email, go to **Apps** and click **View details** on the app.
## Related articles
Install Hyper theme
Theme license & Transfer