ZEST theme
Try Zest freeResourcesOther solutions
  • What is Zest theme
  • Changelog
  • Refund policy
  • Support policy
  • Getting started
    • Install Zest theme
    • Set up my store as Zest demo
    • Update Zest theme
    • Theme license & Transfer
  • build for success series
    • Landing page like puravida
  • Page's global sections
    • General settings
    • Announcement bar
    • Banner logo 🔥
    • Header
    • Footer
    • Menu
      • Add a banner to mega menu
      • Add products to mega menu
      • Add collections to mega menu
      • Add custom cards to mega menu
      • Customize a hovering menu
    • Mobile navigation bar
    • Age verifier pop-up
    • Pop-up
  • Theme sections
    • Auto-scrolling promotion
    • Before/ After image slider
    • Blog posts
    • Collage tab
    • Collapsible tab
    • Collection list
    • Collection list slider
    • Collections showcase 🔥
    • Collection tab
    • Contact form
    • Countdown timer
    • Custom content
    • Custom liquid & HTML
    • Favorite collection 🔥
    • Favorite products
    • Featured product
    • Featured product slider
    • Featured collection
    • Gallery images
    • Handpicked products
    • Highlight text with image 🔥
    • Image with text
    • Image with text overlay
    • Image with text slider
    • Layered images 🔥
    • Logo list
    • Lookbook
    • Map
    • Mixed image cards 🔥
    • Multicolumn
    • Newsletter
    • Products bundle
    • Product tabs
    • Promotion banner 🔥
    • Press
    • Rich text
    • Slideshow
    • Testimonials
    • Video
    • Video hero
  • Theme settings
    • General settings
    • Animations
    • Cart
    • Checkout
    • Color swatches
    • Colors & Color schemes
    • Currency format
    • Cookies banner
    • Layout
    • Product card
    • Product quick view
    • Search
    • Social media
    • Theme style
    • Typography
  • Collections & Products
    • Product page
      • Product template
      • Product description
      • Breadcrumbs
      • Product information
      • Recently viewed products
      • Product recommendations
      • Quick order list 🔥
    • Collection page
      • Collection template
      • Collection sections
        • Collection banner
        • Product grid
    • Collections list page
  • Languages & Countries/Regions
    • Languages
    • Countries/ Regions
  • Other pages
    • 404 page
    • About us
    • Blogs
    • Blog posts
    • Cart & Checkout
    • FAQs page
    • Password
    • Search page
  • FAQs
    • Generic
      • Add custom fonts
      • Add custom CSS
      • Add custom badges to the product card and product page
      • Add gift wrap option to my cart
      • Add product review apps to my theme
      • Change the copyright text at the footer
      • Compare Zest with other Shopify themes
      • Does Zest support RTL languages?
      • JavaScript events for developers 🔥
      • How to migrate your Zest theme to version 7.0.0
      • My store has a low speed score - How can I improve it?
      • Show Payment icons on the Footer 🔥
    • Product page
      • Add a size chart to your product page
      • Add recipient fields to my gift card product
      • Edit product breadcrumbs using metafields
      • Set up quantity rules and volume pricing 🔥
    • Shopify functions
      • Combined listings app 🔥
      • Does Zest support Section groups?
      • Get to know dynamic checkout buttons
Powered by GitBook
On this page
  • Banner and Logo
  • Main content area
  • Order summary area
  • Typography and Colors
  • Checkout layout
  • Checkout settings
  1. Theme settings

Checkout

Learn how to customize your store's checkout page

PreviousCartNextColor swatches

Last updated 10 months ago

The checkout page is where the customer completes payment and provides the information for delivery and contact details that are needed for invoicing.

This article will guide you on how to edit your store's checkout page.

Steps

  1. In the theme editor (Customize), click Theme settings.

  2. Locate Checkout.

  3. Make necessary changes.

  4. Save.

The settings include:

Banner and Logo

You can add their background banner or logo. If not, they can leave it blank.

Main content area

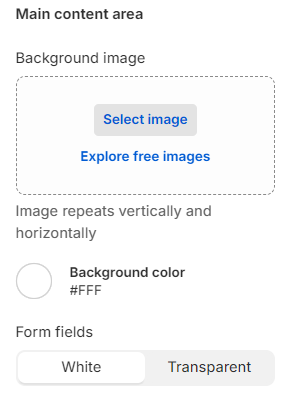
It shows on the site's left-hand side which has contact info and shipping address. For this area, you can also add a background image or leave it blank and use background color only.

The provided field to add text can be set as white or transparent.

Order summary area

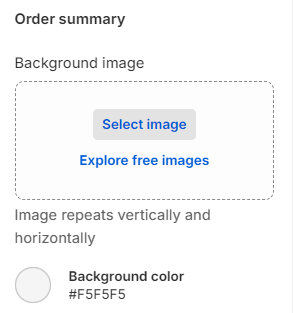
Appear on the right-hand side of the site. The same as the main content area, background image, and color can be added to match merchants' expectations.

Typography and Colors

Use this part to change fonts and colors that match the store' aesthetic look.

Checkout layout

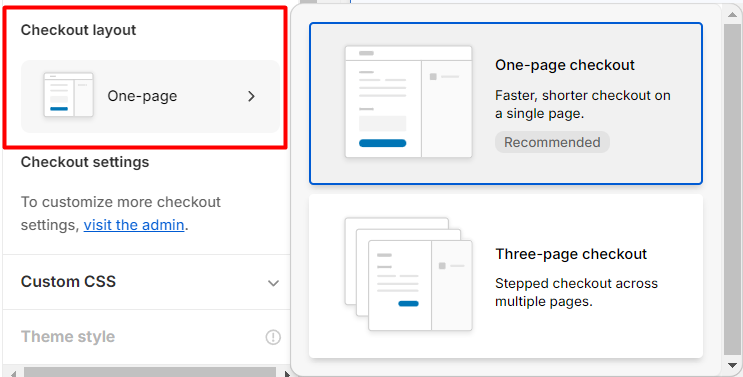
Switch between one-page checkout and three-page checkout from your Shopify admin. By default, the checkout layout on your store is set to one-page checkout.

When you switch your checkout layout, the preview in your checkout or theme editor doesn't display in real time. After you save your changes, navigate to your storefront checkout to view your new checkout layout.

Checkout settings

To customize more checkout settings, please visit the admin page for further details.

Step: Go to Dashboard > Settings > Checkout

Besides editing the Checkout design and appearance as we've mentioned above, you can also edit the following parts:

  • Customer contact method

  • Customer information

  • Marketing options

  • Tipping

  • Address collection preferences

  • Order processing

  • Abandoned checkout emails

  • Order status page

  • Checkout language

  • Checkout rules

.

Comparing one-page checkout to three-page checkout