Although we create Zest theme with a variety of customizable features and settings, it's likely that sometimes you still want to adjust and fine-tune some elements beyond what is already available in the theme editor.
Customizations range in complexity. An easy way to make these styling adjustments is by using CSS.
Modifying theme code requires you to have a certain knowledge of web design languages (CSS, HTML, and Liquid). If you are not familiar with them, avoid modifying the theme code to prevent unwanted technical issues.
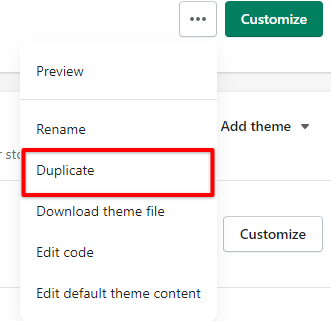
We recommend you back up your work before attempting any theme file adjustments. If errors are encountered, you can use the duplicated (backup) version to restore to the original function and styling.
Steps
In your Shopify admin > Online store, click Actions.
All overriding CSS styles should be added to the same file in the Assets folder. This makes it easier to track and carry across customizations when updating your theme.
Follow the steps below to create a customization file in your theme code.
1. In your Shopify admin > Online store, click Edit code.
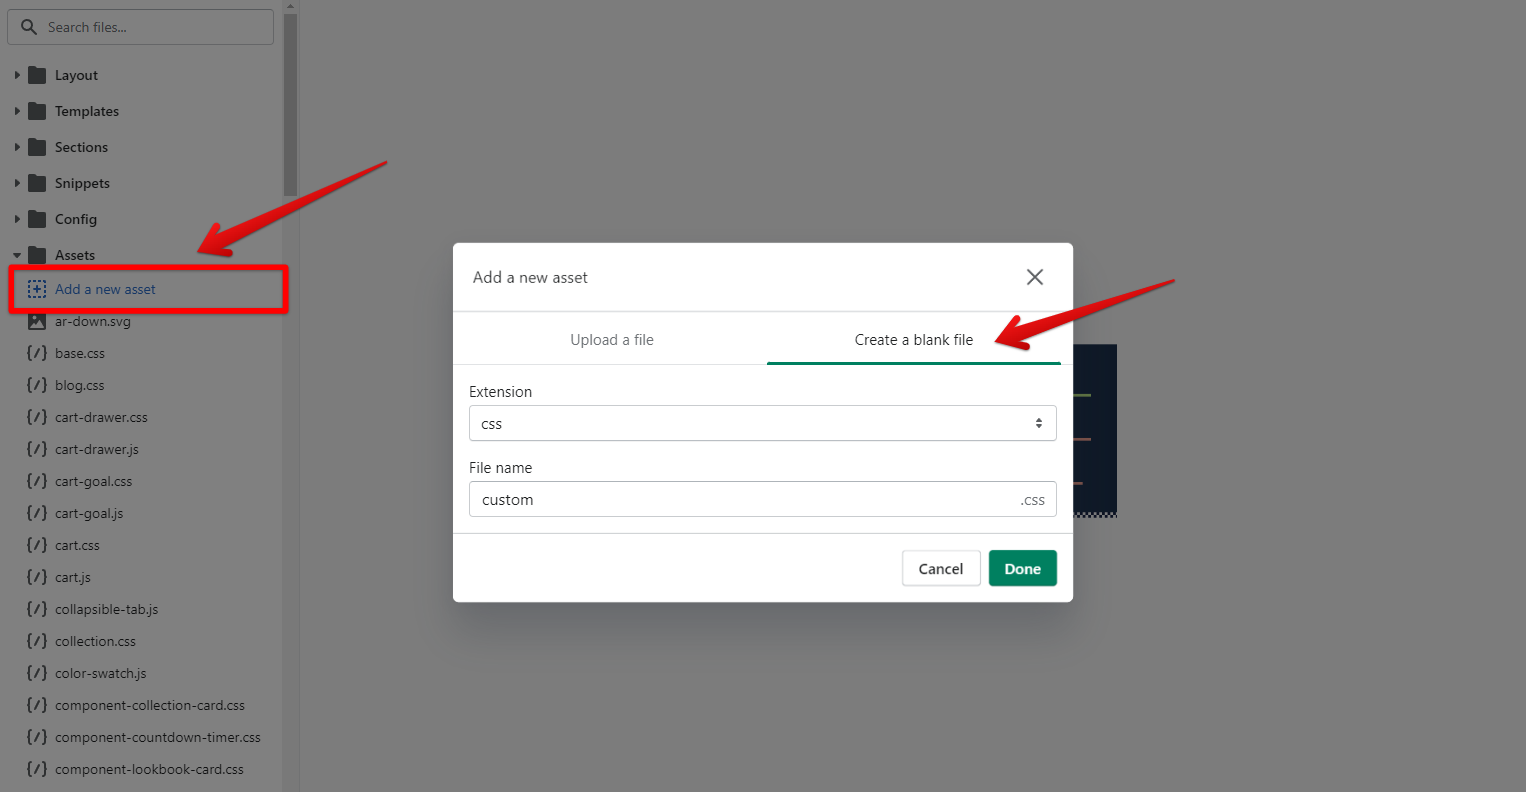
2. Navigate the Assets folder > click Add a new asset.
3. In the popup, click Create a blank file.
4. Select the Extension and enter the File name as custom.
5. Click Done.
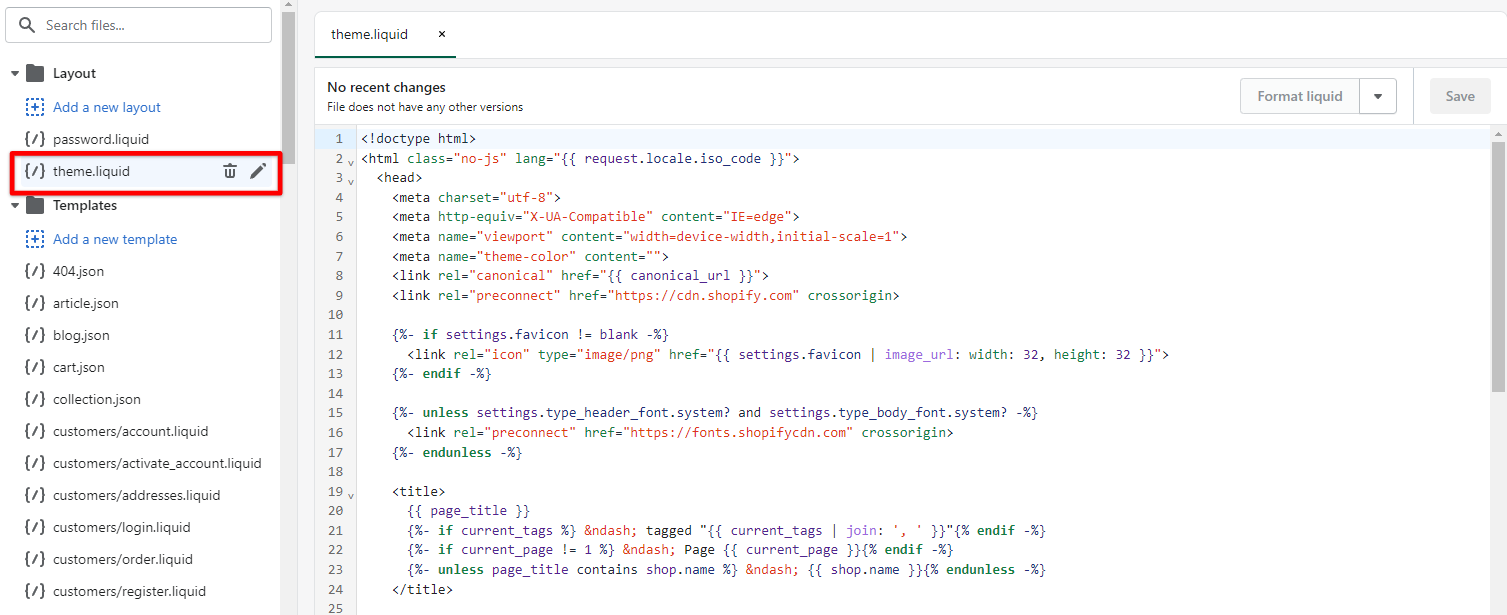
6. After the new asset is created, go to the Layout folder > choose file theme.liquid.
7. In theme.liquid file, find and copy this code line: