# Product information
_UIdTrIdP.jpg)
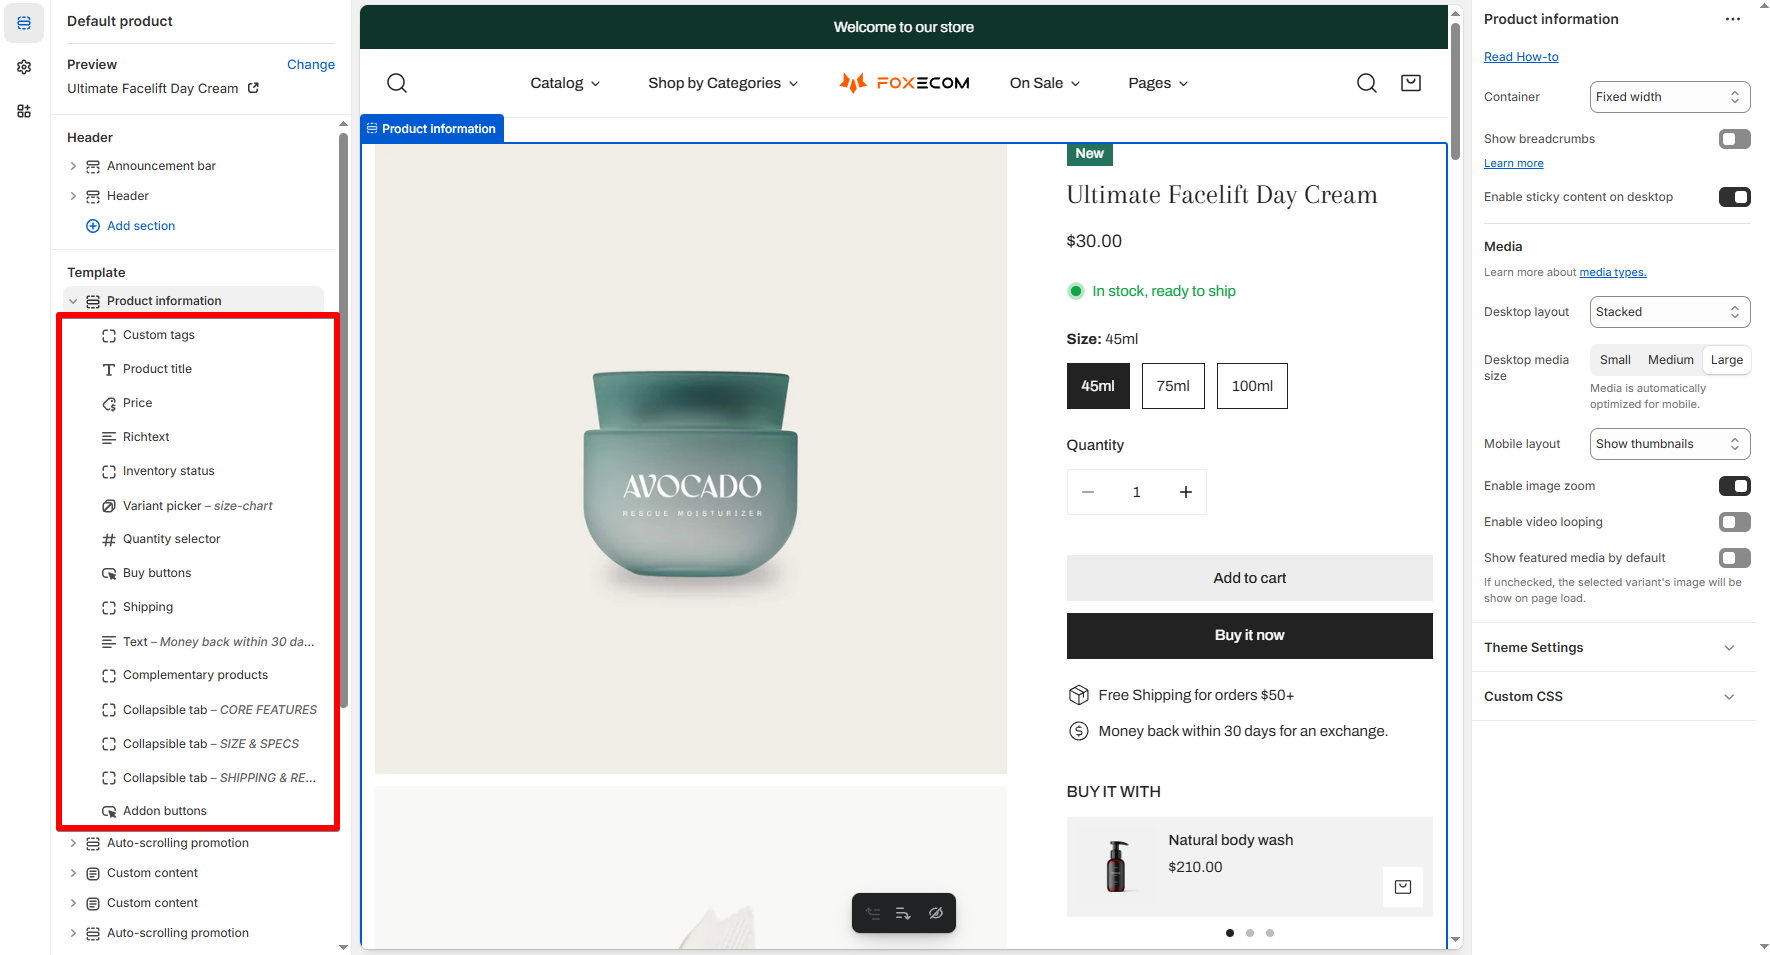
Add, edit, or remove any information on your product pages. Accurate, reliable, and in-depth product details help customers find the information they need to make buying decisions.
## How to add a Product information section to your Shopify store
Steps
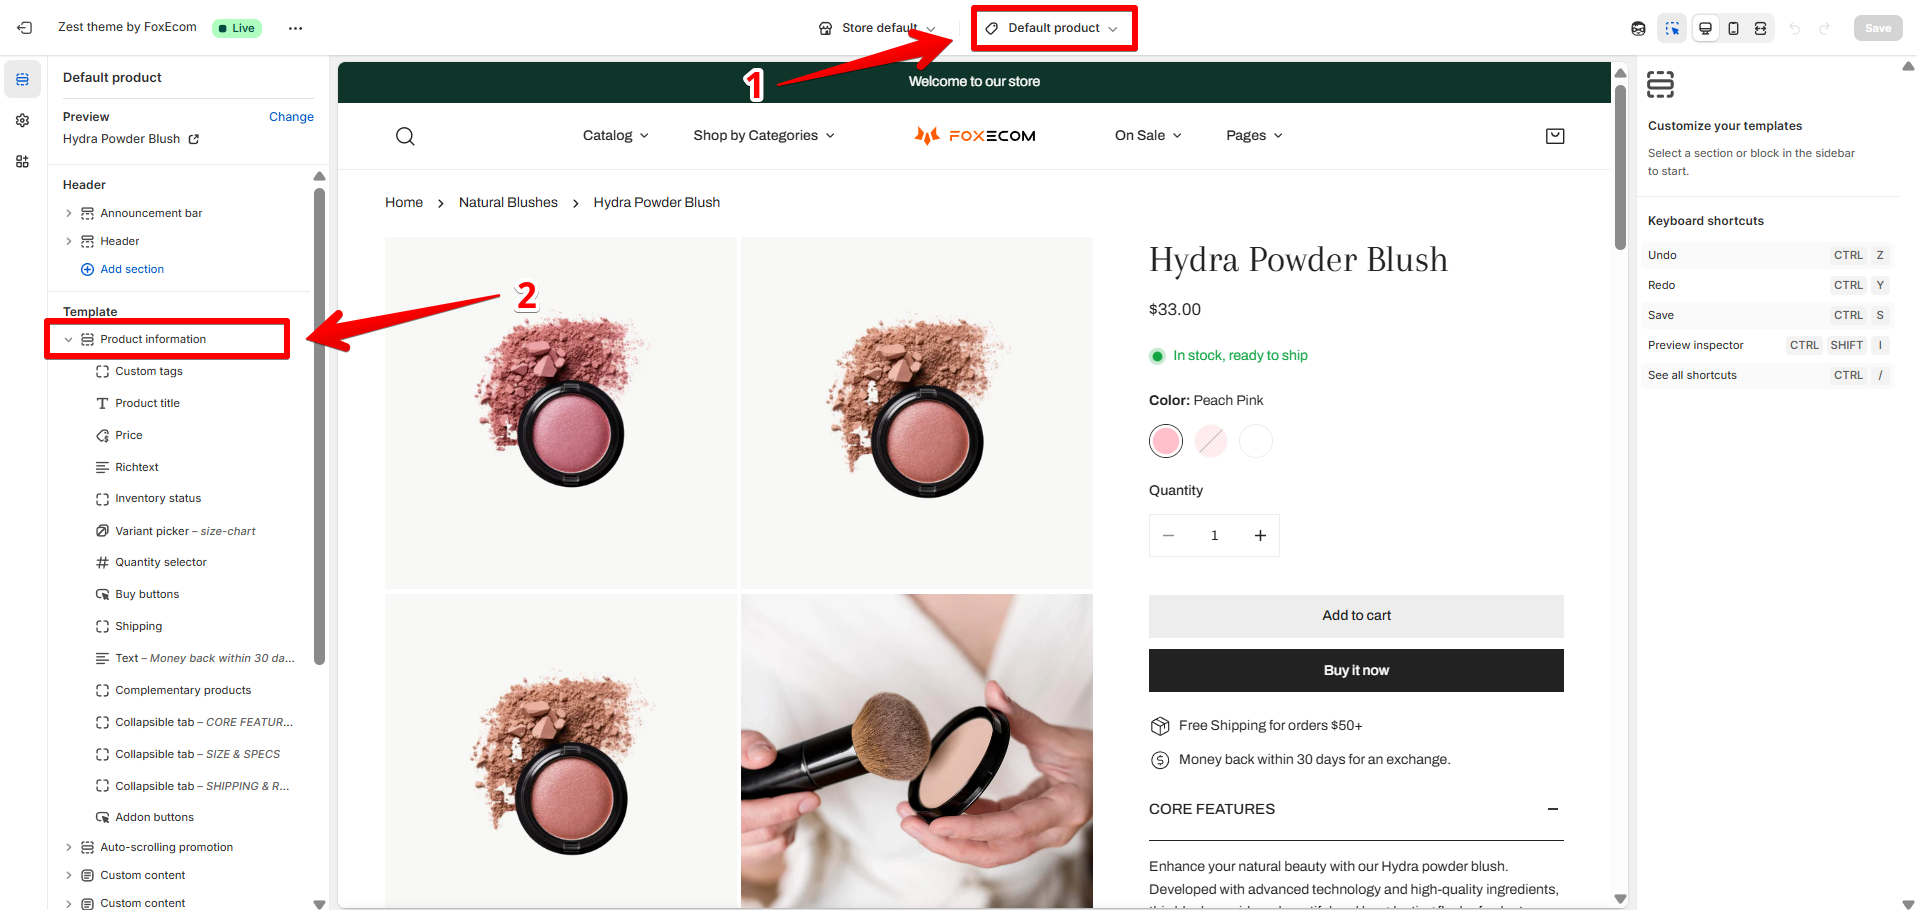
1. In the theme editor (**Customize**), open the template selector.
2. Select **Products**, then **Default product.**
3. On the left sidebar, add **Product information.**
4. Make necessary changes > **Save.**
## How to edit your Product information section
### Section settings
#### General settings
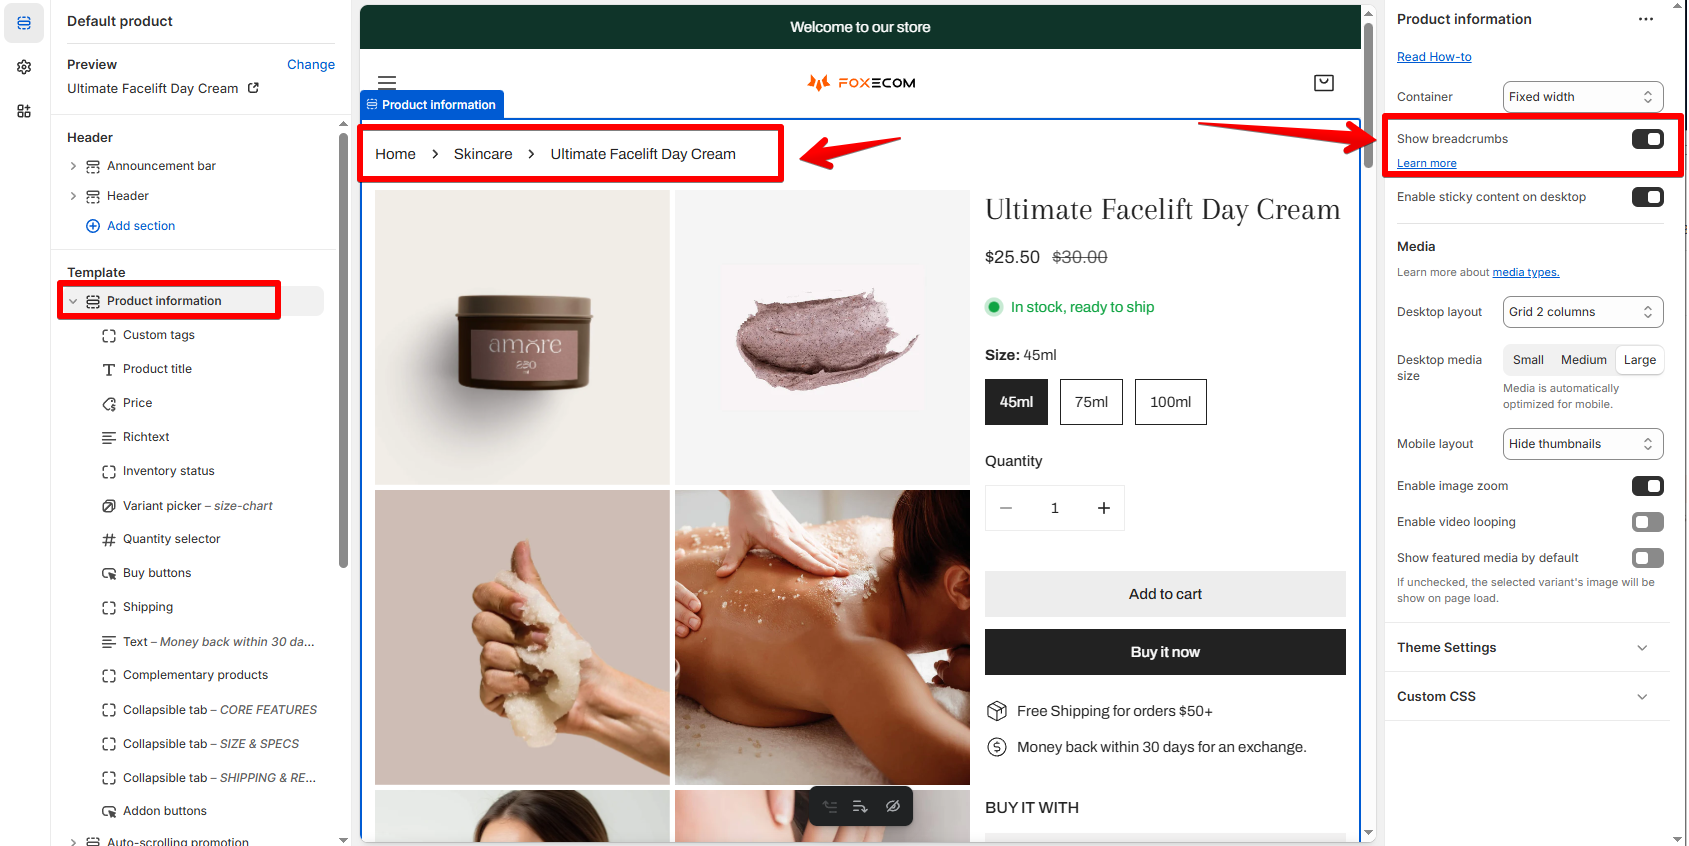
* **Show breadcrumbs**: Enable breadcrumbs for the product. *Learn more:* [Breadcrumbs](https://docs.foxecom.com/zest-theme/collections-and-products/product-page/breadcrumbs)
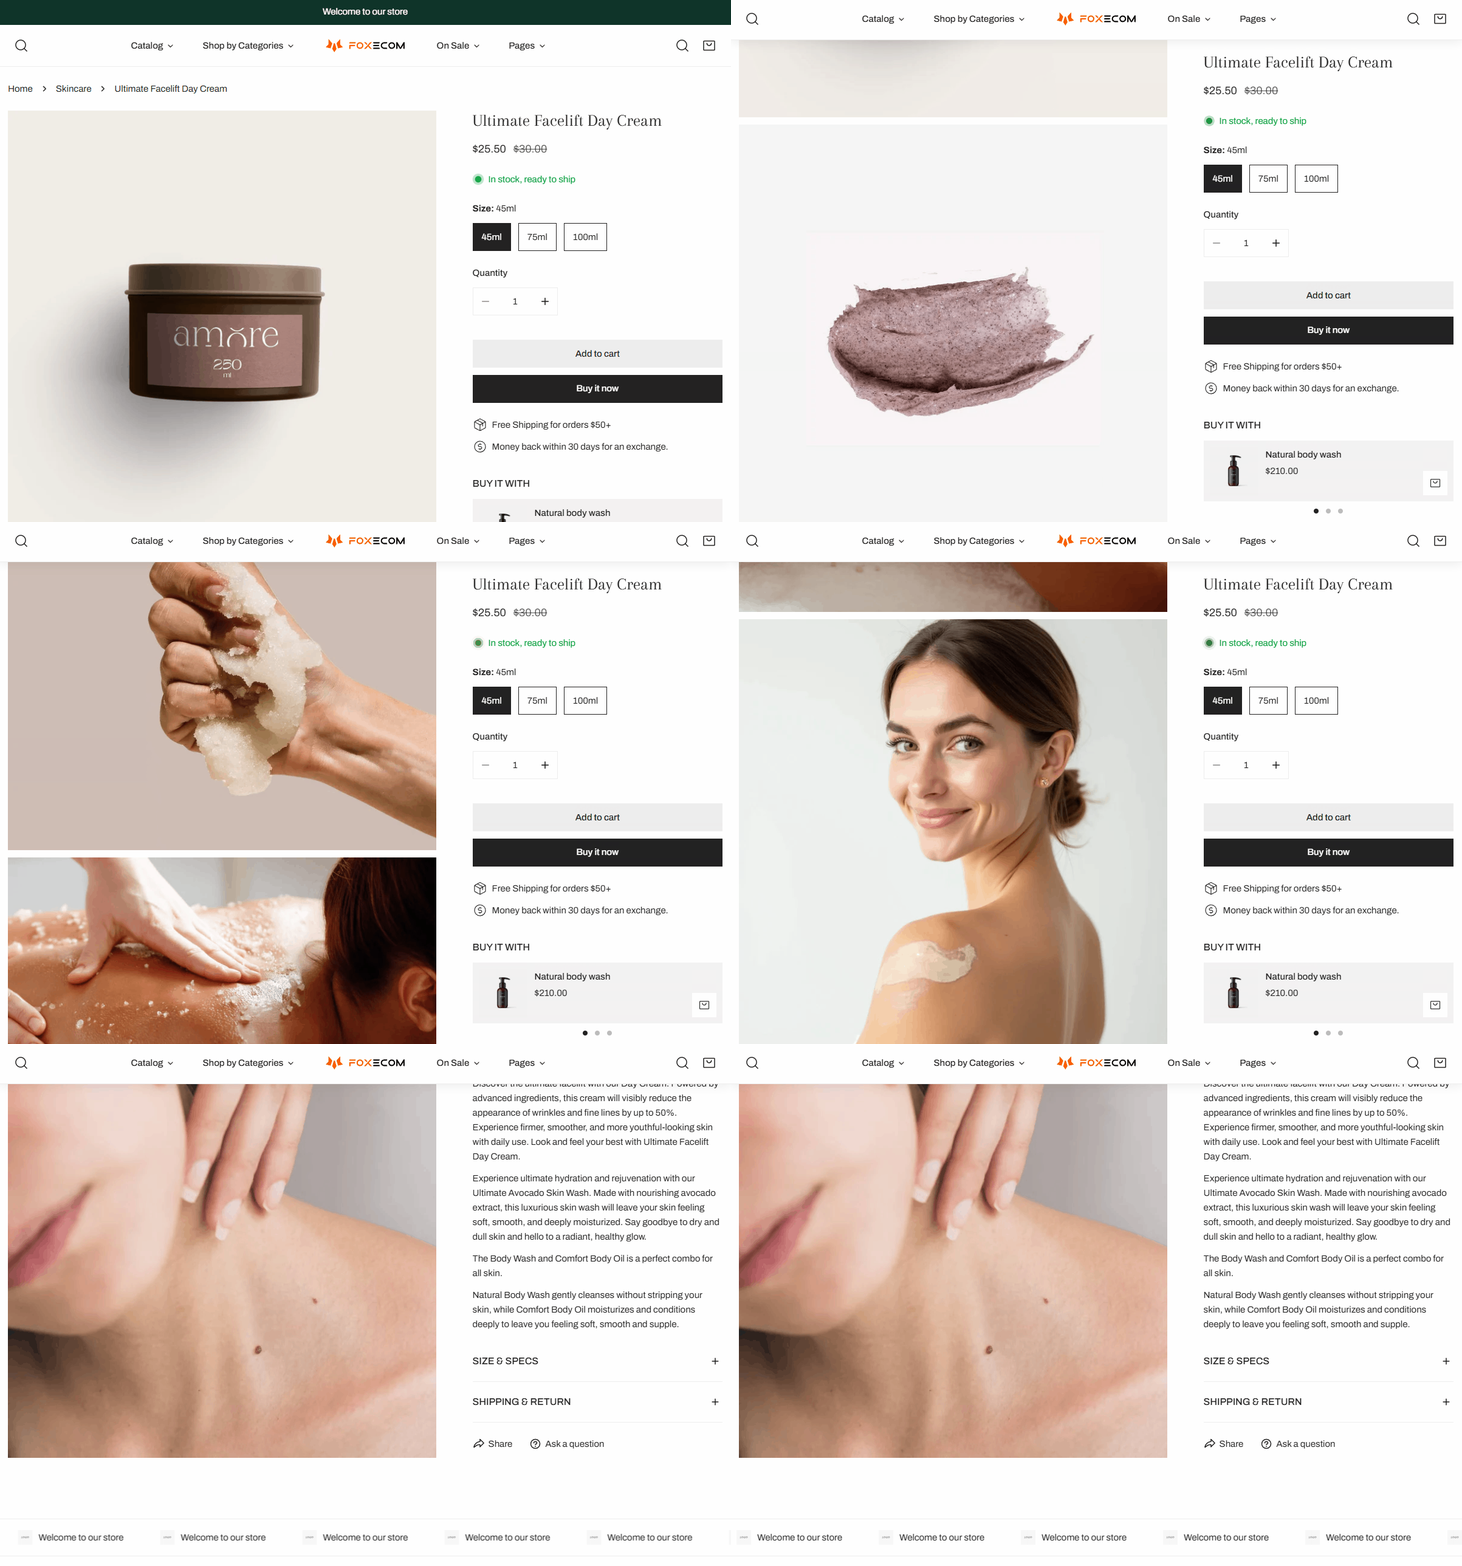
* **Enable sticky content on desktop**: Affix the product content to the screen as you scroll through the product media.
#### Media settings
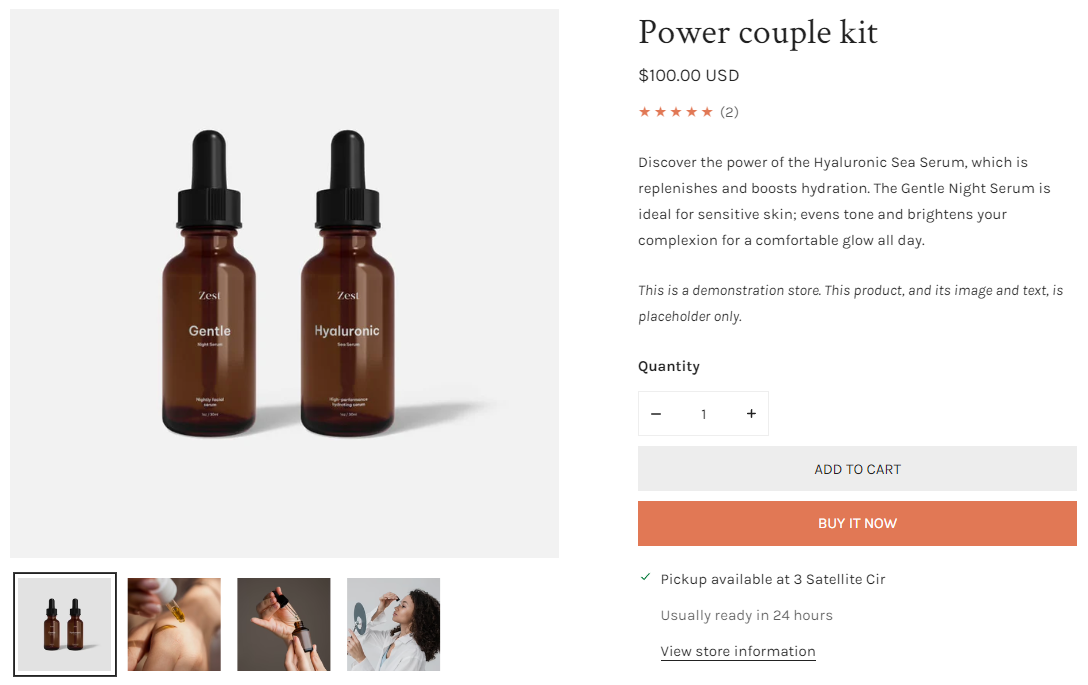
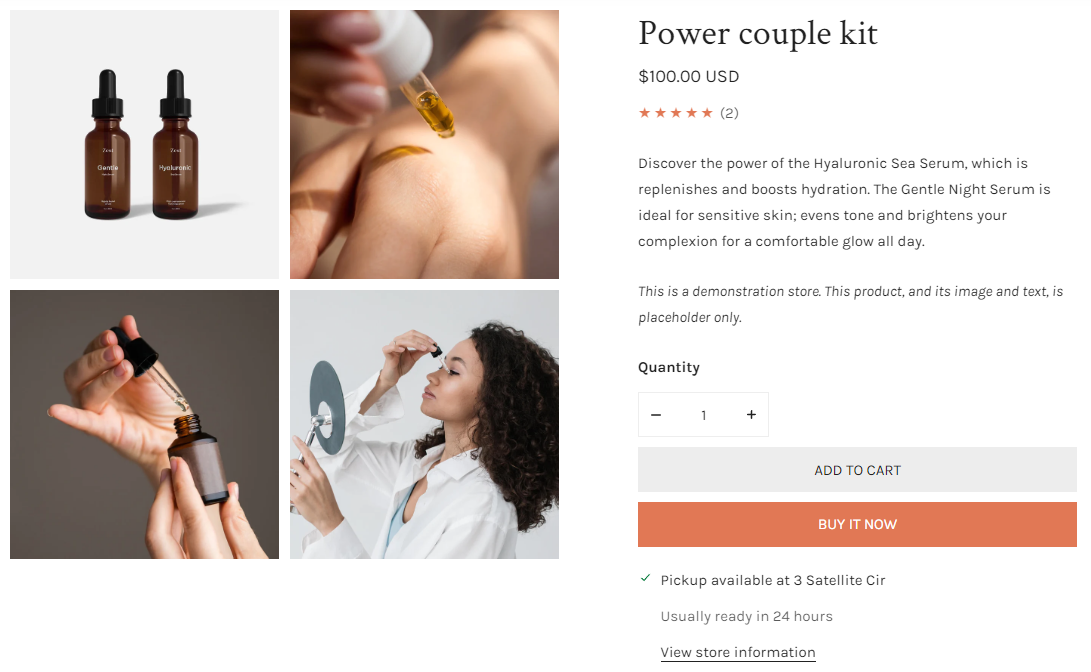
* **Desktop layout**:
_wyU9x93k.gif)
_Mnx0DFG1.gif)
*To know more about media, see* [*Product media*](https://help.shopify.com/en/manual/products/product-media)*.*
* **Desktop media size**: Choose from Small, Medium, or Large image display.
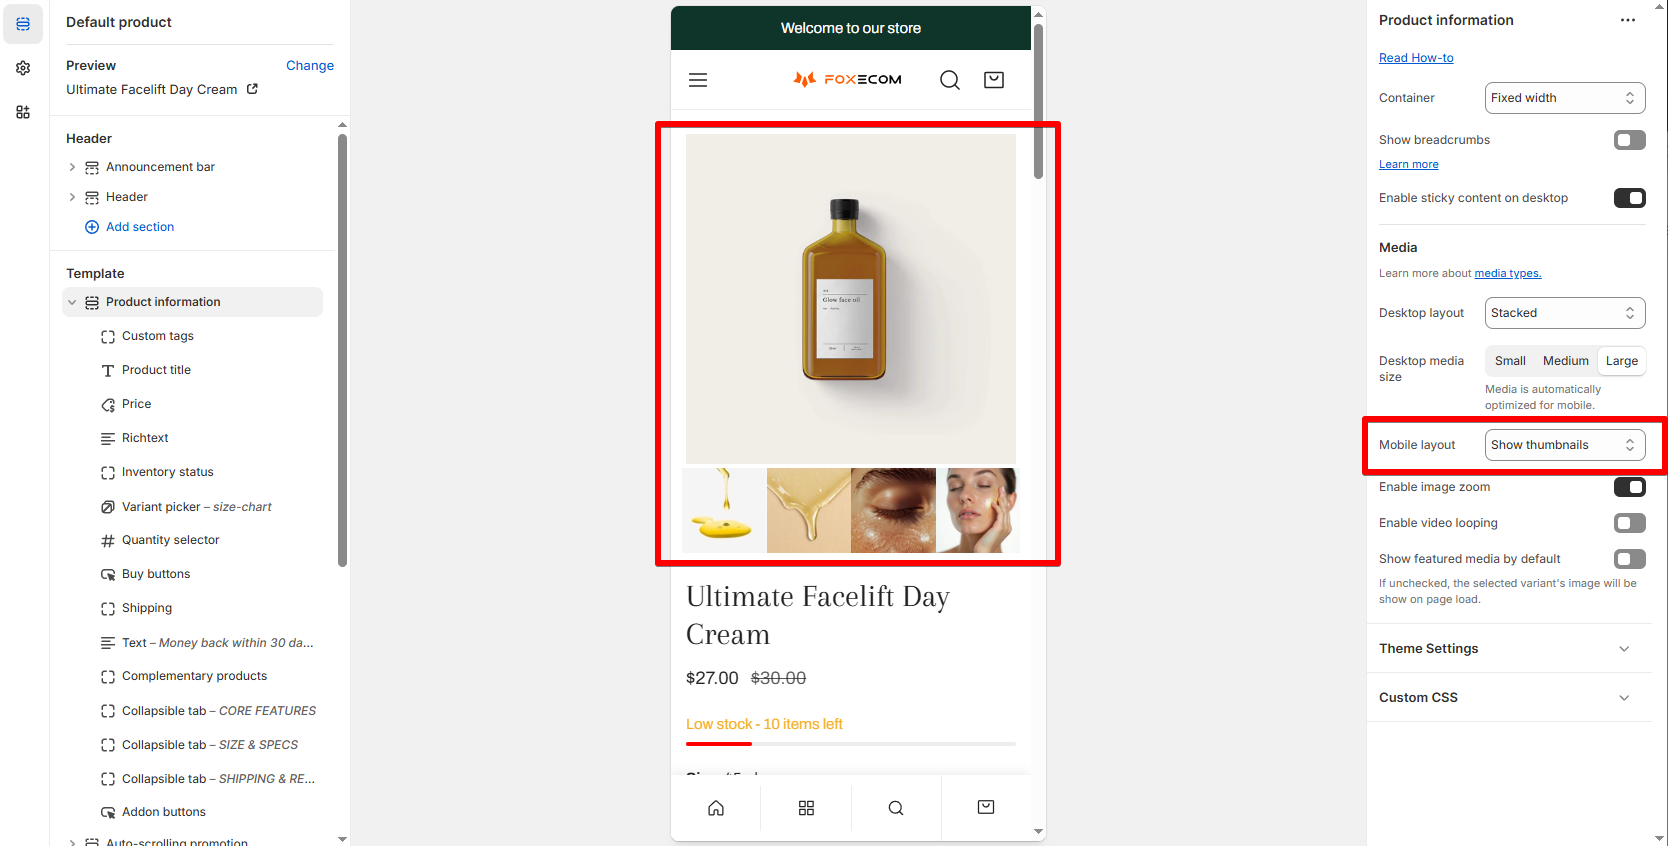
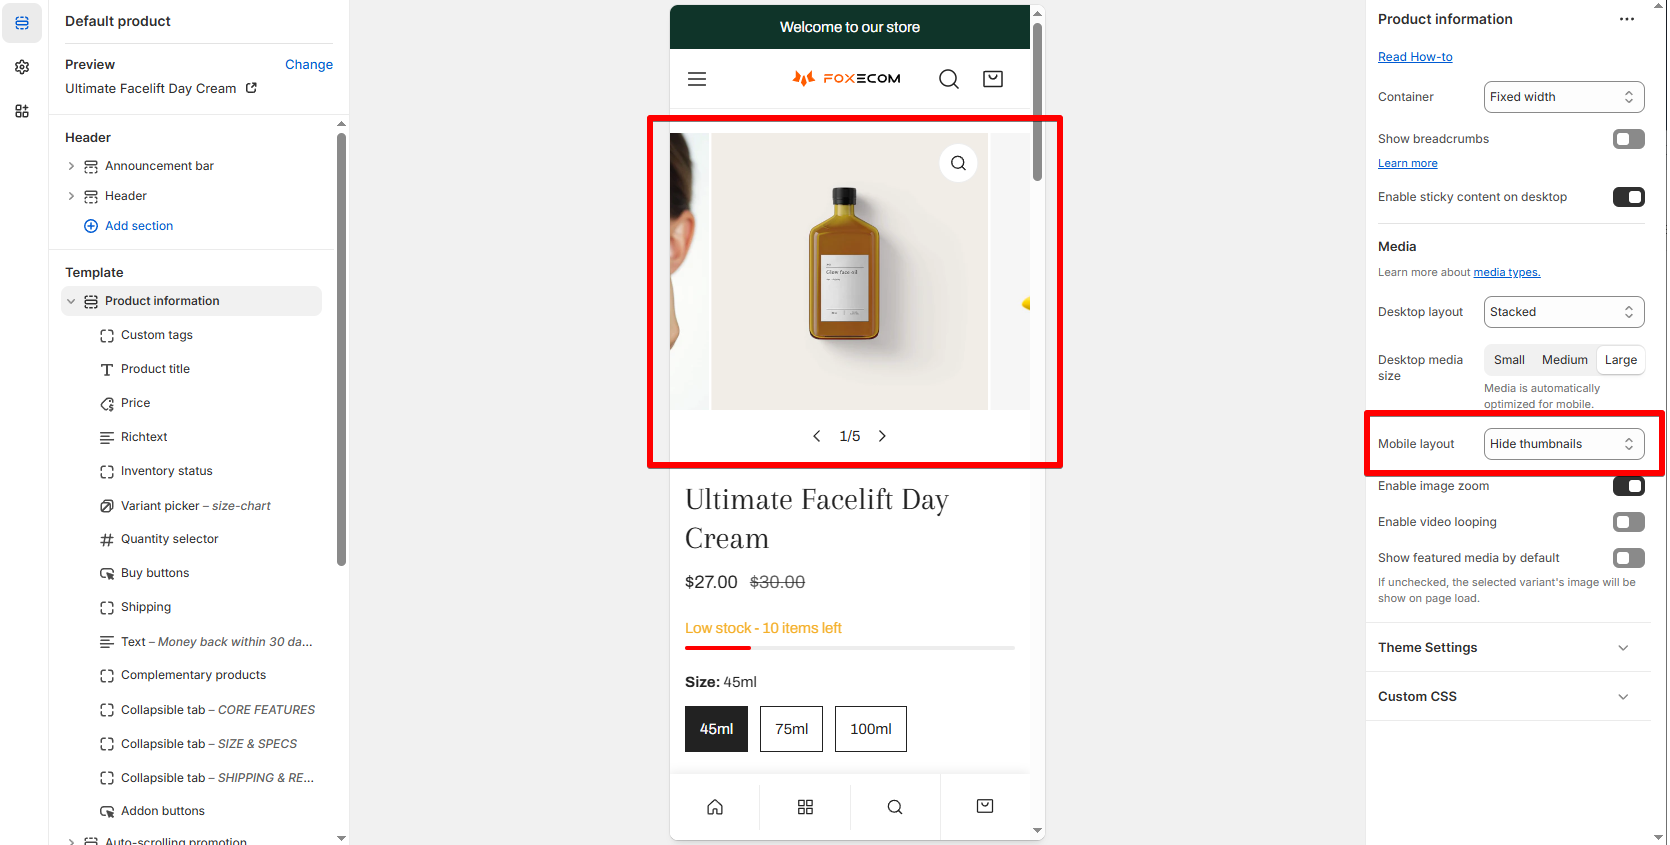
* **Mobile layout**: Hide or Show thumbnails.
* **Enable image zoom**: Let customers zoom into media on tap.
_LxXokTwv.gif)
* **Enable video looping**: Keep product videos playing in a loop.
* **Show featured media by default**: If off, the selected variant image is shown first.
### Product Information blocks
#### Price
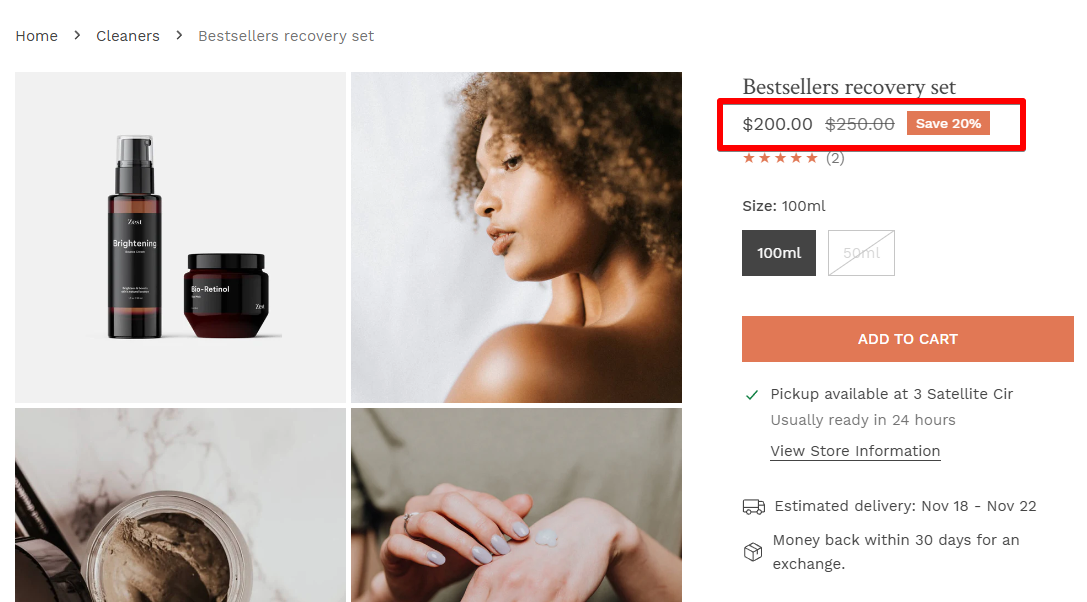
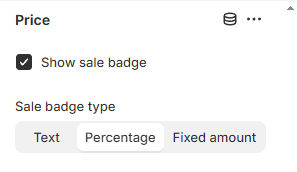
Show sale badge as **Percentage**/**Text**/ **Fixed amount.**
#### Variant picker
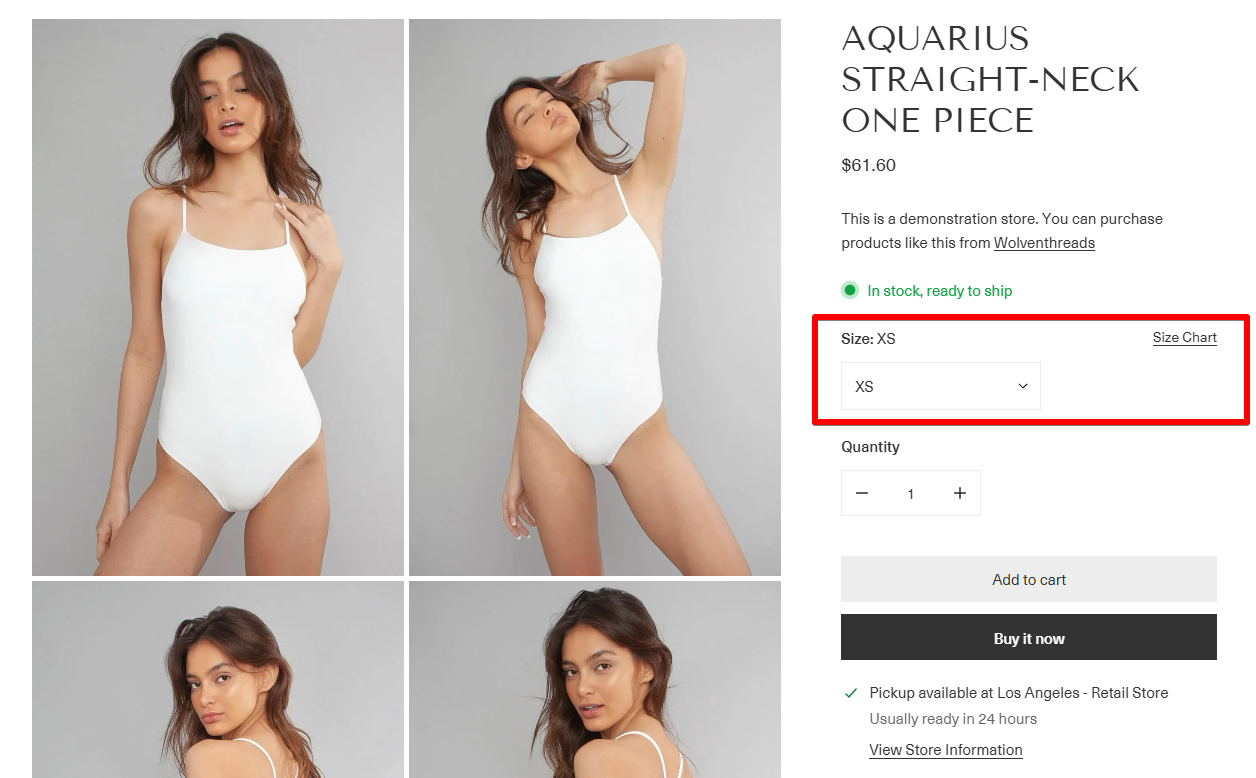
Products with variants are great for giving customers more choices. To learn about variants and how to add product variants, see [Variants](https://help.shopify.com/en/manual/products/variants).
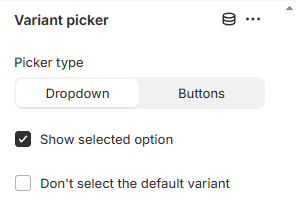
In the product information, you can enable show the selected option and choose **Picker type** as **Dropdown**/ **Buttons**.
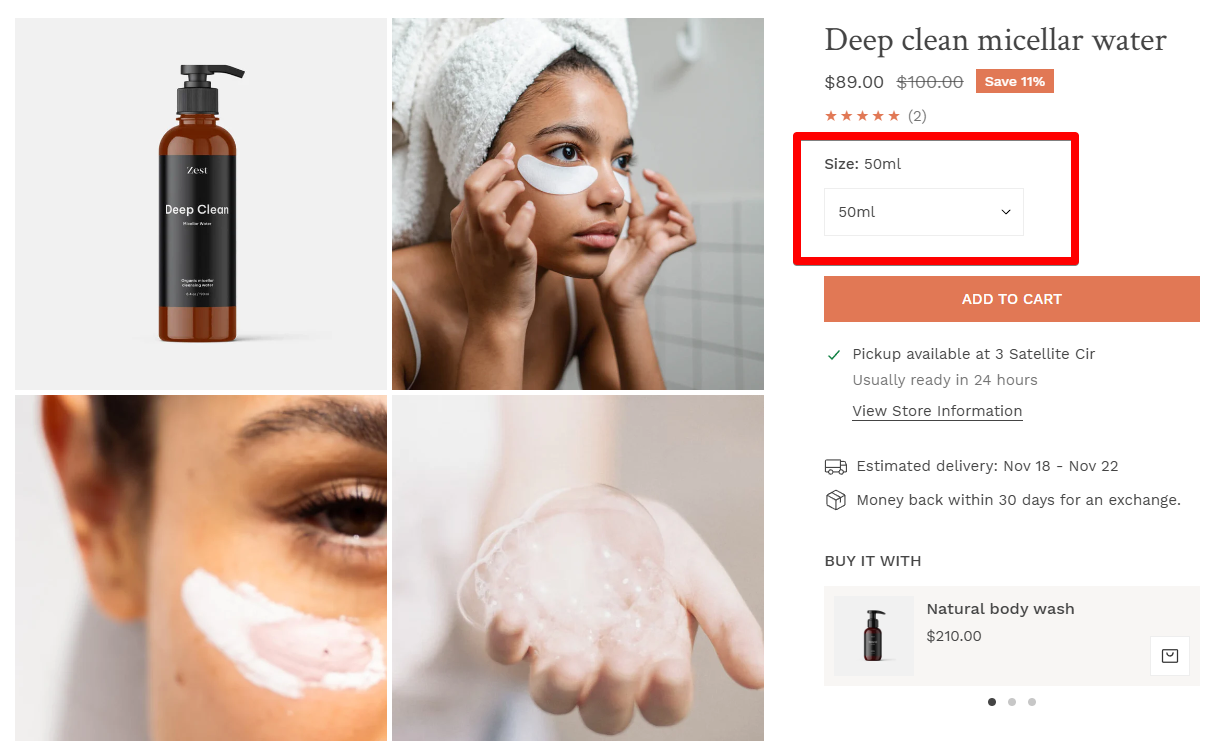
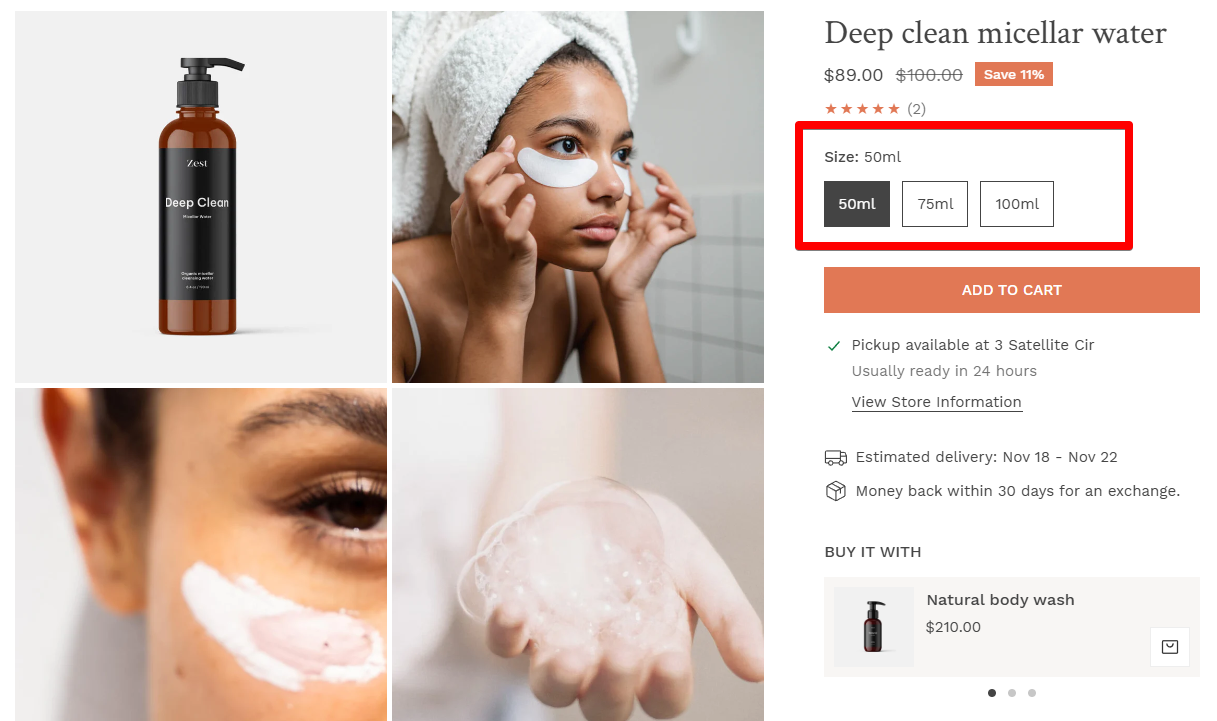
Opt to hide/show the selected option or pre-select the default variant.
* **Size chart**
Add the Option name you want to display your size chart and select a page created in [Shopify Pages](https://help.shopify.com/en/manual/online-store/themes/theme-structure/pages#add-new-page).
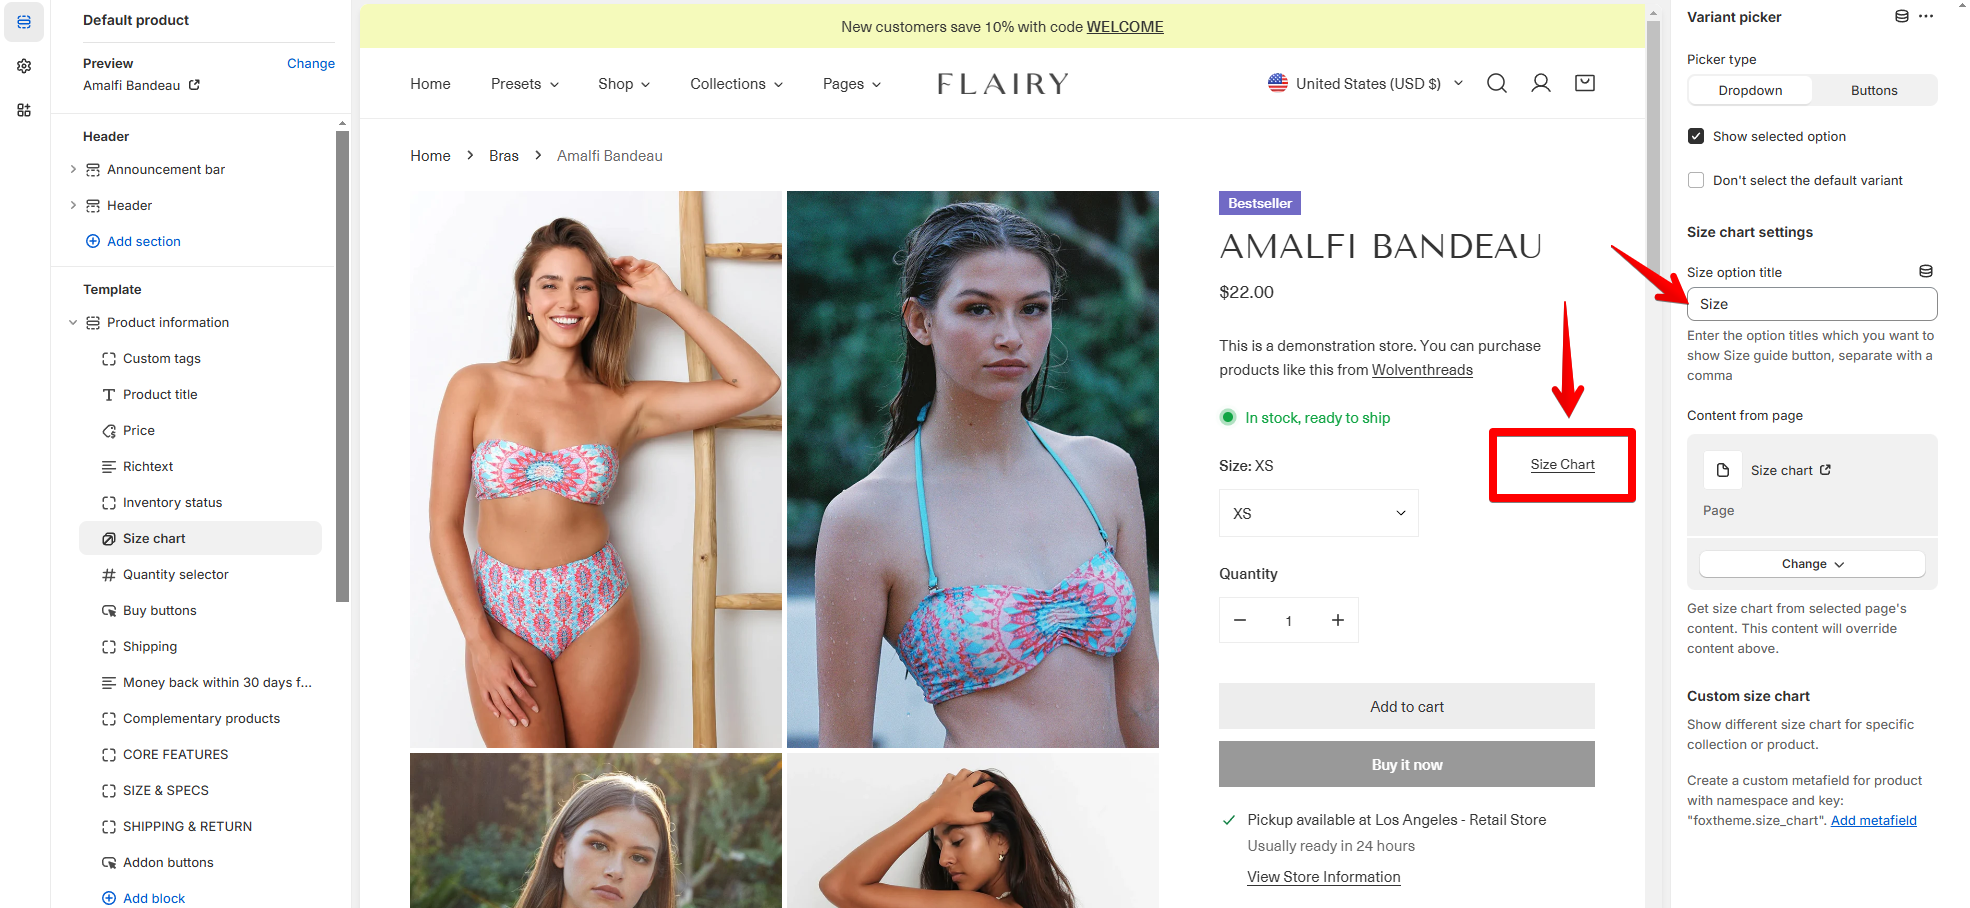
You can use Shopify Metafields to show different size charts across products.
Learn more: [Add a size chart to your product page](https://docs.foxecom.com/zest-theme/faqs/product-page/add-a-size-chart-to-your-product-page)
#### Buy buttons
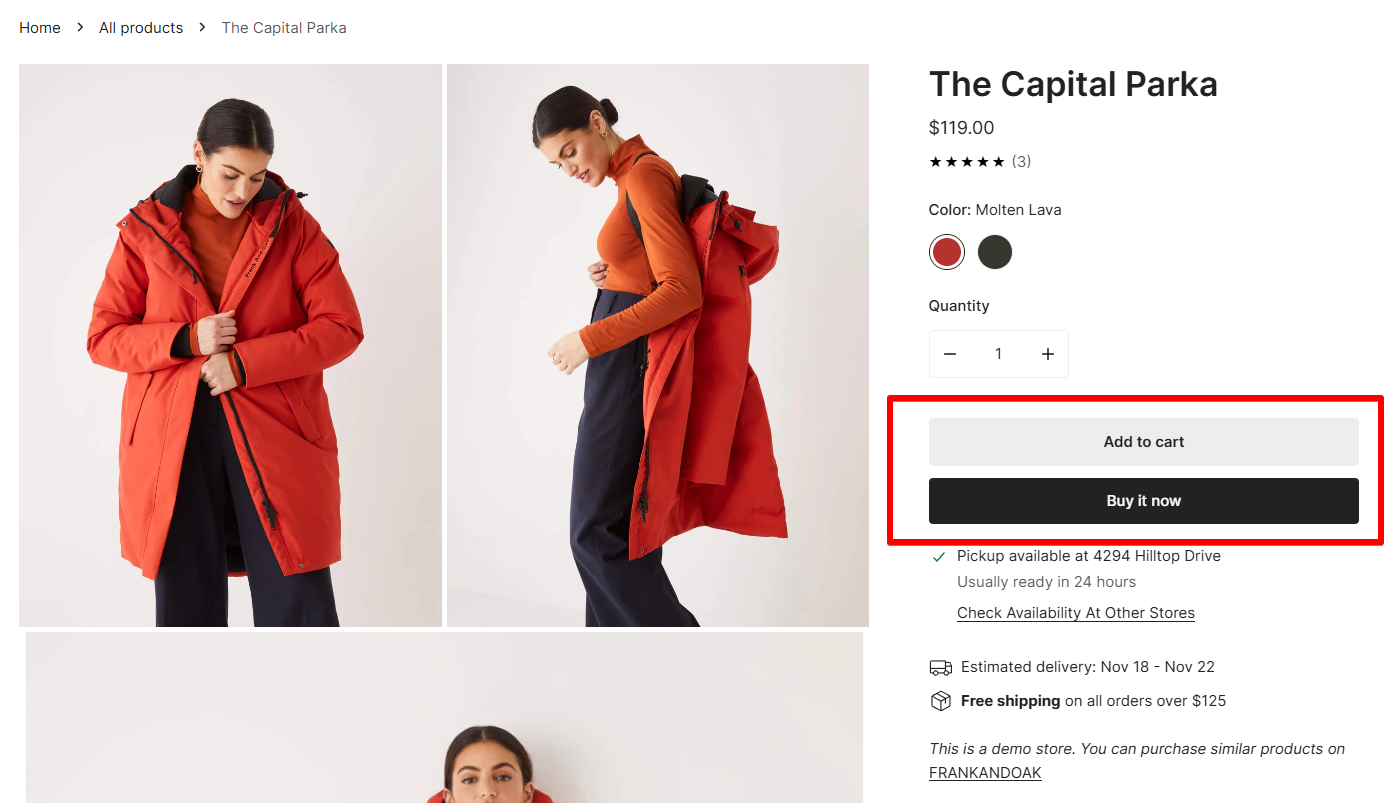
Add an **Add to Cart** button to allow customers to easily add an item to their cart, and include **Dynamic checkout** buttons to let them quickly proceed to the checkout page for a faster, streamlined purchase experience.
You can also include a recipient form for gift card products.
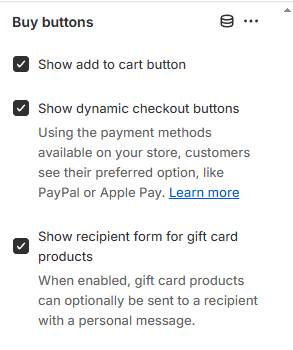
👀 [*Learn more about Shopify Dynamic checkout buttons*](https://help.shopify.com/manual/online-store/dynamic-checkout)*.*
🎁[*Learn more about gift cards.*](https://help.shopify.com/manual/products/gift-card-products)
#### Product meta
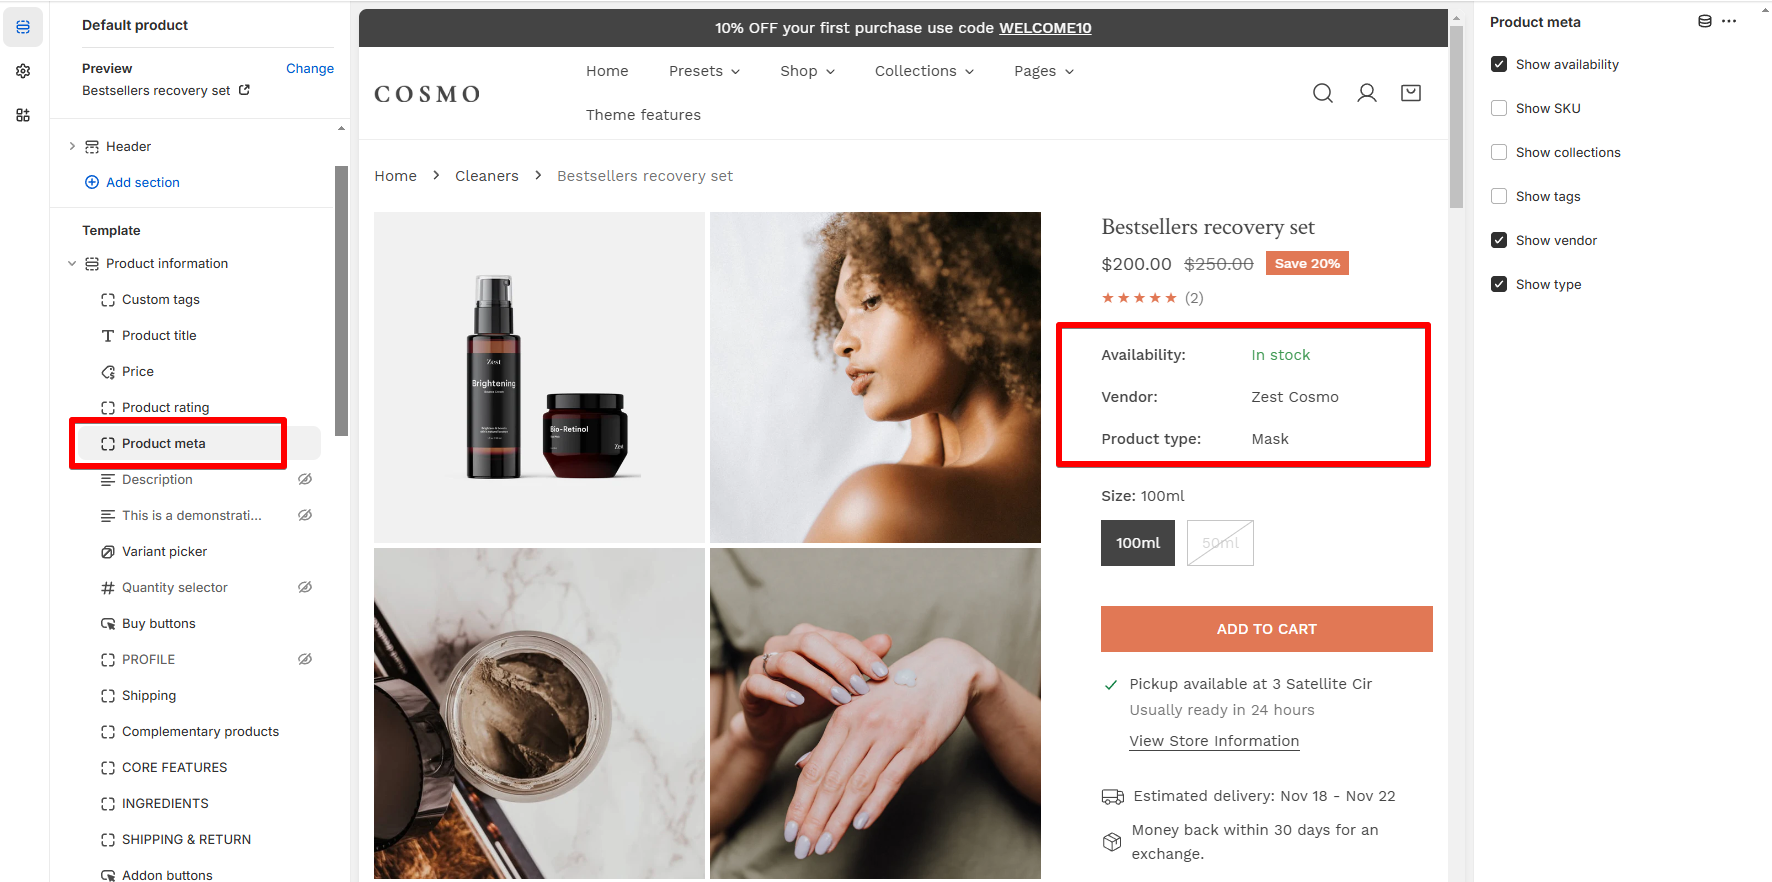
Show/ hide the following product details:
* availability
* collections
* SKU
* product type
* product vendor
#### Shipping information
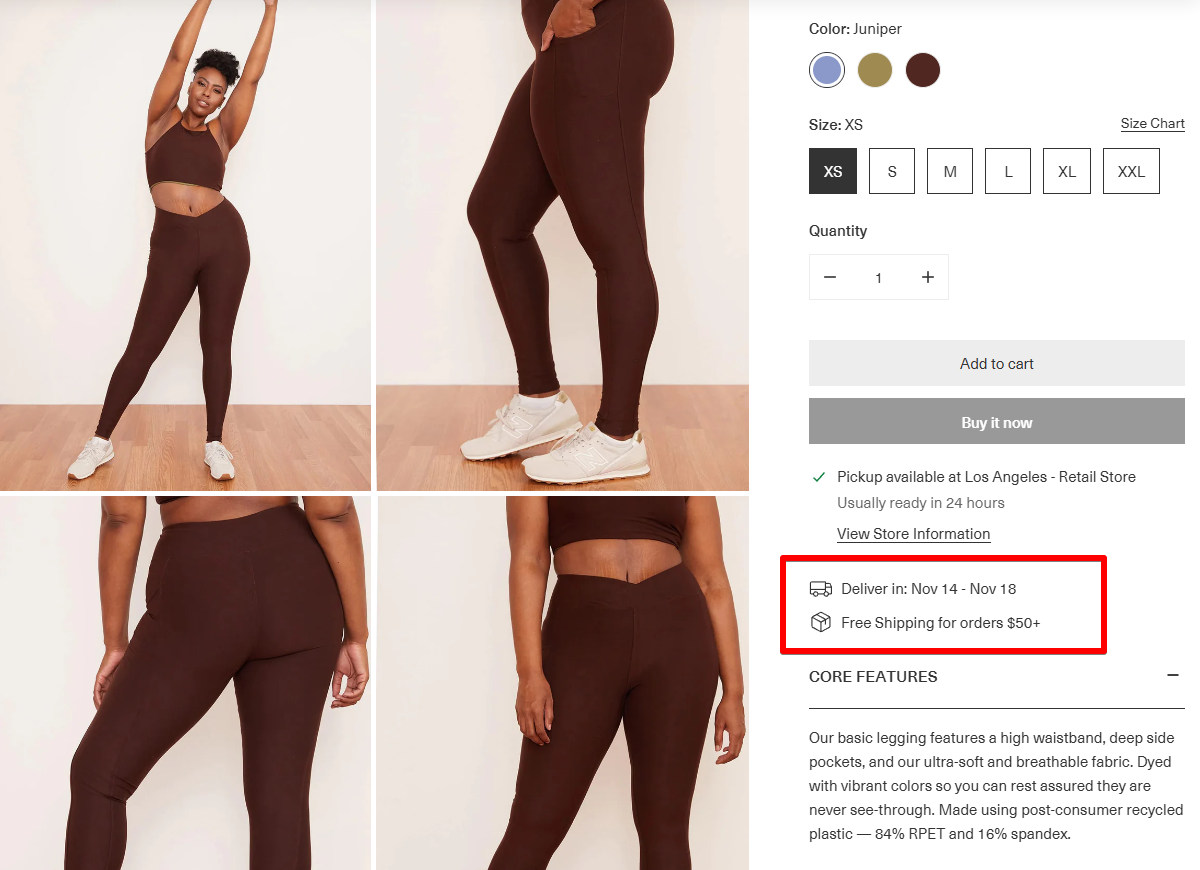
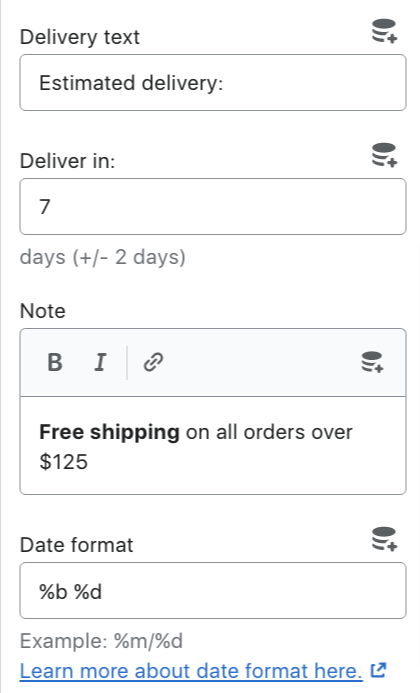
Enable/ disable estimated delivery duration and shipping text.
Add other details if needed (delivery text, shipping time, and delivery note).
#### Add-on buttons
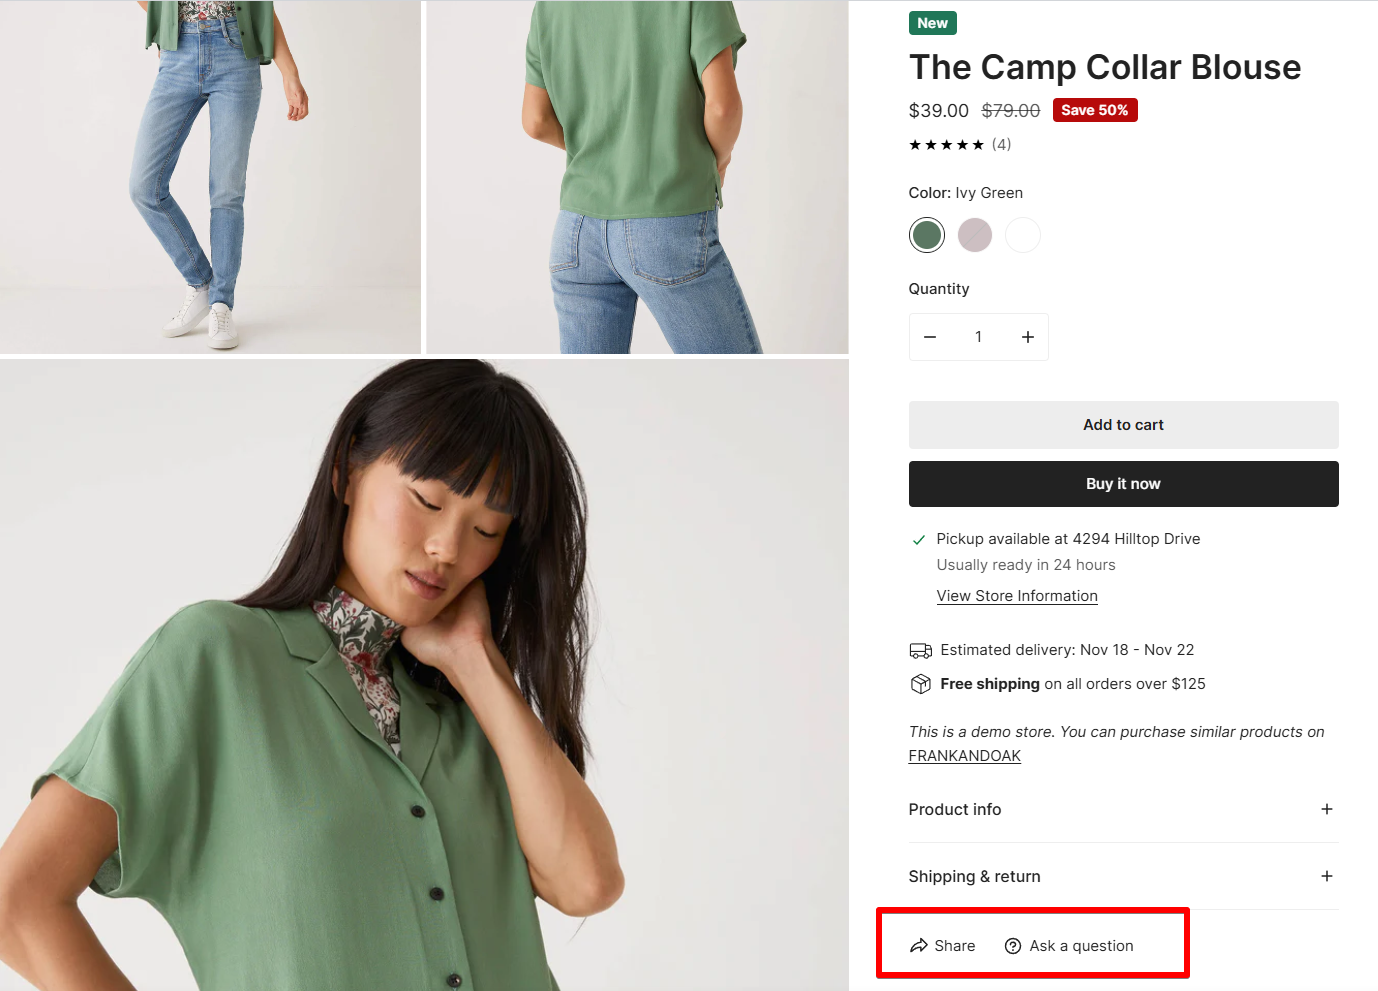
Enable/ disable the following add-on options:
* Ask a question
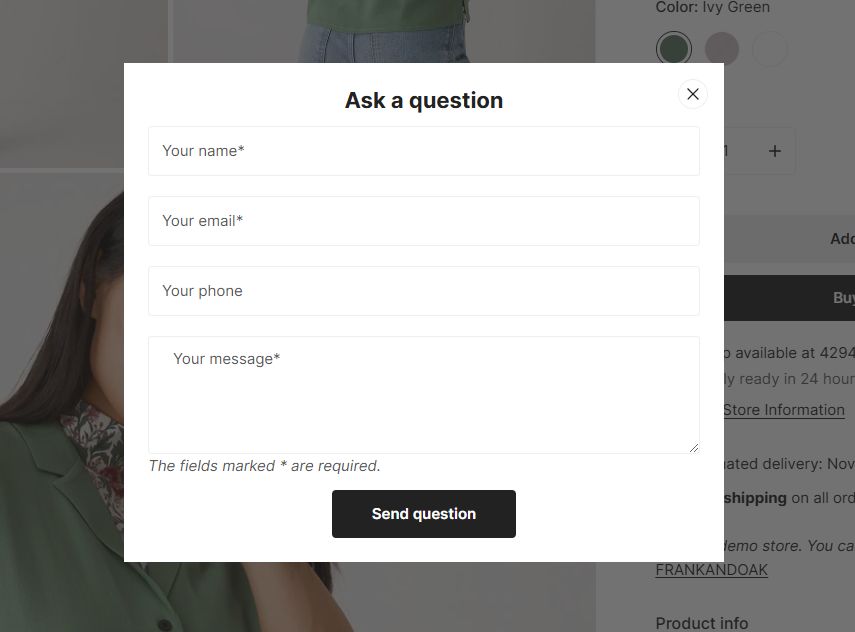
Your Ask a question form sends all submissions to the **sender email address** of your store. You can change the sender email address in the **Notifications** settings page of your Shopify admin.
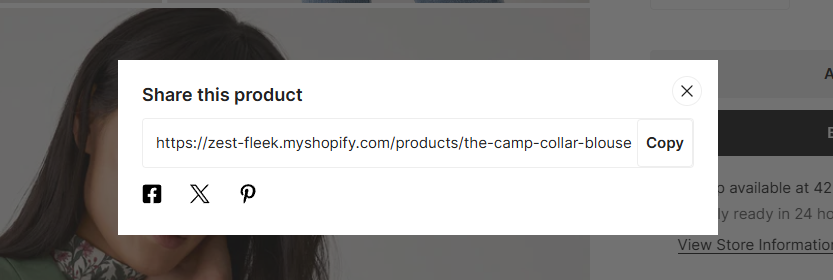
* Social sharing
#### Collapsible tab
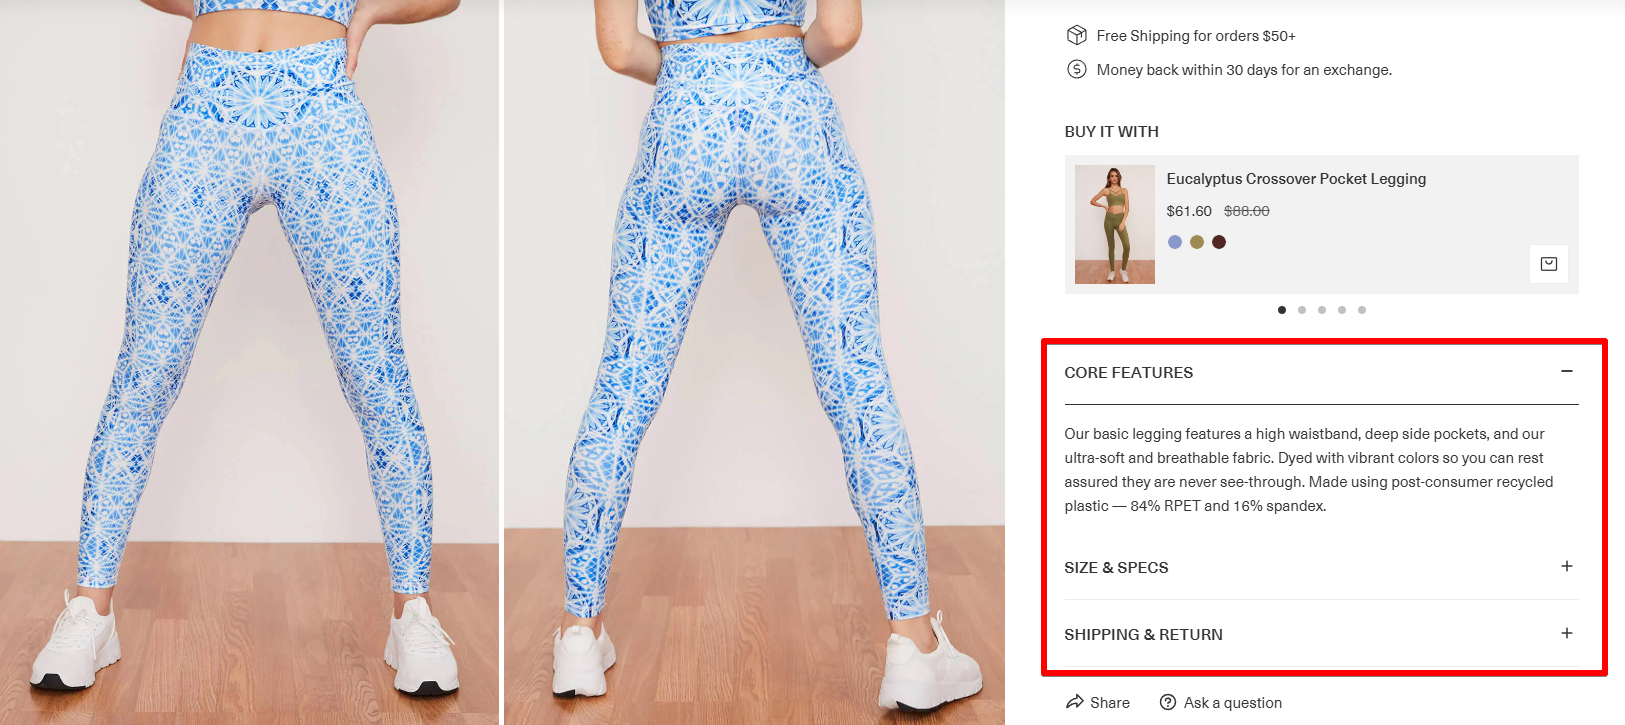
Add a heading and extra information on the tabs.
You can also add content using custom liquid.
⭐ Related resource: [Show dynamic content for Products using Metafields](https://youtu.be/6TT9lbSOJ9M)
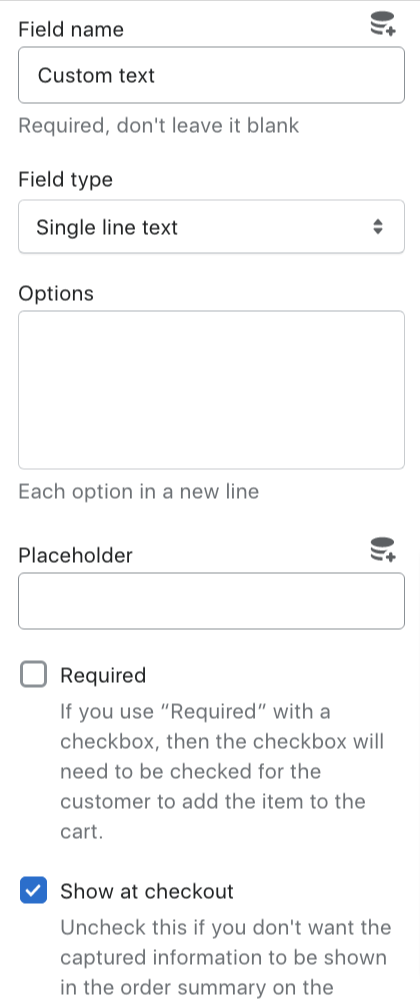
#### Custom field
Add text into the provided space for the field name, options, and placeholder.
* You can control how this block displays as required or show it at the checkout.
For the field type, there are 3 options: single-line text, multi-line text, and select.
#### Trust badge
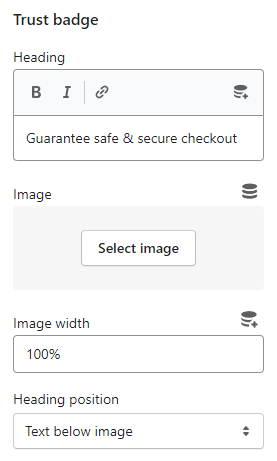
A badge or seal to instill trust in your potential customers.
Add a heading and image for the badge. You can control the image width and the heading position.
#### **Complementary products**
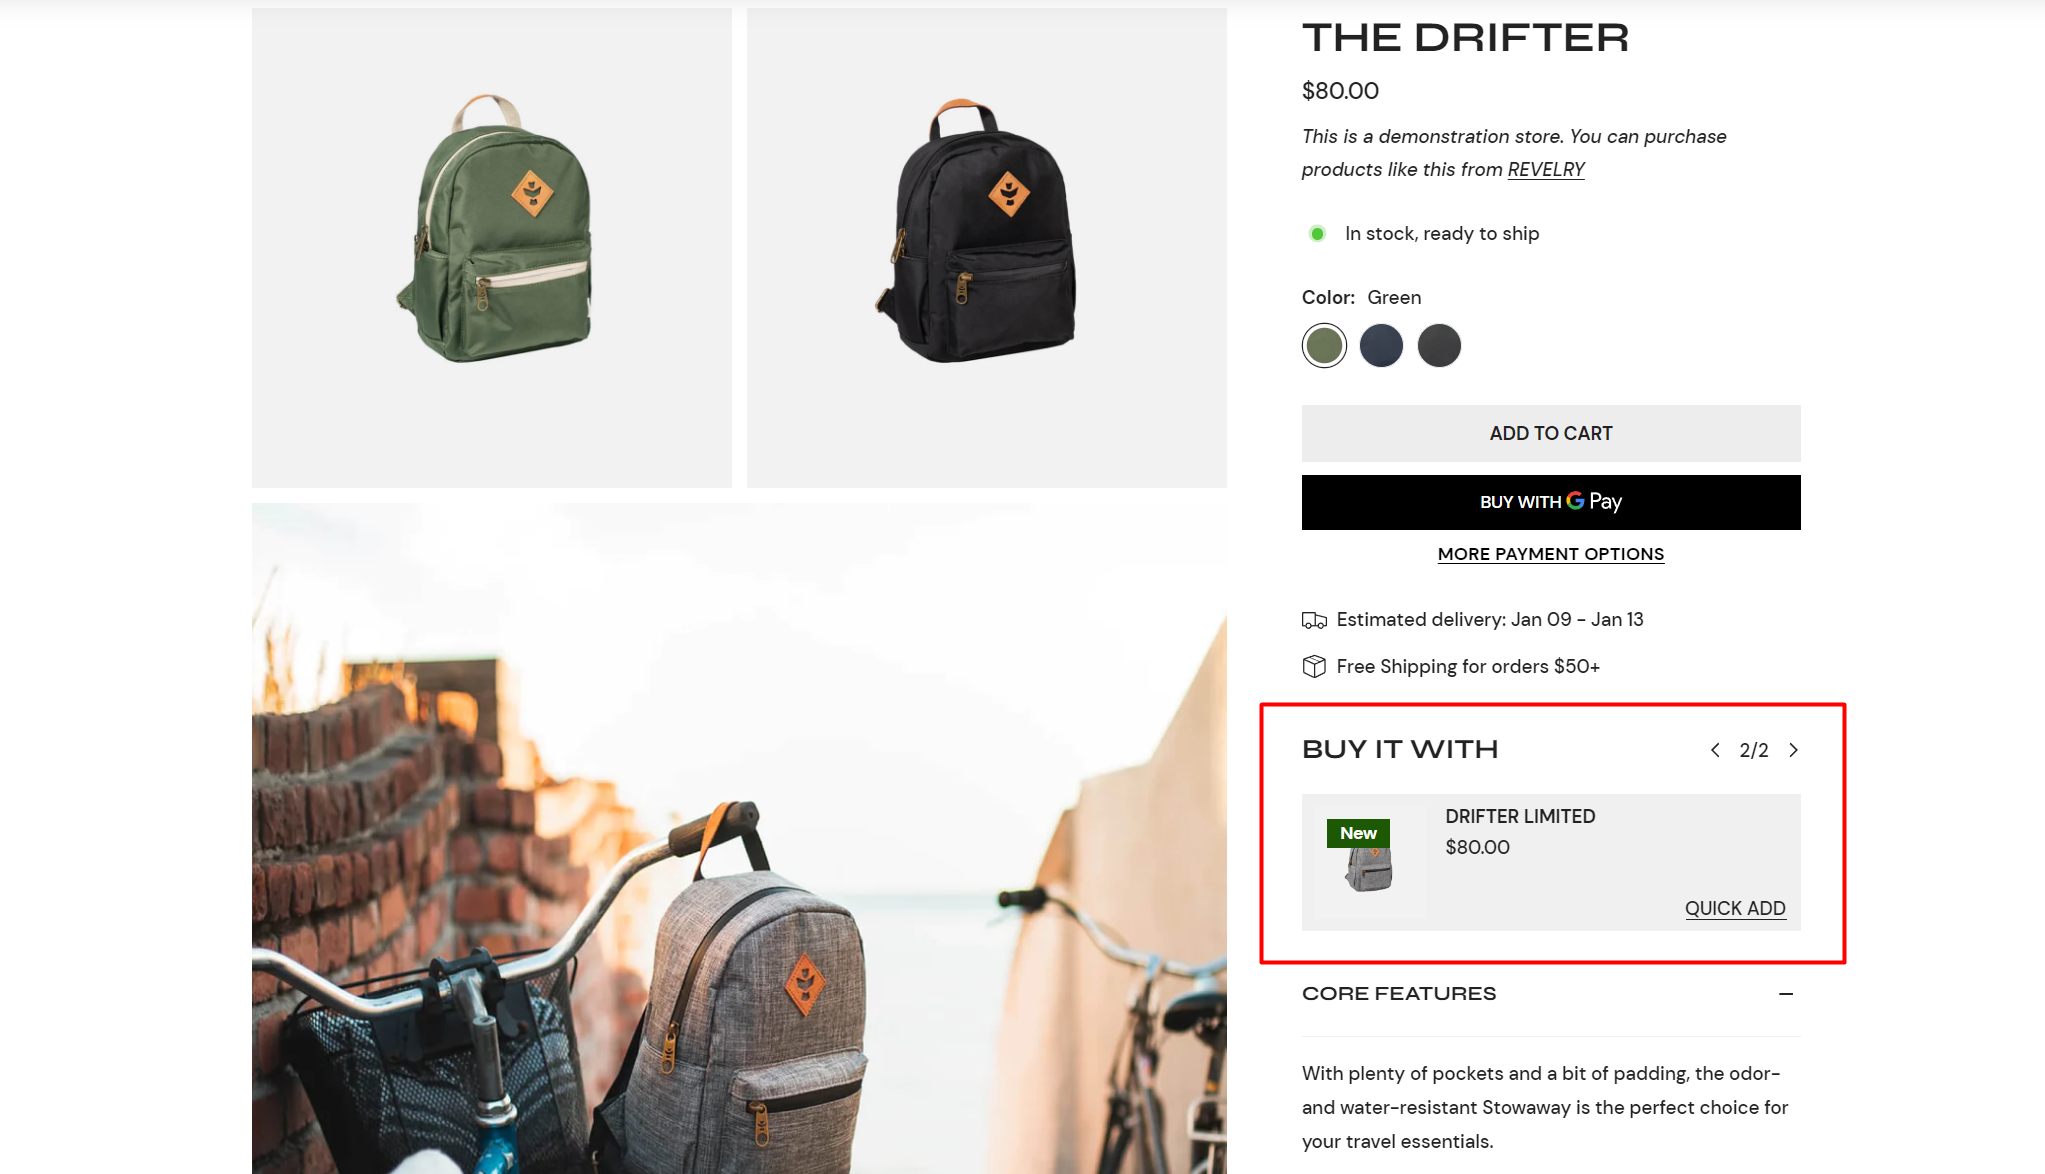
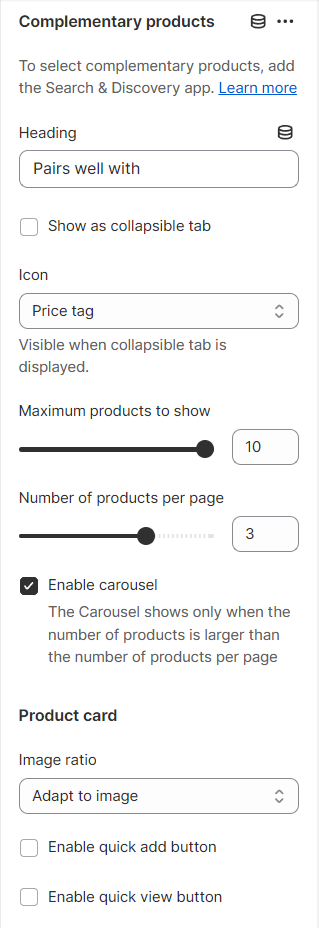
Complementary products are products often bought in addition to the selected product.
Set your complementary products using the app Search & Discovery. [Learn more](https://help.shopify.com/en//manual/online-store/search-and-discovery/product-recommendations#complementary-products)
In the theme editor, you can add a **Heading** for the section and select an **Icon** from the list.
Set the **maximum number of products to show** (1-10 products) and the **number of products per page** (1-4 products).
* You can enable the carousel effect for this section.
#### Inventory status
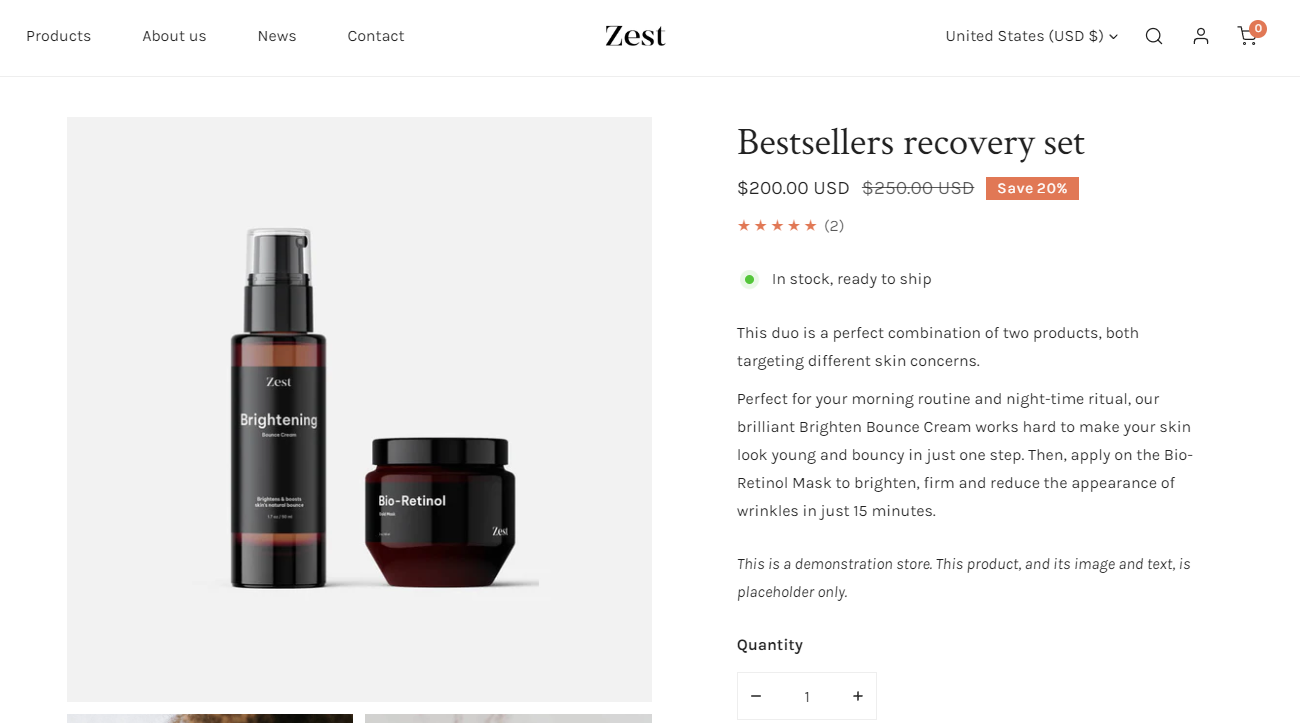
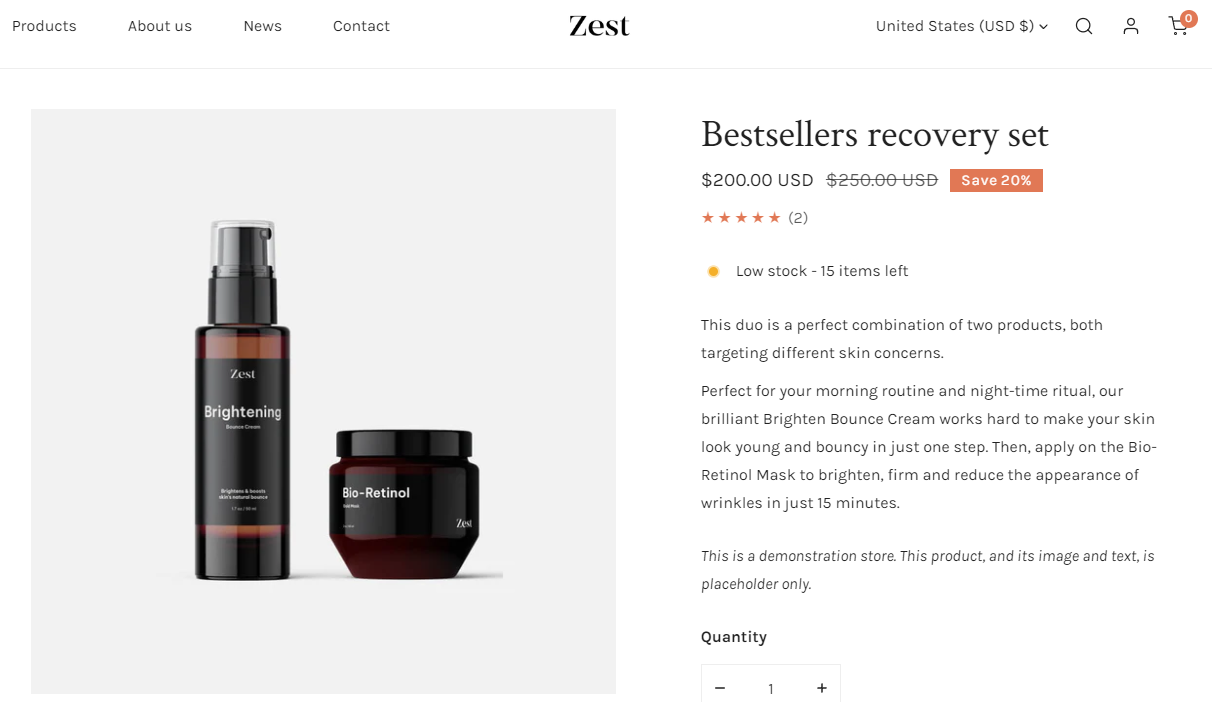
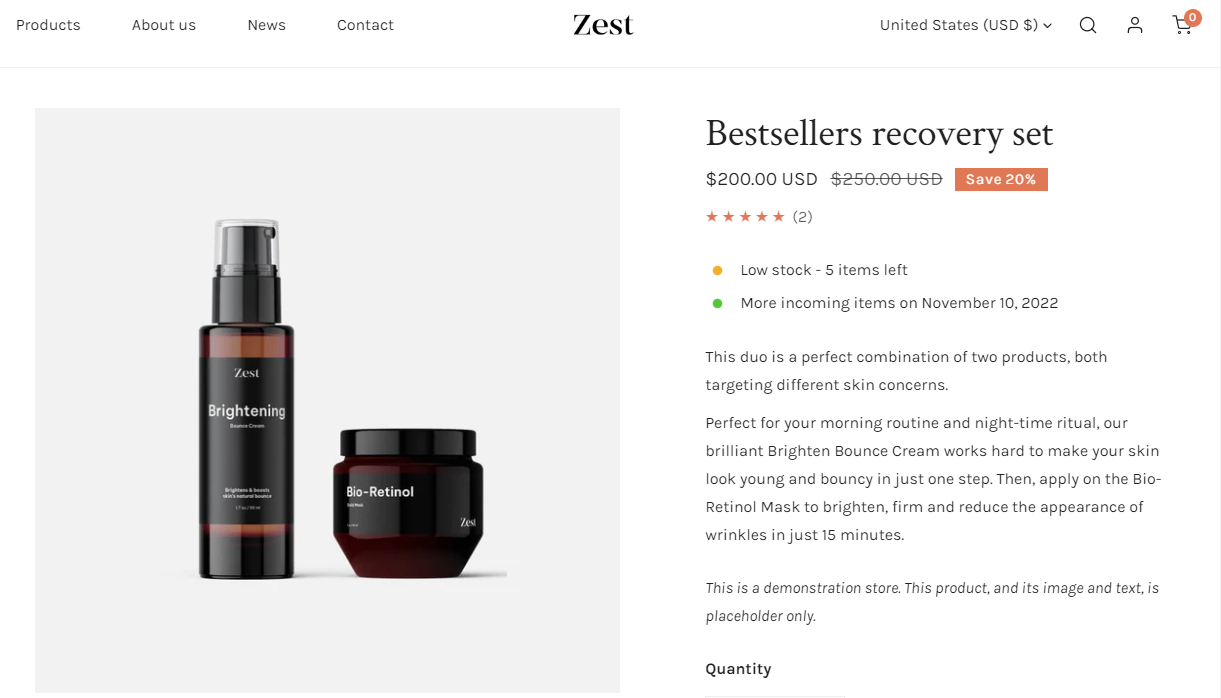
The inventory status block lets you display the stock status on individual product pages so that customers can know if a product is in stock, running low in stock, or when more stock arrives.
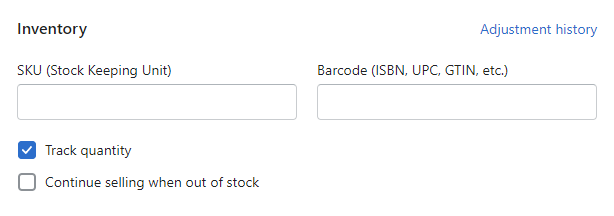
To show the **Inventory status** as in stock and low stock alerts on your product page, in **Shopify products** > **Variants**:
* enable ✅ **Track quantity**;
* disable **Continue selling when out of stock**.
In the product template, add I**nventory status** block > select the **Low inventory threshold** by tweaking the slider (between 0 and 20).
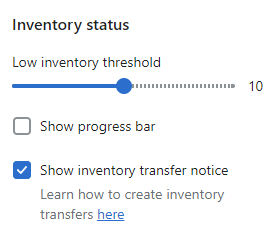
You can also show the low inventory alert as a progress bar.

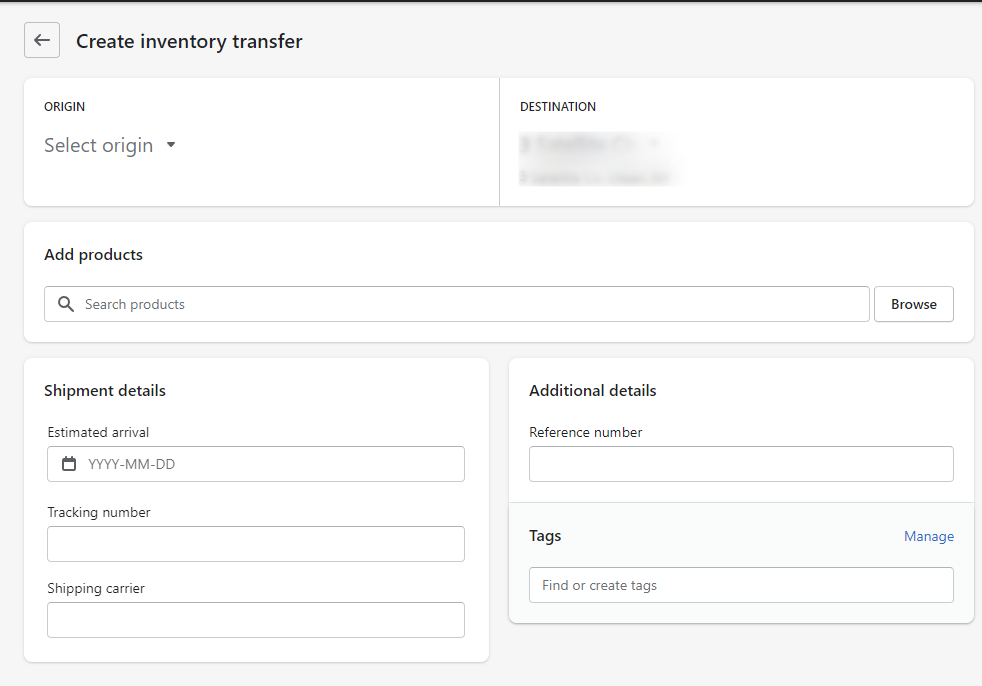
To **show inventory transfer notice**, you need to create a inventory transfer. Below are the needed steps to display the inventory transfer notice on individual product pages.
Step 1: From your Shopify admin, go to **Products** > [**Transfers**](https://www.shopify.com/admin/products/transfers).
Step 2: Click **Add transfer**.
Step 3: In the **Add products** section, enter or select the products and variants that you want to add to the transfer, and then click **Add to transfer**.
Step 4: Under **Quantity**, enter the quantities for each product in the transfer.
Step 5: In the **Shipment details** section, enter a date in the **Estimated arrival** field.
Step 6: **Save** the settings.
#### Apps block
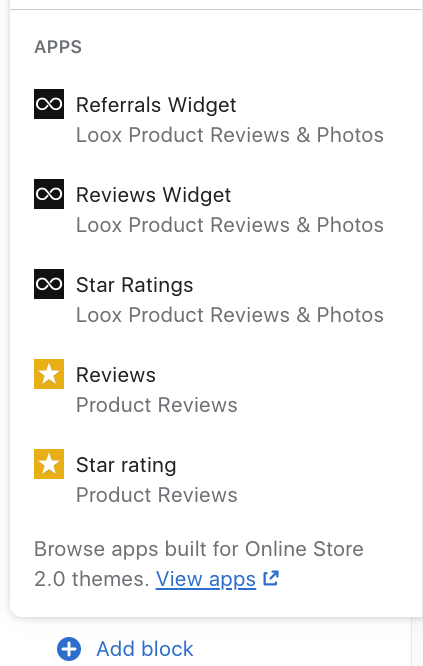
You can select the suitable app block based on the 3rd-party apps that they have integrated with **Zest** theme.