Menu

A guide for creating, editing, and showing menus in your store’s header using the Zest theme.


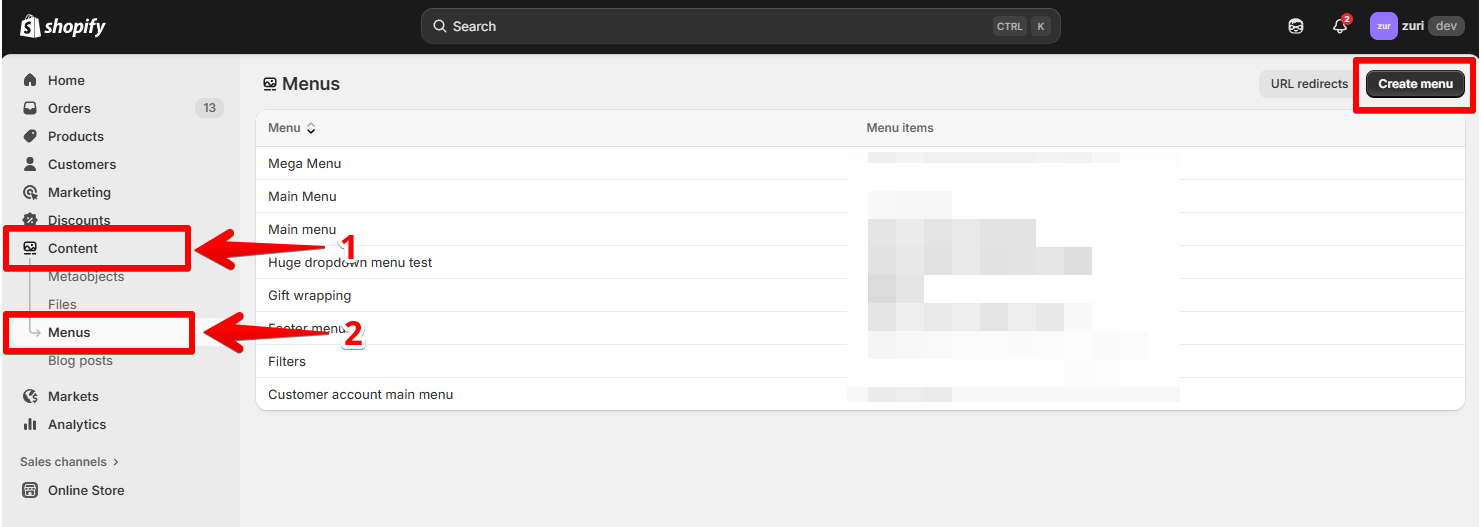
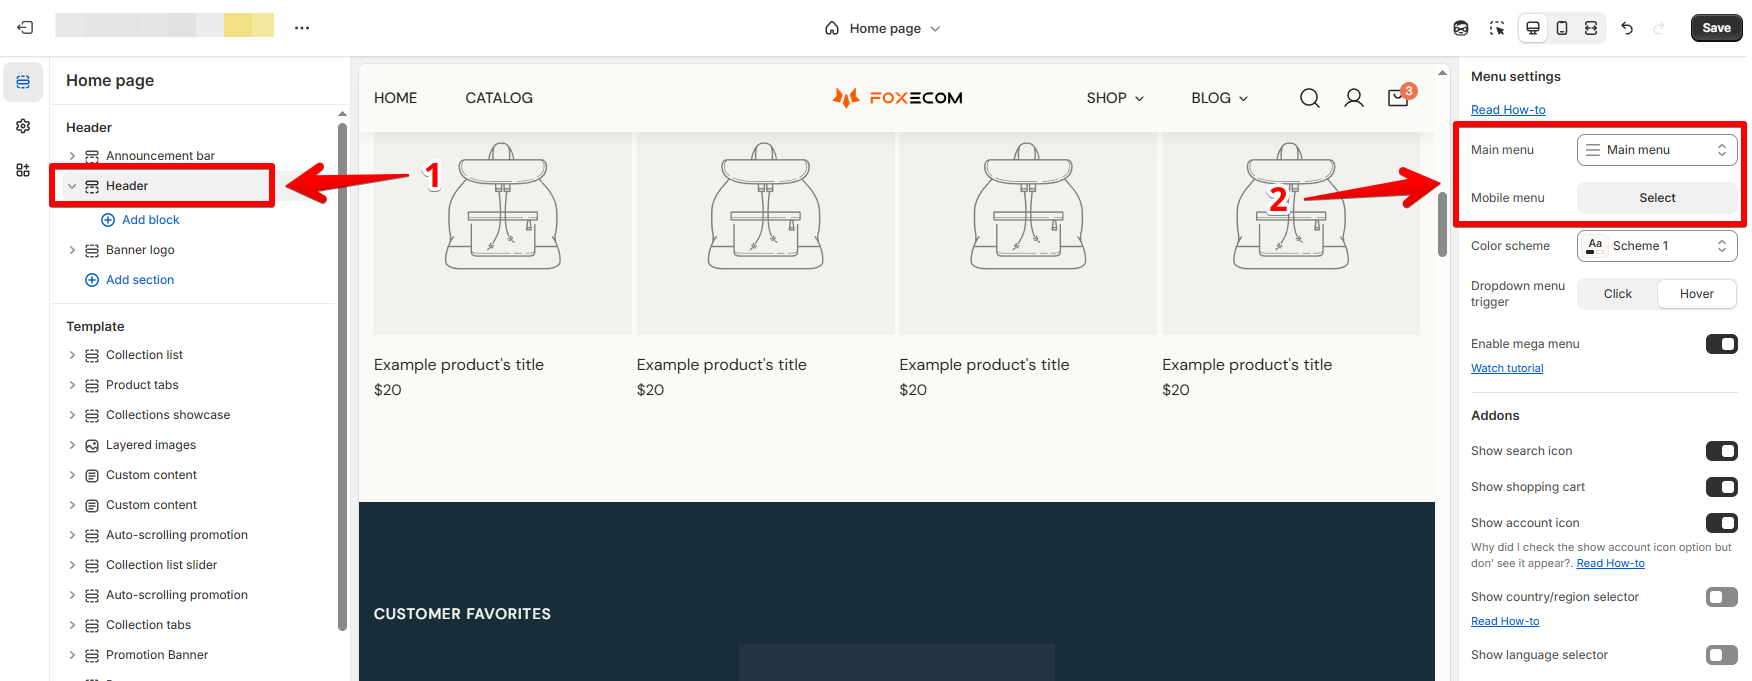
Customers navigate your online store using the links on pages and menus. Different websites require different kinds of menus, depending on the size, nature, and objectives of your store.

What are a menu, drop-down menu, and mega menu?

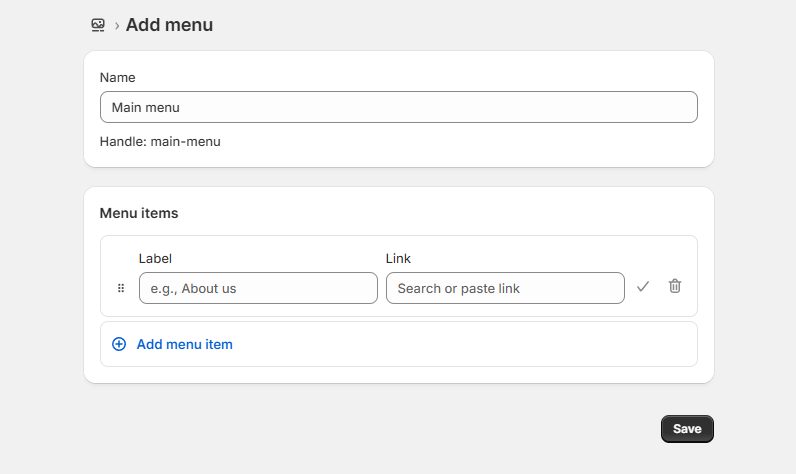
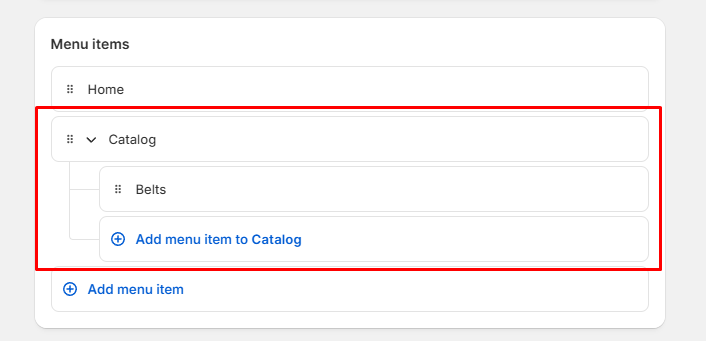
You can add menu items to your online store menus to build your store's navigation. Menu items are links to products, collections, webpages, blog posts, policies, or other websites.

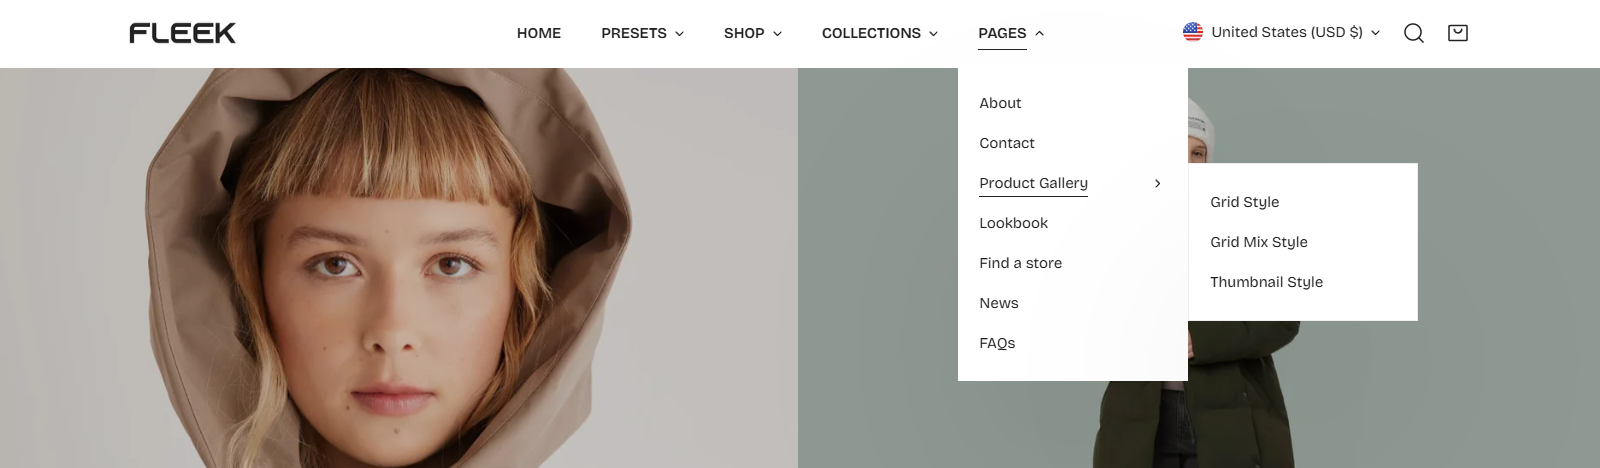
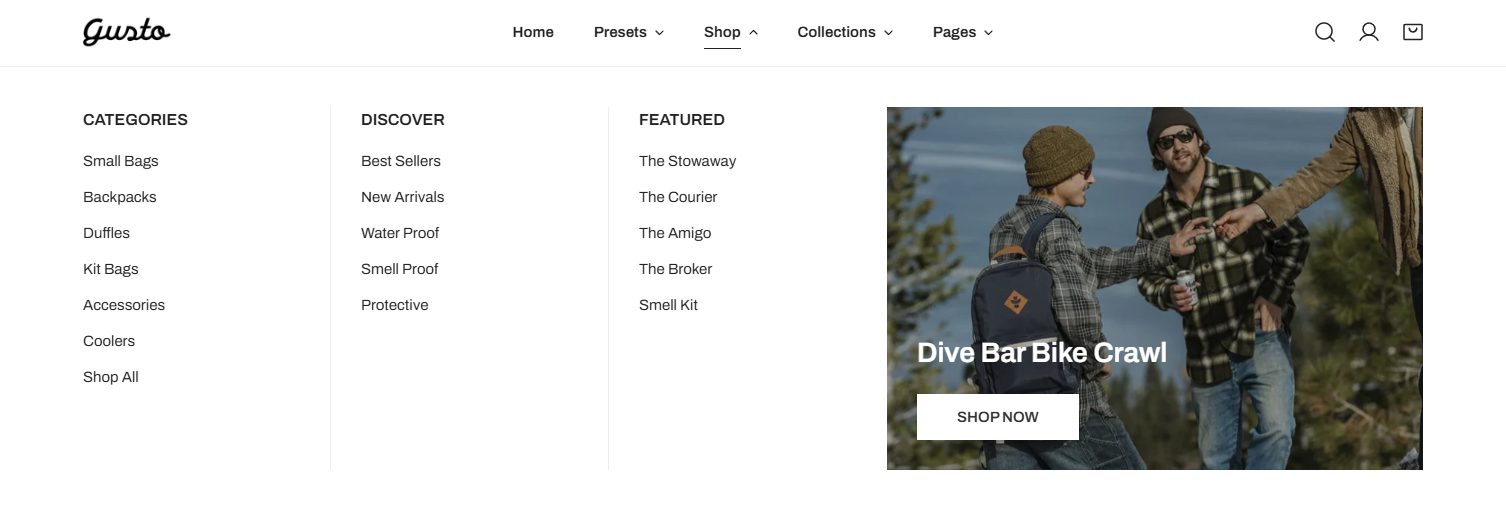
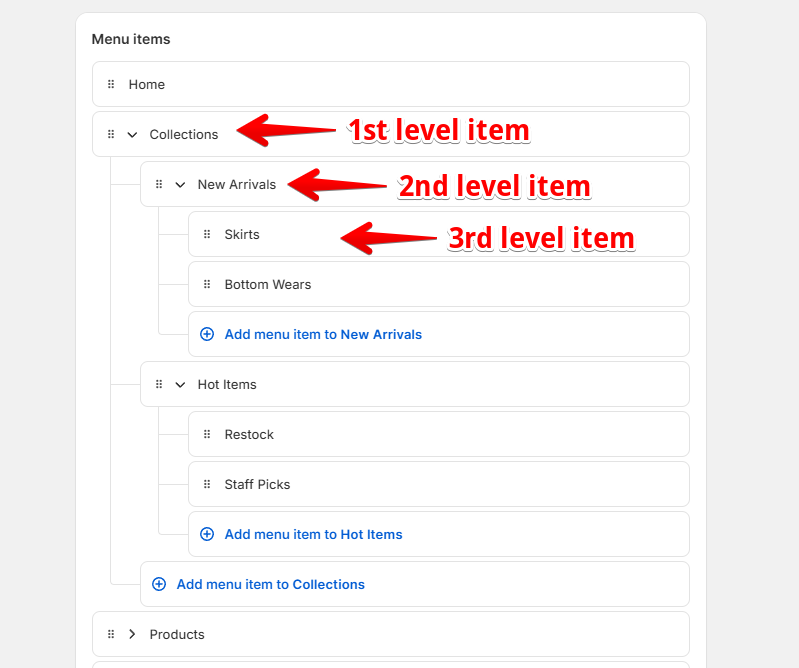
A drop-down menu: a drop‑down menu with multiple levels and can include rich content like banners, custom cards, or collections.

An example of a dropdown menu

A mega menu: a drop‑down menu with multiple levels and can include rich content like banners, custom cards, or collections.

An example of a mega menu with a banner

When to use a mega menu?

Use a mega‑menu when your store has many products or categories, or you want to showcase banners, images, or collections under your main menu item. It improves navigation clarity on large catalogs.

How to create a menu

1

From Shopify admin, navigate to Content > Menus.

2

Choose an existing menu to edit or click Create menu to add a new one.

3

Give the menu a name and click Add menu item.

  • Enter the name (what appears on the menu)

  • Select destination (Product, Collection, Page, Blog, etc.) or enter external URL.

4

To create a sub‑menu (drop‑down), drag items under a top‑level item and indent.

5

Rearrange menu items by dragging them into desired order.

6

When done, click Save.

A menu with 3rd-level nested items is recommended for the mega menu.

How to apply your menu to Zest header

Last updated

Was this helpful?