
Other Pages
Blog posts
2 min read
Static sections
Announcement bar
Age verifier pop-up
Header
Footer
Mobile sticky bar
Dynamic sections
Merchants can add any section that is listed in Theme sections. Nevertheless, there is a section designed specifically for the blog post.
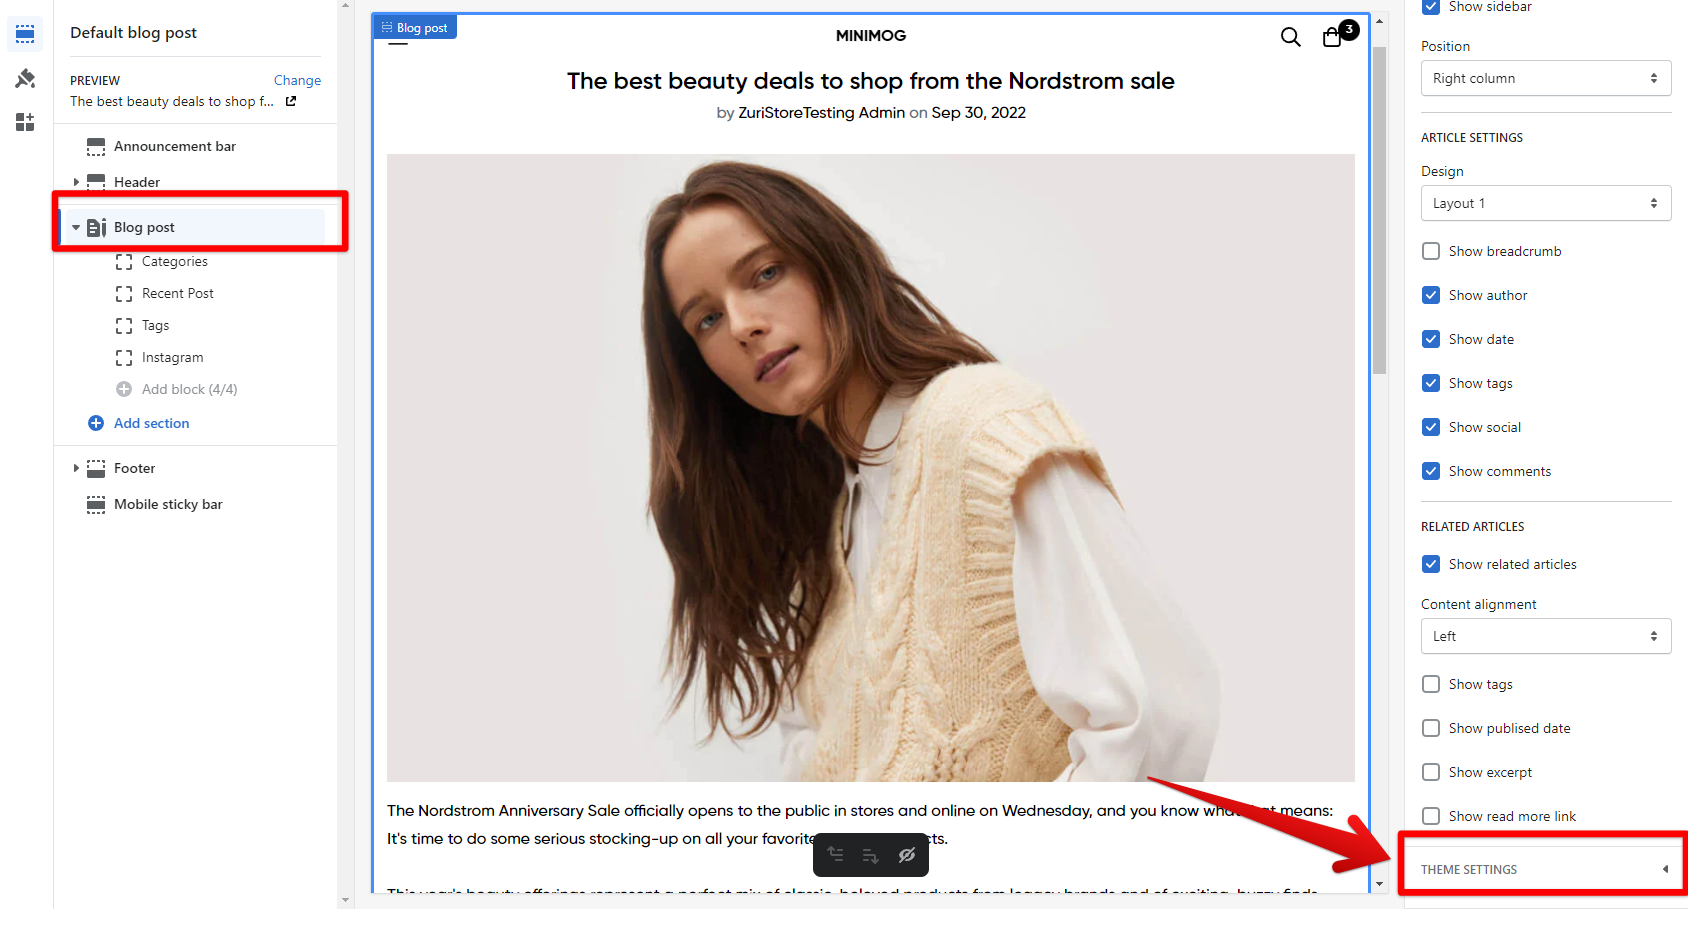
- In the theme editor (Customize), open the template selector
- Select Blog posts, then Default blog posts.
- On the left-sidebar, select Blog posts.
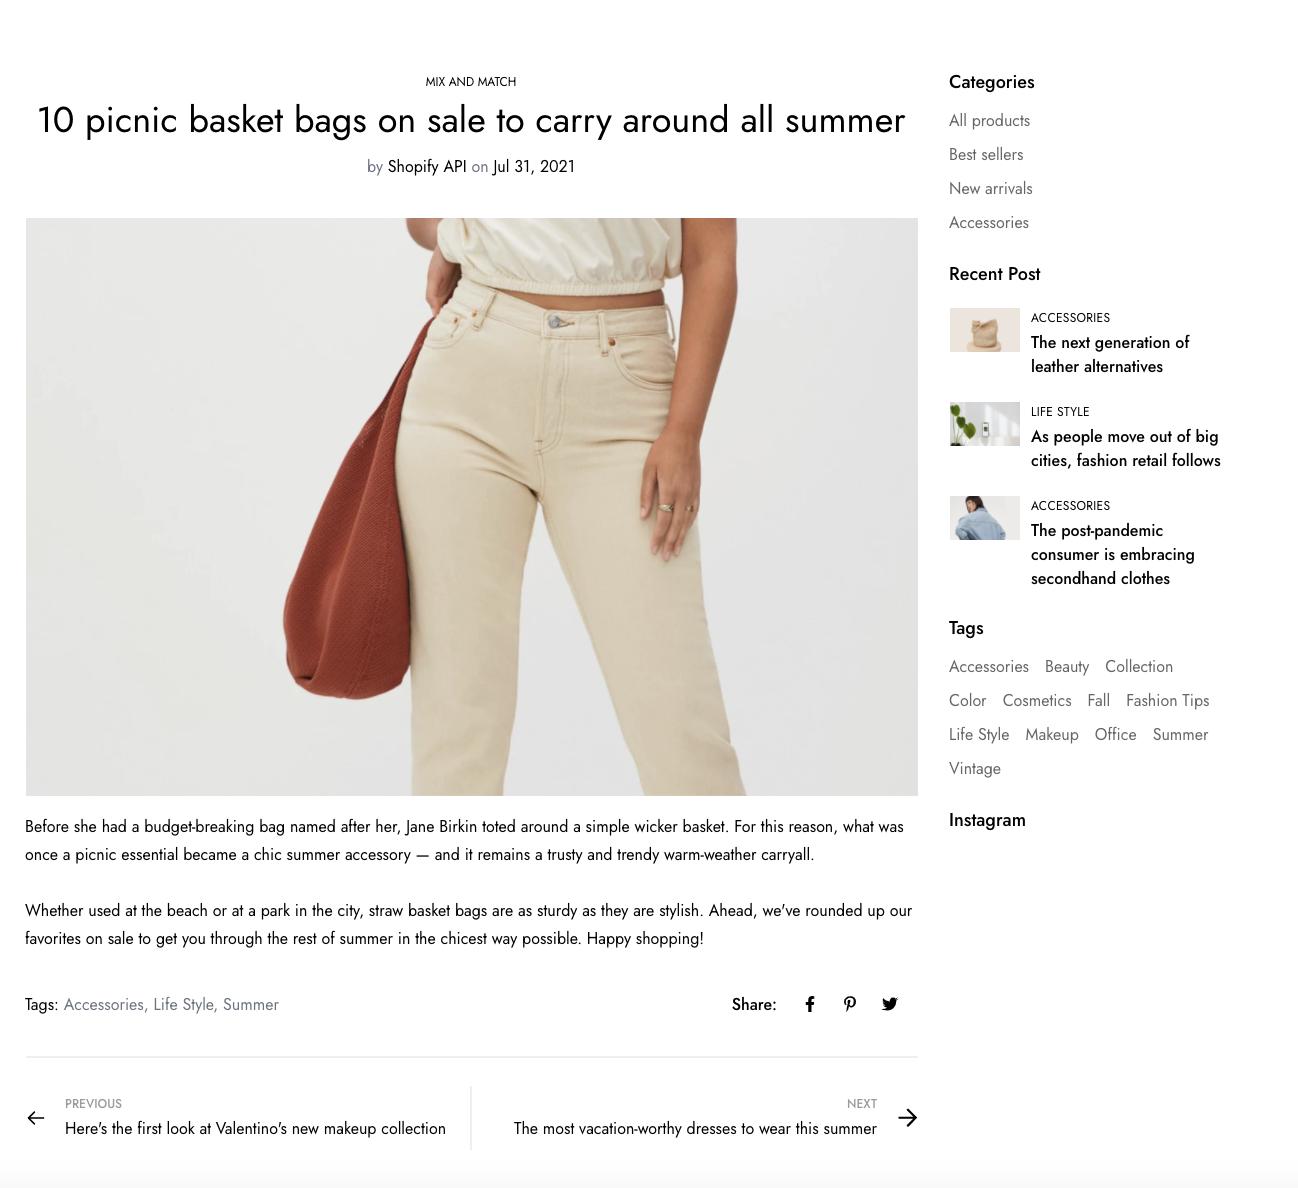
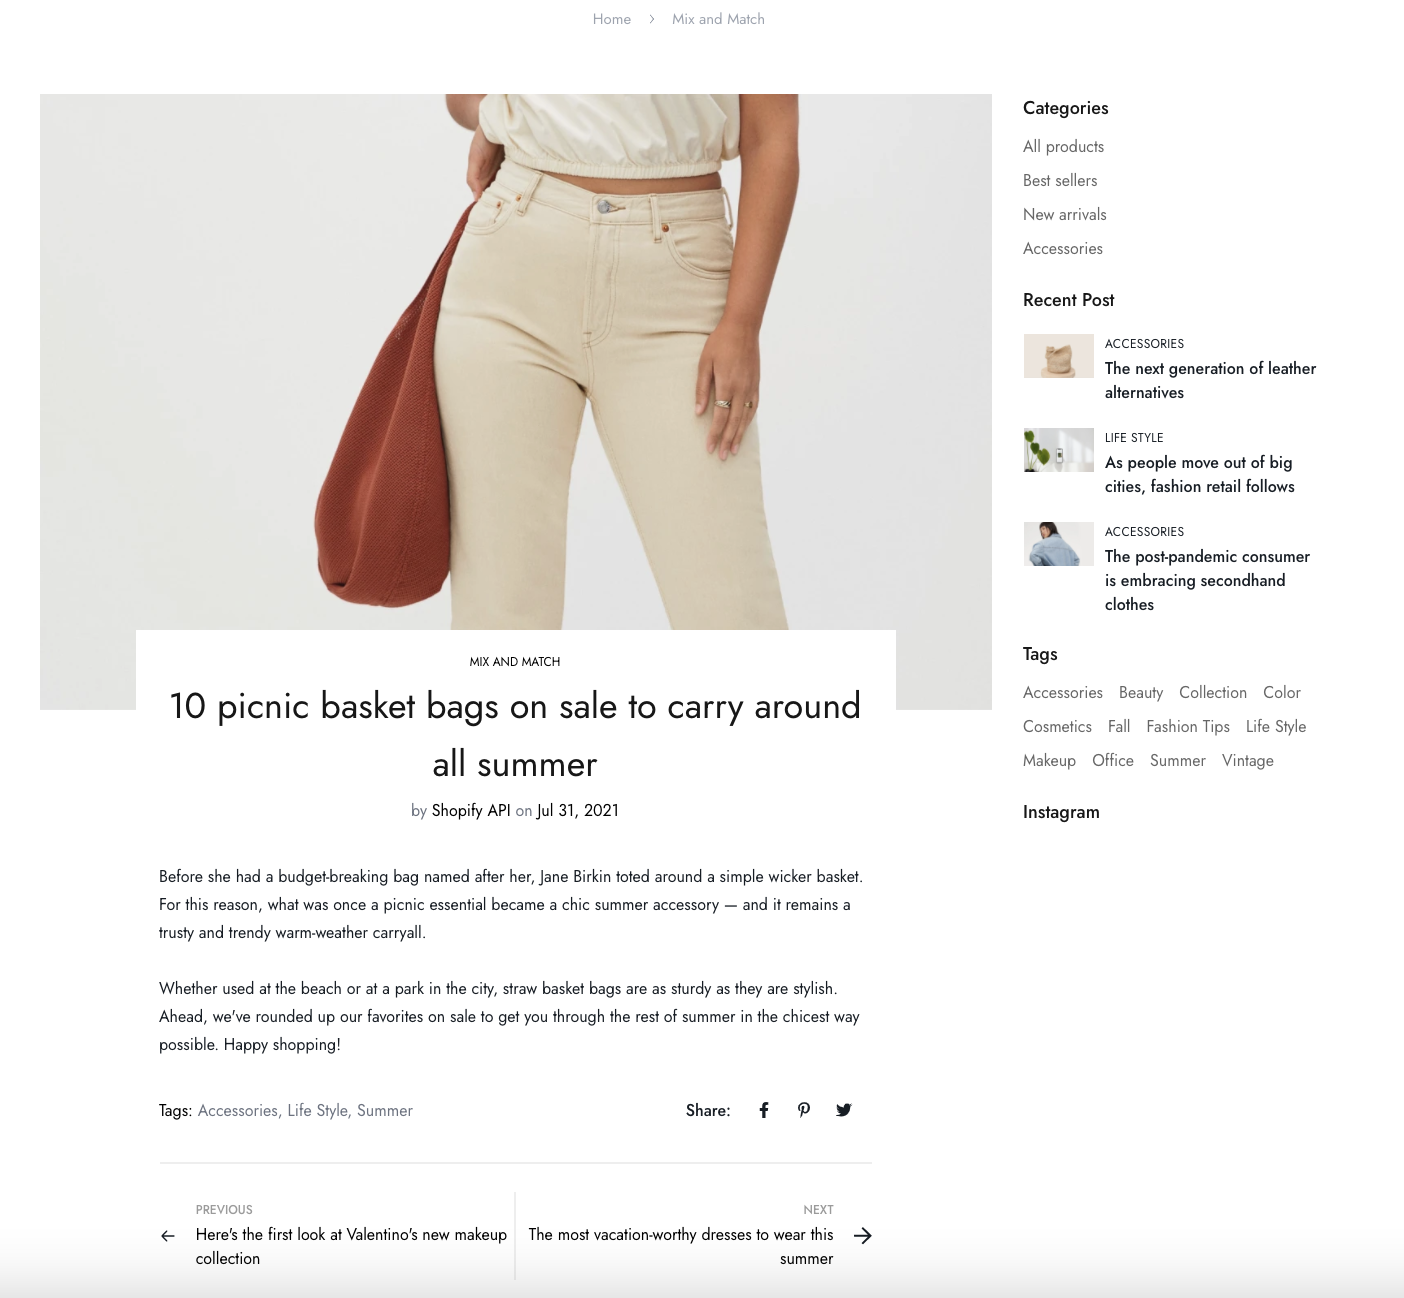
Blog post section settings
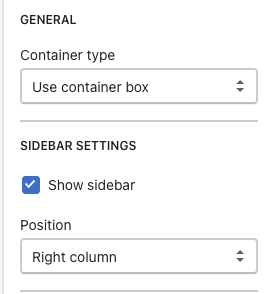
General & sidebar settings
- Control the container type: default, full width, and use container box.
- Enable/disable the sidebar and its positions
Article settings
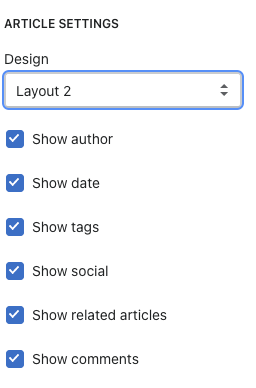
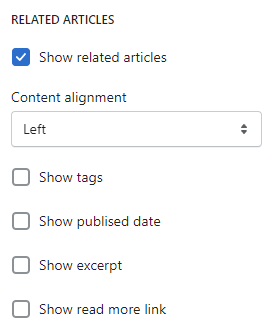
Related articles
- Show tags: Display the relevant tags of the blog post.
- Show published date: Display the date that the blog is issued.
- Show excerpt: Display a summary of the blog.
- Show read more link: Lead the customers to the full blog post.
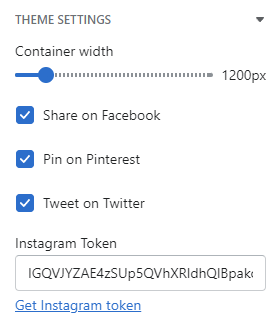
Theme settings
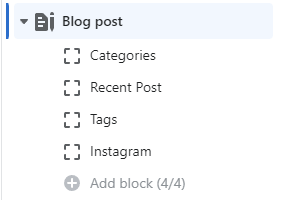
Block post block settings
Last updated