# Update Minimog theme
Keeping your **Minimog theme** up-to-date ensures your store benefits from the latest features, bug fixes, and compatibility improvements.
There are **two ways to update Minimog:**
* [Automatic update with FoxHome](#update-automatically-with-foxhome) (recommended)
* [Manual update](#update-minimog-manually)
Always back up your current theme before updating. Custom code and third-party app integrations may not carry over automatically. Review your customizations and check with app providers if additional configuration is needed.
## Update automatically with FoxHome
We recommend using [FoxHome](https://docs.foxecom.com/minimog-theme/getting-started/foxhome), FoxEcom's theme management tool, to simplify the update process.
1. Sign in to your [FoxHome](https://home.foxecom.com/) dashboard and select **Manage themes**.
2. Under **Out of dated themes**, find the Minimog theme you want to update and click **Update**.
3. Select **Update unlisted themes** if your theme isn't listed, choose it from the **Select theme** dropdown, and select **Verify**.
4. Click **Update now** to start the process.
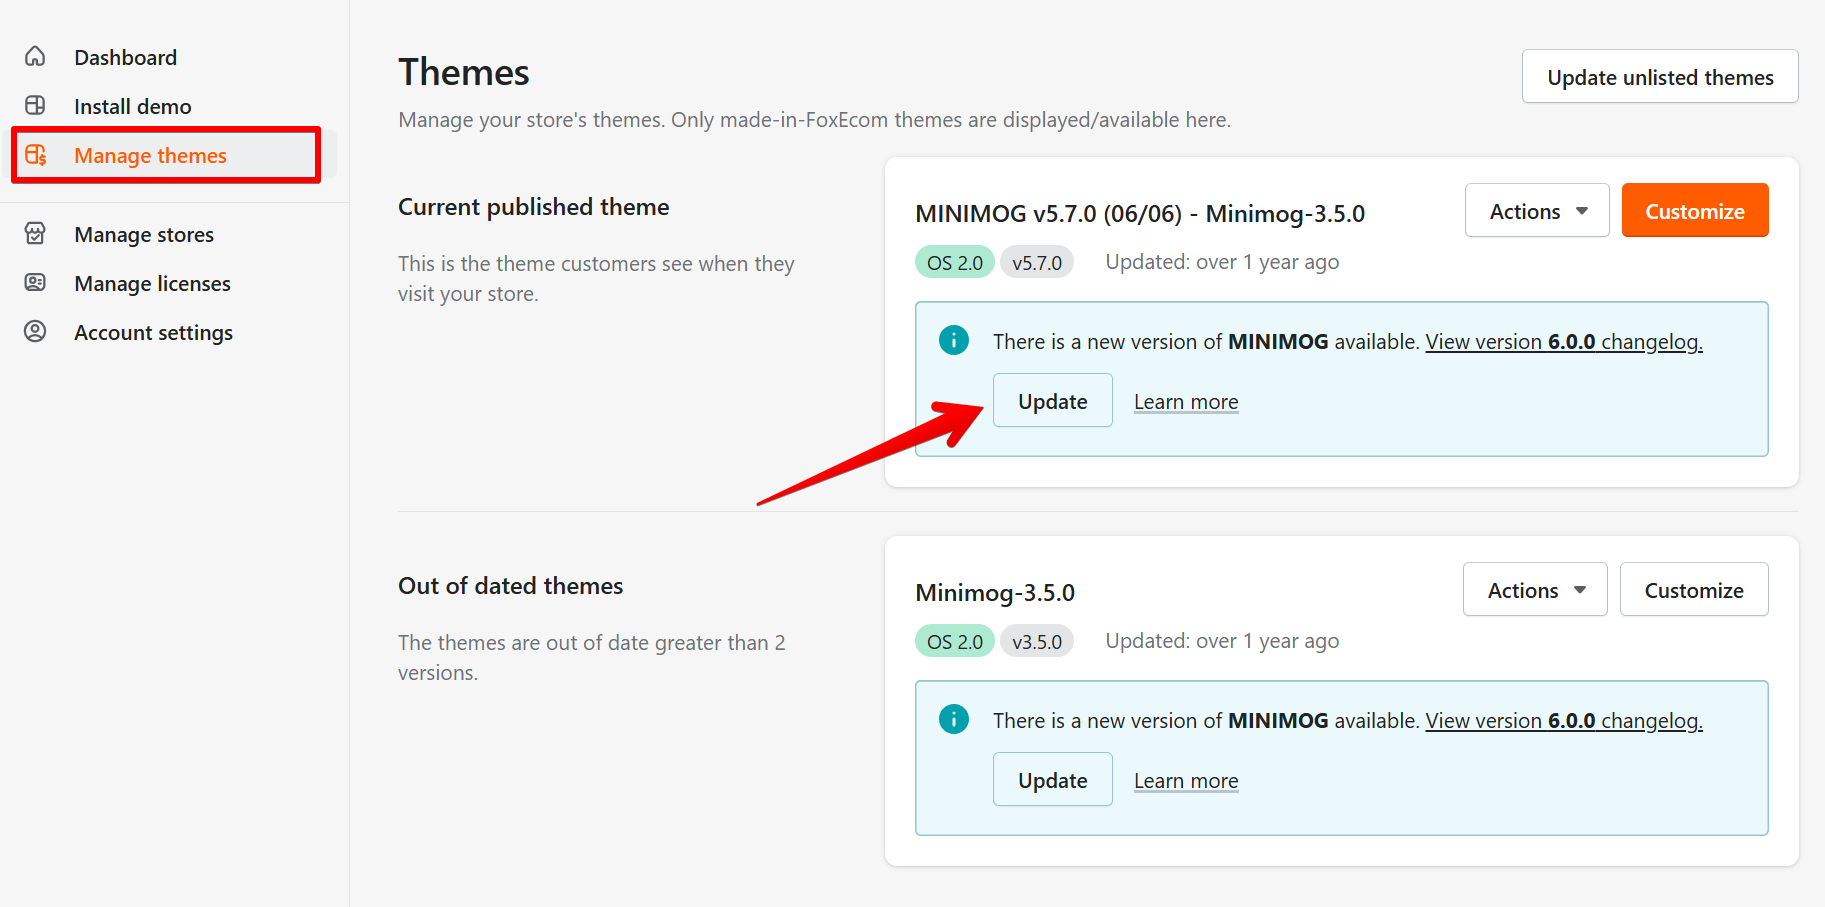
FoxHome creates an **updated copy of your theme** and adds it to your Shopify theme library. Review and test the updated version before publishing it.
### What automatic updates preserve
FoxHome preserves many theme settings and files, but some customizations must be transferred manually.
| Kept after updating | Not automatically kept |
| ------------------------------------------------------------------------------ | ------------------------------------------------------------------------ |
| Sections, including added sections | Changes made to `theme.liquid` |
| `config/settings_data.json` | Third-party app files and integrations |
| `snippets/custom-code-head.liquid` and `custom-code-body.liquid` | Other custom code added by merchants or developers |
| `assets/custom.css.liquid` | Modified JavaScript and CSS files outside the supported carry-over files |
| JSON templates (`templates/*.json`), alternate templates, and Liquid templates | - |
| Added assets, excluding JavaScript and CSS files | - |
| Locale files, including added or edited translations | - |
## Update Minimog manually
If you prefer to update manually, you'll need to install the latest Minimog version and transfer your existing theme settings and customized files.
Before updating, create a backup so you can restore your previous design and settings if needed.
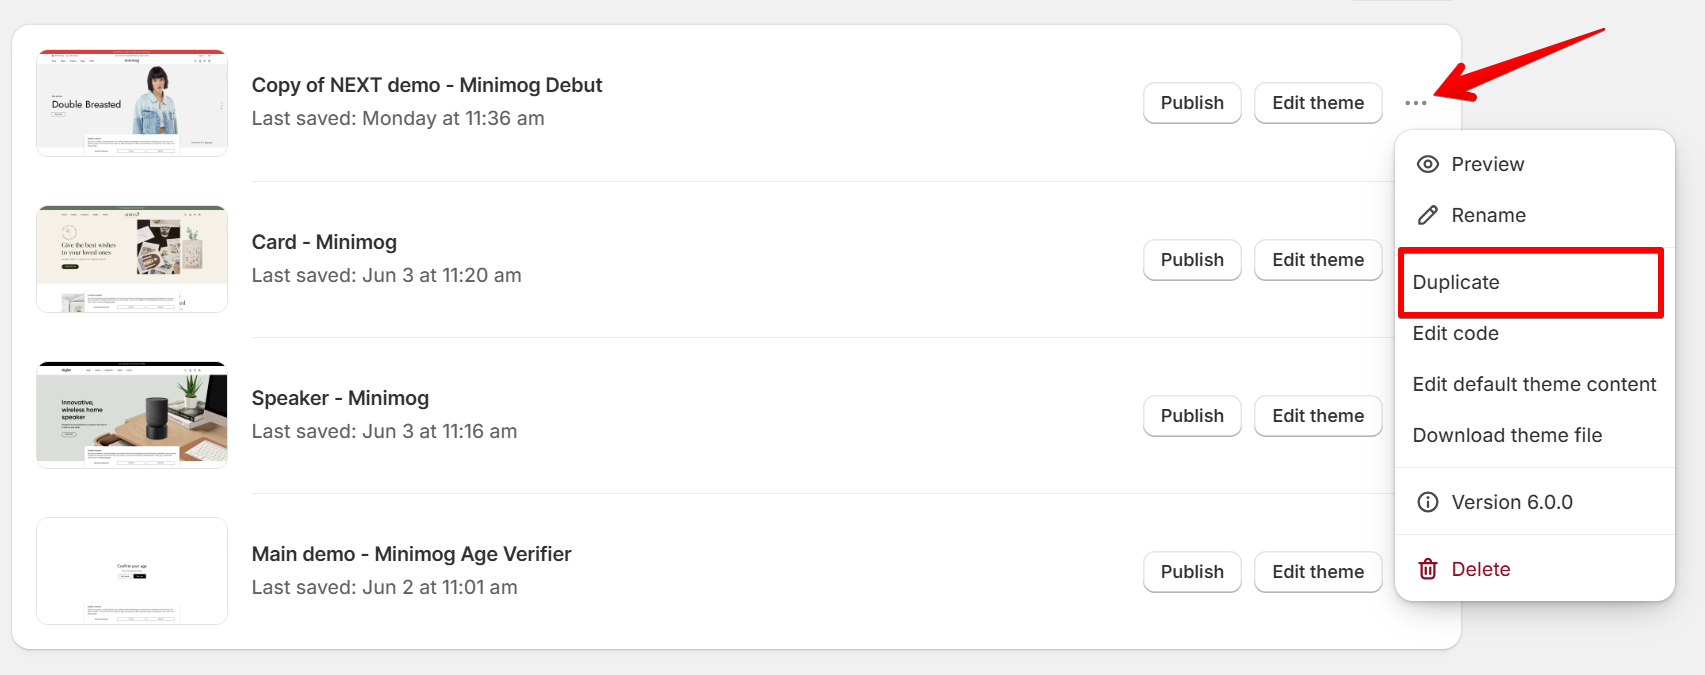
1. From your Shopify admin, go to **Online Store** > **Themes**.
2. Find your current Minimog theme, click **the three-dot menu (⋯)**, and select **Duplicate**.
3. Rename the duplicated theme so you can easily identify it as your backup.
1. Download the latest Minimog package from [ThemeForest](https://themeforest.net/item/minimog-the-high-converting-shopify-theme/33380968?utm_source=chatgpt.com).
2. Extract the package and locate the installable theme ZIP file — see [Get the theme package](https://docs.foxecom.com/minimog-theme/getting-started/install-minimog-theme/install-minimog-manually) for details.
3. Go to **Shopify Admin** > **Online Store** > **Themes**, then select **Import** > **Upload zip file**.
4. Choose your new Minimog ZIP file and click **Upload file**.
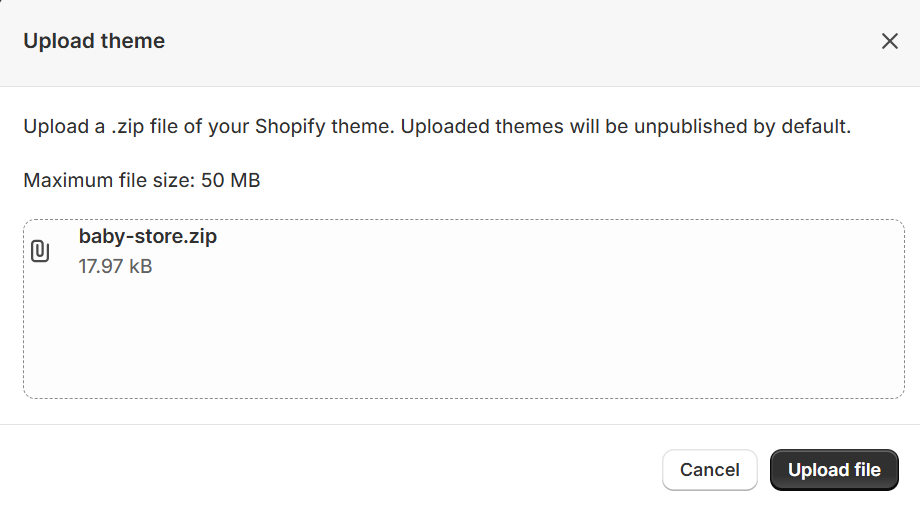
The latest Minimog version will be added as an unpublished theme. Keep your current theme published while you configure and test the new version.
To restore your store's appearance, transfer the relevant settings and templates from your previous theme.
1. Click **the three-dot menu (⋯)** on your previous Minimog theme, then select **Edit code**.
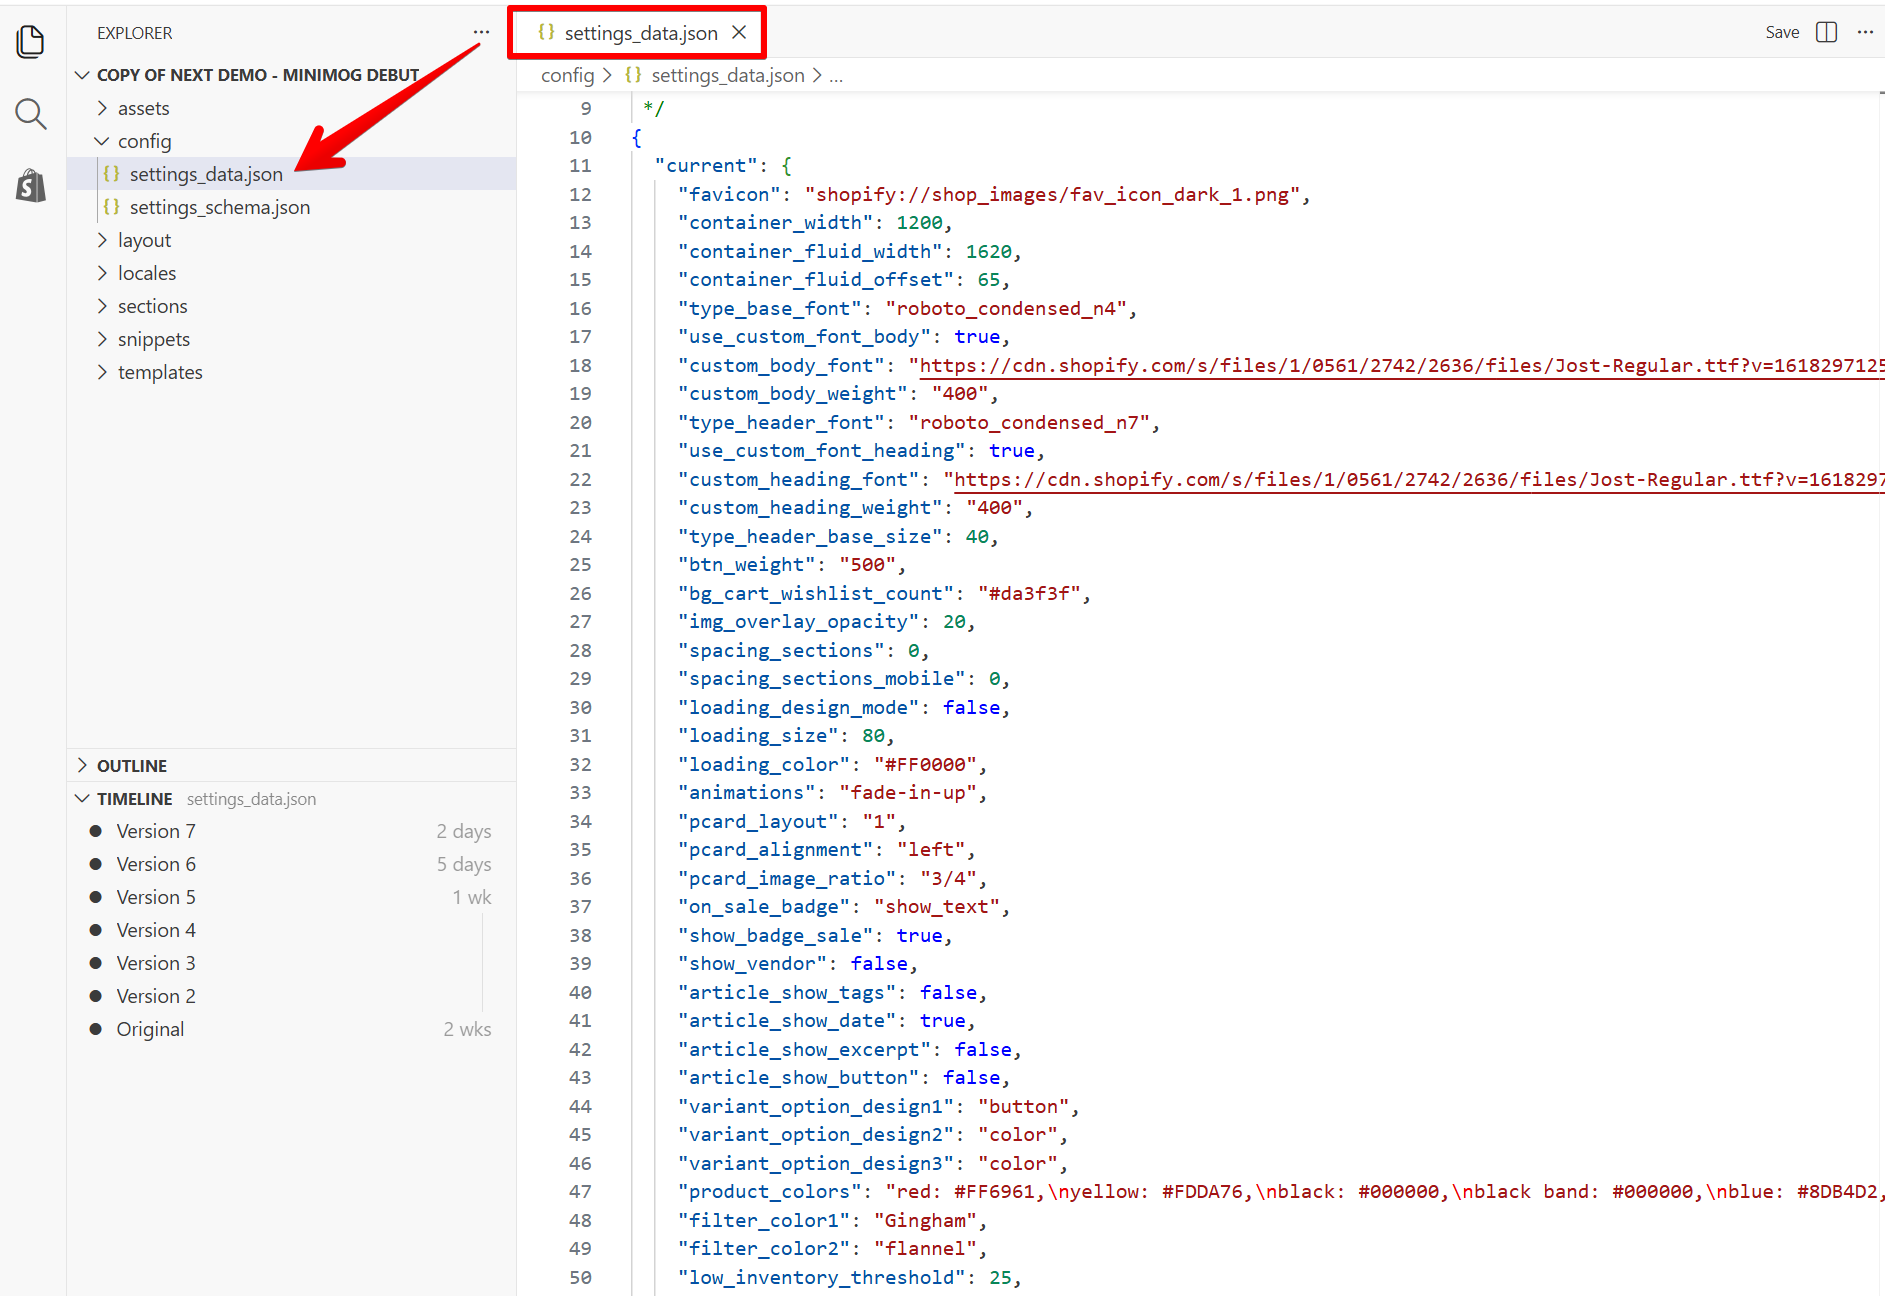
2. Open `config/settings_data.json` and copy its contents.
3. Open the corresponding file in the **updated theme** and replace its contents with the copied settings.
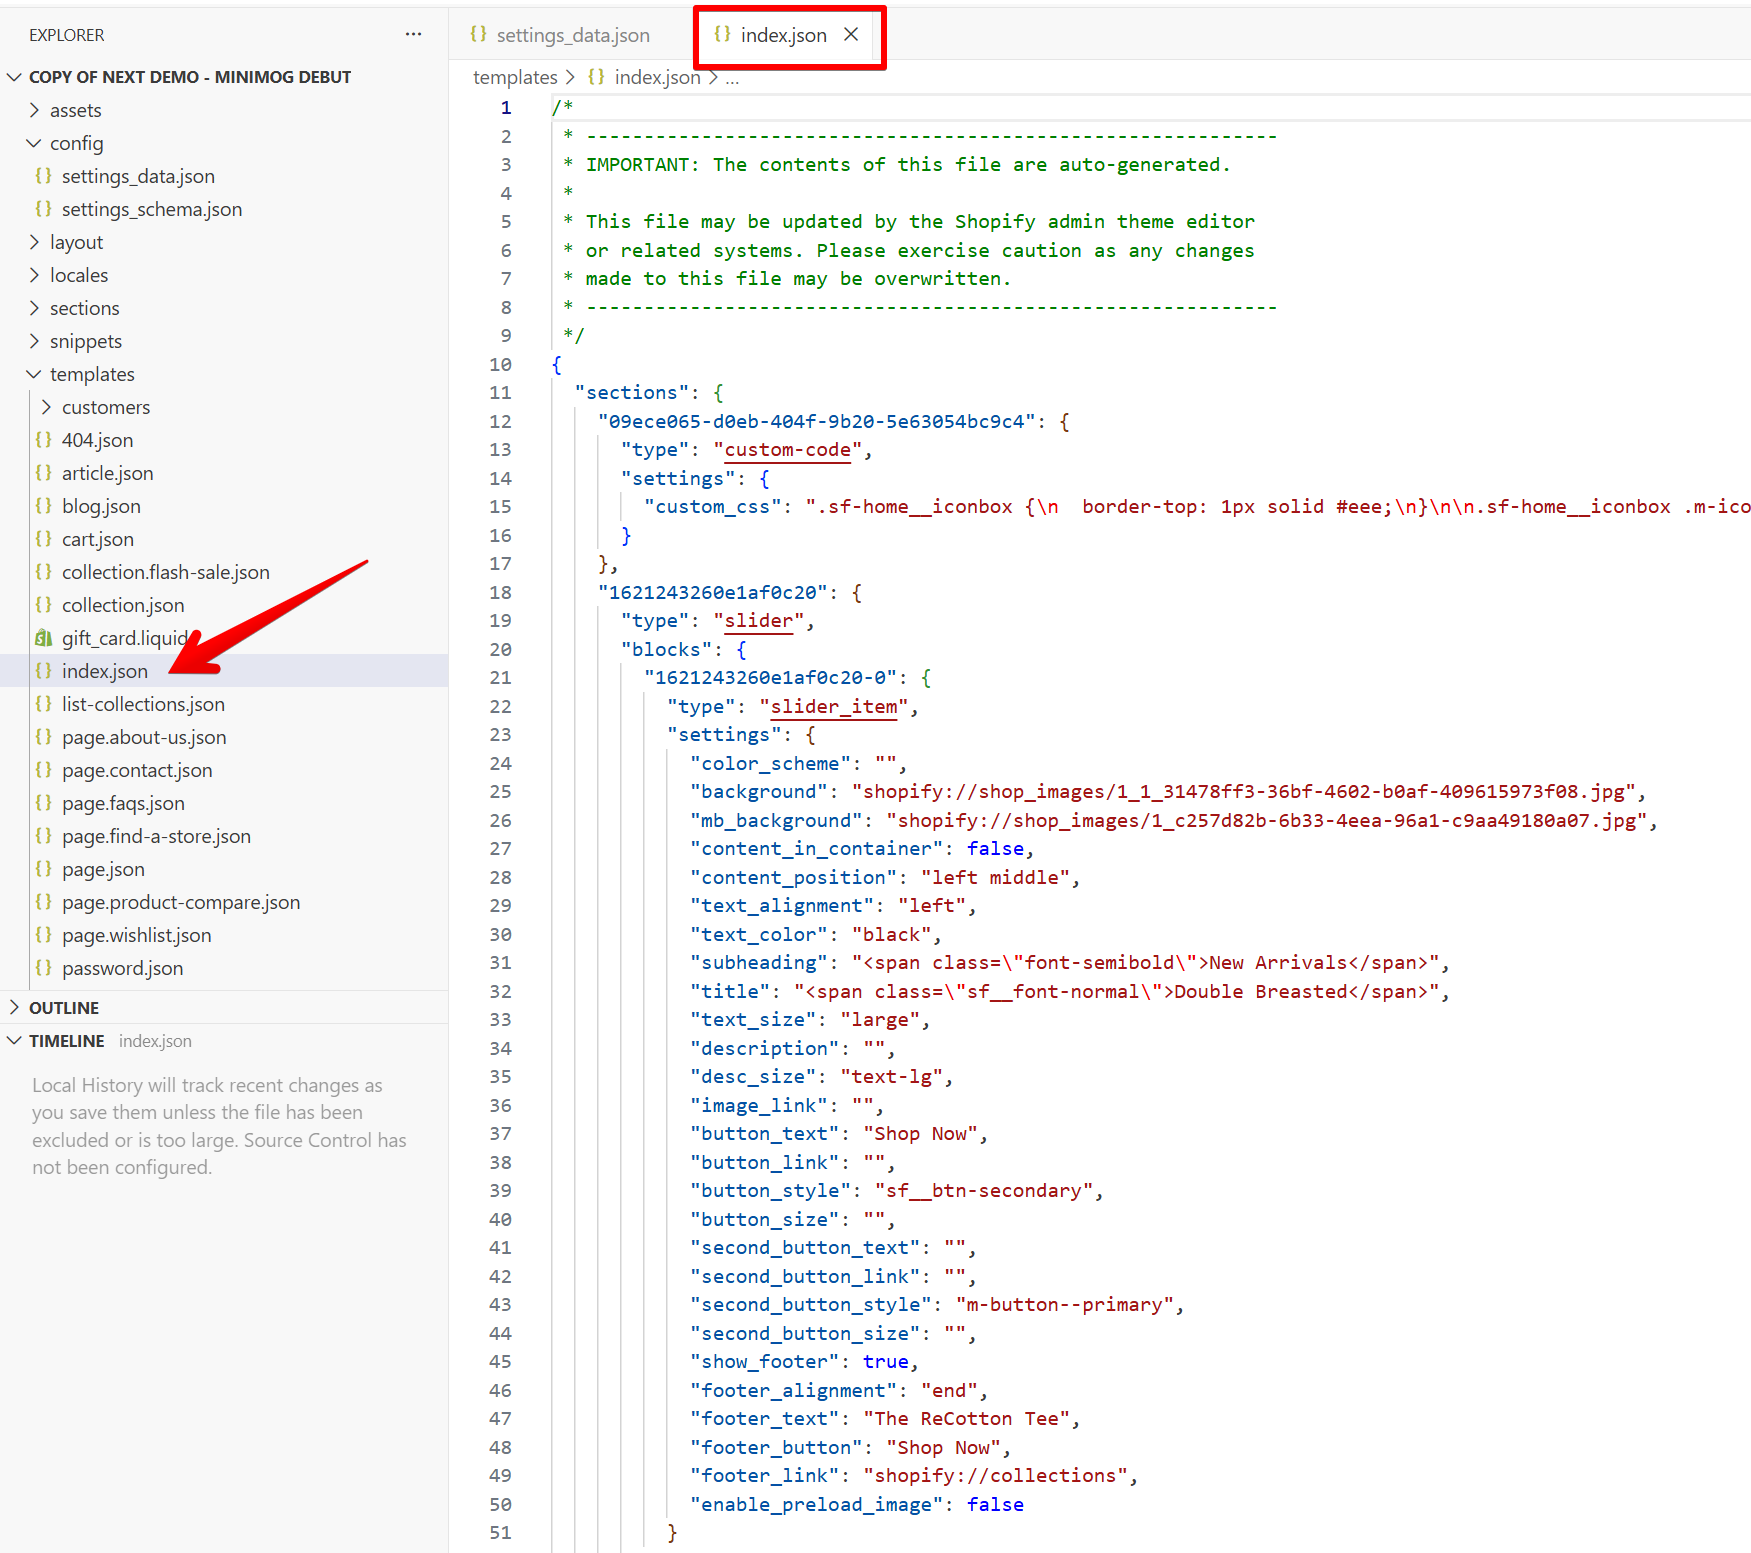
4. Repeat the process for `templates/index.json` and any other customized JSON templates.
5. Save your changes and preview the updated theme.
Copying old settings or templates into a newer theme can overwrite new defaults or introduce compatibility issues. Back up the updated files first and check the result carefully, particularly when upgrading across major versions.
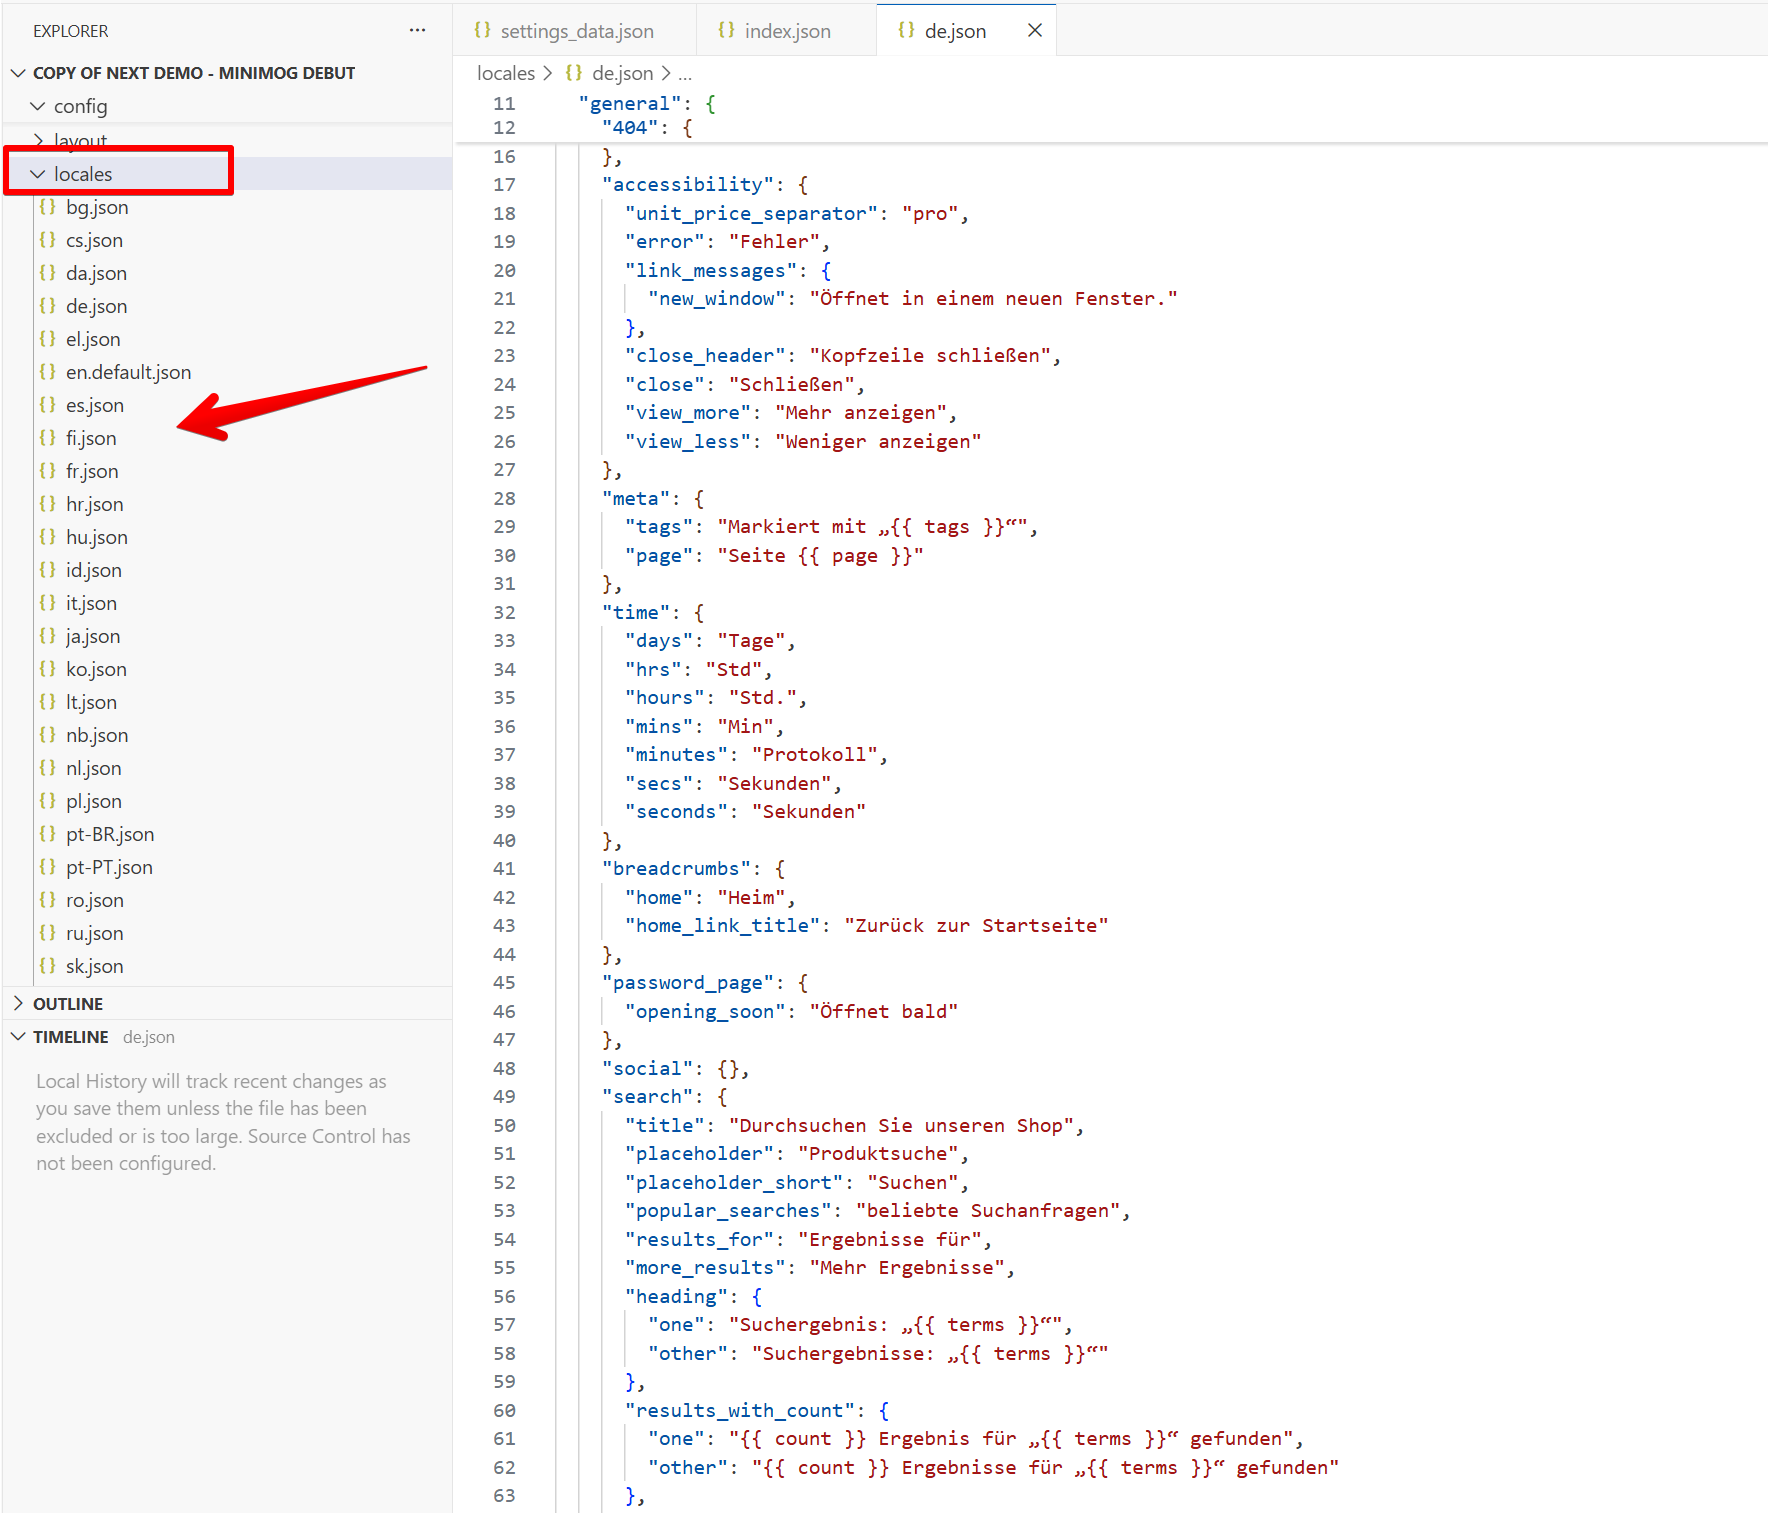
If your store uses multiple languages, you may also need to migrate customized translation files.
1. Go to **Edit code** > **Locales** in your **previous theme**.
2. Open the relevant language file and copy your translations.
3. Open the **updated theme**'s **Locales** folder and add the language file if necessary.
4. Transfer the relevant translations, preserve any new translation keys, and save your changes.