
Pages Global Sections
Footer
3 min read
What is Footer?
How to edit the footer section in Sleek?
- In the theme editor (Customize), click Footer.
- Locate and add suitable blocks.
- Save the changes.
General settings
Follow on Shop
Follow on Shop allows customers to follow your store on the Shop app. When a customer follows your store, they can receive personalized recommendations and notifications about your products. This helps you to create a more personalized shopping experience for your customers.
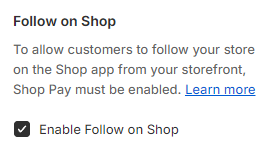
To enable the Follow on Shop button, you need to have the Shop channel installed, and Shop Pay activated on your store.
Add-ons
- Social media icons: To display icons for any social media platforms that you've entered a profile link for in your theme settings > Social media.
- Country/region selector: To add a country/region selector to your footer.
Use Country/ Region selector
- Language selector: To add a language selector to your footer.
Use Language selector
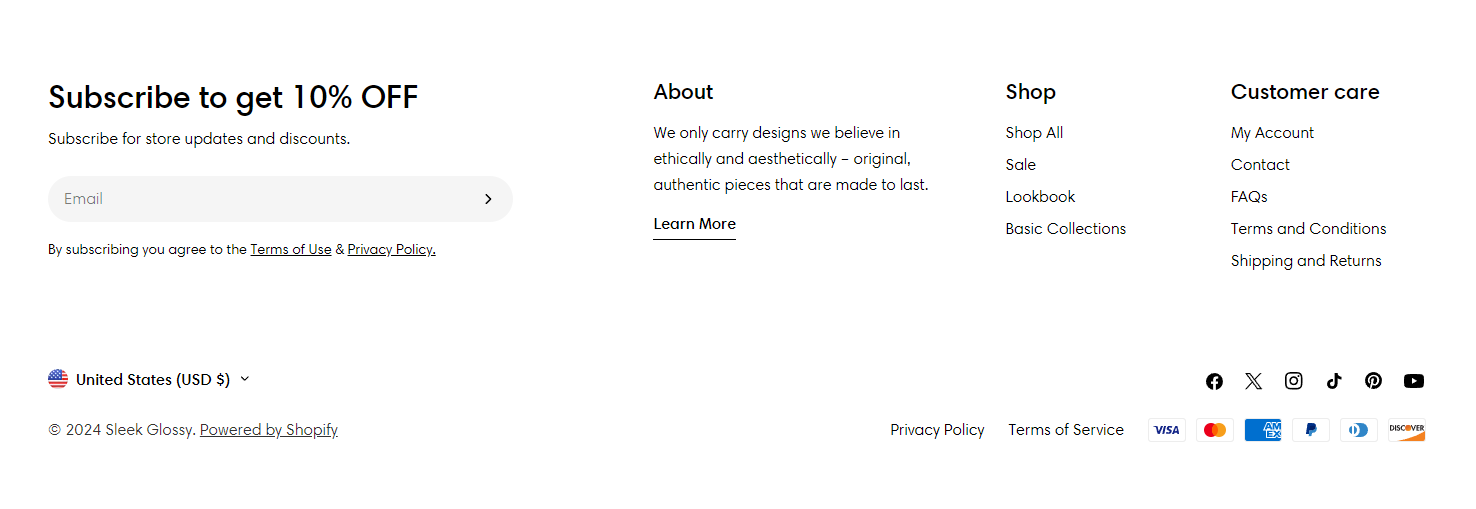
Payment methods
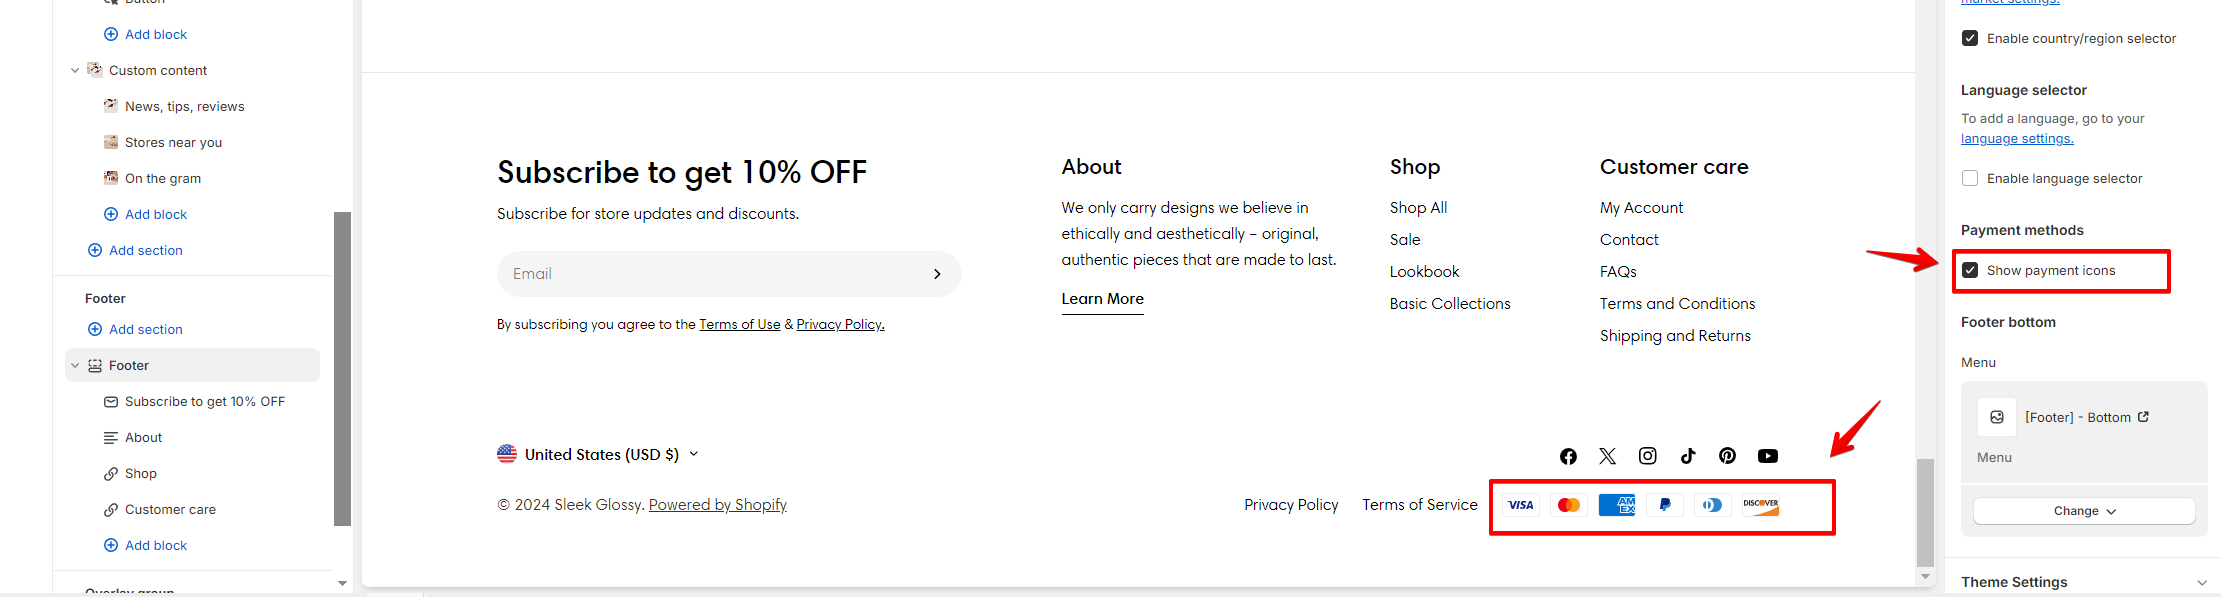
The payment methods here reflect the settings configured in Payments. Only payment options accepted through Shopify Payments will automatically display their icons when enabled.
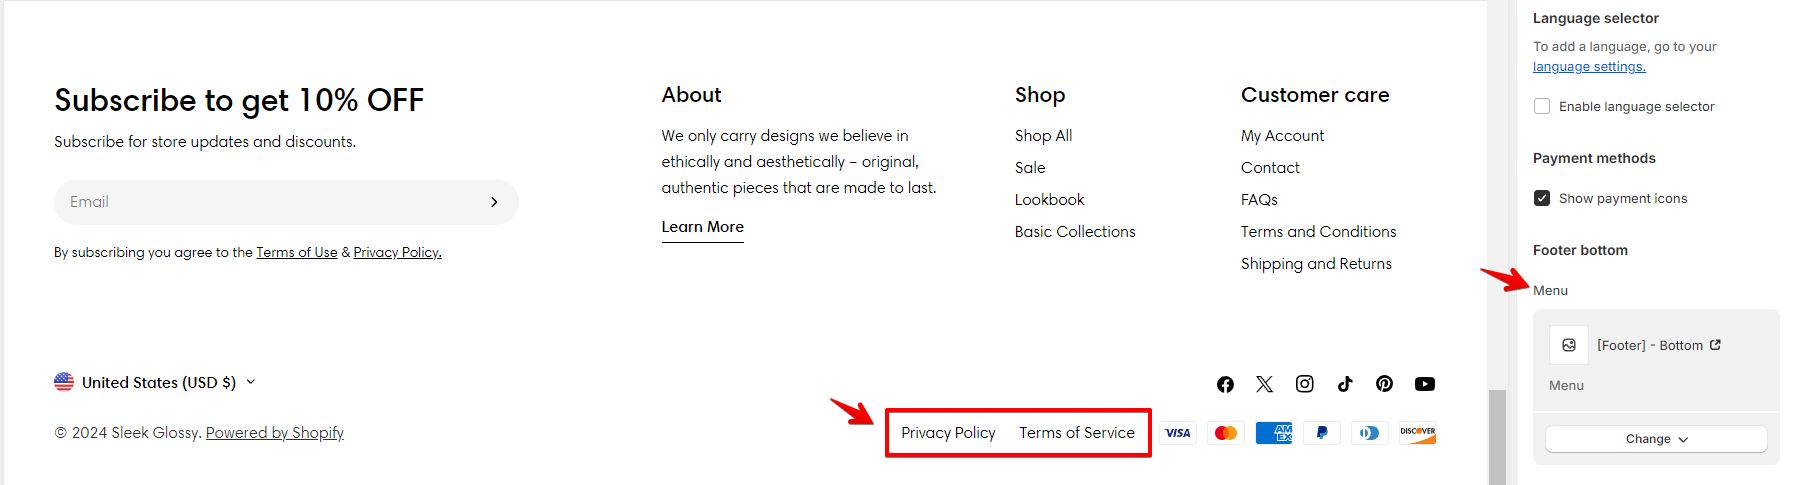
Footer bottom
Block settings
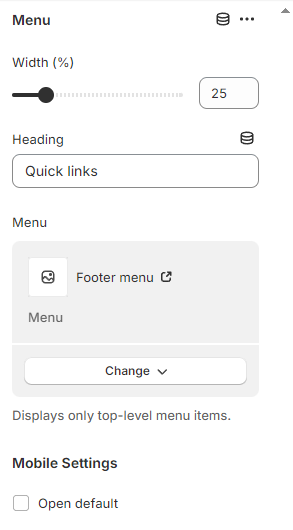
Menu
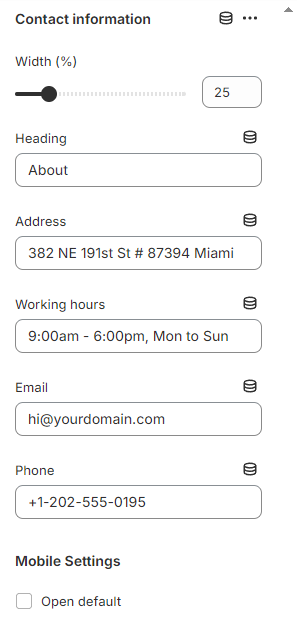
Contact information
Newsletter
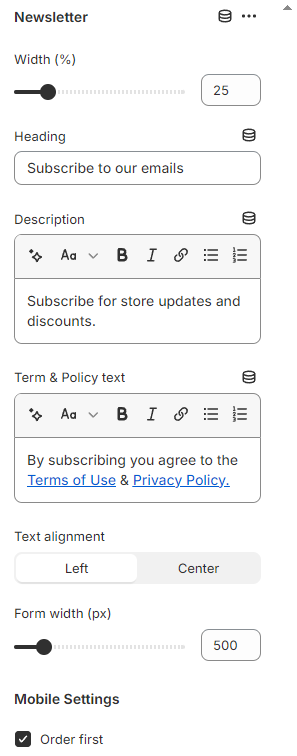
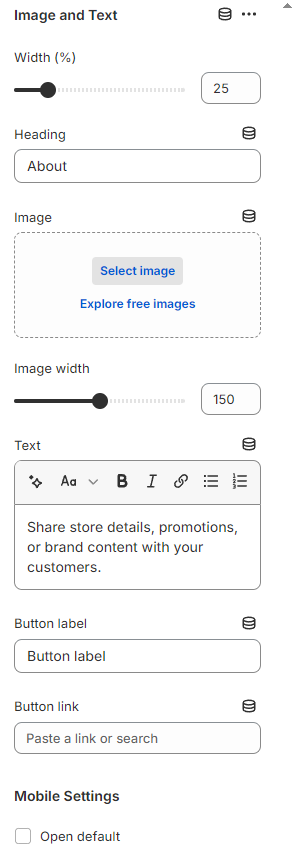
Image and Text
- Heading: The title for the block.
- Image: The image to display in the block.
- Image width: Can range from 50 px to 250 px. The default width is 150 px.
- Text: The text to display in the block.
- Button label and link: A button that links to your desired page. Leave the button label blank to hide the button.
Last updated