
FaqsGeneric
How to add custom fonts in Sleek? 🔥
3 min read
1. Upload your custom font to Shopify
- Ensure the font format is one of the following:
.ttf,.otf,.woff, or.woff2. - Legal use: Ensure you have proper licenses for your custom fonts by working directly with font authors or distributors to ensure legal compliance.
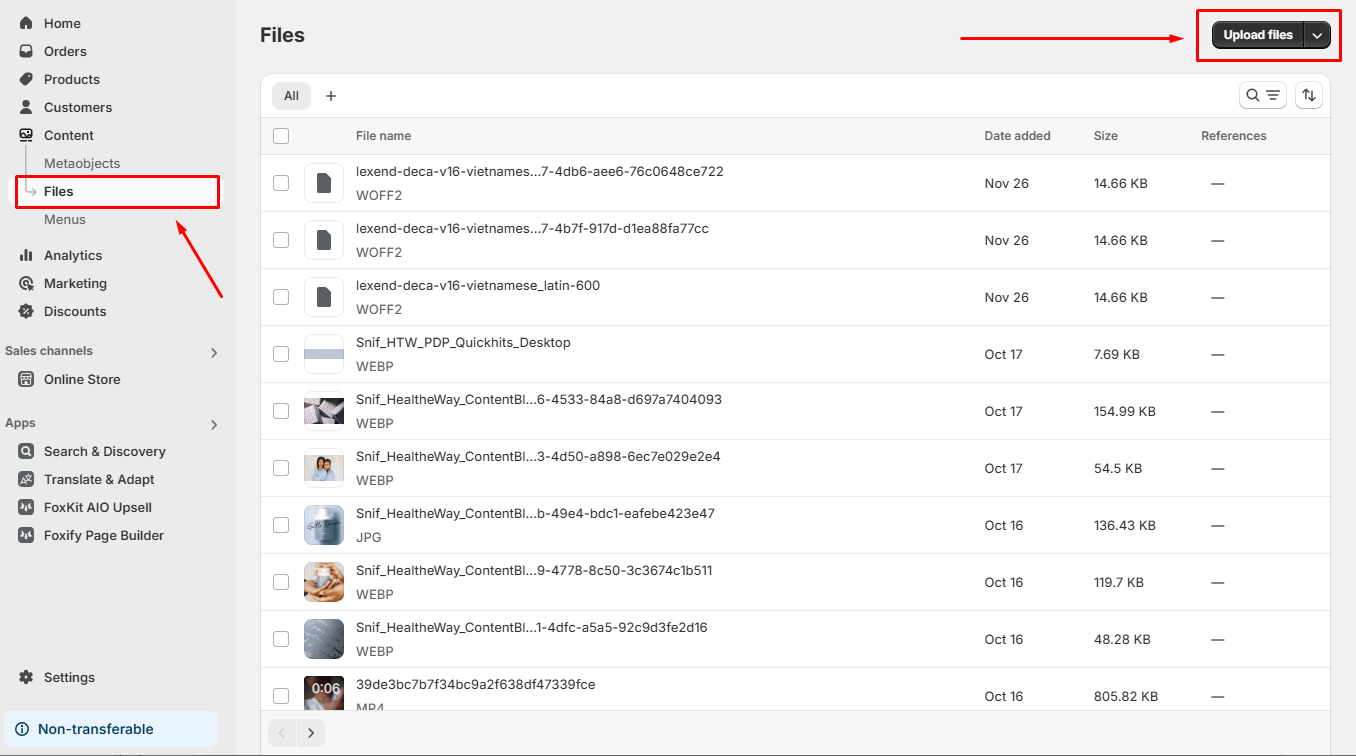
- Go to Shopify Admin > Files > Upload Files.
- Select and upload your font file.
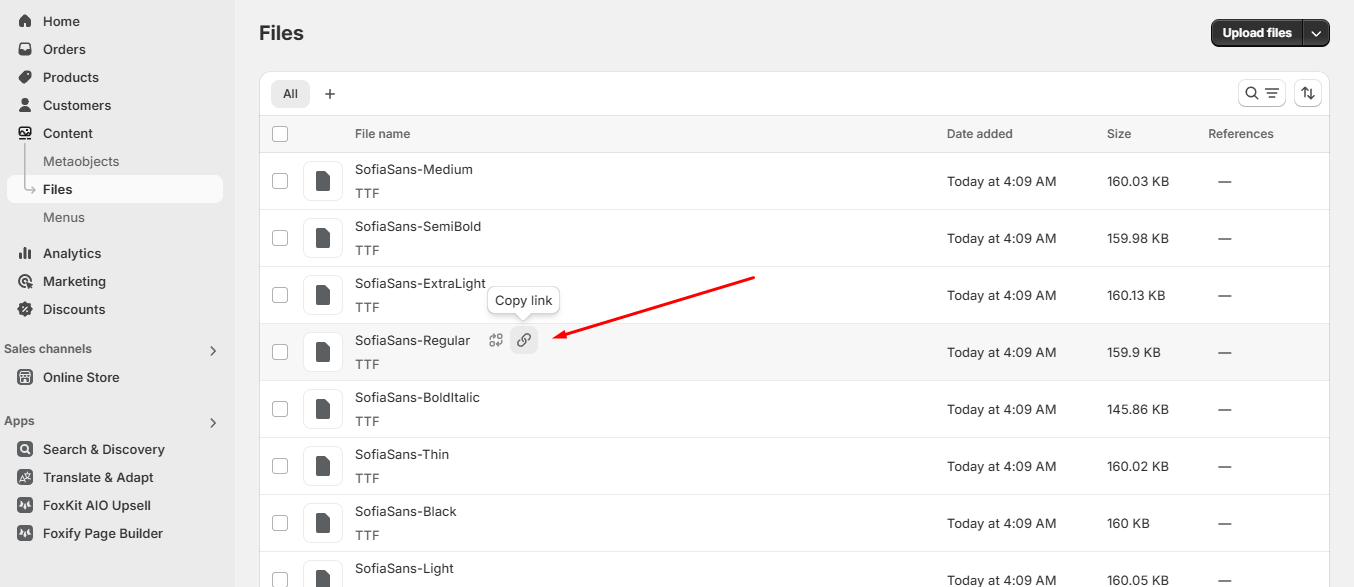
- Once uploaded, click the button and copy the font's URL.
2. Create a customization file for your Sleek theme
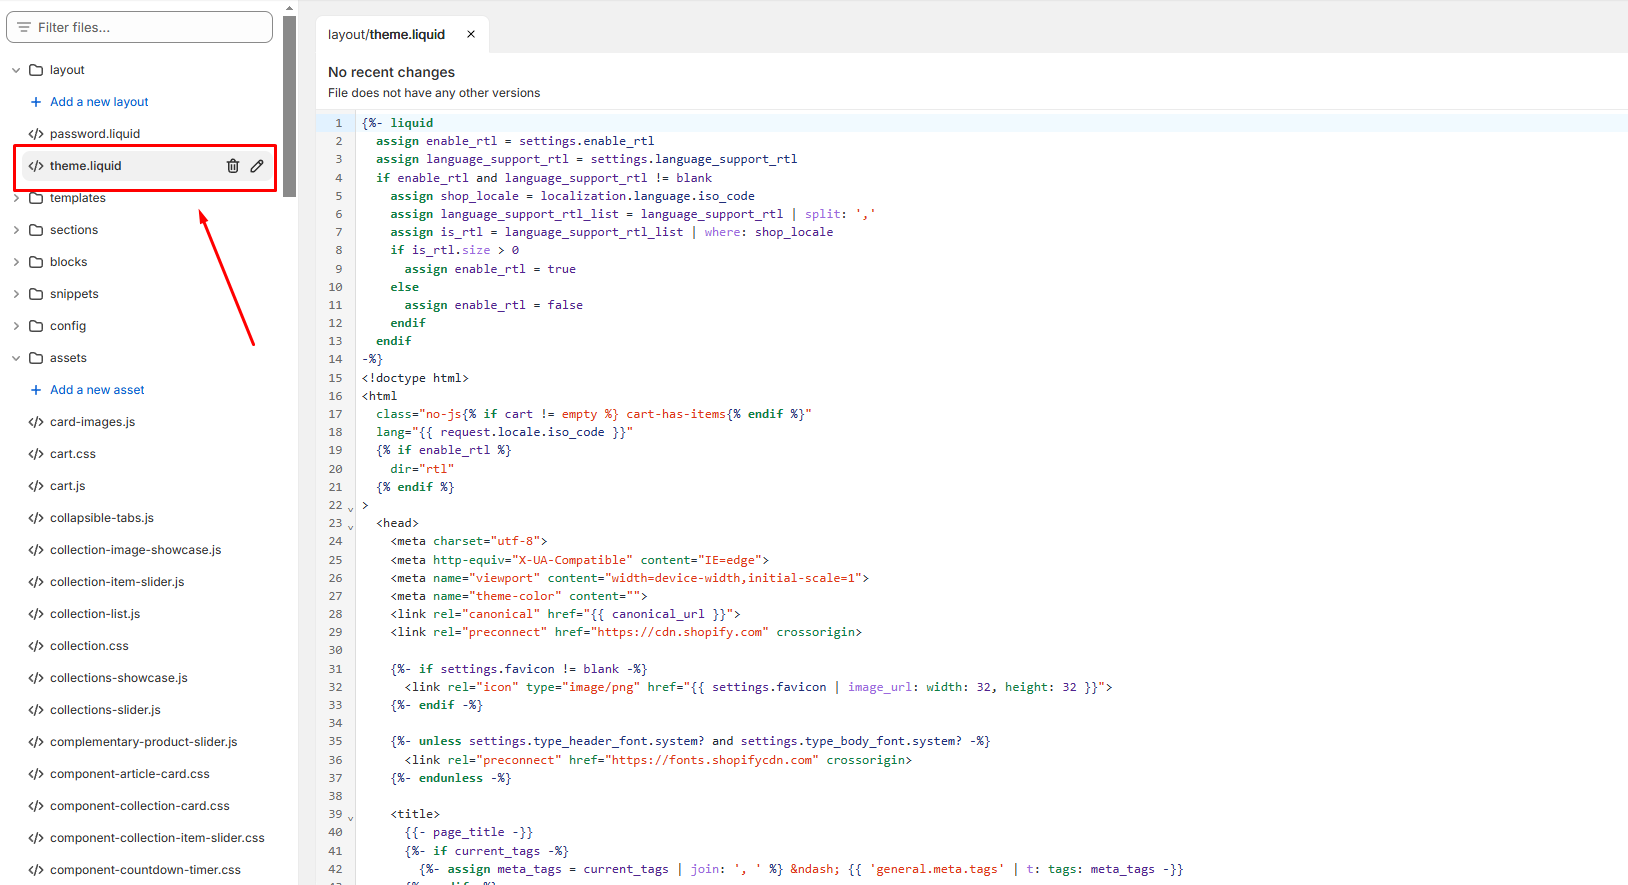
- In your Shopify admin, go Online Store > Edit code.
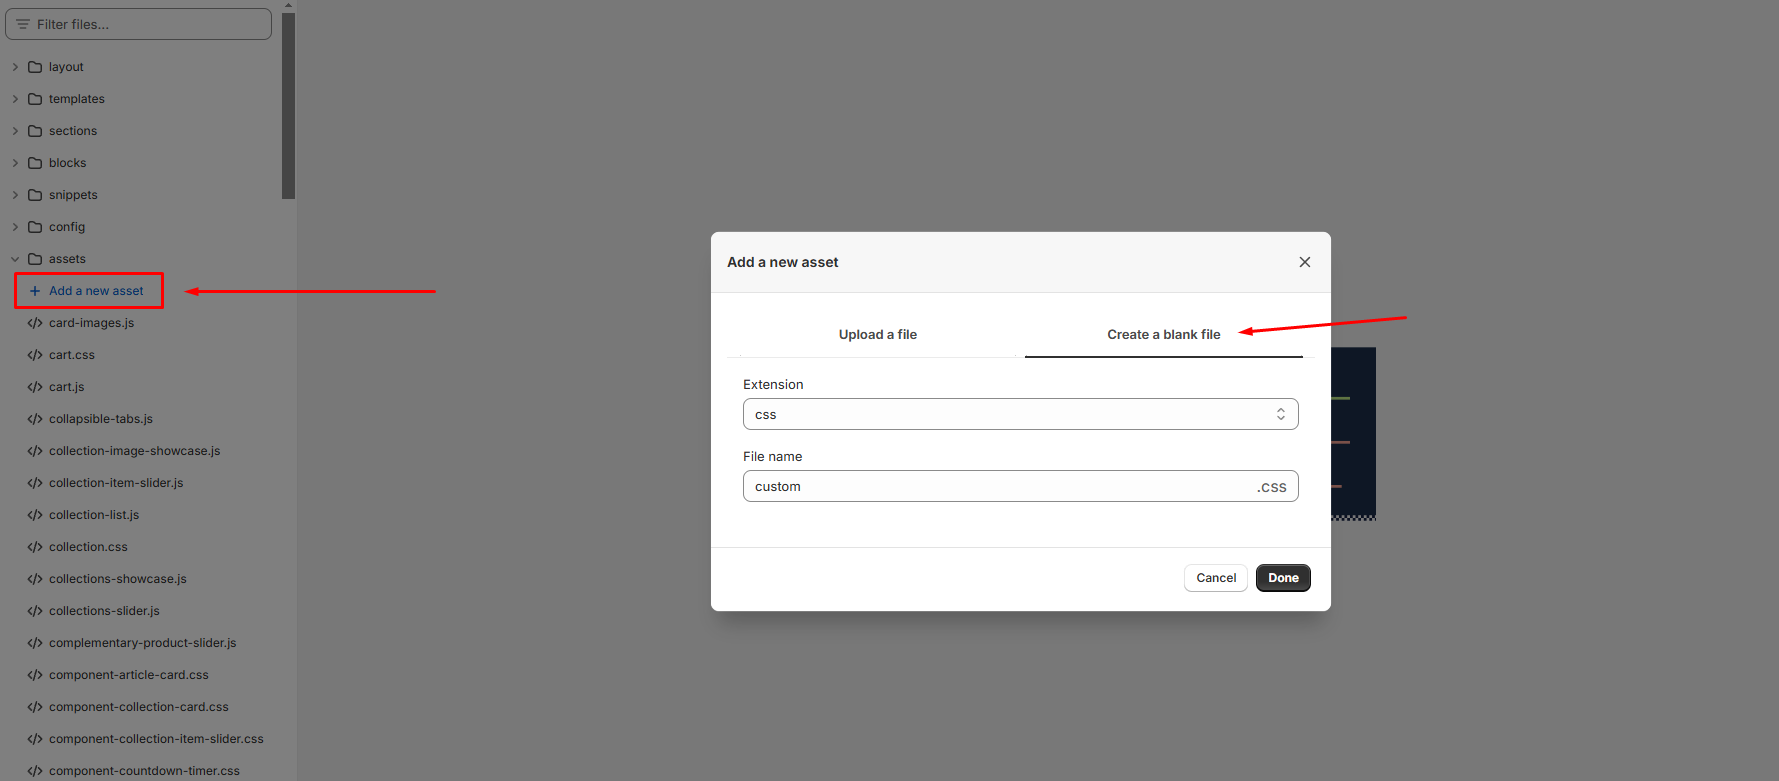
- Navigate the Assets folder, click Add a new asset.
- In the pop-up, click Create a blank file.
- Select the Extension and name the file
custom - Click Done.
echo 'theme.css' | asset_url | stylesheet_tag: preload: true- Copy the line, paste it below, and update the file name to
custom.css:
echo 'custom.css' | asset_url | stylesheet_tag: preload: true3. Initialize the font in the CSS file
- Go to Themes > Edit Code, and open
assets/custom.css
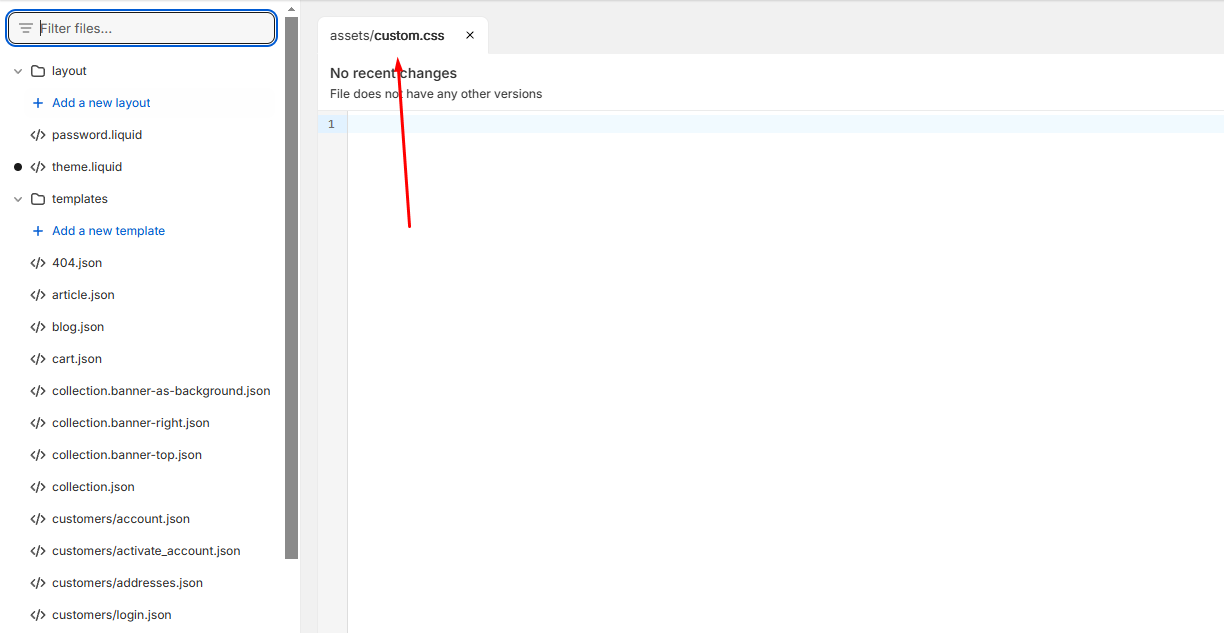
- Add the following code:
@font-face{
  font-family: Name of font ;
  src : url( font-url );
}@font-face{
font-family: SofiaSans;
src : url(https://cdn.shopify.com/s/files/1/0642/0565/2198/files/SofiaSans-Regular.ttf?v=167393855 );
}- Bold:
@font-face{
  font-family: SofiaSans;
  src : url(https://cdn.shopify.com/s/files/1/0642/0565/2198/files/SofiaSans-Regular.ttf?v=167393855 );
  font-weight: bold;
}- Italic:
@font-face{
  font-family: SofiaSans;
  src : url(https://cdn.shopify.com/s/files/1/0642/0565/2198/files/SofiaSans-Regular.ttf?v=167393855 );
  font-weight: bold;
  font-style: italic;
}4. Apply the font to the theme
A. Apply globally (quick method)
body,
h1, h2, h3, h4, h5, h6,
p, span, div,
ul, ol, li,
a, button,
input, select, option,
label, legend, textarea, small {
  font-family: 'font-name', sans-serif;
}B. Apply with CSS variables (granular method)
For body text:
:root
{
--font-body-family : font-name;
--font-body-style : font-style;
--font-body-weight : font-weight;
}:root
{
--font-body-family : SofiaSans;
--font-body-style : italic;
--font-body-weight : bold;
}For headings:
:root
{
--font-heading-family : font-name;
--font-heading-style : font-style;
--font-heading-weight : font-weight;
}:root
{
--font-heading-family : SofiaSans
--font-heading-style : italic;
--font-heading-weight : bold;
}For navigation:
:root
{
--font-navigation-family : font-name;
}:root
{
--font-navigation-family : SofiaSans
}For subheadings:
:root
{
--font-subheading-family : font-name;
}:root
{
--font-subheading-family : SofiaSans
}For product cards title:
:root
{
--font-pcard-title-family : font-name;
}:root
{
--font-pcard-title-family : SofiaSans
}For buttons:
:root
{
--font-button-family : font-name;
}:root
{
--font-button-family : SofiaSans
}C. Target additional elements (optional)
.custom-class {
  font-family: 'font-name', sans-serif;
}

.announcement-bar__message {
  font-family: 'font-name', sans-serif;
}

.footer-newsletter p,
.footer-newsletter input[type="email"] {
  font-family: 'font-name', sans-serif;
}Notes & Tips 📝
- Font performance: Using too many fonts can slow down your site. Stick to 1-2 custom fonts for better performance.
- Browser compatibility: Use formats like
.woff2for modern browsers and.wofffor older ones. - Test across devices: Ensure your fonts display correctly on different devices and browsers.
Last updated