# Product template

<figure><img src="https://3064615700-files.gitbook.io/~/files/v0/b/gitbook-x-prod.appspot.com/o/spaces%2F3yE7VVjvl0MgK6awOPKB%2Fuploads%2F88o7s9AcTsFEnHyWzlLt%2FHelp%20Center%20(1).jpg?alt=media&#x26;token=0c32d43f-3970-45f4-b80c-f82da6e72439" alt=""><figcaption><p><a href="https://chromewebstore.google.com/detail/foxtransfer-html-to-shopi/babcinhpofjfhjjbcnjhoikcjbgebimb?utm_source=foxecom&#x26;utm_medium=helpcenter&#x26;utm_campaign=foxtransfer_launch">Install FoxTransfer Chrome Extension FREE here</a></p></figcaption></figure>

***

By default, you can customize using the **Default product** template.

**Any changes you make to a template will impact all pages that use that template**. If you want to display some pages of that type differently, then you can create a new template based on one that already exists in your theme.

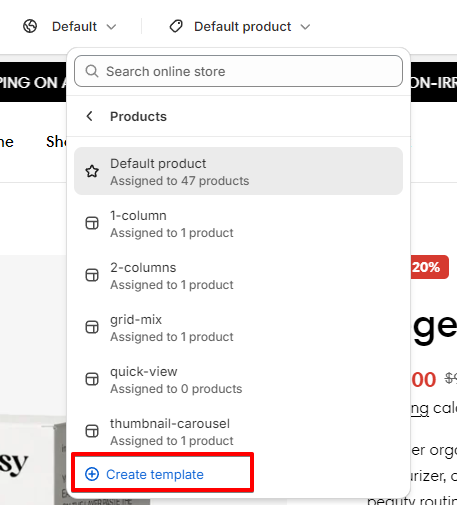
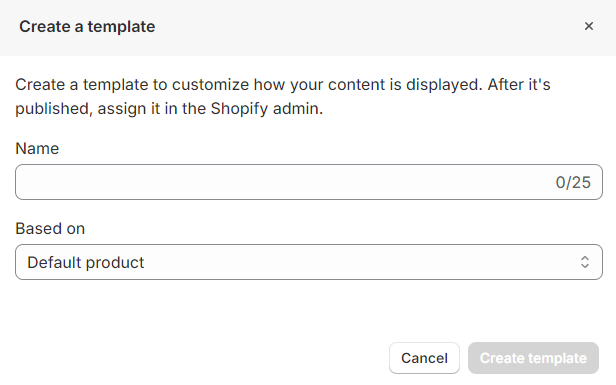
## Create a new product template

1\. In the theme editor (**Customize**), use the page selector to open **Products** > **Create template**.

<figure><img src="https://3064615700-files.gitbook.io/~/files/v0/b/gitbook-x-prod.appspot.com/o/spaces%2F3yE7VVjvl0MgK6awOPKB%2Fuploads%2F1HOl5n2IQl5BD1notxFB%2Fimage.png?alt=media&#x26;token=731da183-c6c8-4a4d-ab25-db3ca126c31c" alt=""><figcaption></figcaption></figure>

2\. Add **Name** in the provided field for the new template.

<figure><img src="https://3064615700-files.gitbook.io/~/files/v0/b/gitbook-x-prod.appspot.com/o/spaces%2F3yE7VVjvl0MgK6awOPKB%2Fuploads%2FX1NlGXpbFxntDS7FhuHG%2Fimage.png?alt=media&#x26;token=65a438c9-d68b-4fa7-9552-e51418068469" alt=""><figcaption></figcaption></figure>

3\. Select an existing product template to base on, then click **Create template**.

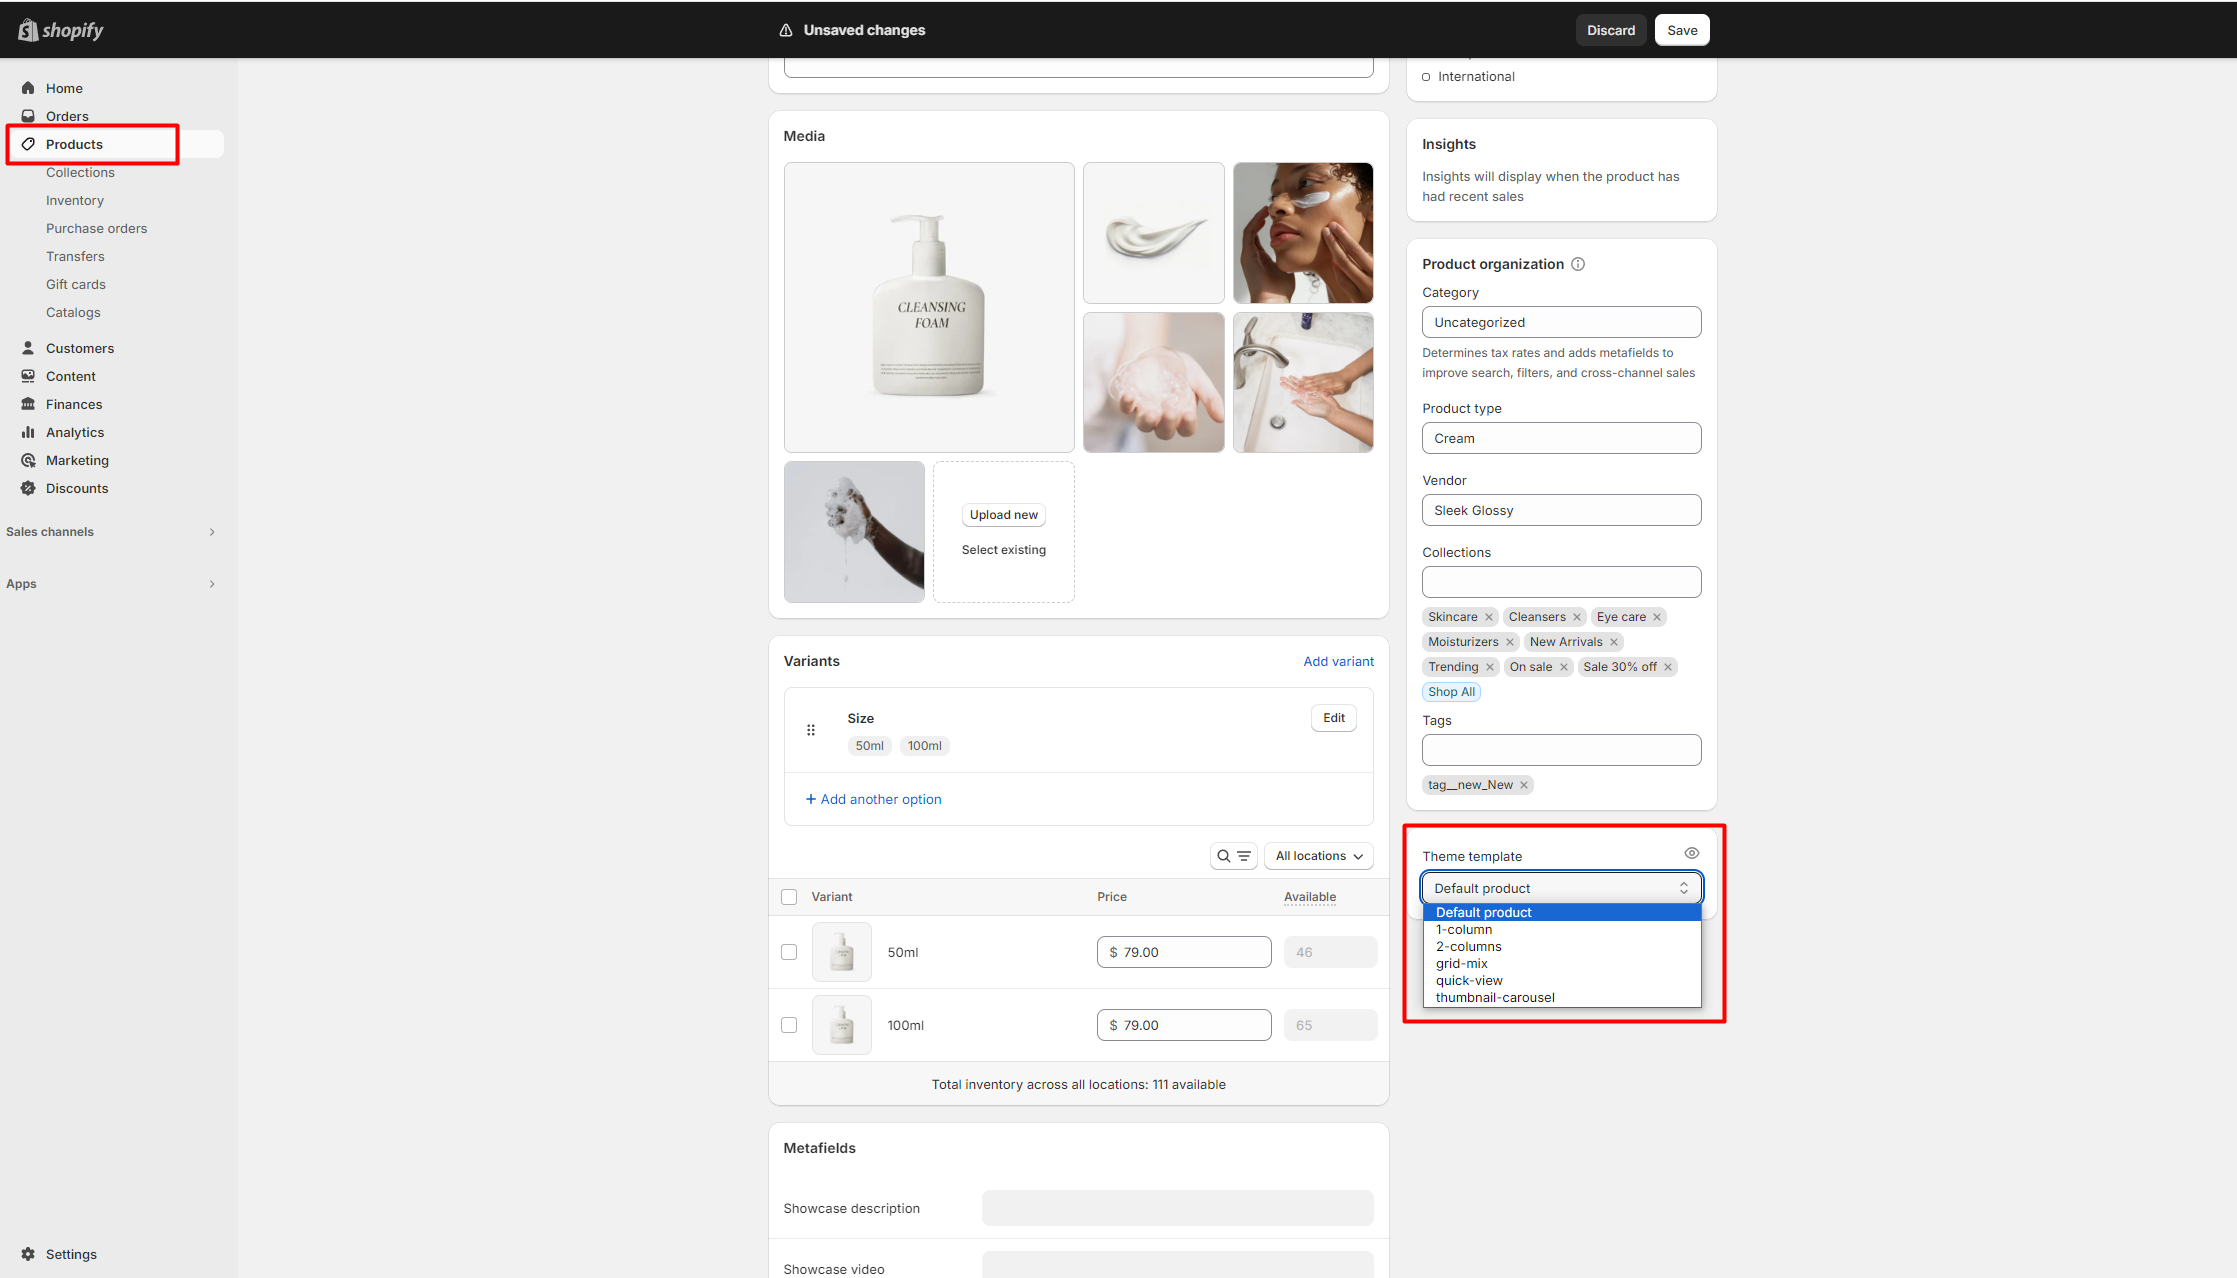
## Apply a new template to a product

1. From your Shopify admin, go to [**Products**](https://www.shopify.com/admin/products).
2. Use the search filter to locate the product that you want to change, or click the product from the list of existing products.
3. In the **Online store** section, use the dropdown menu to select a new theme template to apply to the selected product.
4. Click **Save**.

<figure><img src="https://3064615700-files.gitbook.io/~/files/v0/b/gitbook-x-prod.appspot.com/o/spaces%2F3yE7VVjvl0MgK6awOPKB%2Fuploads%2Fi5zj33ZWXc3OSrt2KKJS%2Fimage.png?alt=media&#x26;token=d3ef7b3f-73d9-4a97-ab44-ea1be36ffc7e" alt=""><figcaption></figcaption></figure>

## Managing your templates

To rename or delete your template, you need to use the code editor. Editing your template file might cause issues with your online store.&#x20;

### Rename a template

1. From your Shopify admin, go to **Online Store** > [**Themes**](https://www.shopify.com/admin/themes).
2. Find the theme with the template that you want to rename, and then click the **...** button > **Edit code**.
3. In the code editor, find the templates folder. Click the name of the template that you want to rename, and then click **Rename file**.
4. Enter the new template name, and click **Rename file** to save.

### Delete a template

1. From your Shopify admin, go to **Online Store** > [**Themes**](https://www.shopify.com/admin/themes)
2. Find the theme you want to delete a template from, and then click the **...** button > **Edit code**.
3. In the code editor, find the templates folder. Click the name of the template that you want to delete, and then click **Delete file**.&#x20;

If you have any resources assigned to that template, then they are displayed with the default template until you assign a different one.<br>
