
Product listing
5 min read
- In the theme editor (Customize), open the template selector
- Select Collections, then Default collection.
- On the left-sidebar, add Product listing.
- Make necessary changes > Save.
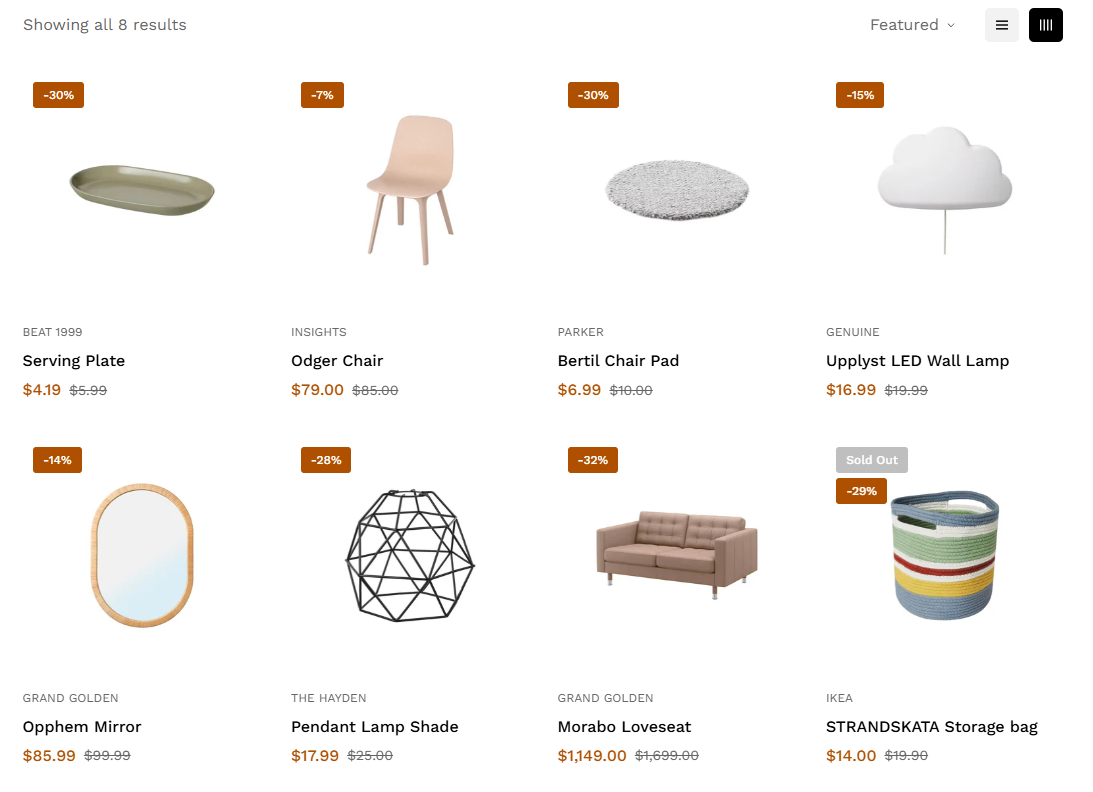
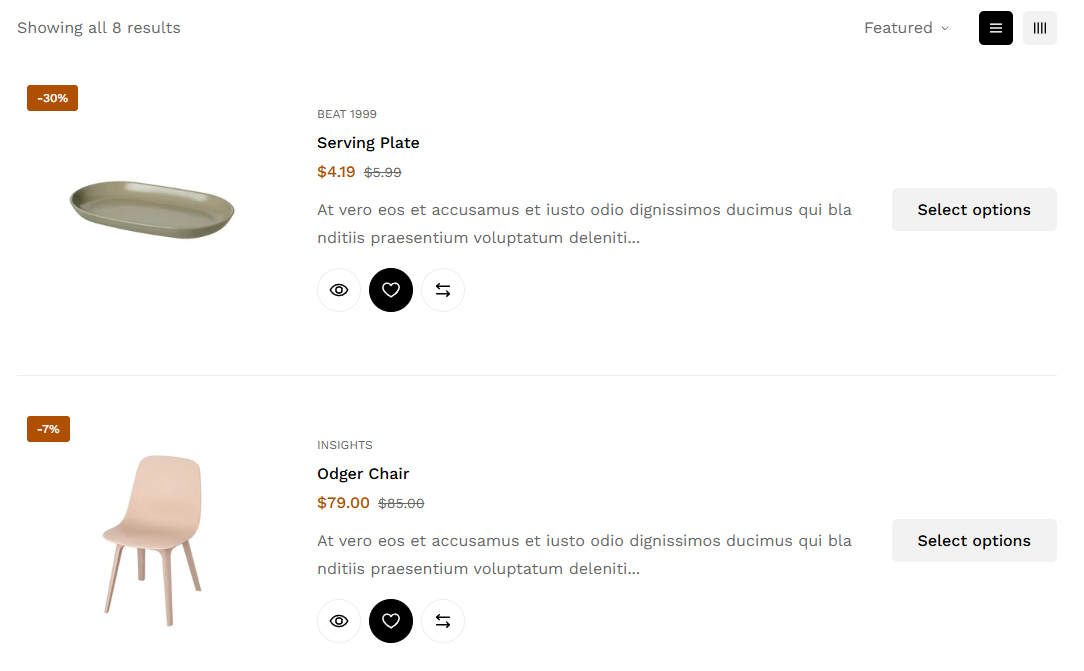
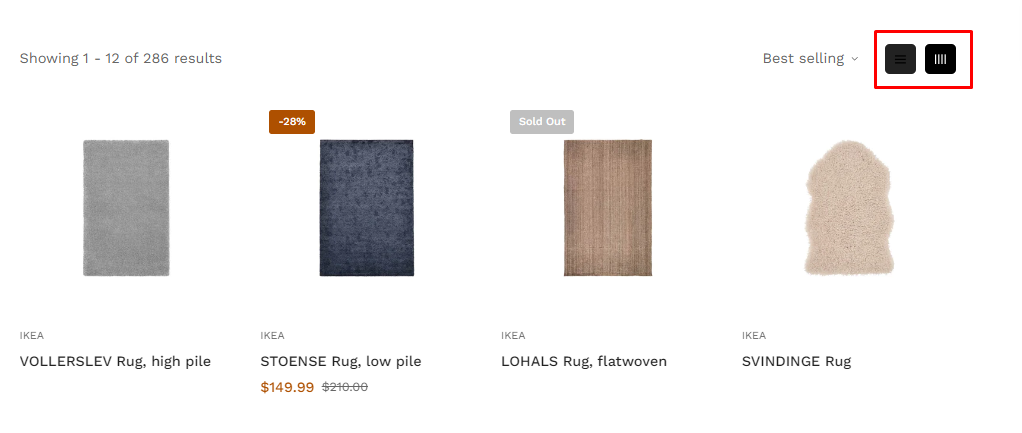
Layout
- Control the listing's container type and layout.
- Show the number of products per row and per page.
- Enable/disable box layout.
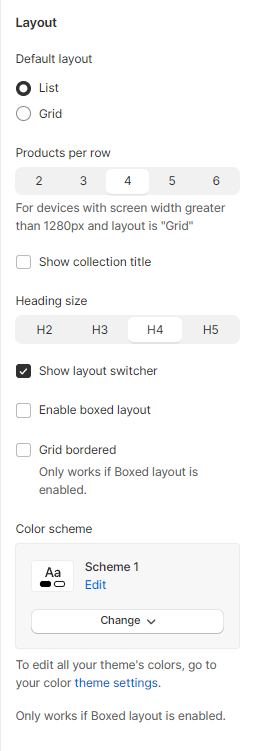
- Show layout the columns switcher.
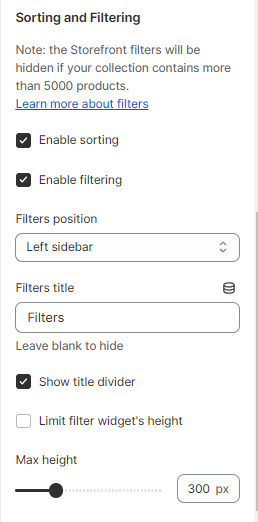
Sorting and filtering
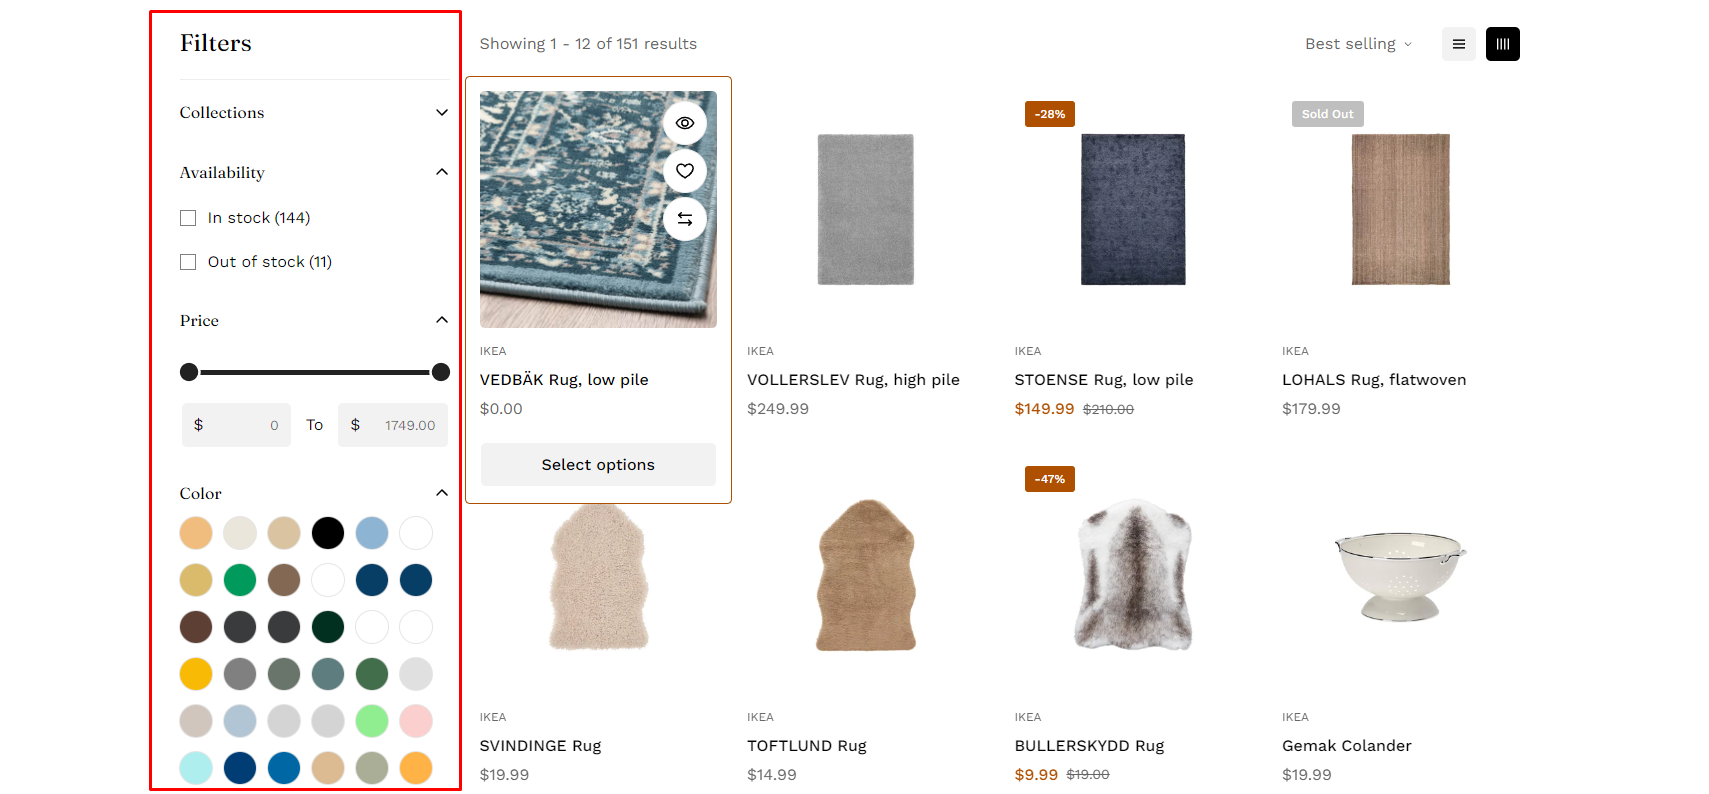
- Enable sorting
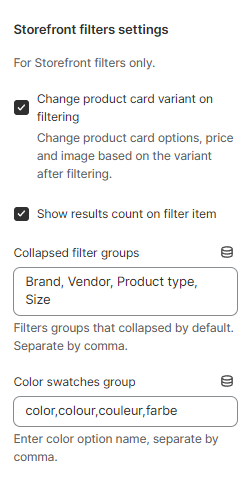
- Enable filtering: Enable Storefront filters for your store.
Customize the filters in your store with the Shopify Search & Discovery app.
- Collections that contain more than 5,000 products don't display filters.
- A filter can display a maximum of 100 filter values on your store.
- In the Shopify Search & Discovery app, a filter displays a maximum of 1,000 filter values.
- Translations aren't supported for the Vendor and Tags filter values. The product tag filter only displays to customers shopping in your store's default language. Vendor filter values are always based on your store's default language.
- The price filter doesn't display for currencies other than your shop's default currency.
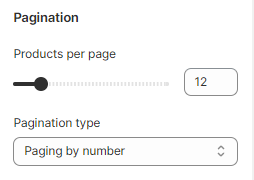
Pagination

Storefront filters settings
How to create a visual filter
To create visuals with your filter values, set up custom data for your store with metafields and metaobjects. You also need to meet the requirements.
Now we will start from scratch by defining the metaobjects:
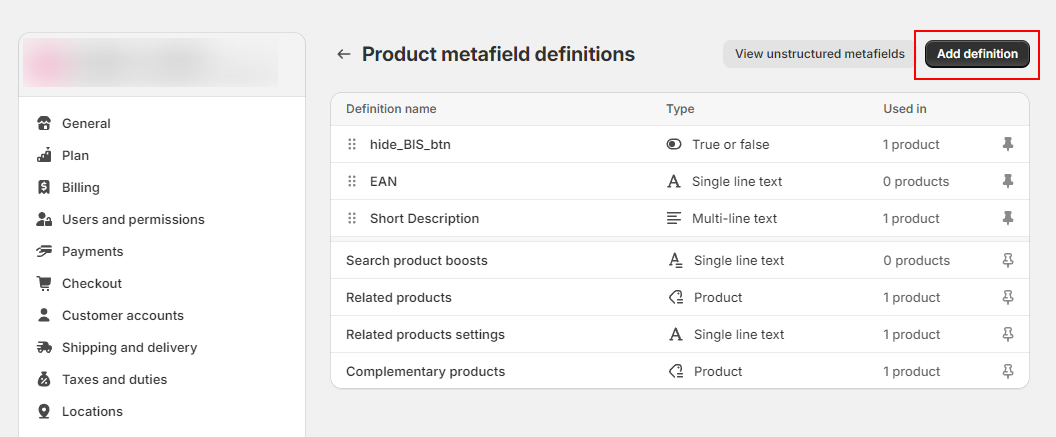
- Go to Settings > Custom data > Find the Metaobject definitions field > Click Add definition.
- In the Add metaobject definition page, give this metaobject a Name (Color) and 3 Fields:
- Single line text - For the color name (Name).
- Color - For the hex code of the actual color (Hexcode).
- File - For the image of this color (Image).
- Click Save.
Next step, we will create the colors list:
- In the Shopify admin sidebar, go to the Content > Metaobjects > In the Metaobjects page, select Color.
- Click the Add entry button to add a new color. Give the color entry the Name, Color, and Image.
- Click Save.
After that, we are going to create color metafields for the products to link to these metaobjects that we've just created above:
- Go to Settings > Custom data > In the Metafield definitions field, select Products > Click Add definition.
- We will define this metafield as Name: "Color filter swatch" and Type: "Metaobject". In the Reference field, select the metaobject you want or you've just created (Color).
- Click Save.
Then, we will connect the products to colors:
- In the Shopify admin sidebar, go to the Products > Select the product you want to connect color metafield.
- In the Metafields field, click on the "Color filter swatch" metafield that you've just created above > You will be able to select multiple colors from your list of colors that you defined using metaobjects.
- Click Save.
After you assign the metafield to products/ variants, you can set up the filter for your online store:
- In the Shopify Search & Discovery app, go to Filters.
- Click Add filter or choose an existing filter.
- Click the Source field > select a metafield filter with a metaobject reference - "Color filter swatch".
- Click Display options.
- Set the Label field for filter values by selecting a metafield.
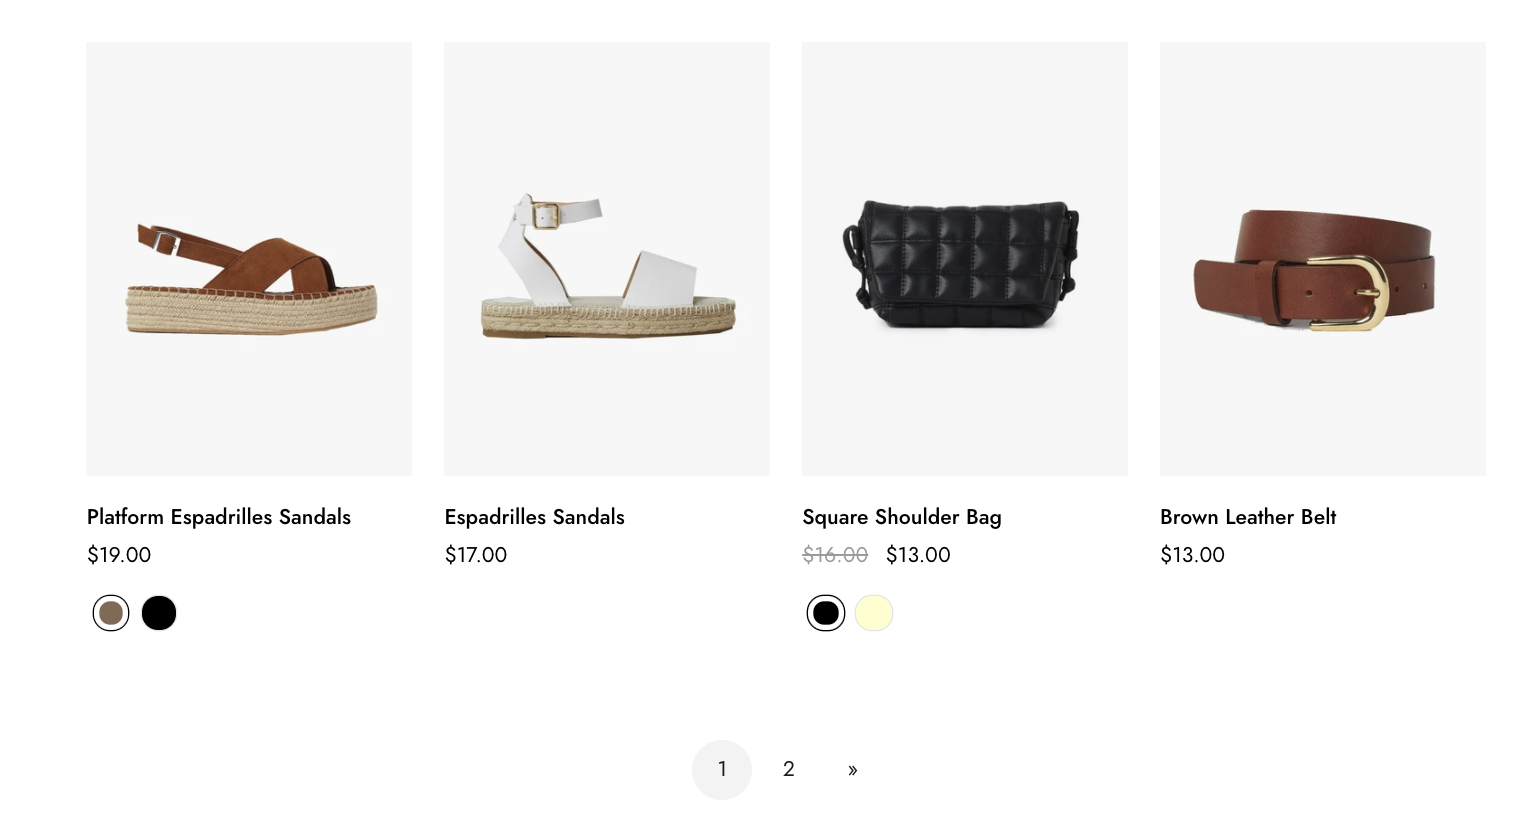
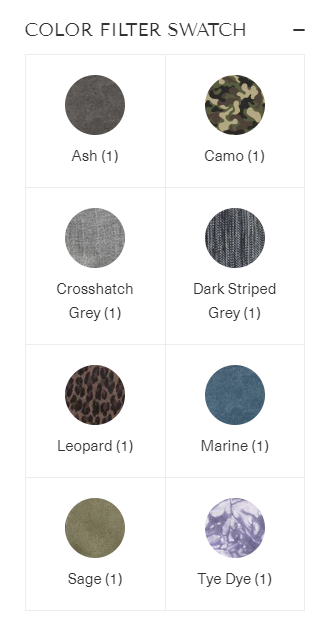
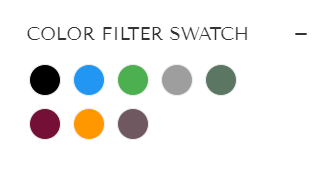
- Check Include visual and select a visual style:
- Choose Swatch for small color swatches or patterns. Set the swatch content by selecting:
- A color field for the Swatch color.
- An image field for the Swatch pattern.
- Choose Swatch for small color swatches or patterns. Set the swatch content by selecting:
- Choose Image for icons, logos, or other graphics that shouldn't be cropped.
- Select an image field for the Image.
- Click Save.
Last updated