
Store Management
Subscriptions
3 min read
View subscriptions
- Open XFlow in your Shopify admin
- Go to Subscriptions.
_Y7qI0Xby.jpg)
Each row represents one subscription created when a customer signs up via the Notify me widget.
- Status – Current state of the subscription
- Product – Product or variant subscribed to
- Customer – Email address used to subscribe
- Date – When the subscription was created
Subscription statuses explained
Pending
- Customer subscribed
- Product has not been restocked yet
- No email sent
Queued
- Product is restocked
- Notification is scheduled but not sent yet
- Usually waiting for workflow timing or conditions
Delivered
- Back-in-stock email was successfully sent to the customer
Engaged
- Customer opened or clicked the notification email
Converted
- Customer placed an order after clicking the back-in-stock email
- Revenue is attributed to XFlow
Completed
- Subscription lifecycle has ended
- No further actions will run
Cancelled
- Subscription was cancelled
- No notifications will be sent
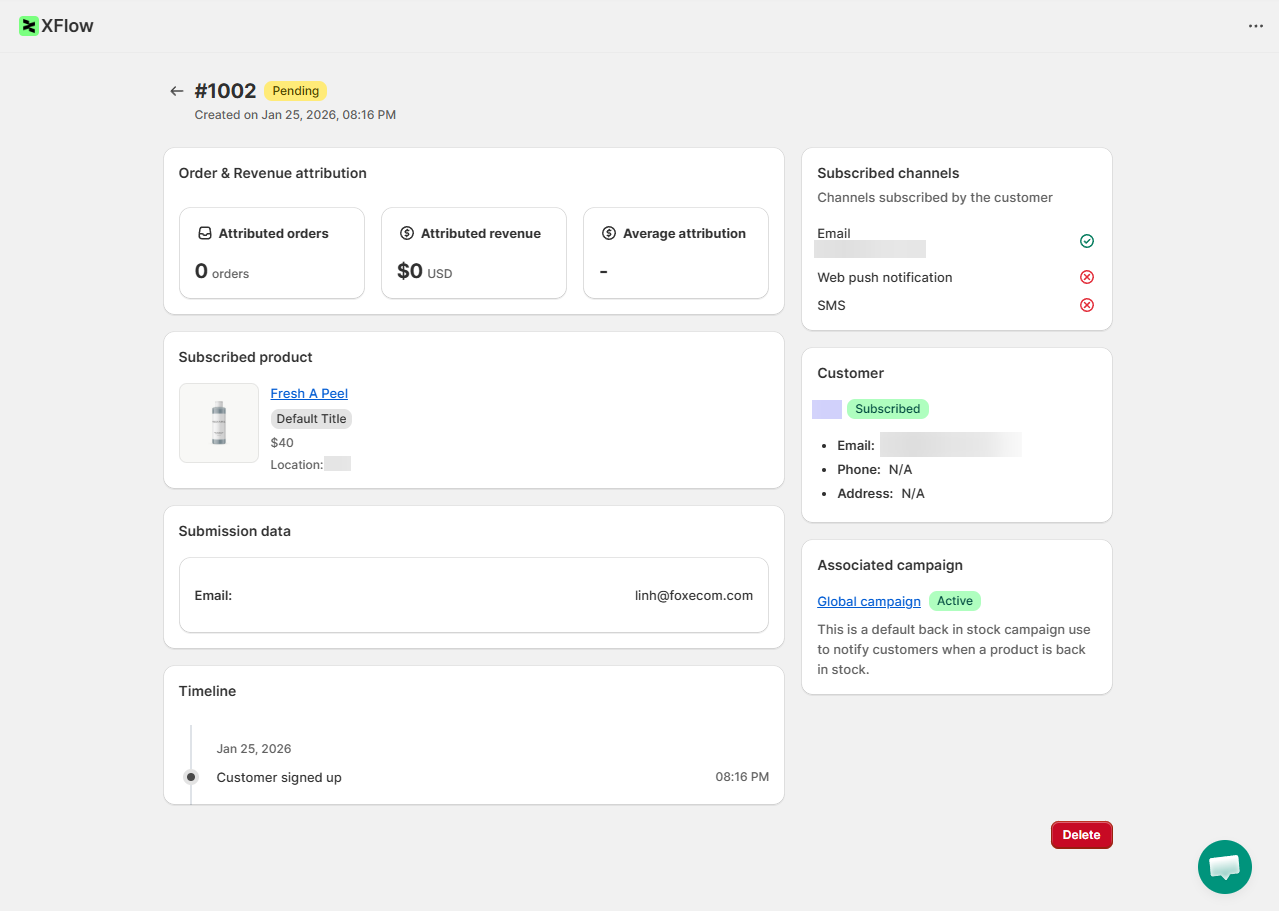
View subscription details
- Order & revenue attribution
- Subscribed product
- Customer information
- Associated campaign
- Timeline
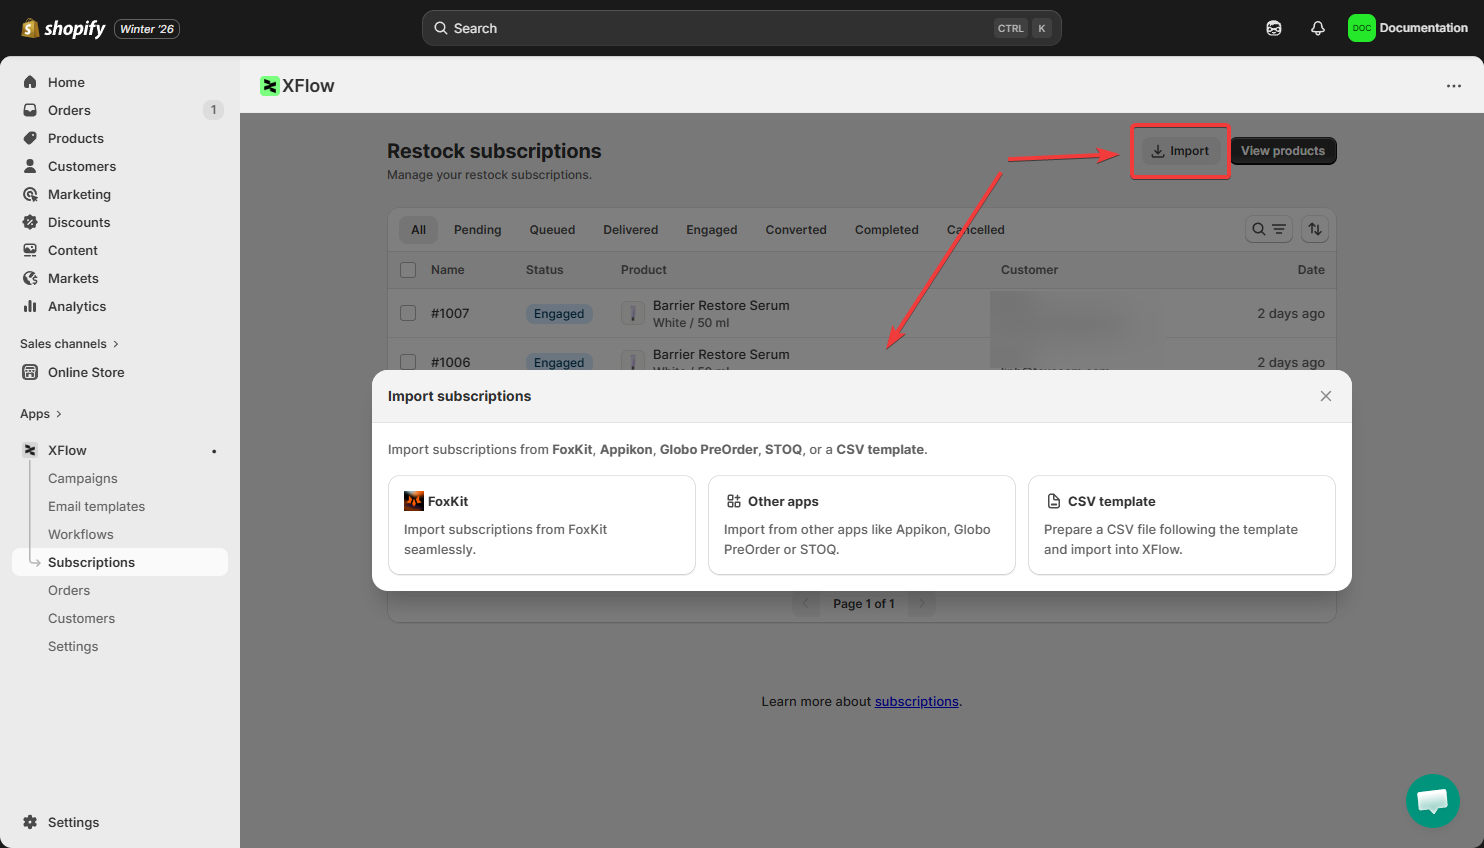
Import subscriptions
- FoxKit app
- Other apps (Appikon, Globo Pre-Order, STOQ)
- CSV file using XFlow’s template
After importing the subscriptions
- Subscriptions with Pending status will be imported
- No emails are sent until:
- The product is restocked
- The associated campaign is Active
- Subscriptions follow XFlow’s normal workflow logic.
Related articles
Create and launch a Restock campaign
Create a workflow
Orders
Last updated