
Page ManagementCreate a page
Create a Password page
3 min read
What is Shopify Password page?
How to create a Password page in Foxify
Before you start
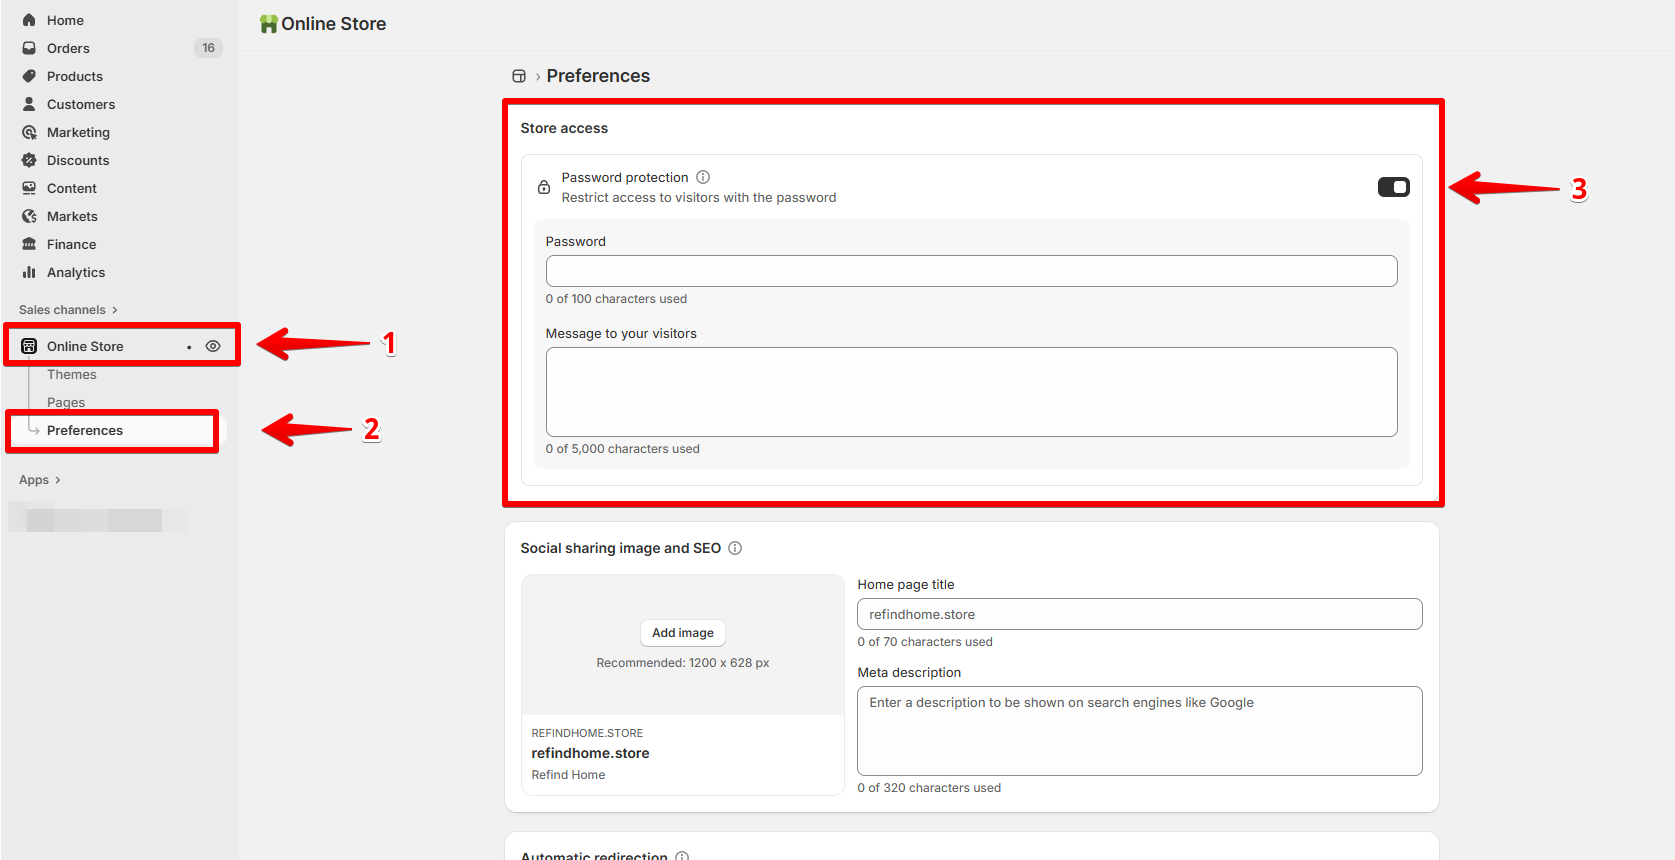
- From your Shopify admin, go to Online Store > Preferences.
- In the Store access section, select Password protection.
- In the Password field, enter the password that you want to add to your online store and restrict access with. Don't use the same password that you use to log in to your Shopify admin.
- Optional: In the Message to your visitors field, enter the message that you want to display to visitors on the password page.
- Click Save.
Create a Password page with Foxify
Select the page type
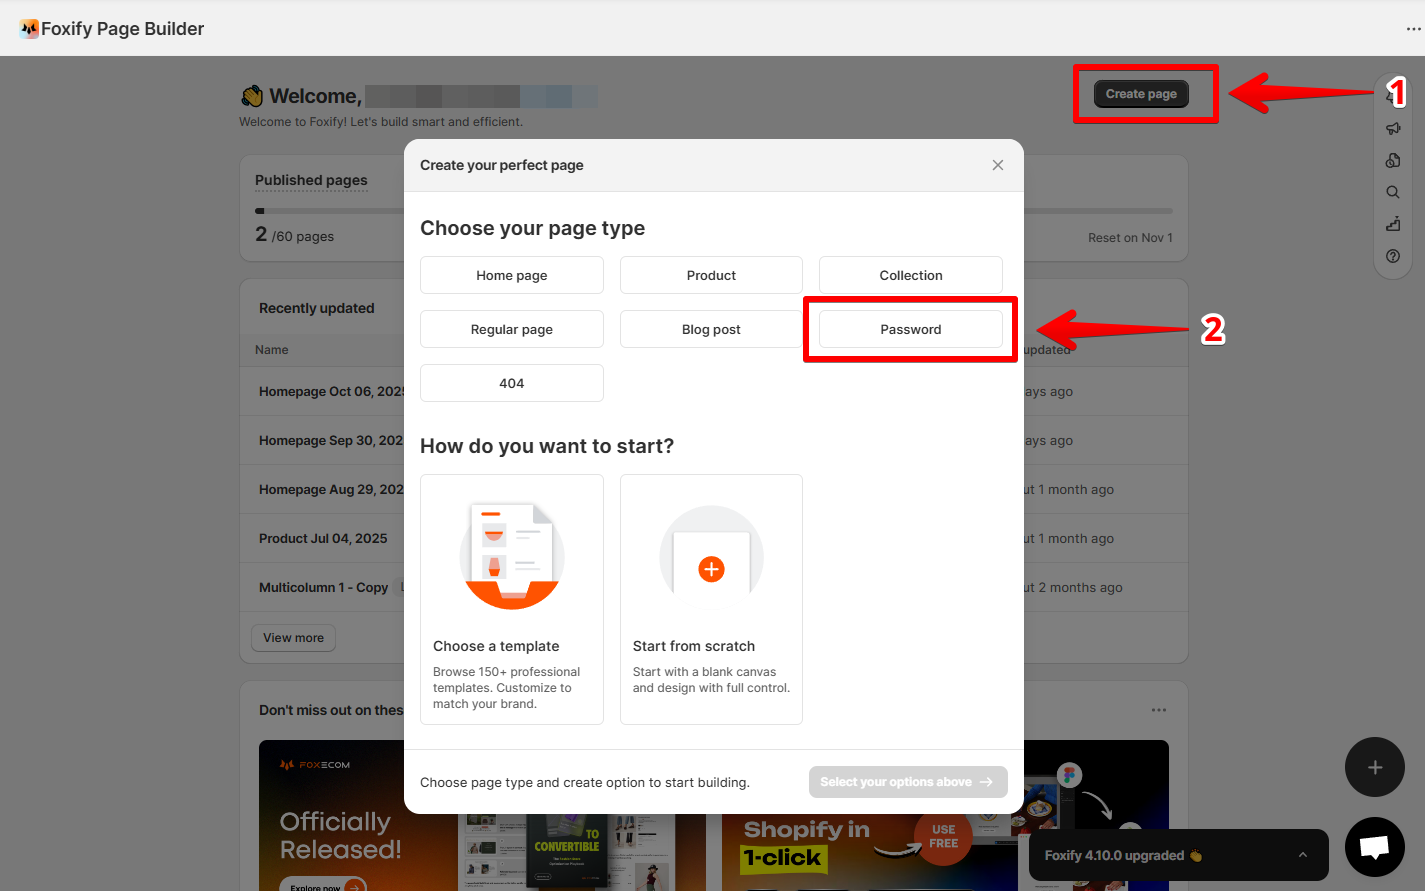
Select how you want to start
- Start from template → Choose from professional, ready-made layouts. Learn more: Templates
- Build from scratch → Start with a blank canvas and customize every detail.
Publish a password page
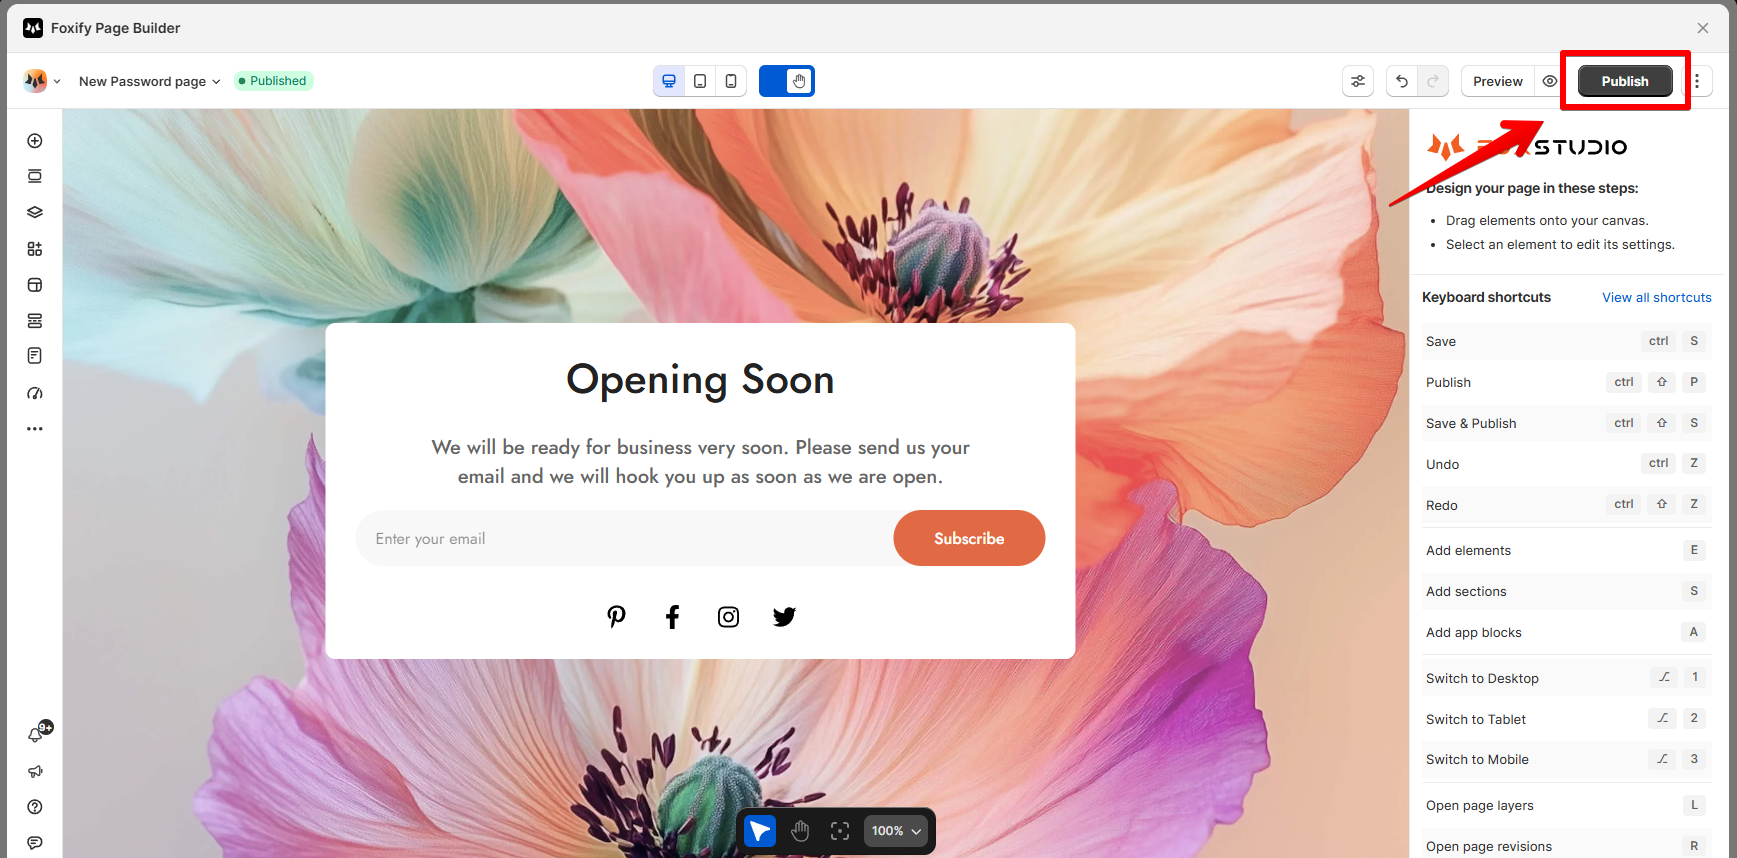
- Click Publish to push your new Password template live.
- Publishing will replace your current theme's password content in Shopify.
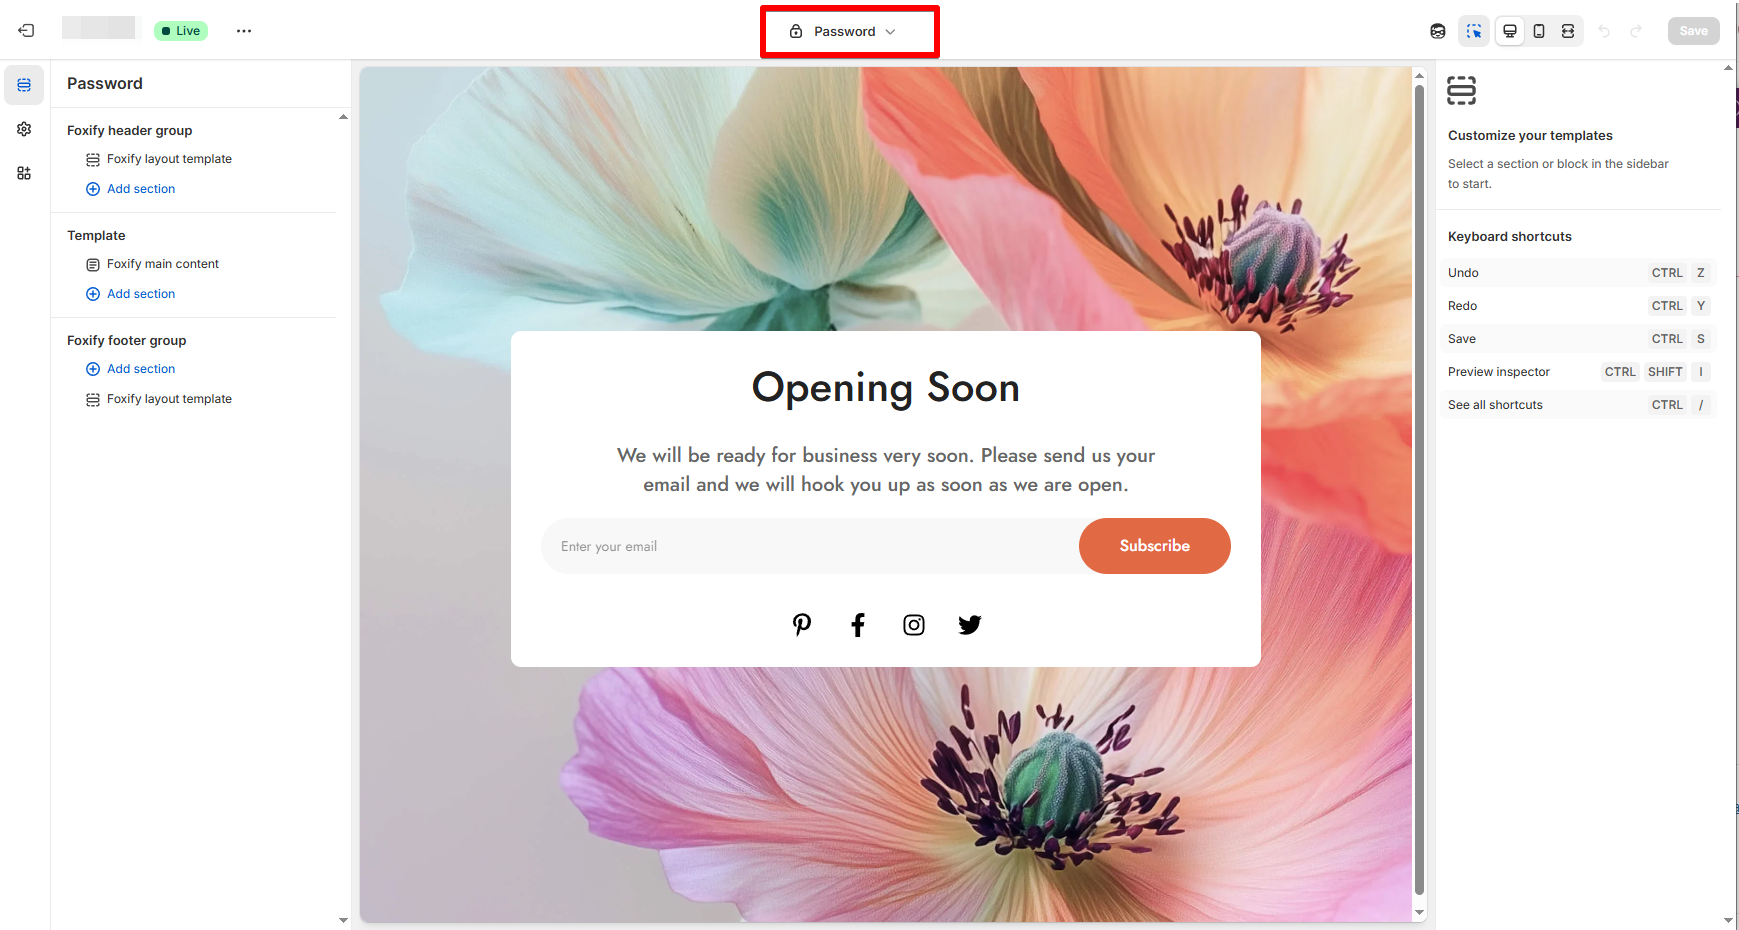
You need to enable Foxify Theme Helper in your Theme App embeds so Foxify can work with your Shopify theme.
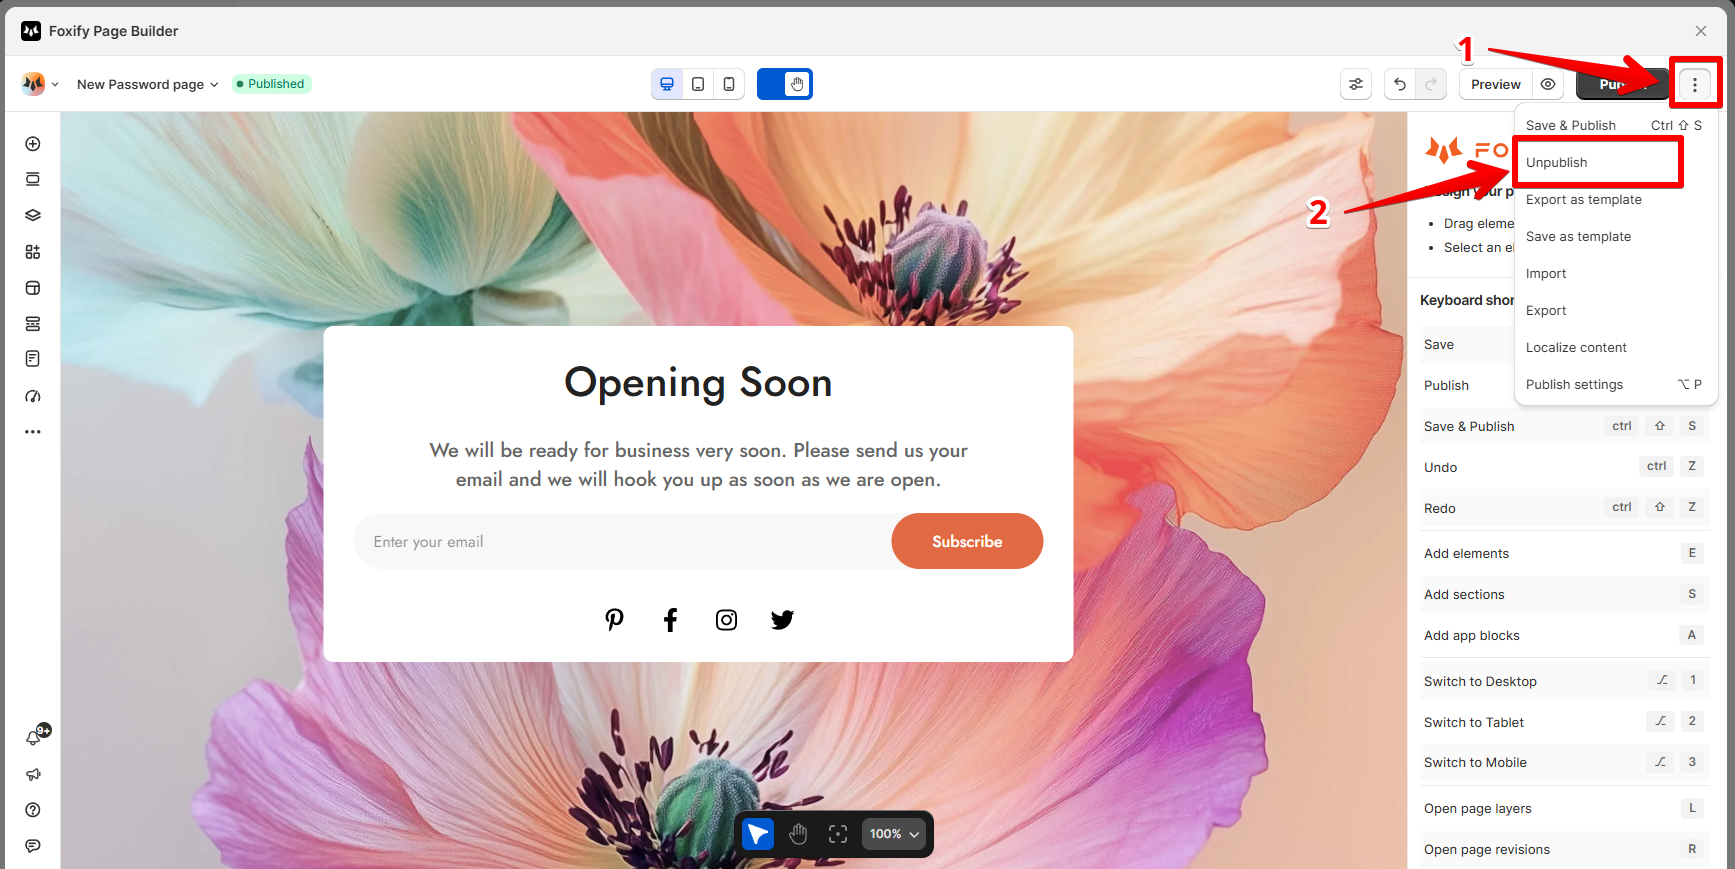
Unpublish Foxify password template
Best practices ✅
- Use your brand identity: Customize the design of your password page in Foxify to match your store’s logo, colors, and typography. A consistent look helps maintain brand trust even while your store is locked.
- Add social links or contact info: Consider including links to your social media or a contact form so visitors can stay connected or reach out while your store is under construction.
You might find these helpful: - Optimize for mobile devices: Always preview your password page on mobile screens in Foxify. Most visitors may access your store on their phones, so ensure the page looks clean and loads quickly.
- Hide Shopify header and footer from your password page: To prevent customers from navigating through your store when it's not ready.
- Learn more: Page settings
Last updated