We will be deactivating the Back-in-Stock Alerts feature in the FoxKit app on May 1, 2025. This change applies to merchants who installed FoxKit before January 23, 2026. For new installations, this feature has already been disabled, and XFlow is now the recommended replacement solution.
If you are currently using this feature, please review the deactivation plan to understand the timeline, impact on existing alerts, and recommended next steps.
We recommend taking action ahead of time to ensure a smooth transition and avoid disruptions to your store’s customer notifications.
Setting up back-in-stock alerts has proven to impact your Shopify store’s growth, giving you the perfect opportunity to capture customer demand and increase your subscription data list.
In this article, we will show you how to use Back-in-stock alerts feature.
#How to add Back-in-stock alerts to your Shopify store
To display the Back in stock alerts on your storefront, you need to configure your Shopify settings for Products:
Steps:
From your Shopify admin, go to Products > Edit Variants.
Under Inventory, check Track quantity and uncheck Continue selling when out of stock option.
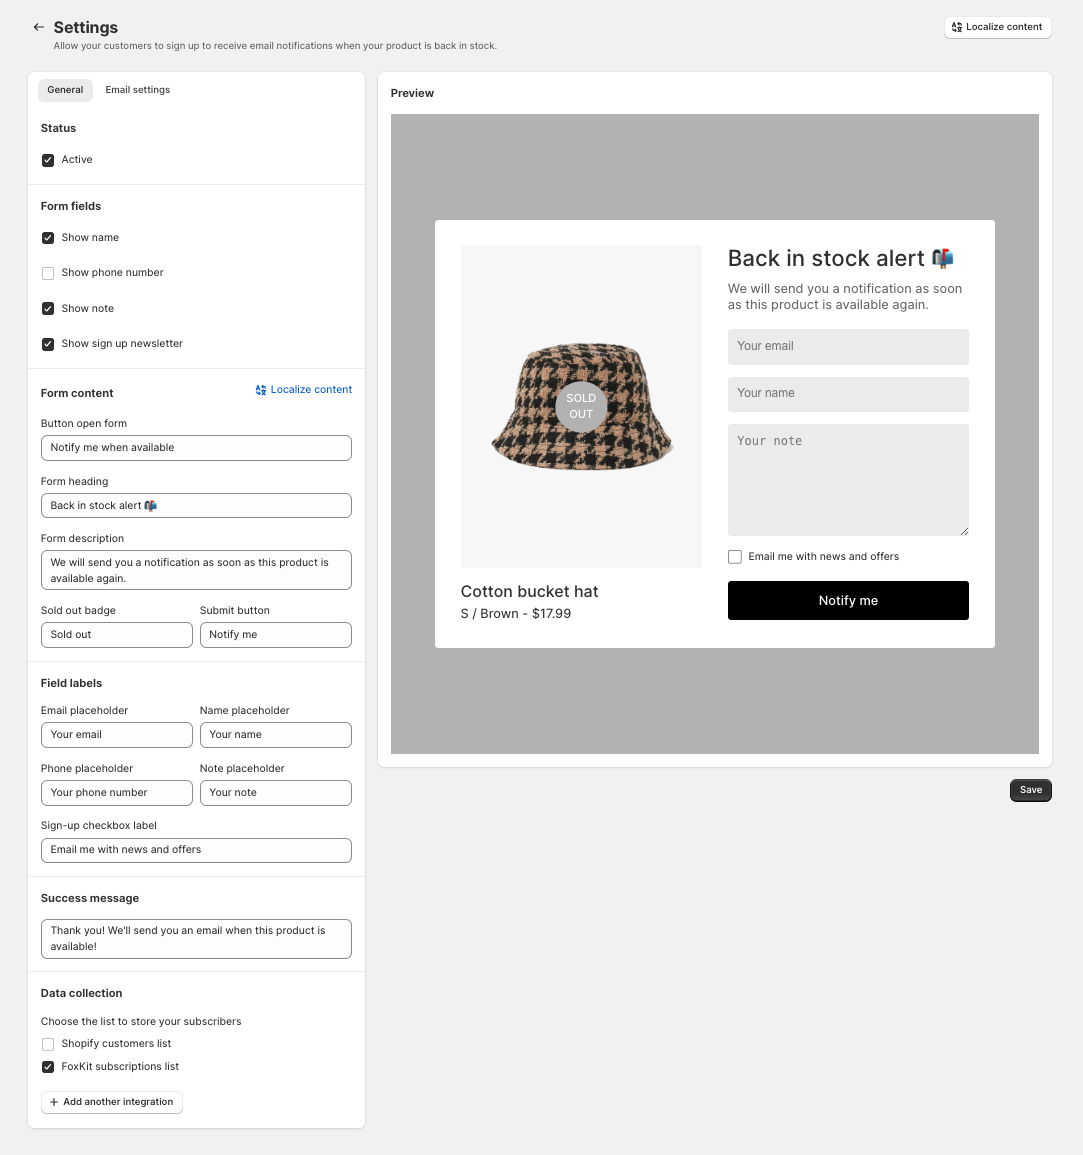
Once you've done this, in FoxKit > FoxKit power > Back in stock > Settings to set up the feature.
You can set up the feature to send emails automatically when the product is back in stock. The number of emails sent per month depends on your plan limit.
To see your current plan, go to FoxKit > Manage > App plan.
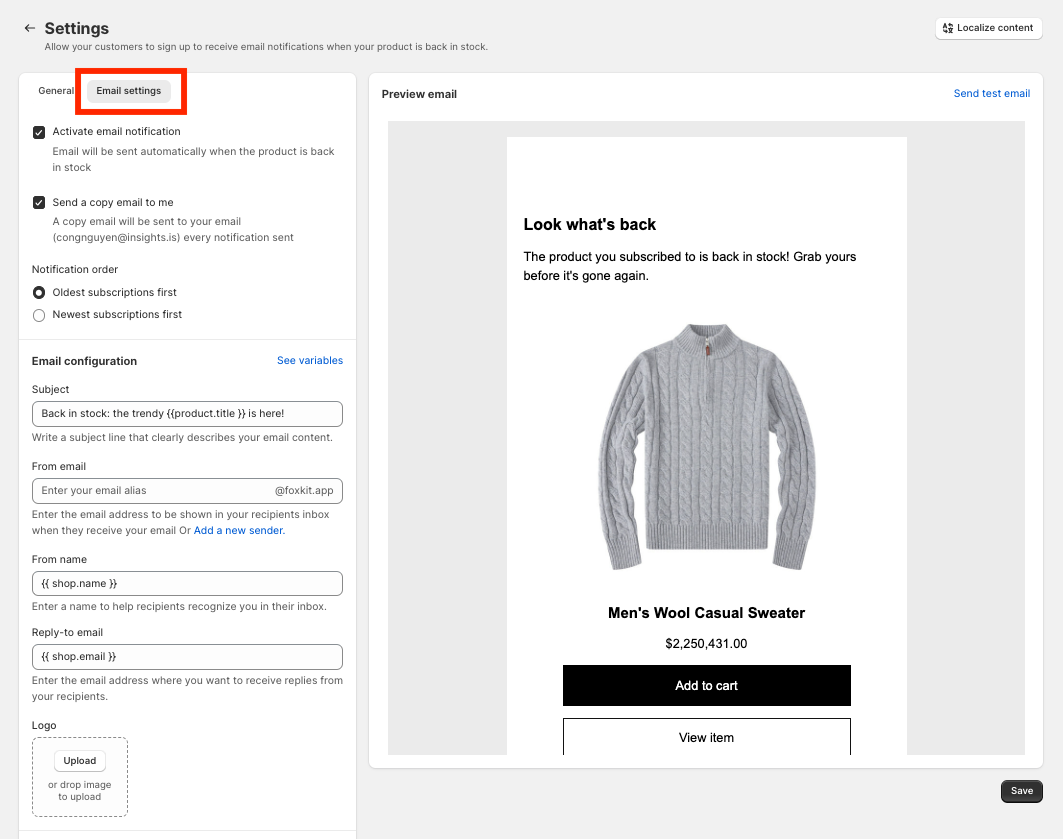
To enable sending email notifications and customize the email that will be sent to your customers, go to FoxKit > Back in stock > Settings > Email settings.
You can set your notification order either as Oldest subscriptions first or Newest subscriptions first.
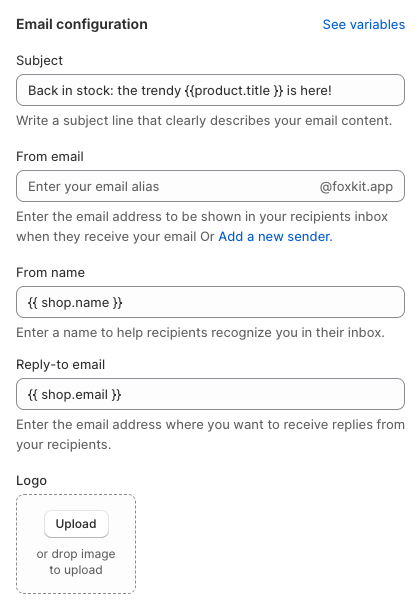
Add a Subject for your emails and configure the From email, From name, and Reply-to email.
Subject: Clearly describe your email content in a few words. The subject line is the first content that your recipients will see in their inboxes.
From email: Enter the user name for the email address to be shown in your recipients' inbox when they receive your email.
By default, the domain of the email address is @foxkit.app.
You can change the sender email in Settings > General > Custom sender email. This setting is available on Growth or Enterprise plan.
From name: Leave the name field as is or type in the name you want to display in your recipient's email client. By default, the name of the sender is your company name.
Reply-to email: Use your store email or add an email address where you want to receive your contacts' replies.
You can use the defined variables to show dynamic information.
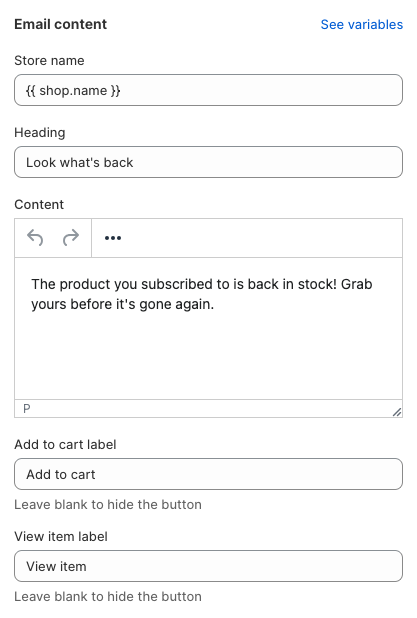
Design your email's content. Your email is rendered using responsive design, so the display can automatically adapt to any platform: smartphone, tablet, or computer.
You should see the Preview displayed on the right.
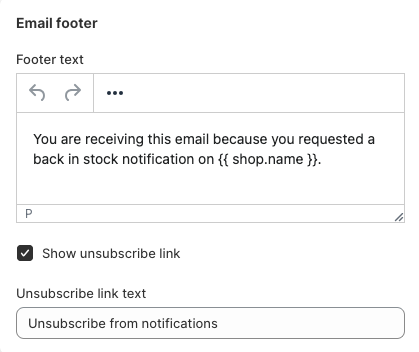
Footer text: Enter the message that will appear at the bottom of your email
Unsubscribe link: Enable this option to include an unsubscribe link in your emails. This gives customers the option to stop receiving future notifications.
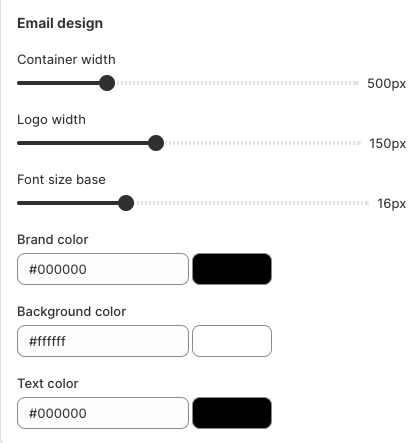
Customize the visual appearance of your email notifications to match your brand. These settings allow you to adjust layout dimensions, font size, and colors to ensure a consistent and professional look across all devices.
If you are on the Free plan, there will be FoxKit copyright shown on your email.