
Sales Boosting
Size chart
2 min read
Steps
- In FoxKit > FoxKit power > Choose Size chart.
- Click Create size chart to start.
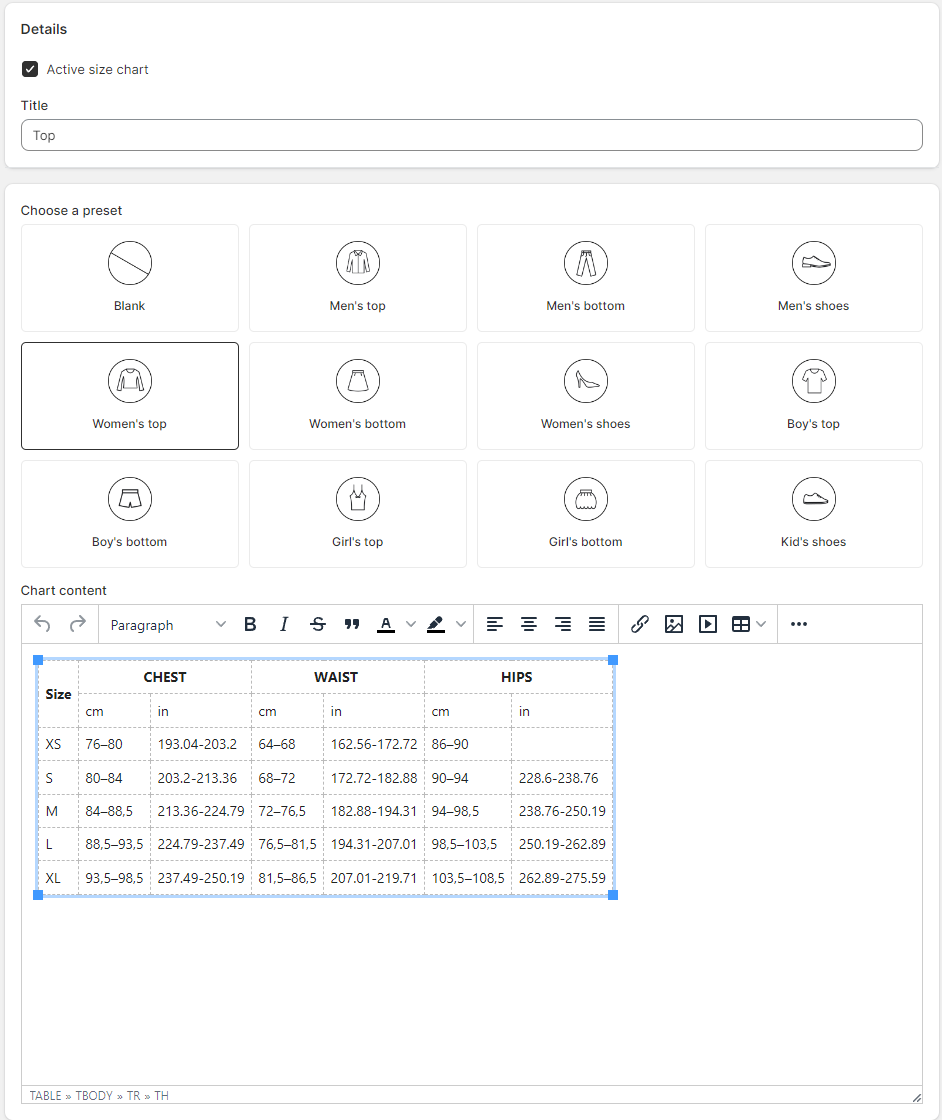
- Choose the chart content to display and make changes in the table if needed.
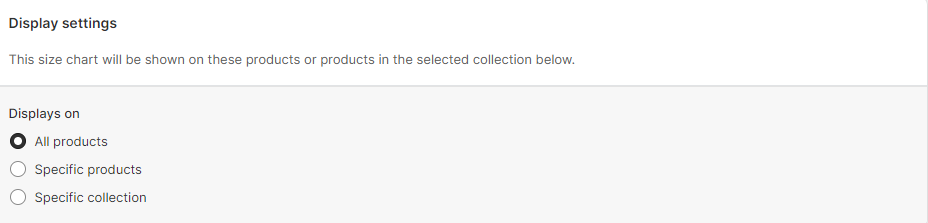
- Choose where to display the size chart.
- All products: apply to all the products that the store has.
- Specific products: need to manually select the products.
- Specific collection: manually add the collection.
- Save the settings.
The below steps are for Minimog theme
For Minimog theme, once you have your Size chart ready, you can decide which product option you want the Size chart button to be displayed next to on your storefront.
- In the theme editor (Customize), go to the Product template.
- Locate the Product information section, select Variant selectors.
- In the Size option title, fill in the Option name you want to show your Size guide button.
- Click Save.
Last updated