# Translate your pages into other languages
Reach international customers by translating your Foxify pages into any language your store supports — auto-translate everything in one click with Fox Magic, or refine the wording and tone by hand.
## When to use each method
## How to translate your pages
1. From the Foxify Dashboard, go to **Translation**.
2. Click **Manage languages** in the top-right corner.
3. Click **Add language**, select a language from the dropdown, then click **Add language** to confirm.
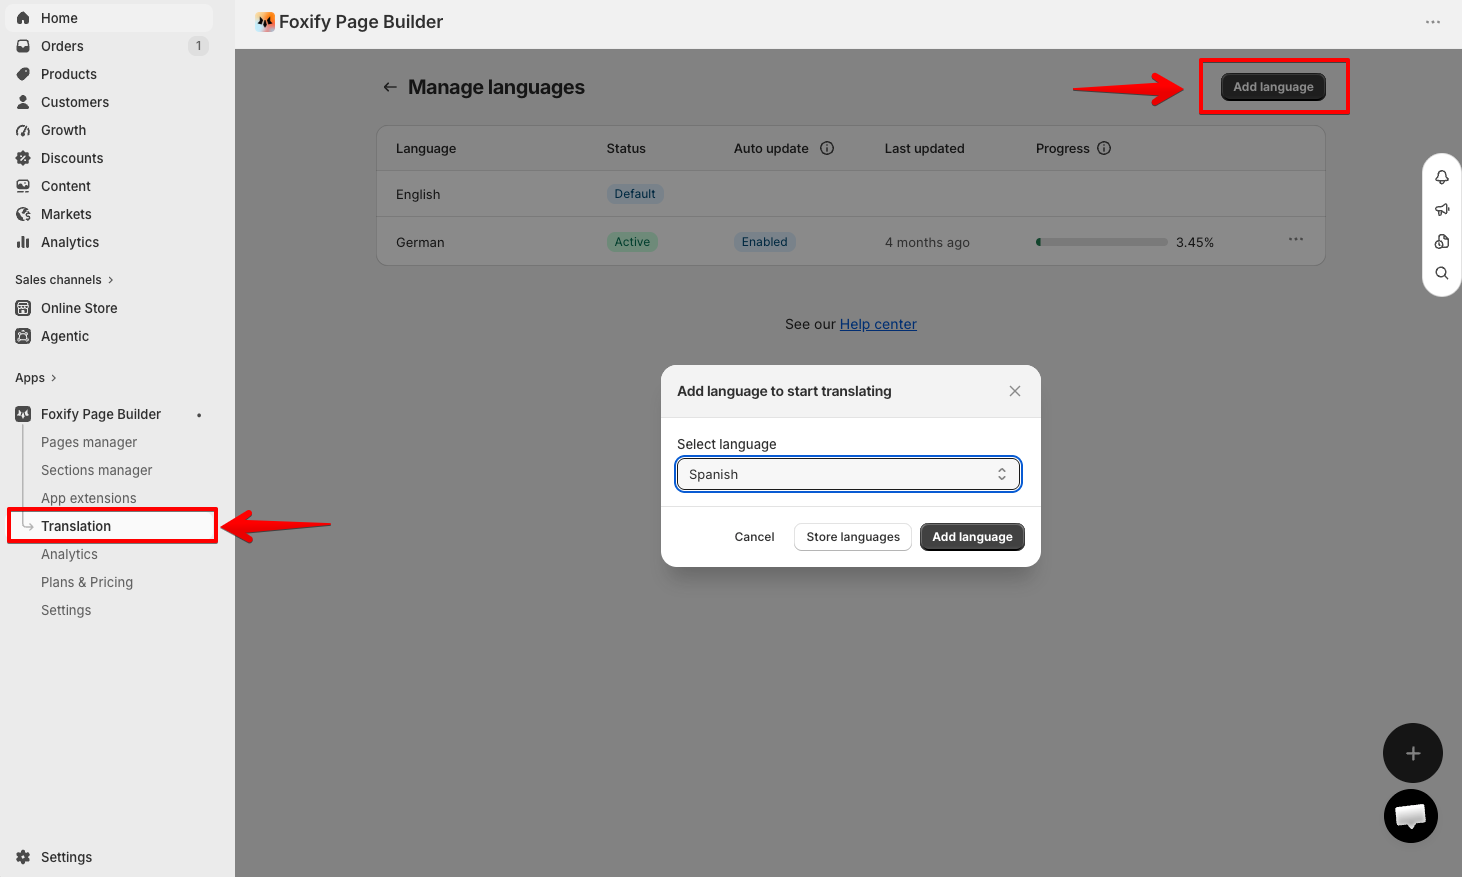
Don't see the language you need? Click **Store languages** in the same dialog to enable it in Shopify first.
Once added, use the **Manage languages** table to track each language's Status, Auto update setting, Last updated time, and Progress.
On the **Localize content** screen, browse by group and click into any item to open it for translation:
* Pages & templates: Home page, Products, Collections, Pages, Blog posts, Cart, Password, 404 page, and more
* Sections: Theme sections, Layout templates, Foxify Header & Footer
* Other: Default Foxify theme content
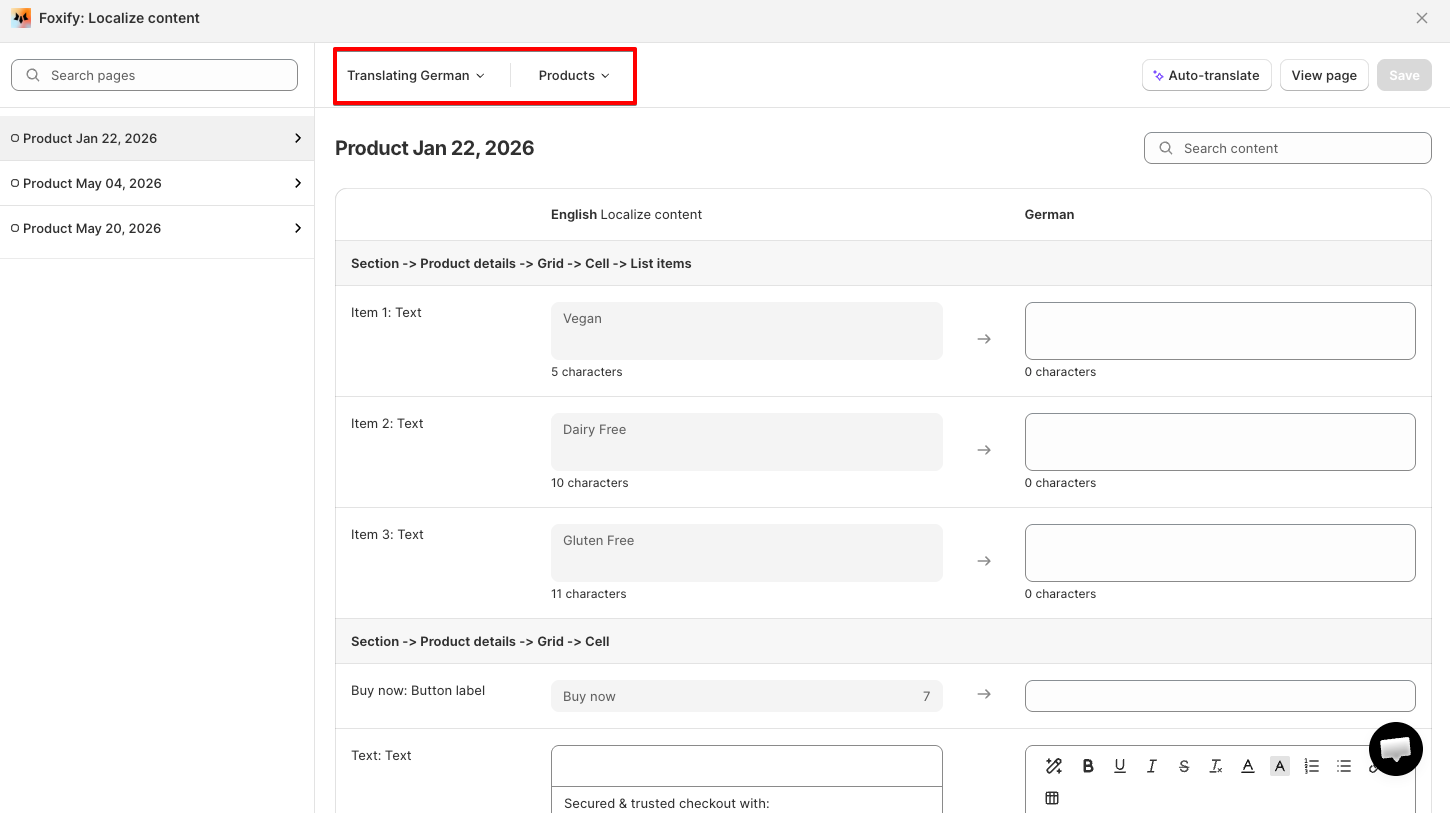
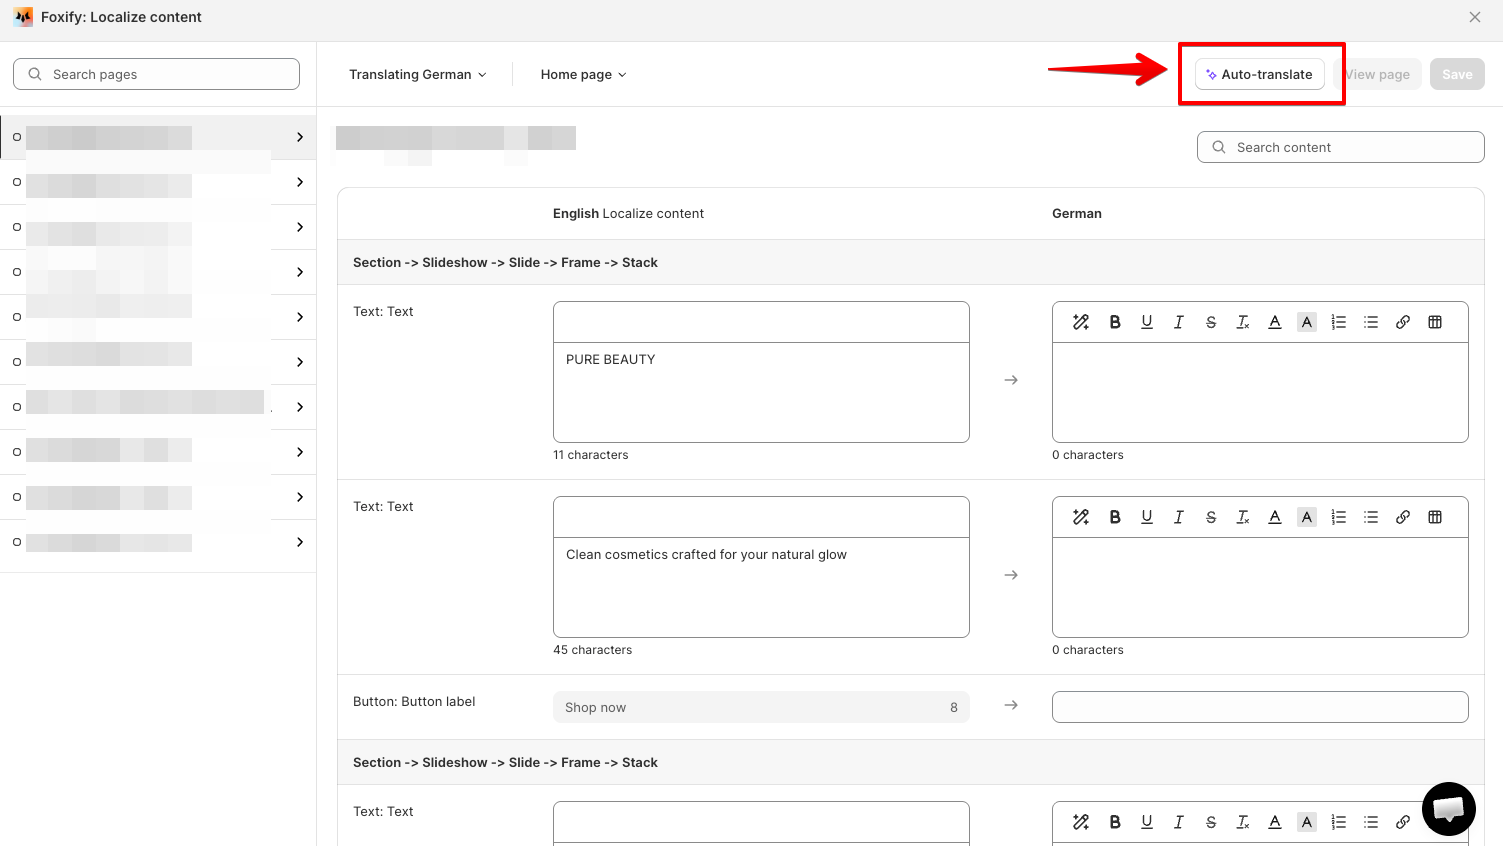
1. Use the **Translating \[Language]** dropdown to confirm which language you're editing, and the type dropdown (e.g. **Home page**) to switch page type.
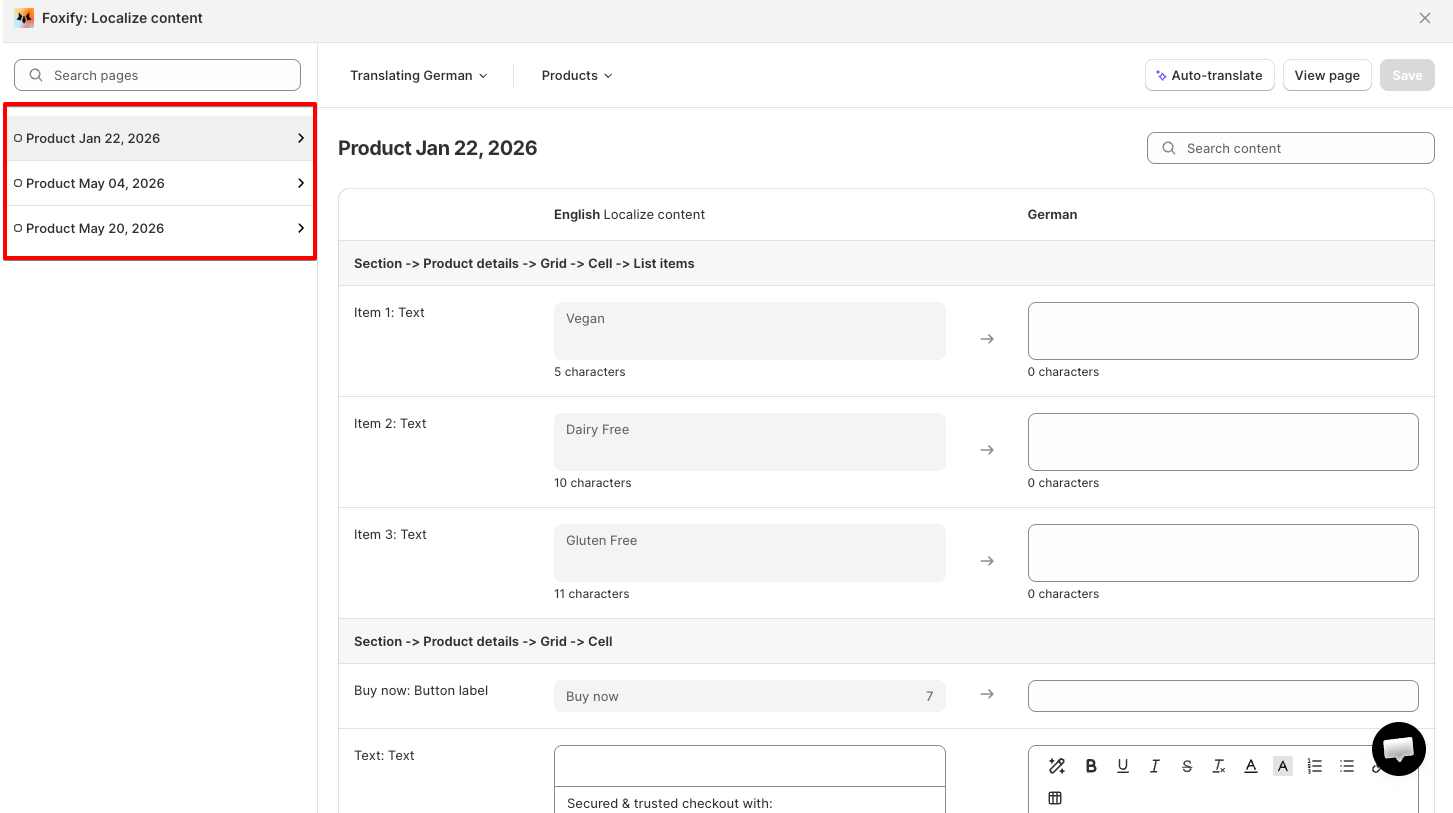
2. In the left sidebar, select the specific template — search by name if there are several.
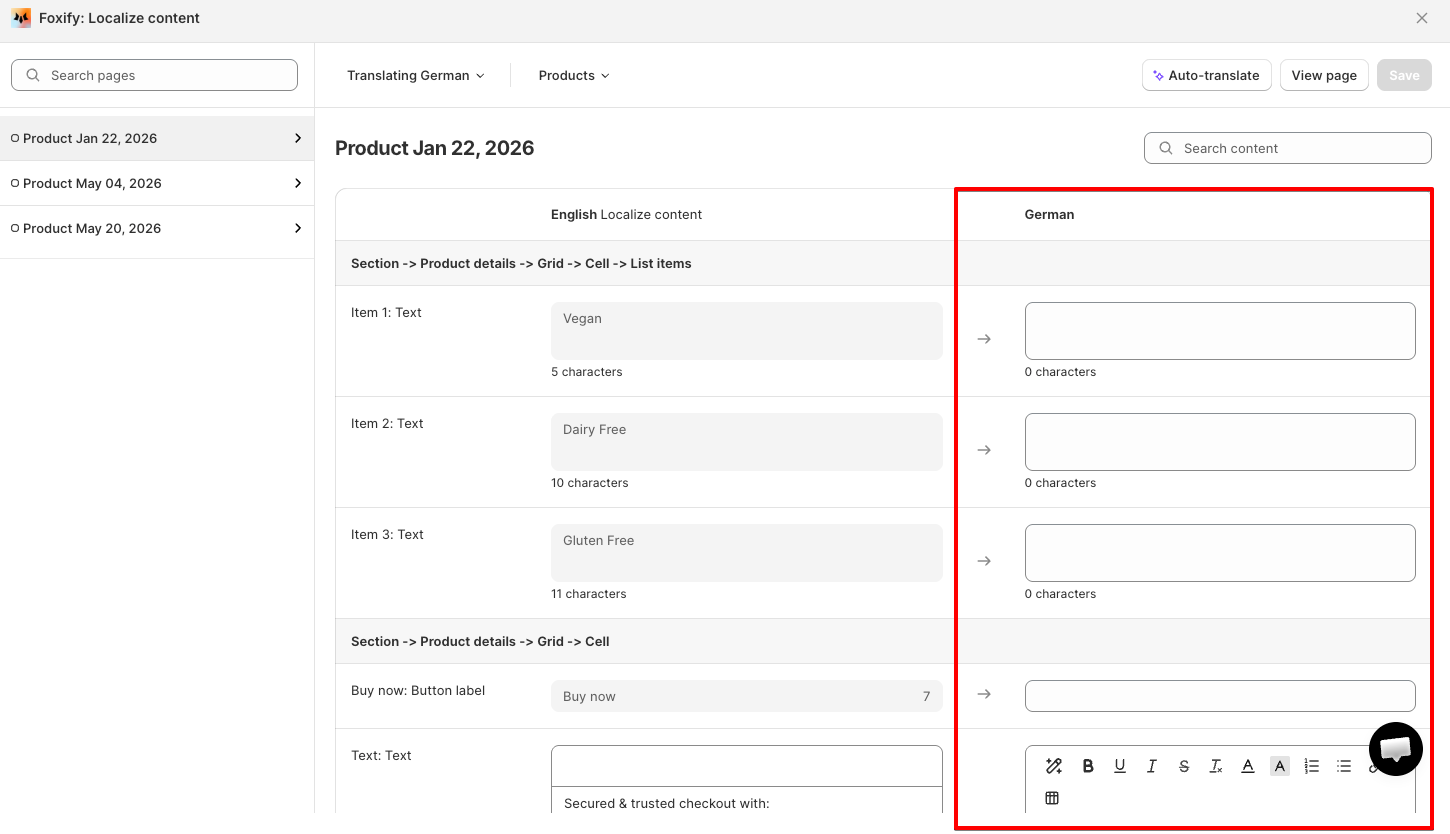
3. Each field appears as a row (grouped by section, e.g. **Section -> Frame**, **Section -> Stack**) with the source text on the left and an editable field for your translation on the right, each showing a character count.
## Auto-translate
1. In the Localize content editor, click **Auto-translate** (top right).
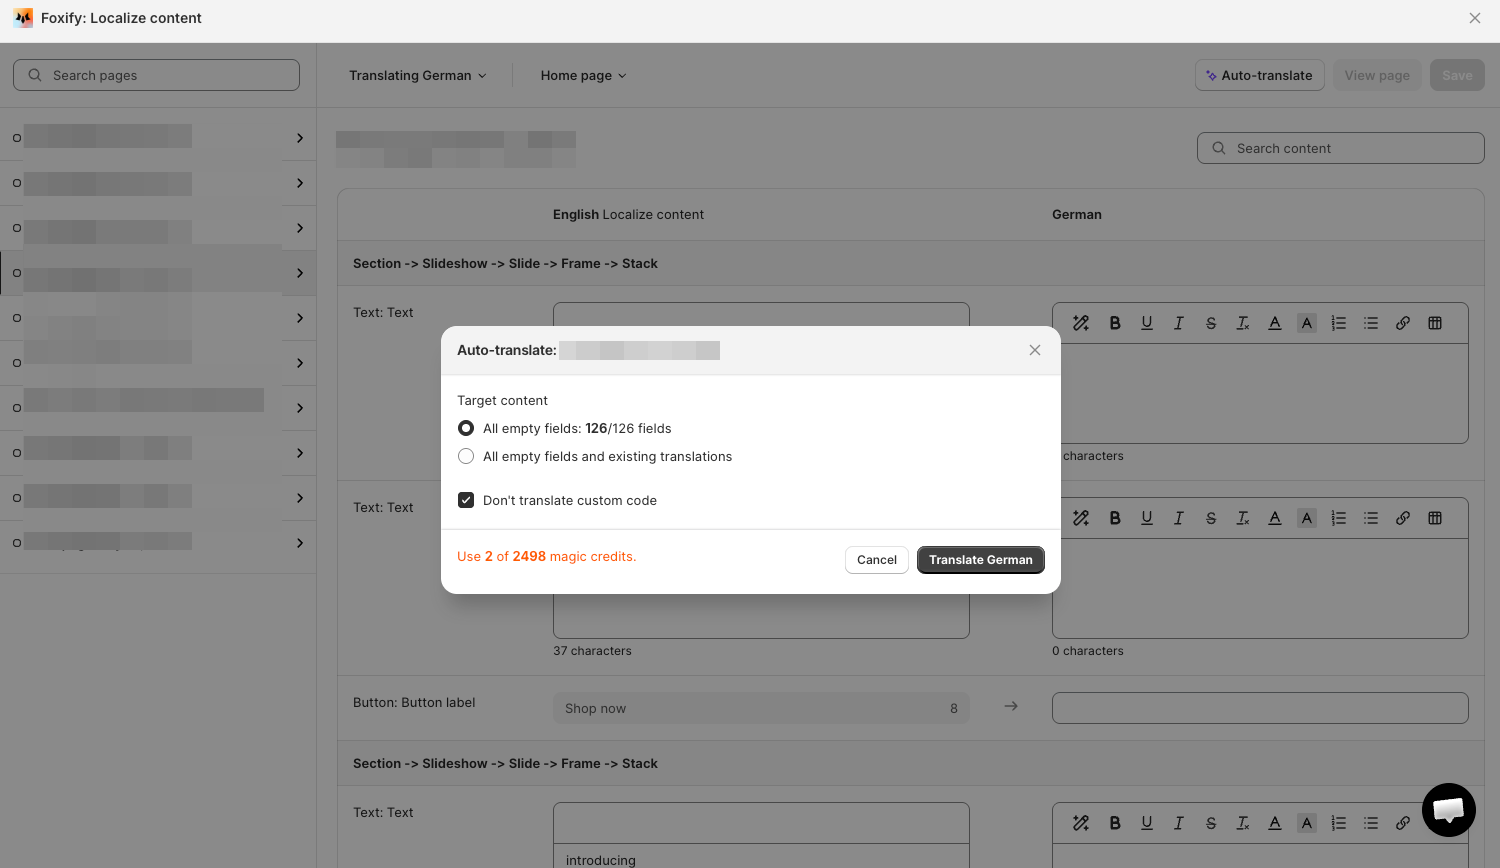
2. Choose target content: **All empty fields** (fills in untranslated fields only) or **All empty fields and existing translations** (also overwrites fields you've already translated).
3. **Don't translate custom code** is checked by default — uncheck it if you want custom code translated too.
4. Click **Translate \[Language]** to confirm.
Already translated some fields by hand? Auto-translate defaults to filling only empty fields, so your manual edits are safe. Choose **All empty fields and existing translations** only if you want to overwrite them.
## Translate Foxify's default wording
**Default Foxify theme content** is the standard system text Foxify ships with — labels like Cart, Log in, Log out, and Account. It's not tied to a single page: editing it here updates that wording everywhere it appears across your Foxify pages.
1. Under **Other** on the Localize content screen, open **Default Foxify theme content**.
2. Use the language dropdown (top right) to pick the language you're editing.
3. Browse by tab and category to find the wording you want, or use **Search**.
4. Edit the field directly. Changes save per field.
## Known limitations
* Up to **3,400 translated strings** per template, per language
* Each individual translated value can be up to **1,000 characters**
These limits come from Shopify's theme [locale file requirements](https://shopify.dev/docs/storefronts/themes/architecture/locales#requirements-and-limitations).
## FAQs
#### Will Auto-translate overwrite fields I already translated by hand?
Not by default. Auto-translate targets only empty fields unless you specifically choose **All empty fields and existing translations** in the Auto-translate dialog.
#### Does auto-translating cost anything?
Yes — Auto-translate runs on Fox Magic credits, and the dialog shows how many credits the job will use before you confirm. See [All about credit](https://docs.foxecom.com/foxify-app/foxify-ai/all-about-credit).
#### What's the difference between translating page content and changing the default Foxify wording?
Page content is your own text — headlines, product copy, and so on — inside one specific page. Default Foxify theme content is the built-in system wording — edit it once, and it updates everywhere that wording appears across your Foxify pages.
## Related articles
What is Fox Magic?
All about credit
Create a page