# Blog post's elements
Build a fully customized blog post template — each element pulls live data directly from your Shopify blog posts.
## How to add the Blog post elements
**Open Add elements**
In the editor, click **Add elements** (or press **E**) → select **Blog post** in the Shopify elements section.
**Drag onto the canvas**
Drag the element you want onto the canvas.
**Style the element**
Use the Inspector panel → **Design** tab to style it to match your brand.
## Blog post elements overview
All elements pull live data from Shopify — no manual content entry needed. Here's what each element displays and where the data comes from:
| Element | What it displays | Where the data is pulled from |
| --- | --- | --- |
| **Post title** | The blog post’s title | Admin → Blog posts → Title |
| **Post meta** | Published date and author name | Admin → Blog posts → Visibility & Author |
| **Post image** | Featured image of the post | Admin → Blog posts → Featured image |
| **Post content** | Full written content of the blog post | Admin → Blog posts → Content |
| **Post tags** | Tags assigned to the post | Admin → Blog posts → Tags |
| **Post comments** | Reader comments and conversation thread | Admin → Blog posts → Manage comments |
| **Post sharing** | Social sharing icons for the post | Choose between: • Share on Facebook • Share on X • Share on Pinterest • Shareable link |
**Comments require setup:** Post comments only appear if comments are enabled for your blog. To enable: Shopify Admin → Content → Blog posts → Manage blogs → set Comments to "Allowed".
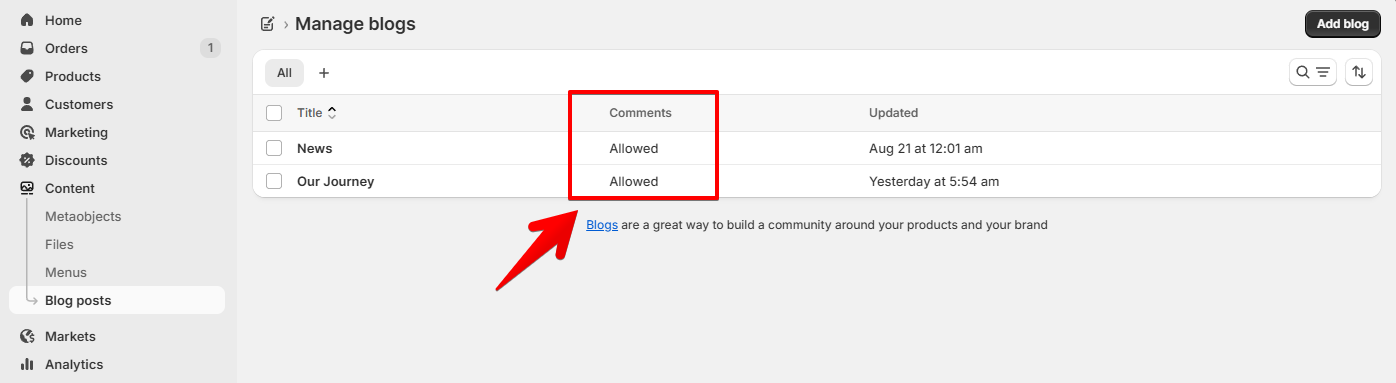
*Learn how to* [*manage comments on blog posts*](https://help.shopify.com/manual/online-store/blogs/managing-comments)
## Related articles
Create a Blog postLayout & styling